1995 Tracker Pro 16 Rebuild

TinBoats.net

Help Support TinBoats.net:

This site may earn a commission from merchant affiliate links, including eBay, Amazon, and others.

srr5008

Well-known member
Joined
Nov 4, 2010
Messages
67
Reaction score
0
Location
New Milford, PA
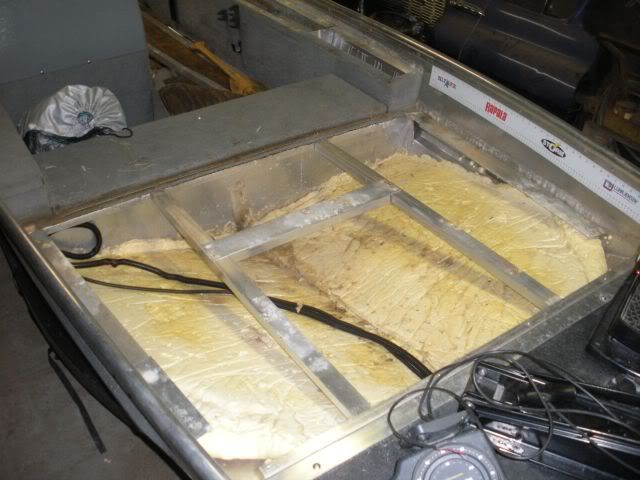
Well after months of lurking on this forum, I've finally started to tear down my boat with plans of restoring it to (mostly) original condition. This site has been in invaluable aid in dealing with the multitude of problems that I've encountered so far.

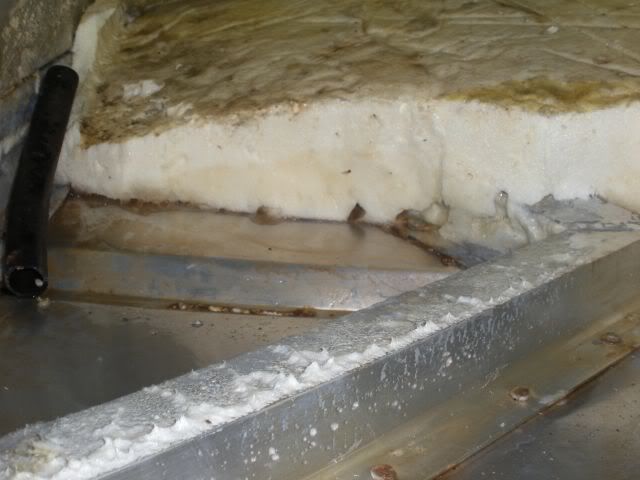
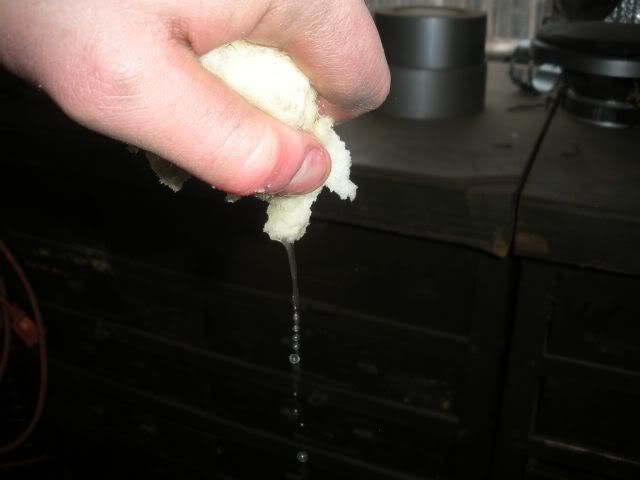
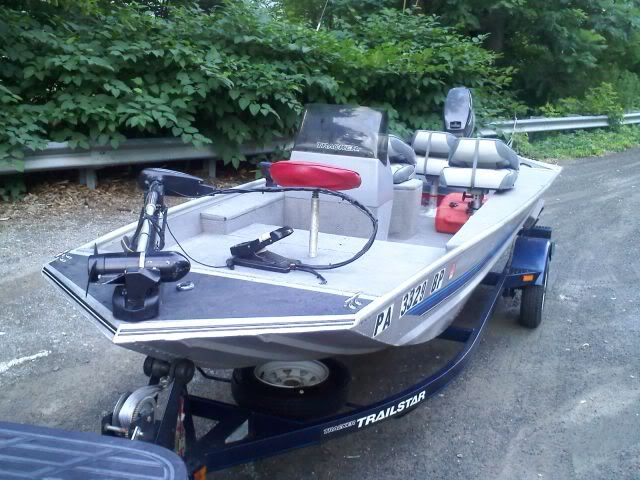
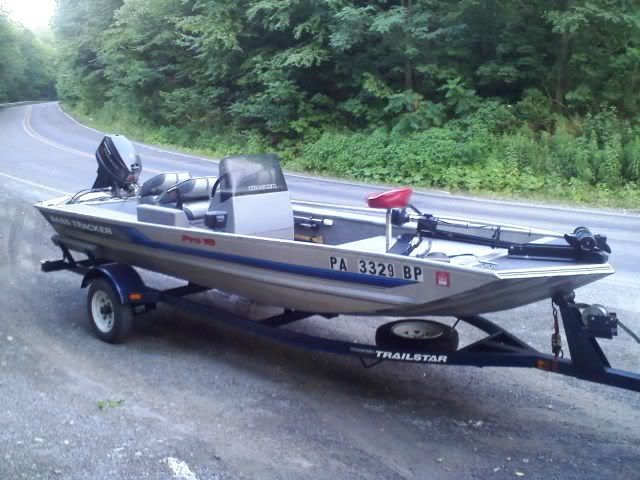
I bought the boat with the intention of being able to fish out of it for the next few years as-is, as it appeared to be in very good shape. The previous owner fished electric only, so the motor was shiny as a new penny under the hood. However, I noticed shortly after taking it out on my first run that with more than one person I couldn't get the boat on plane. Due to the good condition of the motor I suspected waterlogged wood/foam was the culprit. This suspicion was confirmed on the second trip when both of the seat pedestals ripped out of the rotten wood floors. Just goes to show that looks can be deceiving! Here's how she looked when I picked her up:
1-OriginalCondition.jpg

2-OriginalCondition.jpg


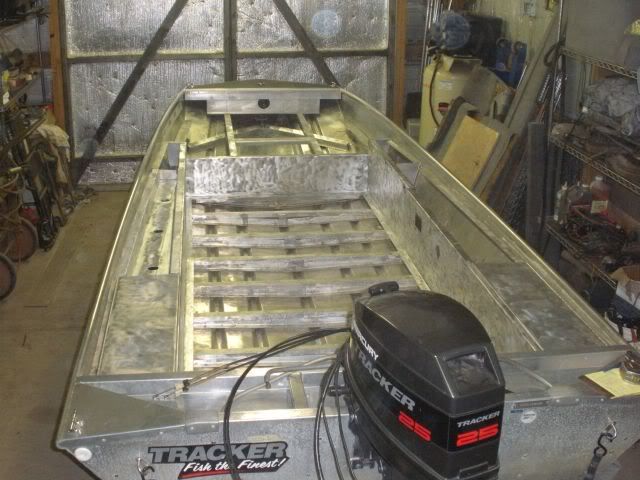
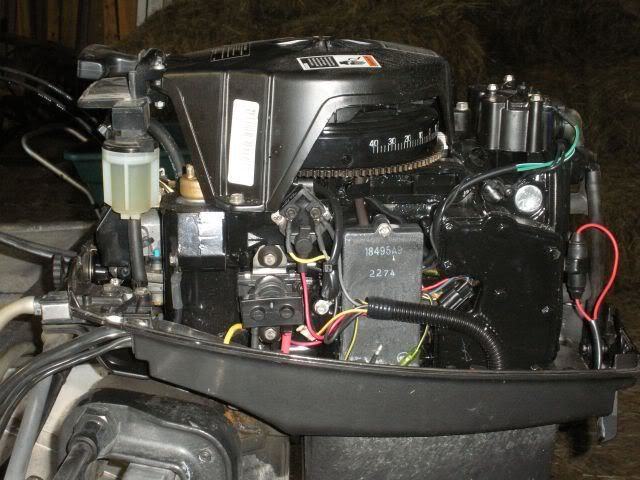
Practically new motor:
4-OriginalCondition-Motor.jpg


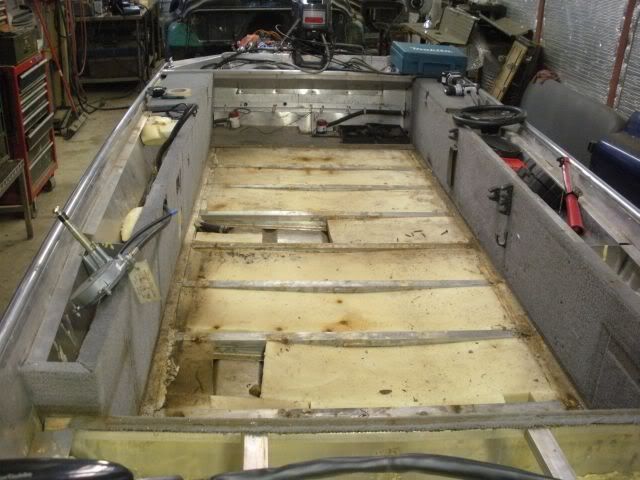
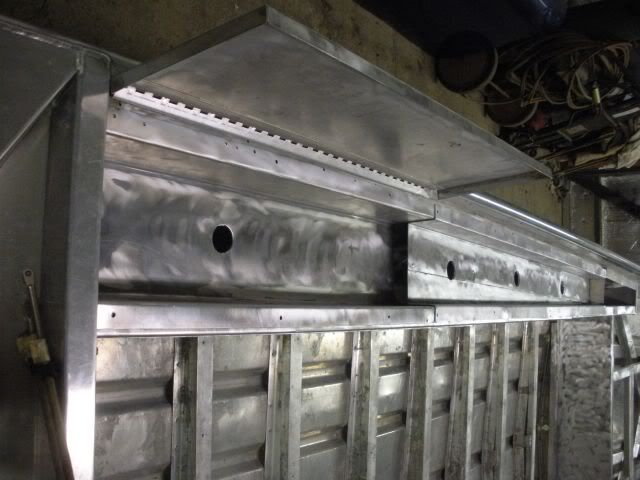
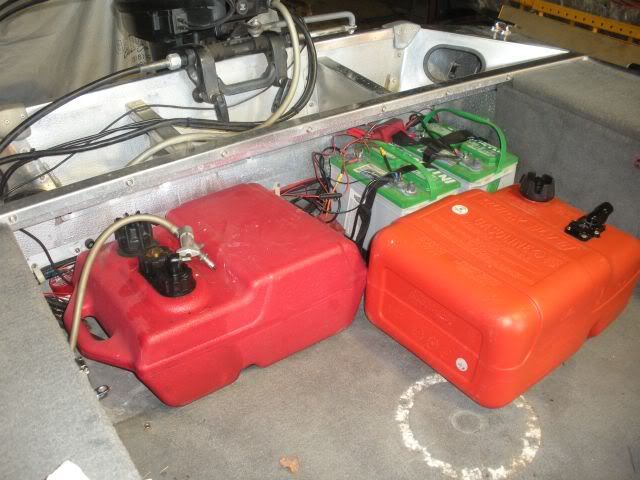
You can see here where the seat pedestal ripped out of the floor:
3-OriginalCondition-PedestalBases.jpg
 
First step was ripping up the floors. As others on this forum have experienced, Tracker in all of the eternal wisdom, used regular steel screws instead of stainless. This were all rusted out, and the end-result was me spending several hours drilling out screw heads. Once I got the floors up, I got my first look at the foam underneath:
5-FrontDeckFoam.jpg


If you look carefully at the cross-section where I cut out a chunk of foam you can see a waterline. The foam under the front deck was 1/2 - 2/3 waterlogged.
10-FrontFoam.jpg


The foam under the floorboards was completely saturated. I estimated the weight of each piece (48" x 12" x 1.5" thick) to weigh at least 15-20 pounds.
8-FloorFoam.jpg


Here is the foam in the sides of the boat - also saturated:
10-SideFoam.jpg


I pulled this chuck of foam from the side flotation (pictured above) about 2" down from the top of the foam. Those suckers were soaked almost all the way to the top.
11-WetFoam.jpg


I believe that the foam in the ribs was the problem all along with the saturated foam. Tracker sprayed foam into the outsides of the ribs, which in turn expanded inwards, and downwards over the channels that run the length of the boat. As a result, water was trapped in the channels between each rib, insuring constant contact between the foam and the water. The pieces of foam in the side of the boat acted like a sponged and just absorbed upwards.
 
I like those semi V trackers. Best of luck and post all the pics you can to let everyone see your progress and help anyone else doing the same boat as you.

The water loggedness, don't know if that is even a word but you get the point, is nuts!!
 
After peeling up the carpet from all the aluminum surfaces, I took a wire wheel and ground all the glue residue off.

13-CleanedRear.jpg

14-CleanedWithCompartments.jpg

15-CleanedCompartments.jpg


Once I had the boat cleaned up and down to bare metal, I partially filled it with water to see if I had any leaky rivets. While I passed the leak-test, I still wanted to coat the rivets with something for peace of mind. I read about products such as gluvit, but wound up going with a waterproof metal adhesive that I picked up at Lowes.
16-SealedRivets.jpg

17-SealedRivets.jpg


I then began to lay down new foam. I copied the practice of using the blue DOW styrofoam that I commonly see people employ on this website. I plan on using the same material in the sides of the boat instead of using a spray-foam, like the material that I took out.
18-NewFoam.jpg
 
Lots of work done so far. Looks great. Those boat look to be built very well. The easy part is tearing it apart, now you have to decide how you want it put back together. Good luck!!
 
reedjj: that bit of information on the 5hp boost is good to know. I don't think I'll need the extra power due to removing a couple hundred pounds of wet foam, and due to the fact that the removed rotten wood weighed more than the marine plywood that I'm replacing it with. But my inability to not tinker with mechanical stuff may get the best of me in the end. :mrgreen:

bulldog: Ain't that the truth! I finished tearing it apart 2-3 weeks ago, and am still drawing blanks.
 
I have seen the posts talking about open celled and closed celled foam. Spray foam will absorbe water. Expanded PolyStyrene will not. Good luck on your boat. It looks like a nice rig.
 
A few years back I stashed away a few catalogs, I was going to look at them at a future date and compare prices and equipment. One of the catalogs is a 1995 Bass Pro. I noticed that your boat had a price tag of $5,395 with a 25HP outboard, today's Pro 165 comes in at $10,995 with a 40HP outboard. Not exactly information to help with your build, I just found it interesting.
 
devilmutt said:
A few years back I stashed away a few catalogs, I was going to look at them at a future date and compare prices and equipment. One of the catalogs is a 1995 Bass Pro. I noticed that your boat had a price tag of $5,395 with a 25HP outboard, today's Pro 165 comes in at $10,995 with a 40HP outboard. Not exactly information to help with your build, I just found it interesting.

Yeah its crazy how the prices have went up, when IMO, the quality has went down. Helps the resale value though, cause most people don't know how cheap they used to be..

Not sure the exact price of todays pro 16, but I think it is like 8 grand plus, with the same motor.
 
you need to check your transom, I'll bet you it's rotten too! you can sample drill a couple of holes from inside the transom, I just did mine and a time job! You also have to cut the welds on top at the transom. Also, tracker did not have drain holes at the rib valleys, one of the reasons your foam was soaked, you must drill drain hole on each floor rib to have proper drainage on these boats!
 
What's interesting to me is that the strakes were filled with foam when it was sprayed in. This prevented water from channeling back to the bilge pump which in this case turned out to be pretty useless. Had the strakes remained open, it's likely the water would have drained to the back so it could be pumped out. When I was looking at the pics it kind of made me laugh to see the bilge pump at the back, wondering what was the point. This seems like a serious design flaw to me and I'd send this posting along to Tracker if I were you. Tracker designed a really nice boat with a structure that could have easily dealt with the water issue. Then they essentially put a sponge in the bottom that not only soaked up and retained the water but also prevented it from being expelled from the boat. It seems to me that not only caused the early ruin of your boat interior but it also compromised your safety. I wonder how well the foam works for flotation when it's full of water? If I were Tracker I'd think about some kind of "good will gesture" to you for having to deal with this preventable problem. By the way, I've always loved this particular Tracker boat. It looks like a nice boat and your work looks really good. One good thing about your project is that you'll be sure of the quality of the build once you're done. Nice job and good luck. Keep the pics coming.
 
Lookin good. Congrats on the progress thus far. It's alot of the non-glorious parts of redoing a boat that pays big dividends at the end.
 
mmf: I've been holding off on checking the transom up until this point because quite honestly, I was scared of the possible outcome. However, I drilled a sample hole this past weekend on the inside of the transom wall, and it appears to be in decent shape. That would make the transom, surprisingly enough, the only piece of wood in the boat that isn't rotten.

Bobberboy: I had the same exact thoughts. The hull & structure was all soundly designed, and then they killed it with the foam. I wish I had taken a picture of the float test I did with the waterlogged foam in my pond. It sank like a rock! So it was a double-whammy... It added a ton of weight, and had no floatation value whatsoever.
 
srr5008 said:
mmf: I've been holding off on checking the transom up until this point because quite honestly, I was scared of the possible outcome. However, I drilled a sample hole this past weekend on the inside of the transom wall, and it appears to be in decent shape. That would make the transom, surprisingly enough, the only piece of wood in the boat that isn't rotten.

Bobberboy: I had the same exact thoughts. The hull & structure was all soundly designed, and then they killed it with the foam. I wish I had taken a picture of the float test I did with the waterlogged foam in my pond. It sank like a rock! So it was a double-whammy... It added a ton of weight, and had no floatation value whatsoever.

Well the foam was doing its job if it were to swamp (displace water)... but that dont mean squat when its asked to hold up an extra couple hundred pounds lol.


Can't say I've ever heard of drilling test holes into the transom to check its integrity, but it makes sense. You got lucky for sure.


Whats the bottom width on that boat?
 
Well I started in on the floors this last weekend. I decided to go with marine plywood, which was a nightmare with this boat for cost reasons. Just about every piece of wood was a different thickness. The floors were 1/2" the front deck was 5/8" and the topper pieces on the sides were all 3/4". I re-did the floors in 1/2" marine, and everything else got 3/4" marine. I coated everything with a spar urethane for extra insurance.

21-FloorWood.jpg


Once I got my wood cut out, I started to work on the carpet. After skimming through various threads on this site I wound up going with marine-backed carpet from Lowe's (open-type, not the looped kind). Quite honestly, after comparing it to the dozen or so carpet samples that I got from various companies I don't see much of a difference. It seems to be a little more plush than the 16 oz samples I got, and just from initially working with it I am very happy with it.

First I traced all my pieces out with a white colored pencil, which worked great for visibility purposes on the dark marine backing.

19-Carpet.jpg


Then I had to cut it. I don't know how most people cut their carpet (probably with scissors) but I took a different approach. I had a tool for cutting carpet that looks like a pizza cutter. It very sharp, and made cutting the carpet a snap. I doubt very much that I spent more than 30 minutes cutting out my pieces.

20-CarperCutter.jpg


Another bonus, as seen in the picture below, is that this method gives you nice unbroken cuts, eliminating problems with the edges unraveling.

21-CarpetStraightEdges.jpg
 
The bottom width is 48".

And to clarify the test holes, I actually was screwing a few hose clips into the transom to run my bilge line. They weren't deep but they bit into the wood, and when I backed two of them out the wood appeared to be in decent shape. It definitely wasn't the rotten wood that i was fearing I'd see.
 
Gotcha.. you're not over powering it by any means anyways, so it'll probably be fine for the length of time you own it.

Interesting carpet cutter.. can't believe I havent seen one of those before. That thing must be outrageously sharp to be able to roll and cut right through. I had enough issues just using a utility knife :roll:
 
It's very sharp, it'll cut you right down to the bone if you're not careful. You also need to make sure you have some type of cutting board underneath your carpet, or you'll cut through whatever is below it too (like the carpet on your basement floor #-o ).
 
Top