15' bluefin v hull NW setup *Complete*

TinBoats.net

Help Support TinBoats.net:

This site may earn a commission from merchant affiliate links, including eBay, Amazon, and others.

bdub065

Member
Joined
Mar 28, 2014
Messages
12
Reaction score
0
Location
Portland, OR
As with every post I read I must thank everyone for all of their insight and knowledge on the topic. My build would have been far more difficult and minus a few cool stolen ideas without you Tinboat members!

So my story begins with an unfortunate beginning as the boat was my uncles before me. Last summer he had a large stroke and will no longer be able to fish so the boat had to go. I received a call from my dad as they reached out to us knowing all the men in our side of the family were fishermen to see if any of us needed a boat. Since you can never have too many boats I jumped on the opportunity to buy my first. I am 26 years old and have been very privileged with boating options (dad: 18' Smokercraft sled, 18' 55 Thompson wood runabout, Brother: 16' Alumacraft drift boat) which let me fish anywhere I have needed in Oregon. But the opportunity for a first boat of my own was just far to good! I am still hoping that at some point he will be able to go on a trip with me in the final product, but at this point it doesn't look like this will be a possibility, he is stable but will be unable to be in a boat.

I ended up driving up to WA for the weekend to spend some time with my uncle and cousins and by the end of it I was the owner of two boats! One I gave to my dad as a little 12' riveted aluminum w/o trailer and the other was my new 15' bluefin profish.

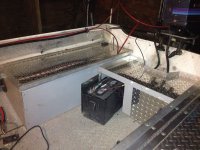
Included was the 35hp Force engine, 50 lb thrust Minn Kota bow mount, 2X batteries, trailer, 2X cannon down-riggers 4 seats, some lake anchors, dock bumpers and some misc fishing gear. This all came with the 12' boat for 500$. I owe him a ton for the deal that he gave me and couldn't be happier with the canvas to start my Salmon/Trout/Steelhead rig.

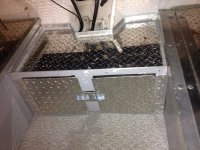
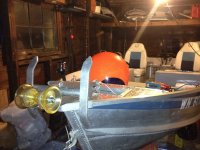
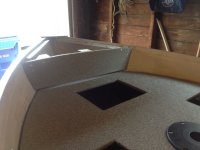
Attached are a few of the beginning photos.
 

Attachments

  • image.jpg
    image.jpg
    670.3 KB · Views: 1,078
  • image.jpg
    image.jpg
    821.6 KB · Views: 1,078
  • image.jpg
    image.jpg
    786.7 KB · Views: 1,078
So I ended up fishing out of the boat and in all reality it was very workable for the next year or so but then I found this site and I began to itch with ideas! Here were the original plans:
This boat had more of a bass setup and although Oregon has some excellent and way under-fished bass fisheries I am so busy with the different salmon and steelhead runs (trout as a filler) I haven't dabbled much with this type of fishing. So the simple plan is to open it up as much as possible, update storage and essentially deck it out for NW rivers/lakes. I started my deconstruction on 2/3 and had a very aggressive timeline in order to get on the river for Springers!!!

Bow:
-motor needs moving to the transom due to columbia river anchor mounts
-need new anchor mount, buoy, columbia river anchor and 300' rope
-carpet is destroyed along with some of the plywood in the rear of the boat
-replacing with marine vinyl
Console area:
-remount rod holders
-new fishfinder
-speakers/radio
-move seats 8" to the rear for more leg room under console
-will cut off 8" from the depth of the seat mounts to open room
-set the center seats to swivel for fishing out the back of the boat
-Dream is to add a windshield
Rear:
-remove entire section with raised seat and livewell (no use for livewell with salmon/steelies)
-build cooler into rear storage
-create splashwell over the top of the battery container
-create storage chests on both sides of rear
-left side is for the gas tanks, will open to outside for easy fill at the tank and is same side truck
-tank on opposite side of driver will balance boat when fishing alone as well.
-right side will be for custom 40" cooler that will hold most salmon around here and if it doesnt fit I am an even happier camper!!!
-add two rod holders for out the back trolling
 

Attachments

  • image.jpg
    image.jpg
    726.6 KB · Views: 1,069
  • image.jpg
    image.jpg
    128.2 KB · Views: 1,069
Here are the first three days spent on deconstruction:
Bow
-Minn Kota removed
-Decking remove and the good news is that the wood is in good shape outside of being a little damp from the previous carpet job
Console section
-seats removed and seat boxes removed (will be resized an remounted)
-throttle cable and steering cable casing removed for more space and future gunnels
-console and steering wheel/gauges/switches/ignition removed
Back
-aluminum framing/ panels removed and floor and carpet was ripped out
-staples were a pain to get out as they had to be pulled individually with pliers
-foam removed from back panels
-touched up the remaining wood and will be reused, this saved me from having to buy more of the marine grade plywood.
-filled the boat to the waterline to see if I had any leaks and again I got lucky with all solid rivets. I don't think my uncle used this boat to often and it was always garage kept with a cover. I think this saved me hours of work I have see you others have to take checking and replacing rivets.
Spoiler alert there will be a ton of rivet work in the near future!

Sorry for some of the poor pictures I was working in a non-heated garage and due to the timeline was working in temperatures in the low 20's. Those springers don't wait for nothing and you better have your boat in the water when they are running!
 

Attachments

  • image.jpg
    image.jpg
    963.8 KB · Views: 1,063
  • image.jpg
    image.jpg
    842.1 KB · Views: 1,063
  • image.jpg
    image.jpg
    1,017.8 KB · Views: 1,063
  • image.jpg
    image.jpg
    761.1 KB · Views: 1,063
  • image.jpg
    image.jpg
    807.1 KB · Views: 1,063
  • image.jpg
    image.jpg
    792.2 KB · Views: 1,063
  • image.jpg
    image.jpg
    806.4 KB · Views: 1,063
The next few days of work was spent cleaning up the wood and laying down the marine vinyl:
I got my marine vinyl from a local Smokercraft dealer in Oregon called Stevens Marine they were a great resource for my parts including some unique larger rivets.

I used 3m Professional 90 spray adhesive for ease and if I did it again I would use the spreadable glue in the buckets. The hold is amazing so far but I had to use 5 cans for my application at about 12$ a piece you can save a lot on the slightly messier glue. No harm done but could have saved some cash here. Lastly I secured with SS staples on the back side.

I saved the old carpet to use as a template and since much of the bow layout remained unchanged it made my vinyl job an easy one.

I finished the doors and mounted the front seat post mount and my only regret is the doors arent as tight as they could be. The boat is going to be garage kept to keep dry and nothing in the front will be harmed by a little water on the rainy days but I will probably cut new doors that will fit more flush.
 

Attachments

  • image.jpg
    image.jpg
    930.7 KB · Views: 1,057
  • image.jpg
    image.jpg
    858.1 KB · Views: 1,057
  • image.jpg
    image.jpg
    601.9 KB · Views: 1,057
  • image.jpg
    image.jpg
    662.3 KB · Views: 1,057
  • image.jpg
    image.jpg
    698 KB · Views: 1,057
  • image.jpg
    image.jpg
    729.9 KB · Views: 1,057
  • image.jpg
    image.jpg
    806.8 KB · Views: 1,057
  • image.jpg
    image.jpg
    794.4 KB · Views: 1,057
  • image.jpg
    image.jpg
    812.6 KB · Views: 1,057
  • image.jpg
    image.jpg
    805.9 KB · Views: 1,057
Now that the smurf turf is gone I could move on to the custom fabrications. I would start this section by saying that I have had very little metal work in my past and the rest of the project was completed with mostly common tools for a handy man.
-jig saw, drill, circular saw, measuring tape/ruler/strait edge, rivet gun, a good mechanic socket set and screwdrivers

This section was included reducing the size of the center seats, swivel mount the seats, and re-fabricate the entire back end opening up a ton of space and utilizing storage. I also was able to buy a sheet of diamond plate aluminum,.080 sheet aluminum in the 5054 marine grade and an 8' aluminum hinge to cut for the rear boxes. I was able to get it all for around 150.00 at a sheet metal shop nearby. I looked for remnants but because I was unsure of all the sizing I didn't want to guess at the sizes and just cut to fit.

I used aluminum rivets from Stevens Marine as my hardware in all this section with two different sizes one is carried by Home Depot but the longer ones (1 3/4") with the larger heads were only available online or from Stevens. All of the aluminum parts were repainted with spray cans of rustoleum auto body primer (4 coats) and finished with rustoleum auto enamel gloss clear coat (3 coats)

A big goal of mine was to open up the boat an utilize the storage better to make the boat seem a little more comfortable while fishing long days. removing part of the back section also helped reduce the weight of the boat which allowed an neutral weight difference after adding the 25lb anchor system.
-the combined seats size and shorter boxes add a little over 9 square foot of space
-removing the center section of the rear end where the seat was raised and mounted will open up about another 8 square ft of space.
-total is around 17 square ft of space freed up!!!

Seats
-took the jigsaw to the seat box and cut off 6 inches of the box then slid them together drilled some holes from the top and re-riveted to hold together
Rear box fabrication
-utilized the same sheet metal and shortened the boxes by about another 8" to a total length of 42"
-started to build the hinged lid to the rear boxes
-cut the aluminum plate to top the boxes for added strength and durability at the entrance point of the boat
-due to my jig saw and uneven edges I used 1.5" X 1.5", and 1" X 1" angle aluminum (from Home Depot/Lowes @ about 14$ for 8'section) to set my clean edges as a trim.
-riveted the metal down to lid and the hinges
-cut the angle aluminum and drilled new holes for the insides of the boxes to hold the edges secure as well as new mounts through the plywood/ribs when available (this boat is 10X more solid than I recieved it! :D I am a fan of overkill!!!
 

Attachments

  • image.jpg
    image.jpg
    938.6 KB · Views: 1,049
  • image.jpg
    image.jpg
    614.1 KB · Views: 1,049
  • image.jpg
    image.jpg
    866.2 KB · Views: 1,049
  • image.jpg
    image.jpg
    1,000.4 KB · Views: 1,049
  • image.jpg
    image.jpg
    955.3 KB · Views: 1,049
  • image.jpg
    image.jpg
    897 KB · Views: 1,049
  • image.jpg
    image.jpg
    982.5 KB · Views: 1,049
  • image.jpg
    image.jpg
    624.9 KB · Views: 1,049
  • image.jpg
    image.jpg
    826.1 KB · Views: 1,049
  • image.jpg
    image.jpg
    706.6 KB · Views: 1,049
  • image.jpg
    image.jpg
    894.7 KB · Views: 1,049
  • image.jpg
    image.jpg
    906.6 KB · Views: 1,049
  • image.jpg
    image.jpg
    819.3 KB · Views: 1,049
  • image.jpg
    image.jpg
    817.6 KB · Views: 1,049
Next part was to fabricate a battery box and splash-well for the rear of the boat. I wanted to have a splash-well that would double as a bait station for herring, sardines and other salmon bait. Underneath I built a box with two door that contain both of my batteries (minn kota and engine/aux power) and the bilge pump.
I started by repurposing the cut out section of the back deck and used it as the front of the battery box. I had to cut some square holes for the door holes and used some of the old aluminum hinges along with some diamond plate to create the doors. I took a trip to Home Depot to pick up some outdoor gate hinges and marine/auto weather stripping to seal the door and prevent any rattling. I was really happy with the doors and they fit like a glove. The front panel was then riveted to the floor and angle aluminum on attached to the boxes on each side.

I then needed to add a bilge pump which was missing on the original boat so I settled for a 500 gal pump that should be plenty for this size boat. Fishermans marine had it for about 35$ on sale.

Next step was the splash-well which I measured and cut so I would still have access to the plug and bilge but add as much protection as possible to the electrical housed in underneath. The end result isn't perfect but it looks clean and I think it will work out well as all of my electrical connections are heat shrink and marine grade. Fingers crossed! The top of the box/splash-well was then riveted in place and sealed with marine grade 3m silicone so it shouldn't leak from the top just a little from the opening.
 

Attachments

  • image.jpg
    image.jpg
    918.9 KB · Views: 1,042
  • image.jpg
    image.jpg
    1 MB · Views: 1,042
  • image.jpg
    image.jpg
    934 KB · Views: 1,042
  • image.jpg
    image.jpg
    1,013.5 KB · Views: 1,042
It was about this point of the project that I really started to see how amazing my girlfriend is as this was a far larger time commitment than I originally thought. It has worked well with her going to college and studying during my boat affair, but none the less she is my best catch!!!

The next several days were loaded with the midsection of the boat. Mainly electrical and the console fabrication. I was lucky to have a drivers console to start and that saved me a bunch of work as well as gave a perfect template for my passengers console. I built this out of the .080 sheet aluminum and angle aluminum for the fame again riveting everything together. This turned out much cleaner than my previous metal work as I picked up a metal blade for my circular saw. This helped my cuts stay straight but my difficulty was changing the 90* angle of the aluminum. I ended up having a banged out metal angle that will work well but definitely looks homemade. Unfortunately I didn't have a brake to make my own angles and I didn't want the build to be outsourced for extra costs. Overall I am happy with the end result. Both consoles were again pained like the rear section and reassembled.

Once together I had the challenge of the electrical system which I must say was much easier due to my college job at Uhaul. I was the hitch and wiring pro which helped gave me a lot of experience to rewire the boat more simply and safe. I added fuses and switches for all of my electrical devices to protect the expensive gear and revamped all of the connections with marine grade heat shrink connections. I am hoping this will last but with my previous experiences with outdoor electrical is that they will have issues eventually! I picked up some wiring grommets for all of the areas the wiring passes through the aluminum to help protect the wires and connected everything up.

There wasn't a fish finder included so after a lot of research and a timely new line from Lowrance (prices plummeted on last years models) I picked the Lowrance Elite 4 with GPS. That was a fairly simple install compared to the electrical.
 

Attachments

  • image.jpg
    image.jpg
    707.1 KB · Views: 1,032
  • image.jpg
    image.jpg
    874.4 KB · Views: 1,032
  • image.jpg
    image.jpg
    898.9 KB · Views: 1,032
  • image.jpg
    image.jpg
    574.9 KB · Views: 1,032
  • image.jpg
    image.jpg
    403 KB · Views: 1,032
  • image.jpg
    image.jpg
    965.2 KB · Views: 1,032
  • image.jpg
    image.jpg
    842.2 KB · Views: 1,032
  • image.jpg
    image.jpg
    725.8 KB · Views: 1,032
  • image.jpg
    image.jpg
    895.4 KB · Views: 1,032
  • image.jpg
    image.jpg
    938.5 KB · Views: 1,032
Next step was to build the side gunnels. I had to build 4 because the seats wouldn't swivel if the gunnel wasn't recessed, but in the end I am happy with the result. They were made by cutting the angle aluminum and then cutting the diamond plate to 4" wide. I then had to develop some brackets (angle alum) to hold, mount and support the gunnels. The connection point at the hull I lined with the marine weather stripping to make sure the aluminum didn't rub any holes in the hull or cut the LED wires. Finally all the edges of the tray were lined with the marine silicone to eliminate any edges/gaps for line to get nicked or cut.

The steering wheel was weathered from a grey color to an almost white so I hit that and then front seat mount with some black plasti dip to bring it back to life.

I had to make a trip to the dollar tree and picked up some pencil holders that fit any cup, can or bottle for 1$ a piece which was a good savings. Cheapest I found online were about 2.50 and only fit cans. I will eventually hit the metal with plasti dip as I assume the metal will rust out on the 1st trip but thankfully I have a left over can so no added cost here. I drilled out the holes with my 3" holse saw and the holders drop right in.
I ran into another good buy online for some led lights and picked up a pair along with some marine wire and switches for my dash. I will probably add to the system with a few more later down the line and designed the system to just wire in additional lights.
I called it a night after that but I was starting to get excited to fish at this point!!!
 

Attachments

  • image.jpg
    image.jpg
    708.6 KB · Views: 1,025
  • image.jpg
    image.jpg
    799.3 KB · Views: 1,025
  • image.jpg
    image.jpg
    884.7 KB · Views: 1,025
  • image.jpg
    image.jpg
    839.4 KB · Views: 1,025
  • image.jpg
    image.jpg
    863.7 KB · Views: 1,025
  • image.jpg
    image.jpg
    719.7 KB · Views: 1,025
  • image.jpg
    image.jpg
    833.1 KB · Views: 1,025
With the center console wrapped up I moved my focus to the front of the boat and tacked a few large projects. I started with creating the bow storage and decking. I cut a piece of some marine plywood (donated from my brother) to fit the top of the bow storage area and then matched it with a piece of the diamond plate aluminum. I had to drill out a new hole for the bow nav light which was difficult without the proper hole saw but I was able to complete the job without spending the extra 20$ for the hole saw. I used a large drill bit to start the holes to fit the jig saw on all 4 corners of the hatch. Angle aluminum was then cut to fit lining the hole, riveted down and sealed with the marine silicone.

I wanted to build the anchor mount myself but considering the amount of force on that part of the boat with the anchor, chain and current it was really more appropriate to have this part done right. I looked all around all the usual stores and the price ranged from 150-300 for these little contraptions so I was highly discouraged. I then remembered the guy I bought the windshield from (Brad from Fairview Marine Supply) said he had seen some on craigslist that are built locally and we were able to track my man Gordon down who lived a short while away. His design is as good and potentially better than any of the ridiculously priced ones from the retail stores and his aluminum is a thicker size. The best part is that the price was only listed as 85. The guy was genuine and solid guy with his shop attached to his home and when I didn't have the correct change he didn't hesitate to make me a deal for 80 that day. I was rather embarrassed about the situation but it is always nice to see great service from a local guy. I would recommend him to any salmon rig that doesn't already have this type of setup.

So after the story and a thank you to Brad and Gordon I ended up installing the anchor mount with some stainless steal bolts to mount it to the hull and bow. The other great thing about his mount is that it came without drill holes in it so I was able to easily set it up for my boats strongest anchor points.

Next step here was to head down to Fishermans Marine for a sale where I picked up the whole columbia river anchor system for about 180$. That included the 25 lb anchor, 300 ft rope, the buoy (priced 200 alone!!) which will be all I need in the areas I fish (but I also have the lake anchors I can use when hitting the mountain lakes for trout.

Finally I needed to find a way to keep the buoy from rolling all around or flying out of my boat on the hwy. I used a simple bent hook and a d-ring attached to the buoy for quick/easy release when I want to use the anchor.
 

Attachments

  • image.jpg
    image.jpg
    941.2 KB · Views: 1,019
  • image.jpg
    image.jpg
    592.6 KB · Views: 1,019
  • image.jpg
    image.jpg
    700.1 KB · Views: 1,019
  • image.jpg
    image.jpg
    881.7 KB · Views: 1,019
  • image.jpg
    image.jpg
    848.6 KB · Views: 1,019
I ended up getting some toys in the mail and installed them for the next phase. This included my Pyle speaker system I picked up off amazon. I didn't want any of the bumping speakers you see on those pleasure boats but do like to listen to a football game or some music while on the water. I ended up finding the Pyle systems that is essentially just a small amp to power the speakers and a headphone jack you can plug in your phone or mp3 player, and finally the two speakers. The total cost was just 69$ for the system. I ran into a dilemma for how to power this system as I didn't want it to drain my engine ignition or my minn kota power so I had to get a separate battery. I am no math expert but from the formulas online this little golf cart battery should power the system for 8-10 hours depending on the volume while keeping the added weight down. I found the battery for 99$ at Fishermans Marine along with a net that was on sale. I probably could have shopped around a little but my timeline had me wanting to wrap this part of the project up.

I also found a glovebox for around 30$ online that has a lock and will keep our electronics dry. I had to cut the hole in the console with the jig saw. Since this was an add on project I had already painted the console so to save the paint I took a suggestion of another post (cant remember what one there were so many, but thanks for the suggestion) by adding painters tape the jigsaw didn't ruin the paint.

I was able to mount the aux cable hookup for the speaker inside the glove box to protect the electronics as mentioned above so the system should be fairly self contained and the system is marine grade so it should hold up well.

Last step here was mounting the new rear cleats for tie offs at the rear.
 

Attachments

  • image.jpg
    image.jpg
    650.9 KB · Views: 1,015
  • image.jpg
    image.jpg
    574.4 KB · Views: 1,015
  • image.jpg
    image.jpg
    580.3 KB · Views: 1,015
  • image.jpg
    image.jpg
    907.5 KB · Views: 1,015
  • image.jpg
    image.jpg
    760.2 KB · Views: 1,015
  • image.jpg
    image.jpg
    485.5 KB · Views: 1,015
  • image.jpg
    image.jpg
    673.1 KB · Views: 1,015
  • image.jpg
    image.jpg
    650.9 KB · Views: 1,015
  • image.jpg
    image.jpg
    737.3 KB · Views: 1,015
The goal is now in sight and this was my work done on my boat as of 3/23/14. We are just starting to hear reports of fish being caught in the rivers so it looks as though the water test and 1st fishing trip will be next weekend. As some have noticed I wont be able to get the windshield design done on time but I did pick up an appropriately sized windshield and am working on how to get it attached to the two consoles. Like with the whole process this will take a lot customization an thought especially because the windshields will take a lot of abuse and jolting while on the trailer and water.

The other thing I haven't been able to fabricate yet is the rear mount minn kota. I have the foot control and from all the research I have done there is no one that is using one of these with a transom mount so I have some ideas on how to fabricate a mount. My problem is that the foot mount has an extra sleeve that allows the foot petal to rotate the prop position. So I have the old bracket that fits the larger sleeve and will find a way to attach that to the smaller transom mounts from the minn kota.

Any advise or people that have done this before please weigh in as I am definitely unsure about this one.

To the progress:
-patched the holes from the previous live well pump with a cut piece of .080 aluminum and a smooth coat of jb weld along with rivets and finally lined all rivets and edges with marine silicone. I don't see this one leaking on me!!!
-Jb weld wrapped rivets patched up the other holes on the boat
-mounted my rod holders
-installed my chromed door latches from online (4$ a piece is a good alternative to the flush mount ones that go for 30$+)
-had some peeling paint on the engine, scraped off the old paint and resprayed with the primer used on the rest of the boat

I should be doing some work on the boat tomorrow and will post the next steps hopefully followed by a fat springer in the boat!
 

Attachments

  • image.jpg
    image.jpg
    704.9 KB · Views: 1,006
  • image.jpg
    image.jpg
    1.2 MB · Views: 1,006
  • image.jpg
    image.jpg
    731 KB · Views: 1,006
  • image.jpg
    image.jpg
    681.4 KB · Views: 1,006
  • image.jpg
    image.jpg
    684.8 KB · Views: 1,006
I finally got this beauty on the water and being a first time builder I expected some tweaks to be made! I invited my Dad on the first trip as I knew his experience would be valuable if we ran into problems. Right off the bat I realized we had a significant leak. After putting around infront of the docks for about 20 minutes I noticed I had accumulated about 3 inches of water and was highly concerned but thankfully my overpowered bilge was able to easily keep on top of the leak allowing us the ability to keep fishing. Once I got the boat on the ramp that evening I found I had nicked about a 3/16th size hole on one of my "finishing" touches that occurred after my last hull check... lesson learned take time and recheck before taking the boat to the ramp.

The next issue we ran into was I mounted the throttle to close to the console and was unable to hit full speed by any stretch of the imagination toping out at a whopping 4.8 mph. None the less we were able to fish but the 35 wouldn't troll down slow enough to really be effective. It was a good learning experience but we would have been lucky to hook up with a springer with the condition of the boat.

Thankfully I had remembered my Dad owned a 5 hp Mercury that had been broken in their garage for the past 8 years. I used the trip to strike a bargain with him and ended the day with an even trade the Mercury for the Minn Kota that came with the boat with the condition I would be able to fix the motor on my own. He had bought the repair manual several years back but never had the time to dive in on the rebuild.

Long story short I spent about 5 hours online researching the issue (the motor was run without oil for a fair distance on one trip and was squealing like a worn timing belt) and found out that it was the bearings that were worn out being run without oil. I ordered new bearings and about a week later was able to tear apart the engine and replace the worn bearings. Sorry no pics of the work I was quite focused on the work as the engine work was a little technical. Long story short I put it in a bucket of water and filled the tank (with proper oil mix this time) and the engine fired up on the third pull!!! needless to say I saved myself about 1400 dollars on a new 5hp.

I was able to head out the next weekend and tried my luck at another Springer but still no luck. Will post new picks with the first Chromed Spring Chinook.
 

Attachments

  • image.jpg
    image.jpg
    814.8 KB · Views: 779
  • image.jpg
    image.jpg
    904.3 KB · Views: 779
  • image.jpg
    image.jpg
    1,016.1 KB · Views: 779
  • image.jpg
    image.jpg
    935.3 KB · Views: 779
  • image.jpg
    image.jpg
    166.6 KB · Views: 779
  • image.jpg
    image.jpg
    816.6 KB · Views: 779
Top