Late 80's Starcraft project

TinBoats.net

Help Support TinBoats.net:

This site may earn a commission from merchant affiliate links, including eBay, Amazon, and others.

Waldershrek

Member
Joined
Apr 2, 2014
Messages
16
Reaction score
0
We have a late 80's/early 90's (I'm not sure on the year) family fishing boat my dad bought a couple years from an old guy. It's in good shape but used. We've used it the last couple years but now it's time to make some changes. Last year my cousin talked me into a walleye fishing trip on Oneida Lake and I had a blast so I'm back this year and I want the boat to be ready by opening weekend for the trip (first weekend in May) so I don't have a whole lot of time.

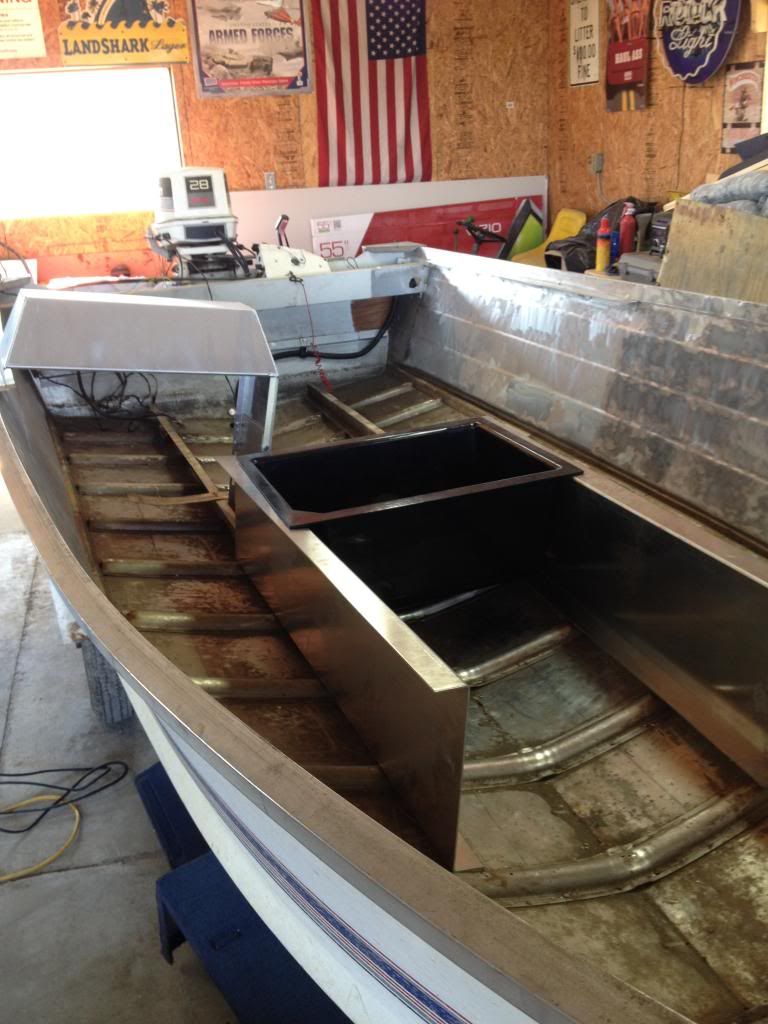
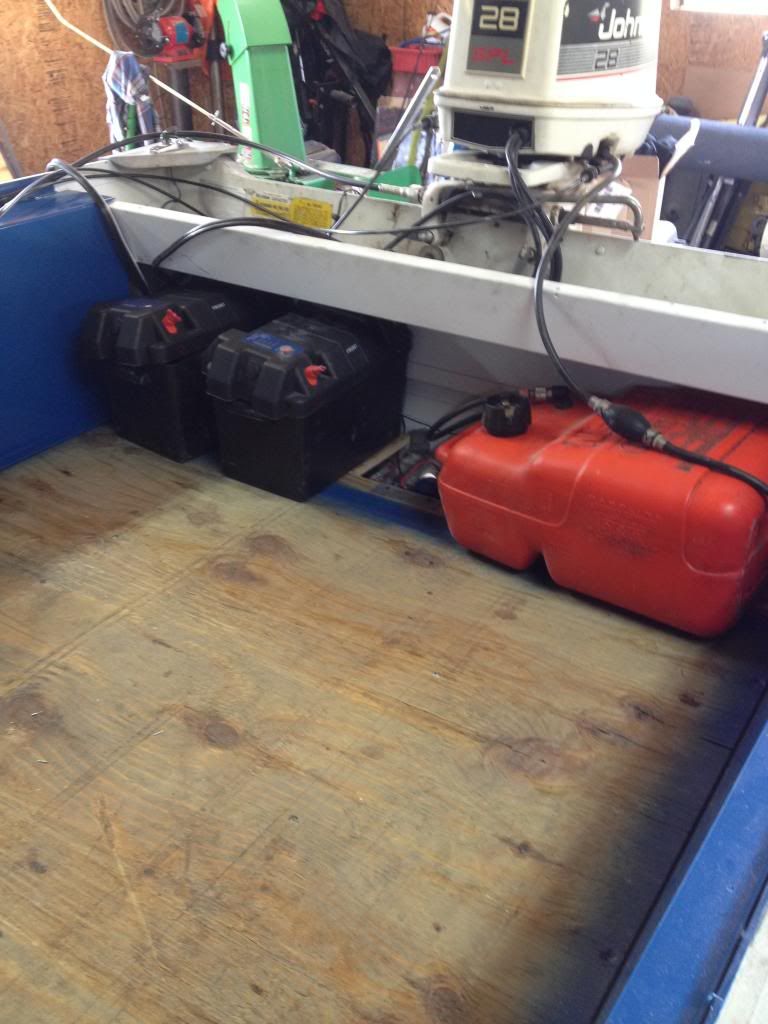
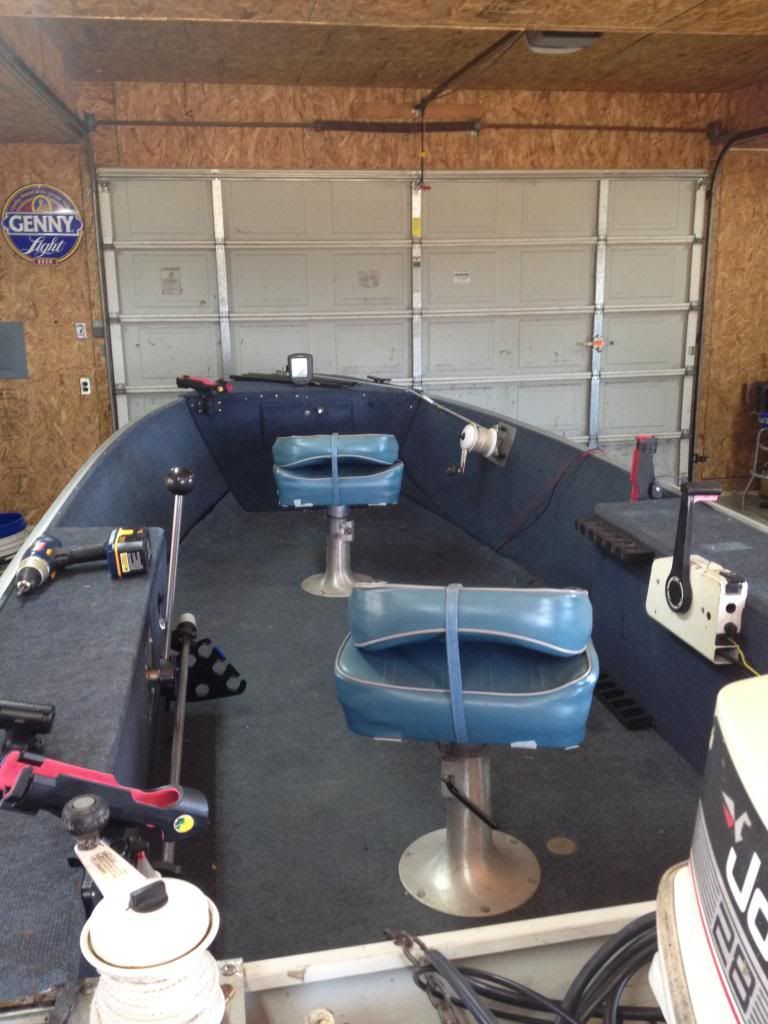
Quick overview of the boat. It's a 16' Starcraft with a Johnson 28 SPL (electric start) outboard. It currently steers via stick which I absolutely hate. It has two seats, bow mounted foot controlled trolling motor on a quick release plate, basic Humminbird fish finder (screen is on the bow although the transducer is on the rear) and no livewell. there is a home made glove box type storage thing in the bow but in order to open it it requires the key which is usually in the ignition so it's a pain to access while on the move. Other than that the boat has no storage. The battery for the trolling motor and fish finder sits about in the middle of the boat along the right side, the cranking battery sits in the back of the boat on the floor. We've had a problem with both sliding around as well as the five gallon gas can. The carpet is pretty faded and thin in spots

To do list:


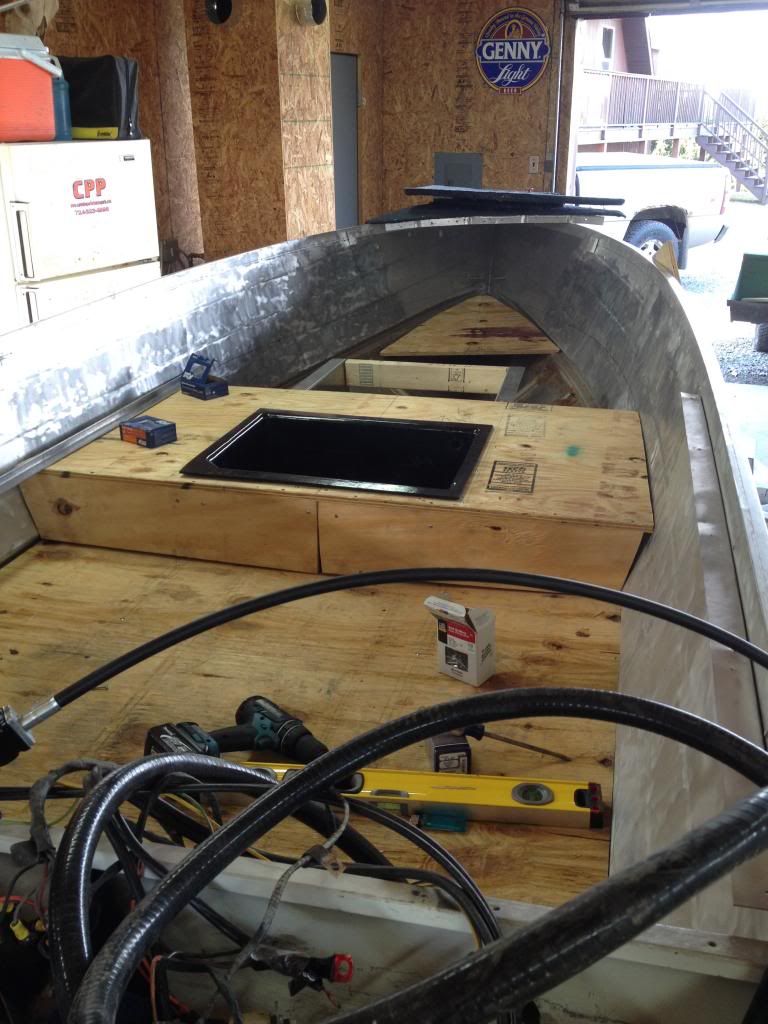
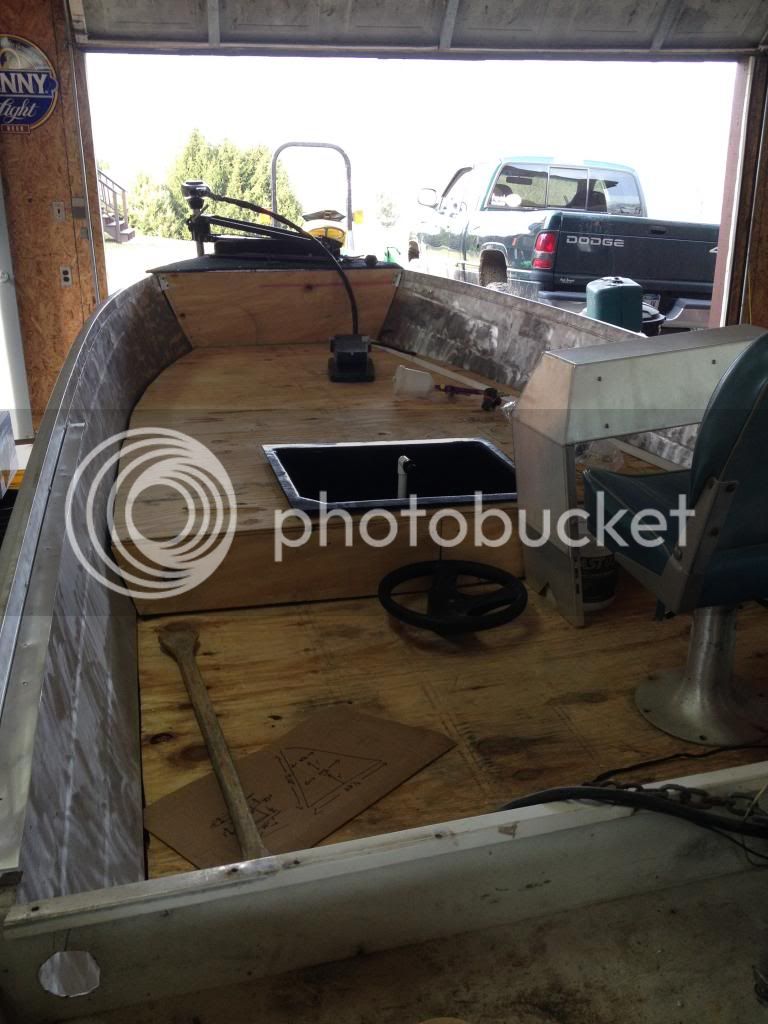
1. Add a livewell. It currently does not have one
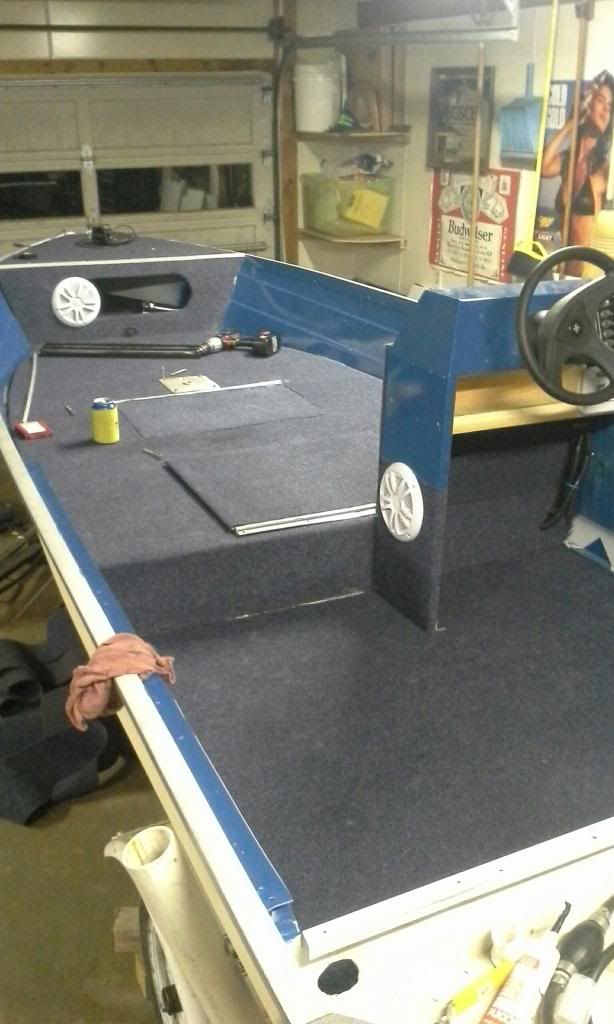
2. New carpet.
3. Add storage to side compartments that are on either side in the rear. Currently they are filled with foam and hide cable for steering stick.
4. Add stereo. Gotta have my tunes.
5. Add battery boxes and relocate them to the rear of the boat.
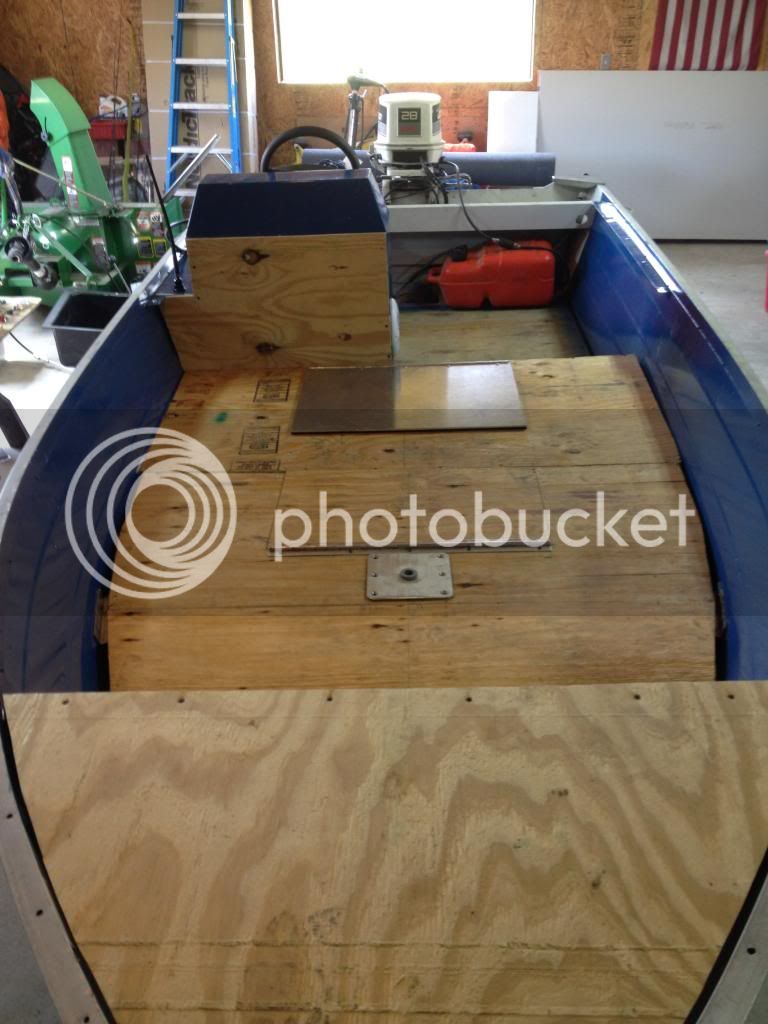
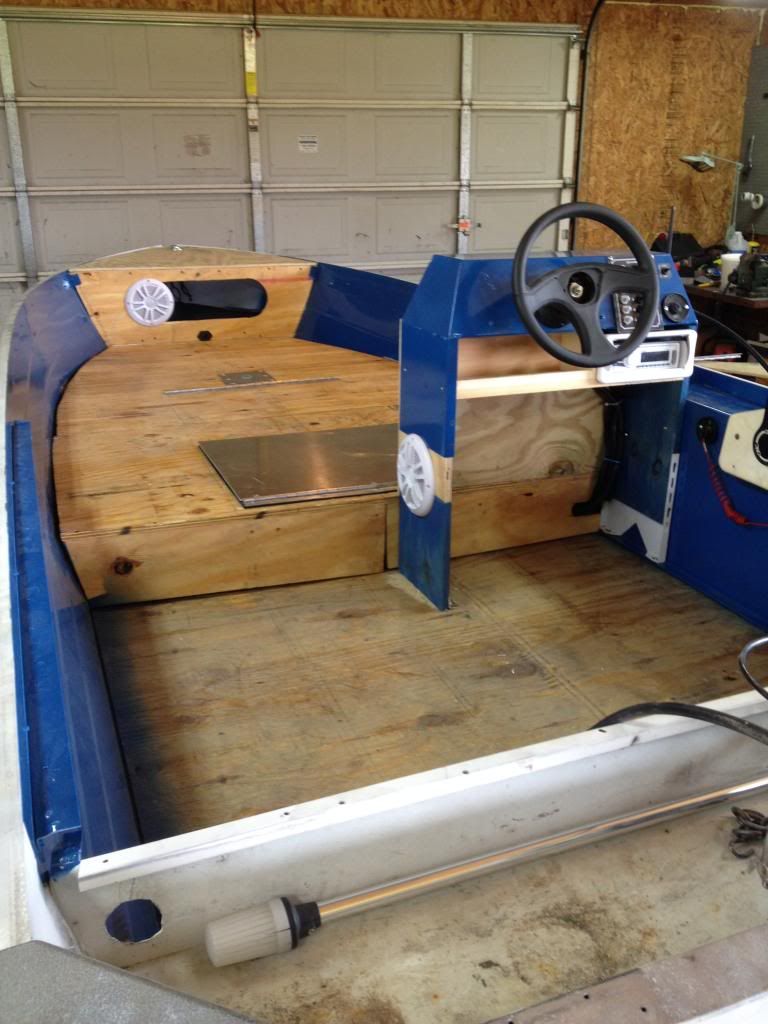
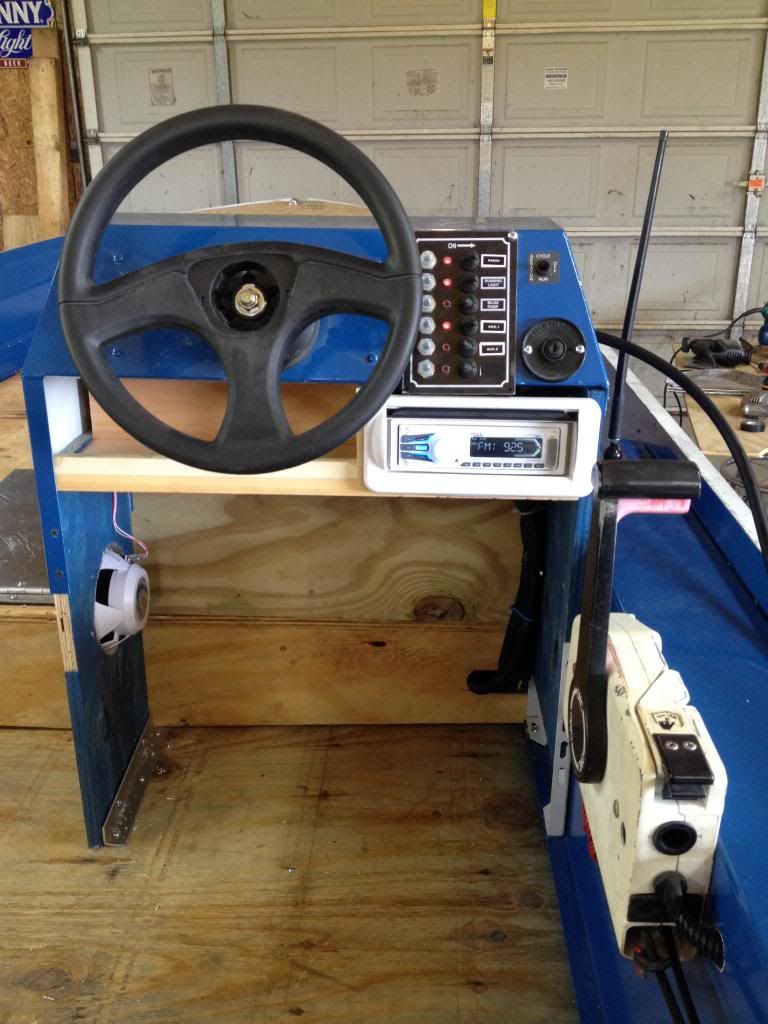
6. Add console and convert to steering wheel. Here is the console I ordered:
attachment.php


Some before pics:

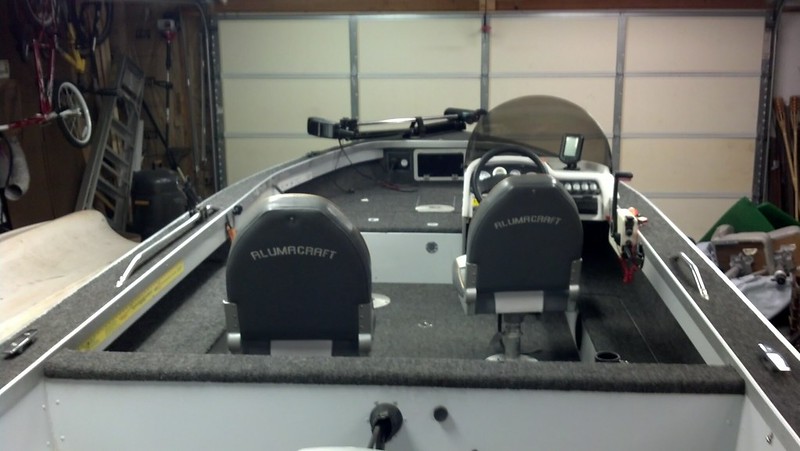
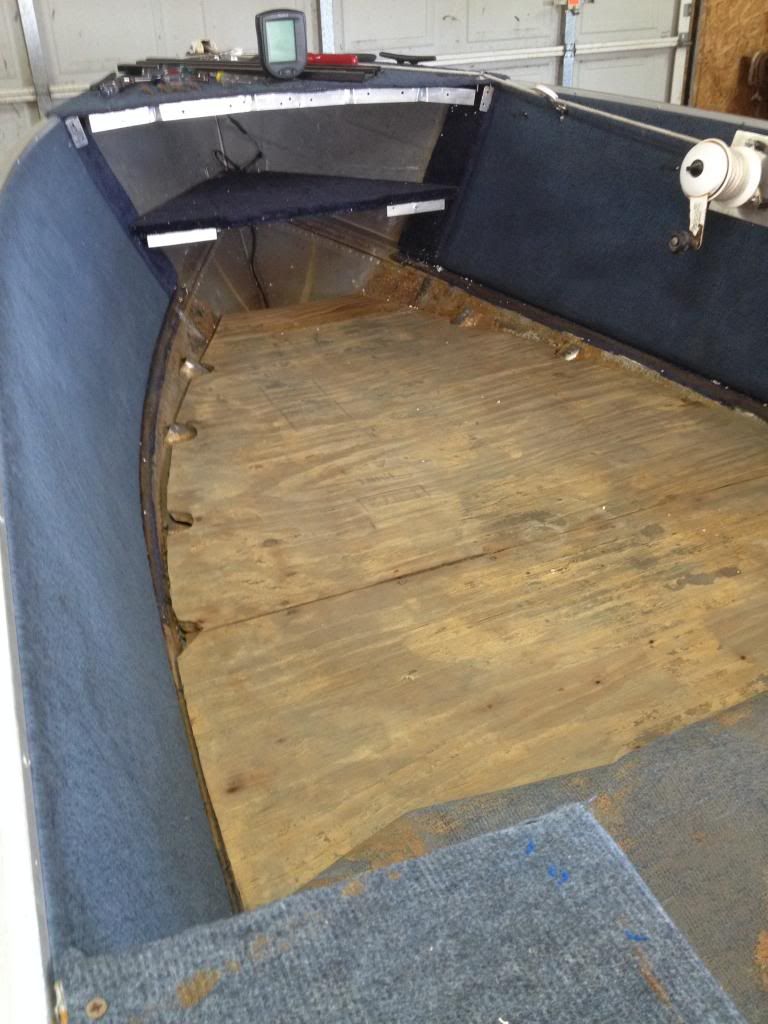
General shot. Note the stick, ignition and killswitch on the left side and the throttle on the right.


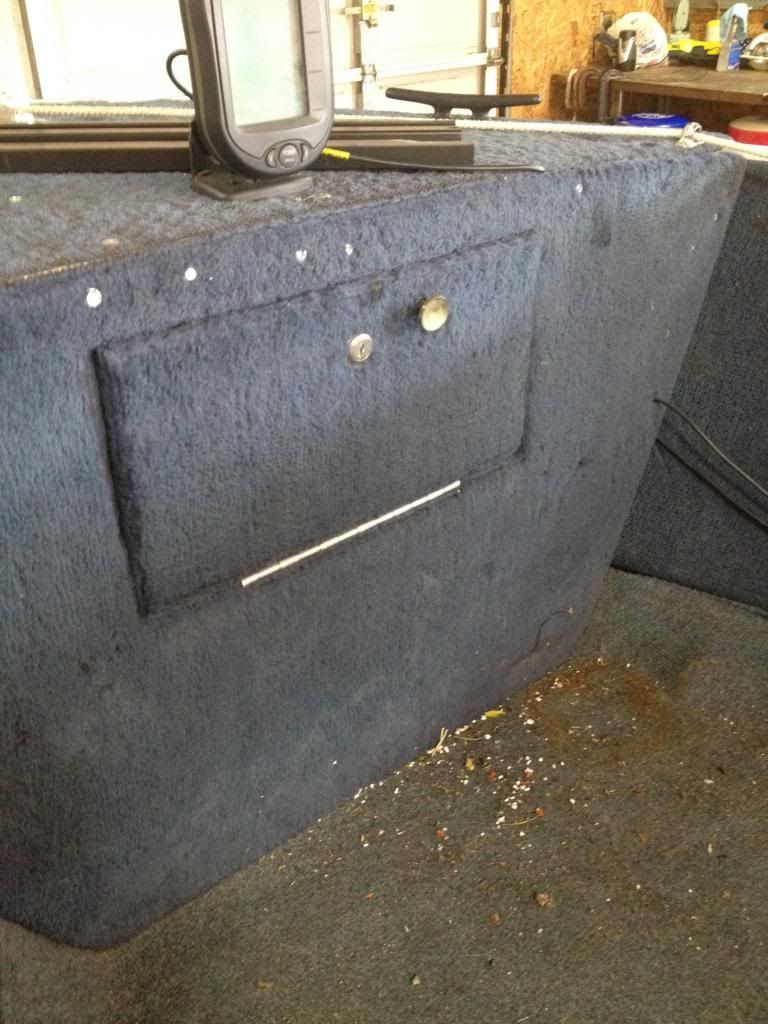
Glove box thing in the bow


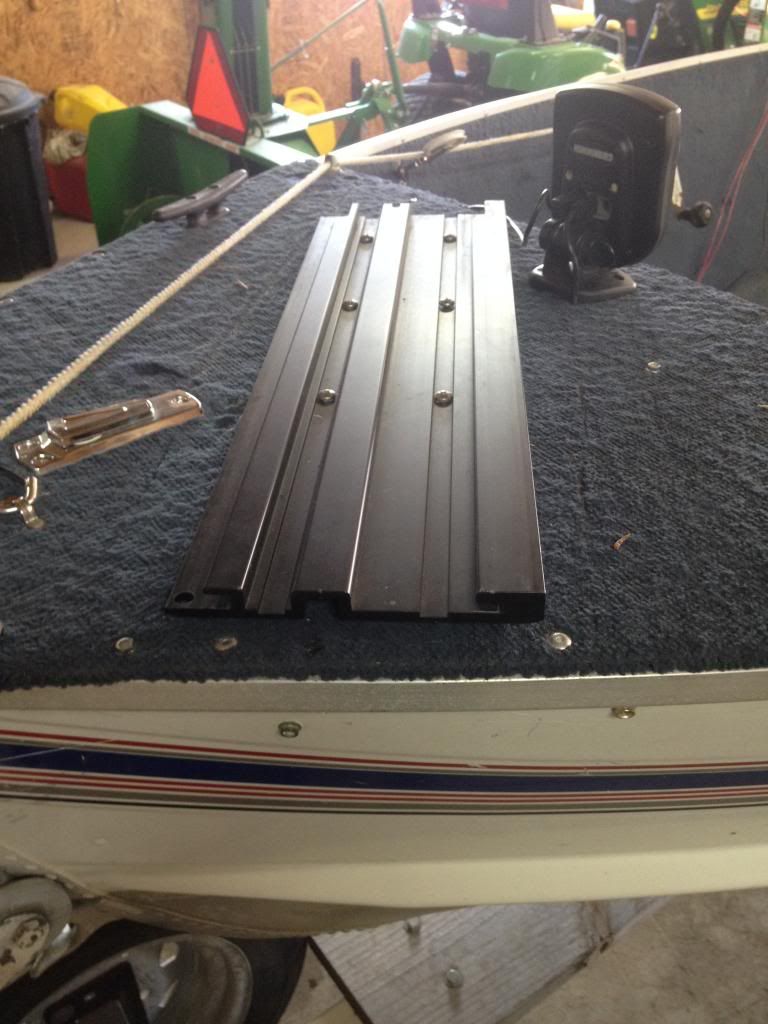
Trolling motor is on a quick mount plate.
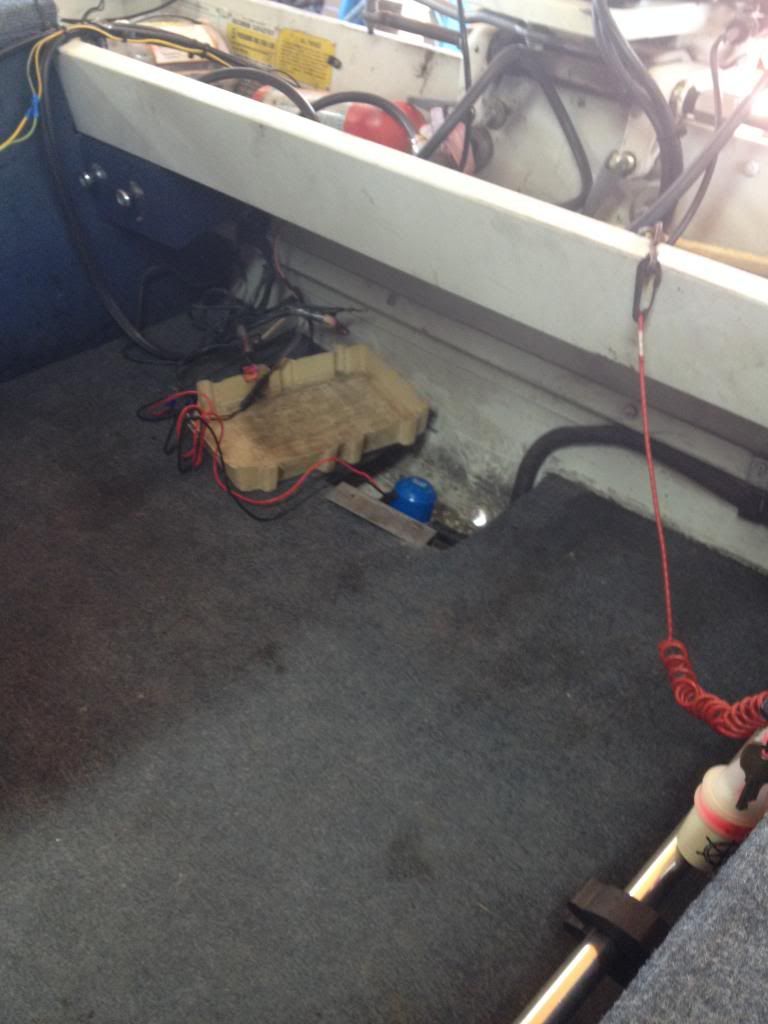


Stern/Bilge


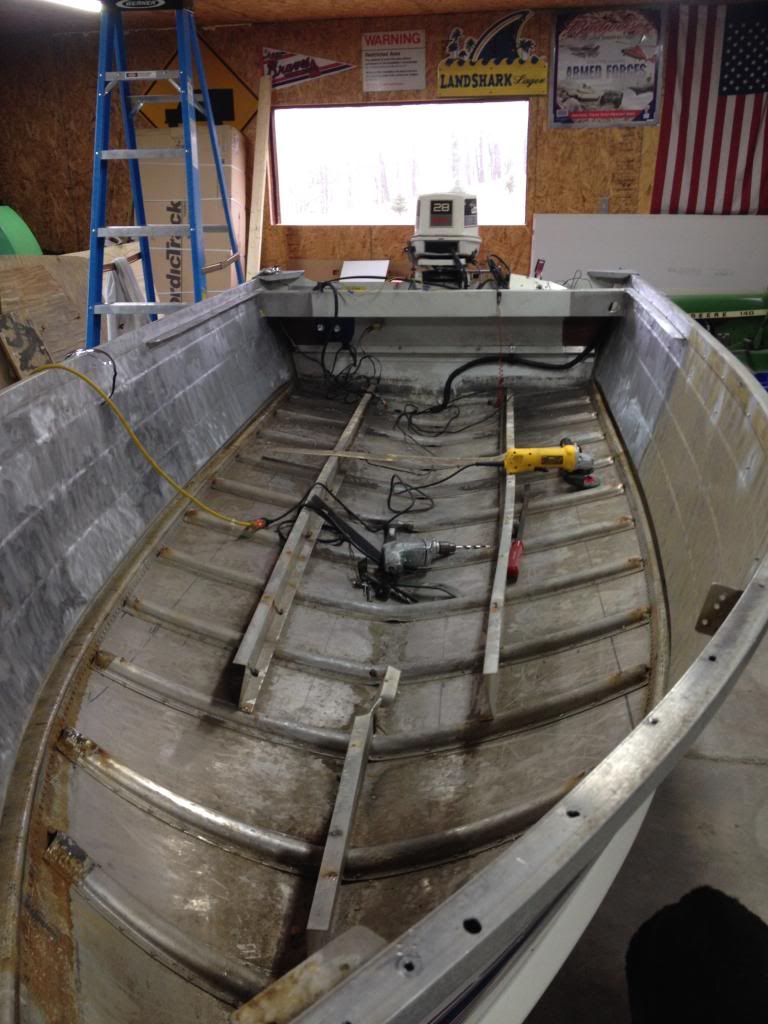
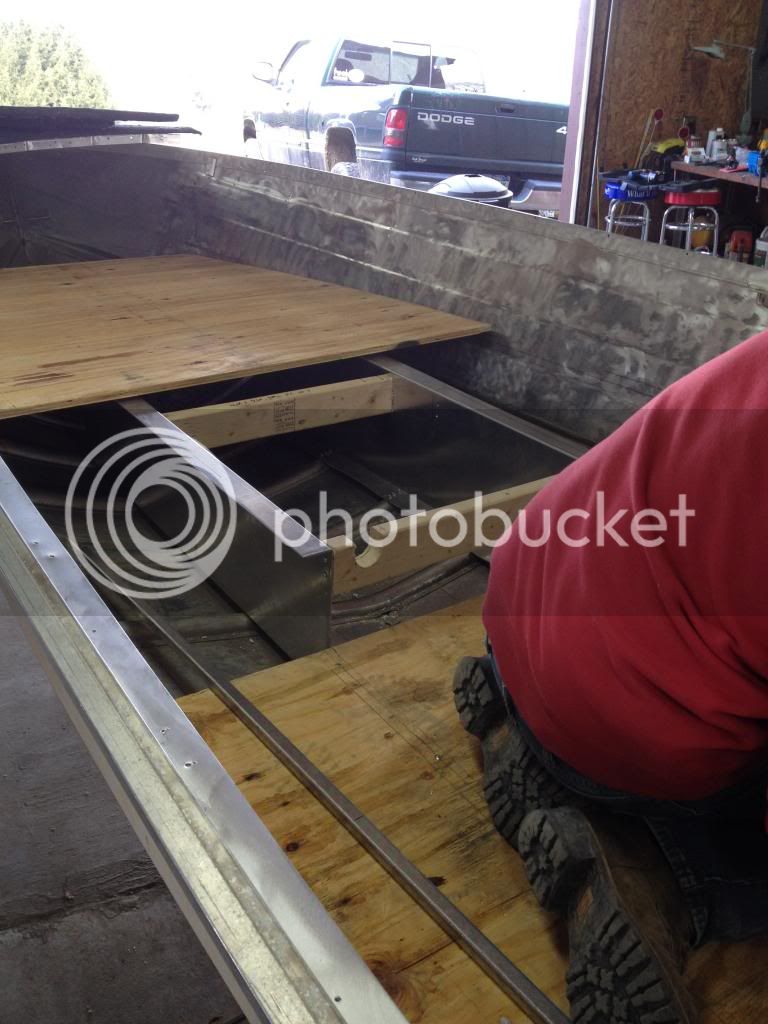
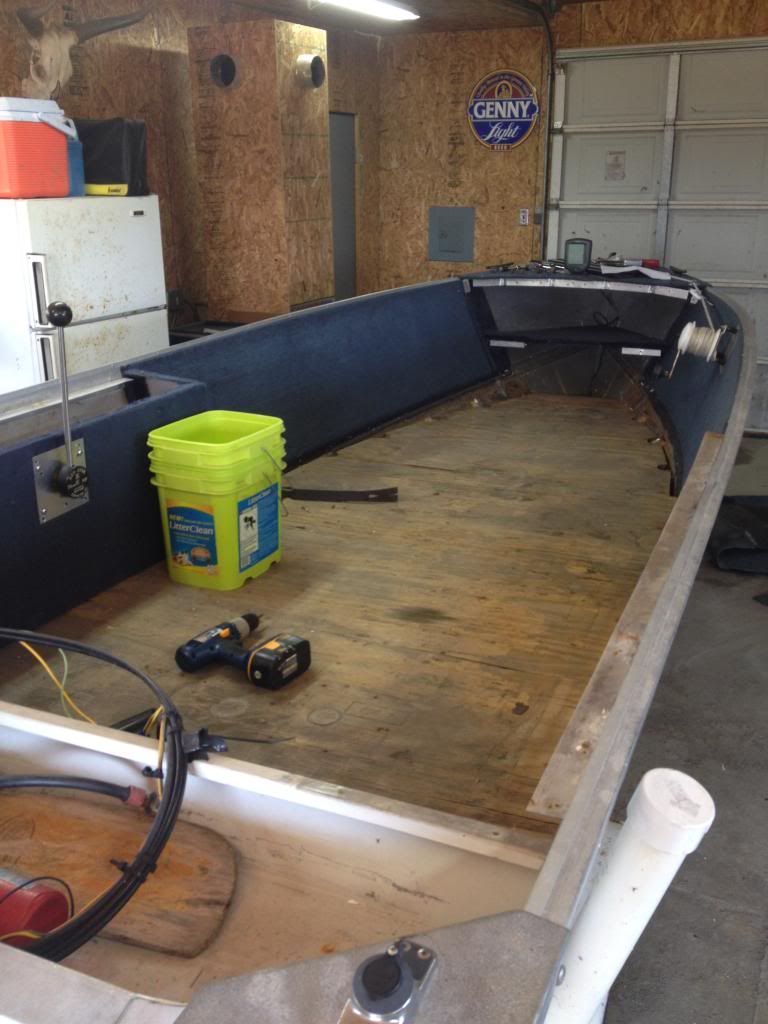
So I started tearing into her:

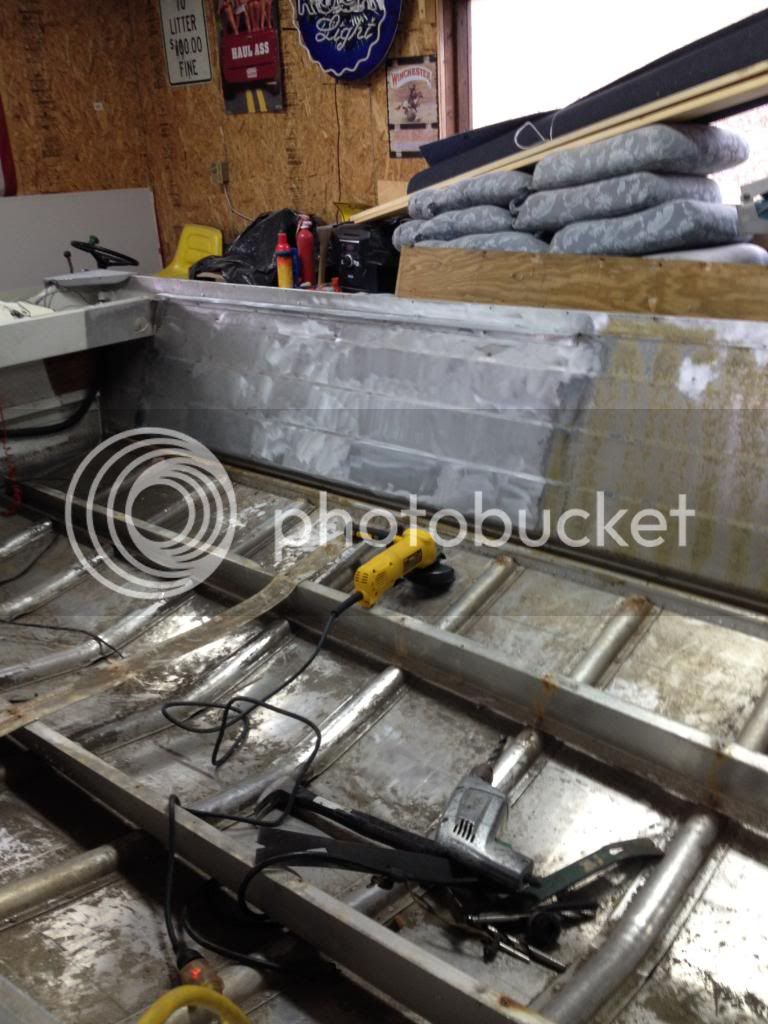
Started pulling carpet up. Boy was it nasty, falling apart everywhere.


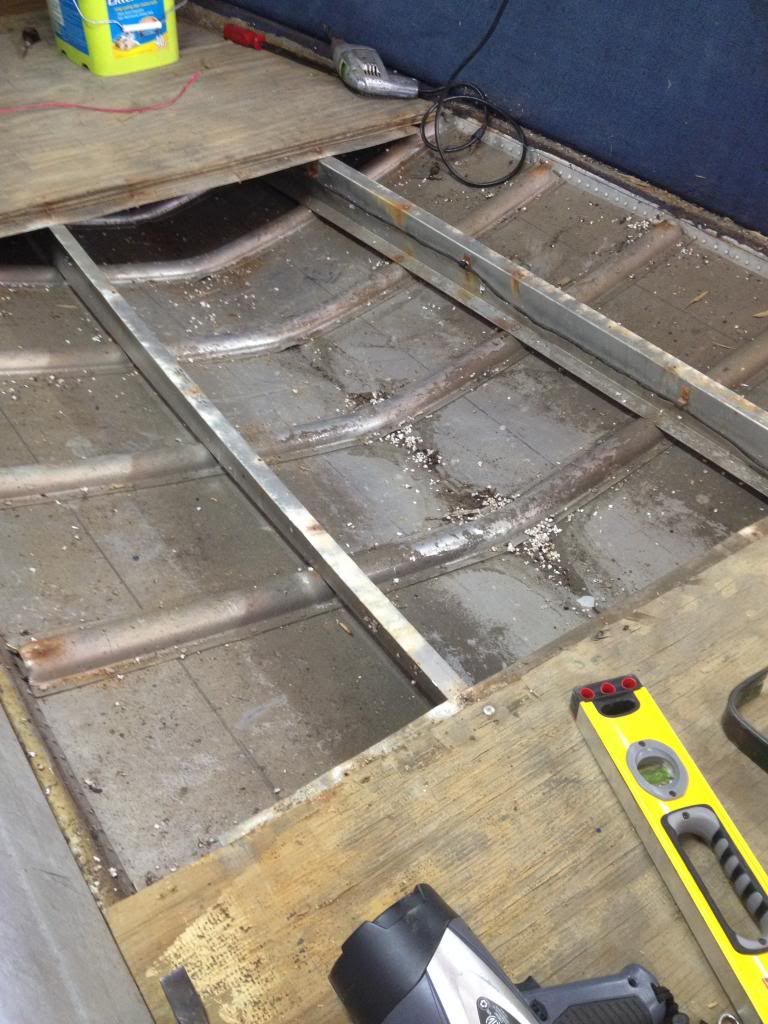
Got everything out. I unhooked the steer stick and removed that side piece right after this was taken


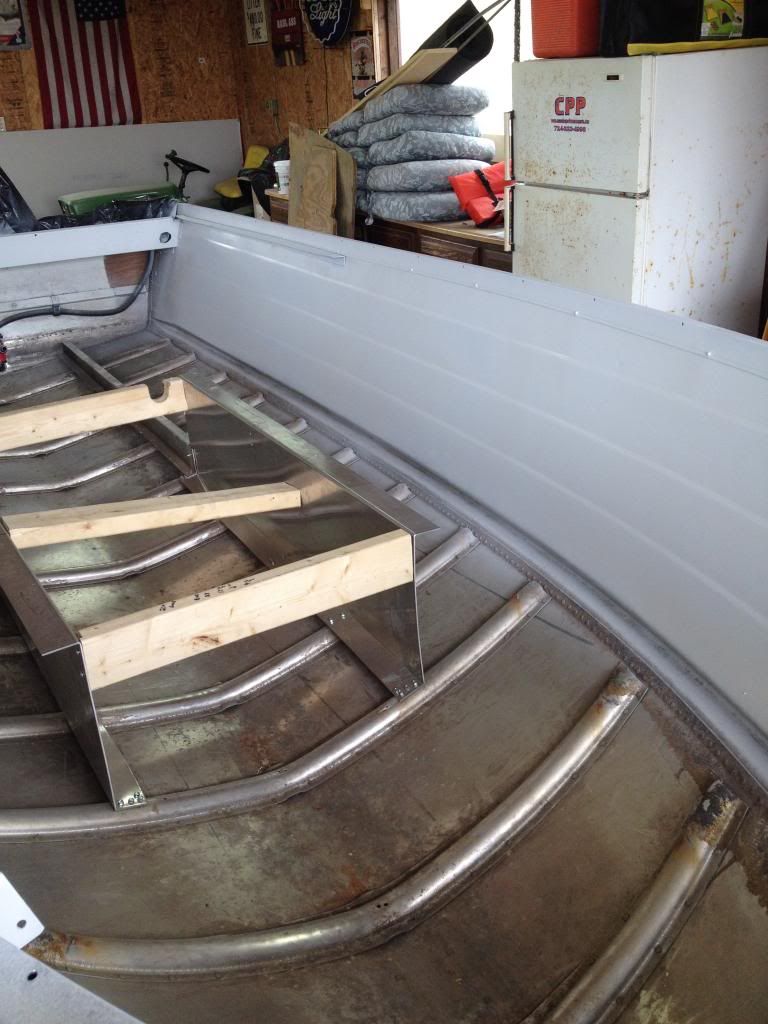
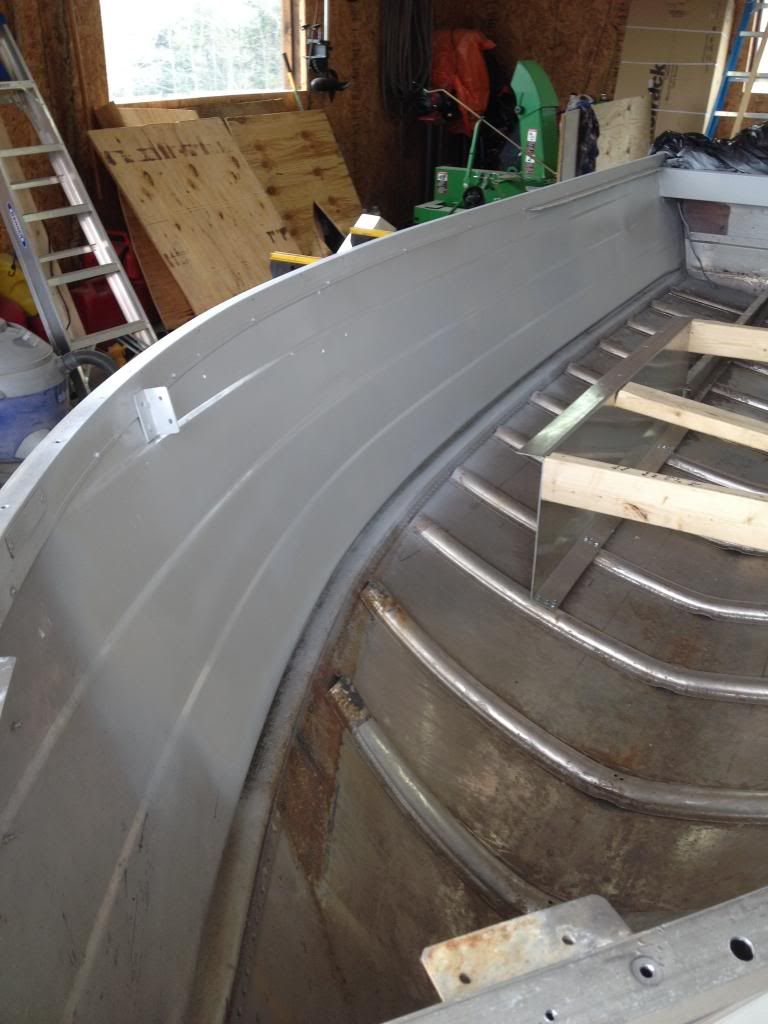
Since taking the floor off and after discussion with some folks on another forum about the weight of such a thing I decided to go with a smaller livewell (16 gallons): https://greatlakesskipper.com/standard-16-gallon-black-boat-livewell-tank-w-drain

That will go right in the middle of the boat between the rails even with the front of where the console will be. About right where the rear piece of plywood edge is:


Let me know your thoughts guys. I'll take some more pics when the stuff I ordered gets here.
 
My original plan was to go with this type of setup with the console and then the front half of the boat would step up to be flush with the new livewell. This will mean the floor gets raised by 6 inches Like this (forgive my terrible paint rendition of this idea):


Basically just like this from my buddy's old boat:


With the livewell hatch right in the middle like this:


Now my question is, should I leave the existing plywood in the front, and just raise the deck over it and use the old floor as the floor for the new storage space? Or should I remove the old floor, raise the new floor and just use the hull as the floor in the storage hatches?
 
Got some more accomplished today, removed anchor setup from the bow, removed bow plywood from the floor, pulled carpet off the sides and scraped off all the old carpet residue with a putty knife. UPS guy showed up with my livewell I ordered from great lakes skipper. Fits good, I think it's gonna work nice


Before scraping:


After scraping:


Livewell came:


And it's gonna go roughly here:


Obviously you saw the sides were carpeted before, should I recarpet them or paint them? I assume I'm gonna have to use a stripper of some kind to get that old nasty glue residue off there?
 
I'd paint the entire inside with some sort of paint after you reseal the bottom. Paint isn't expensive, you've done the hard part!
 
I've used these in the past
https://solutions.3m.com/wps/portal/3M/en_US/3MIndustrial/Abrasives/Products/~/Scotch-Brite-Clean-and-Strip-Unitized-Wheel?N=7581702+4294945756&rt=rud


I'd raise that front floor up just like you suggested...just to the top of the livewell.

It'd be similar to my alumacraft
13267589924_d583394b8f_c.jpg
 
While I'm stuck waiting for the console and stuff to get here, I've been thinking about how to rig this livewell up as far as plumbing. More so with the drain. I don't know if I want to have it drain into the bilge and use the bilge pump to pump the water out of the boat or if I want to rig it up with some sort of pump to actually pump the water out. My fear with draining into the bilge is what if the bilge pump quits? Now I've drained a bunch of water into the bilge that I can't get out. Another option is to run drain pipe back to the bilge pipe/ Currently the bilge pumps out via pipe to a thru hull fitting just below the gunwale. I could put a t fitting and use that same pipe couldn't I? The other option is to put a dedicated pump for pumping out the livewell and putting it's own separate thru hull fitting maybe on the right side just below the gunwale. What are you're thoughts?
 

Attachments

  • img147.jpg
    img147.jpg
    394.4 KB · Views: 3,577
  • img148.jpg
    img148.jpg
    400.5 KB · Views: 3,577
Very nice boat. I do not use a live well as I am more into catch and release, but from a systems perspective it would be best if the live well had its own pump/drain system. Like you said if the bilge pump failed you have a real issue on your hands. If you end up connecting the drain lines together make sure you put a check valve between each pump and the connection point so one pump does not discharge right through the other. It might be better yet for the livewell to have its own outlet port because check valves fail also, but I sure dislike poking holes through a hull. Sounds like you think that way also.
 
[url=https://www.tinboats.net/forum/viewtopic.php?p=347647#p347647 said:
Centrarchidae » 06 Apr 2014, 13:26[/url]"]Very nice boat. I do not use a live well as I am more into catch and release, but from a systems perspective it would be best if the live well had its own pump/drain system. Like you said if the bilge pump failed you have a real issue on your hands. If you end up connecting the drain lines together make sure you put a check valve between each pump and the connection point so one pump does not discharge right through the other. It might be better yet for the livewell to have its own outlet port because check valves fail also, but I sure dislike poking holes through a hull. Sounds like you think that way also.


Yeah I don't like putting holes in a boat although at least with a dedicated drain pump the thru hull fitting is above the water line so it's not as scary to me.

One other thing I had been planning to was a storage locker on the port side wall in the rear. My cousin suggested I put another seat there instead and just leave the storage cabinets for the front. Thoughts?
 

Attachments

  • img150.jpg
    img150.jpg
    430.8 KB · Views: 3,542
  • img149.jpg
    img149.jpg
    494.4 KB · Views: 3,542
Ok so it's been a few day. Got all the glue off the sides, got points cut off screws that were sticking through the sides for the snap on cover (I don't know who thought it was a good idea not to put them in the gunwale) and ground them smooth.

IMG_0402_zpseea44ebc.jpg


IMG_0403_zps59f40fc7.jpg


New aluminum beam cut and bent to raise floor and aluminum angle bent to rivet to the sides of the boat so I have something to secure the plywood to along the outside of the boat.

IMG_0409_zps10940007.jpg


Gonna get wiring ran today for trolling motor plug and nav lights, get plywood cut and get console painted.


I set the console, livewell and new floor beams in just so you can kinda see how it's gonna be setup.

IMG_0412_zpsf0661a93.jpg


I got the spar to for the plywood, do you guys sand your first? On the can of spar it says to sand before applying.
 
The livewell drain just goes out of the boat down by the drain plug with a bulkhead fitting....you can fill the livewell with the fill pump and drain plug installed.....turn the fill pump off and pull the drain plug in the livewell do allow the water to go out - no pump needed. You can also reverse fill the livewell to the water level by pulling the well plug the inserting it once full - no need to run the fill pump then.
 
[url=https://www.tinboats.net/forum/viewtopic.php?p=348283#p348283 said:
matzilla » Today, 11:54[/url]"]The livewell drain just goes out of the boat down by the drain plug with a bulkhead fitting....you can fill the livewell with the fill pump and drain plug installed.....turn the fill pump off and pull the drain plug in the livewell do allow the water to go out - no pump needed. You can also reverse fill the livewell to the water level by pulling the well plug the inserting it once full - no need to run the fill pump then.

Wow very interesting. Saves your from buying two pumps too! Is this what you do in your boat?

Good Looking SC so far Walder! What kind/color paint are you thinking of for the interior of the hull?
 
Wow very interesting. Saves your from buying two pumps too! Is this what you do in your boat?

Good Looking SC so far Walder! What kind/color paint are you thinking of for the interior of the hull?

Just a flat white. I got a bunch done over the weekend. Pics coming soon
 
So here are the pictures from this weekend:

Got the plywood cut and started putting that in

IMG_0418_zps8e76d76f.jpg


Frame for livewell

IMG_0419_zps1aa98134.jpg


Livewell liner dropped in

IMG_0420_zpsfe87e80f.jpg


Looking more like a boat now! Got livewell fittings all put in and then I set the console, seat, and trolling motor on to get a rough idea of the layout.

IMG_0421_zps3b59b168.jpg


Took everything back off yesterday and primered the sides and the rear tray

IMG_0422_zps159092a9.jpg


IMG_0423_zps80c55072.jpg


Won't get much time to work today but maybe get console primered weds or thursday and then I can lay some paint. I have to get all the plywood hit with spar too. Friday is gonna be carpet, wiring and putting the steering wheel and rack on. Moving right along!
 
Yeah actually she just got carpeted last night. I got trolling motor mounted, battery boxes secured and drivers seat in today. I'll try to get some pictures up tomorrow. I didn't take as many pics as I wanted because we worked like crazy to finish it in time for walleye tournament this weekend

*edit*

Here are some pics. I'll get some more today hopefully when I'm done doing a couple more things.

Prior to carpet. You can see the plate for the new front seat, right behind that is a storage hatch and behind that is the livewell.

IMG_0445_zps88bc0b26.jpg


A look from the back

IMG_0446_zps2a1d87d9.jpg


Console. 6 switch plate on the dash for stereo power, nav lights, bilge pump, livewell fill pump and livewell aerator pump. Stero underneath.

IMG_0447_zpsa030f188.jpg


Battery boxes in their approximate location and the fuel tank

IMG_0448_zps9c34344f.jpg


Right after carpet was done

IMG_0452_zps984b0570.jpg


Got trolling motor mounted

IMG_0453_zpsab9748a9.jpg


Got a few more things to do today
 

Latest posts

Top