Project overboard (with questions)

TinBoats.net

Help Support TinBoats.net:

This site may earn a commission from merchant affiliate links, including eBay, Amazon, and others.

FloridaGrown

Member
Joined
Dec 12, 2014
Messages
22
Reaction score
0
Location
Deep South (AKA Florida)
Been digging around for a while and decided to join up. First, great site, tons of info , Thank you. OK, so i picked up an Alumacraft 1436 and knew that the boat was going to get a floor because my i do not want my day or I to trip on ribs, dad has diabetes and his feet aren't so good.
Second, I knew i wanted a built in live/baitwell so no having to hang/pull up a baitwell.. dad is getting older and i wanted us both to have the luxury of just opening a lid.
after getting the boat home i began by cutting the middle bench open for the well..

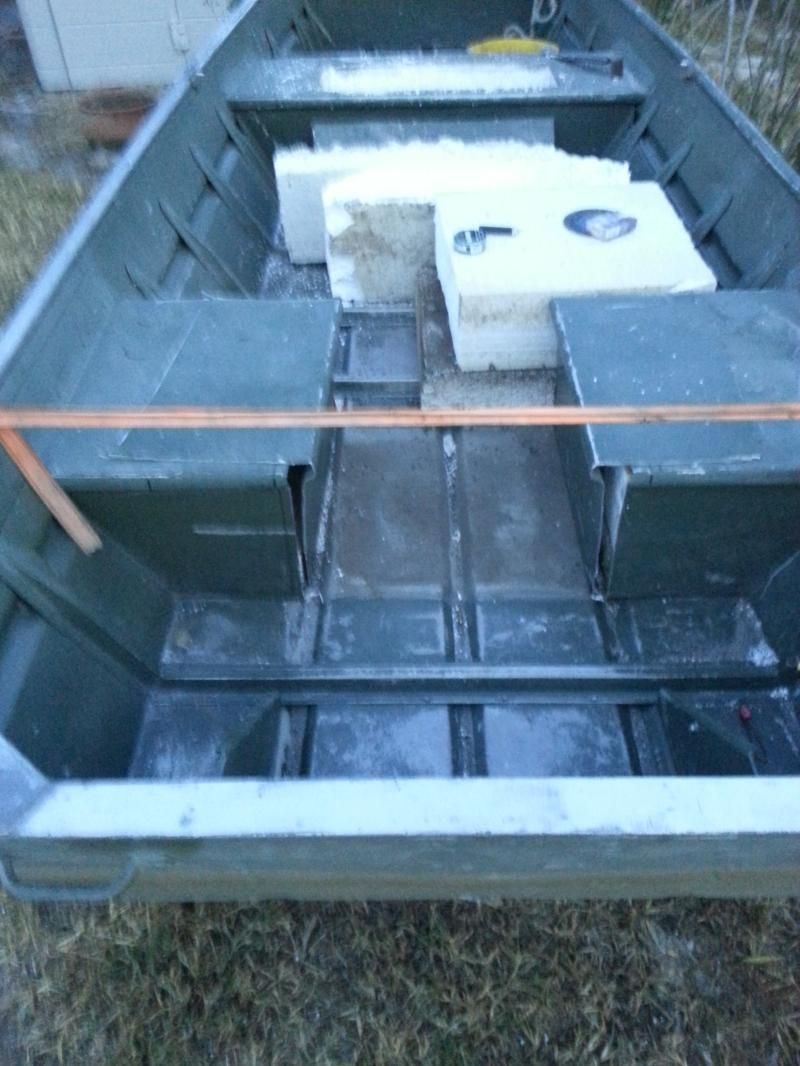
along my way while cutting i decided since the boat will be a longtail, that it would probably be wise to "split" the rear bench.The rear bench still needs corners shaped once i go buy some aluminum and feel up to making them then welding them back shut.I'm leaving the foam in the rears as i have taken a large amount out from the rear split and the middle well areas.
Installed an at-500 aerator and plumbing

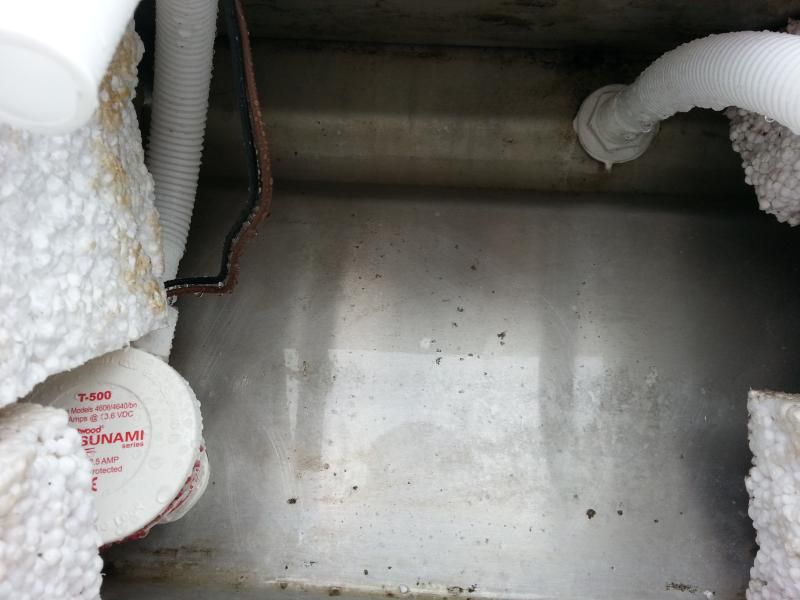
i have two overflows...one on each side of the boat so that regardless of weight distribution or if standing on one side the well cannot flood.
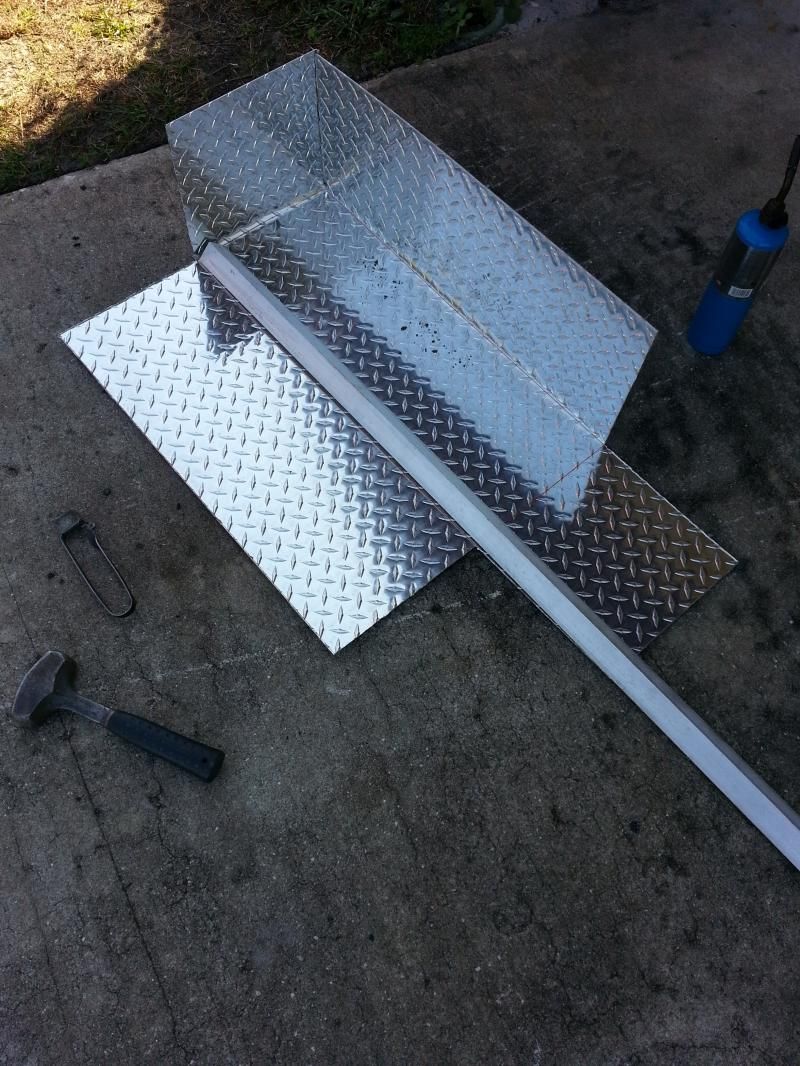
next i began on the well... don't laugh, i do not have a brake and since i have taken a %60 pay cut , i'm a poor white guy nowadays..i ended up using map gas (the propane didnt seem to get hot enough), a 3lb. sledge and you'll recognize the aluminum in the next few pics...

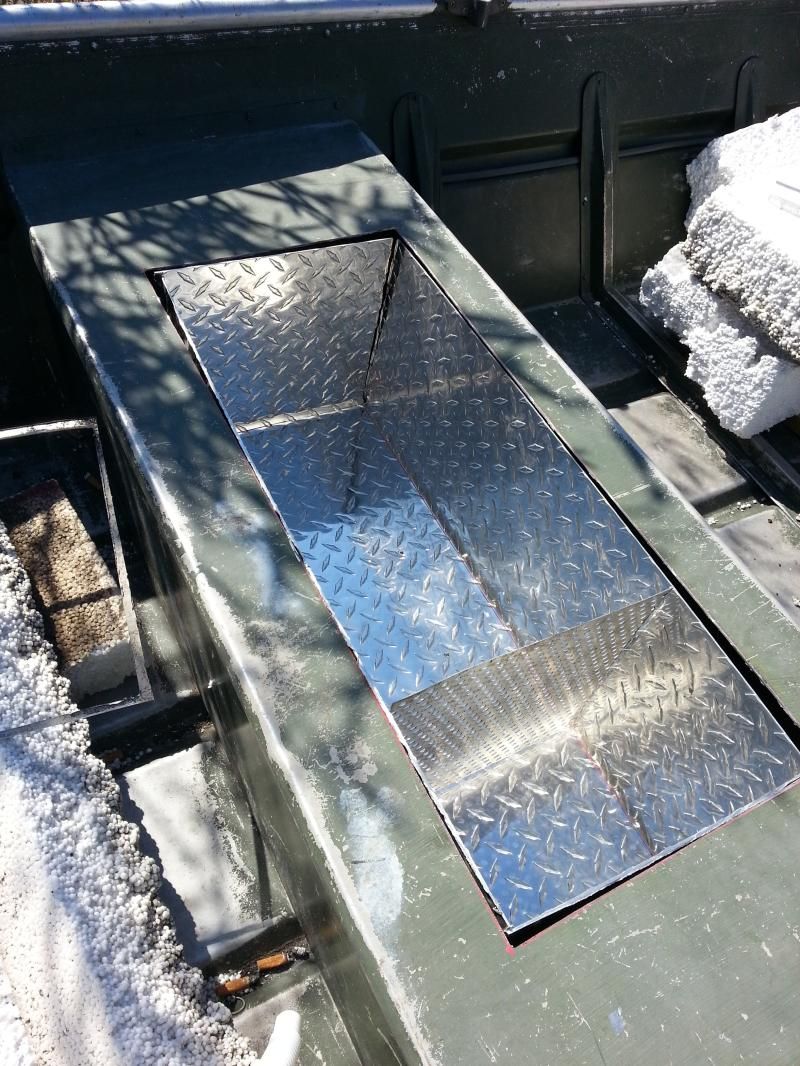
well rough fit in... corners need welded up, and in this pic no plumbing yet. The divider is for bait, it will just slide in via guide tab guides i am welding up.i also now have two underwater leds in the well that will run on a momentary switch that when the lid opens they will light the well up on both sides.

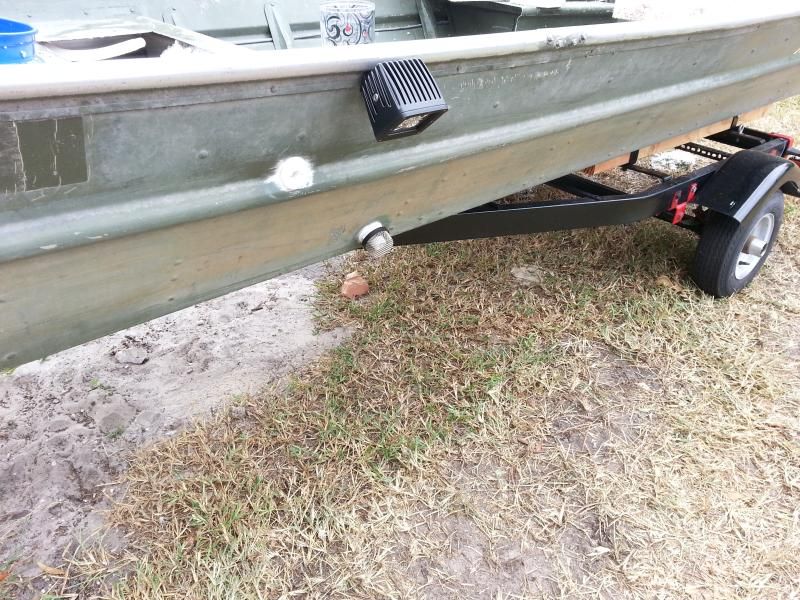
hull plumbing(one side) for the well and pictured is one of 4 LED shrimping lights 1650lumens @ 16W @12v. i don't think the boat will be stable enough to gig from but i'll sure be finding out once on water.

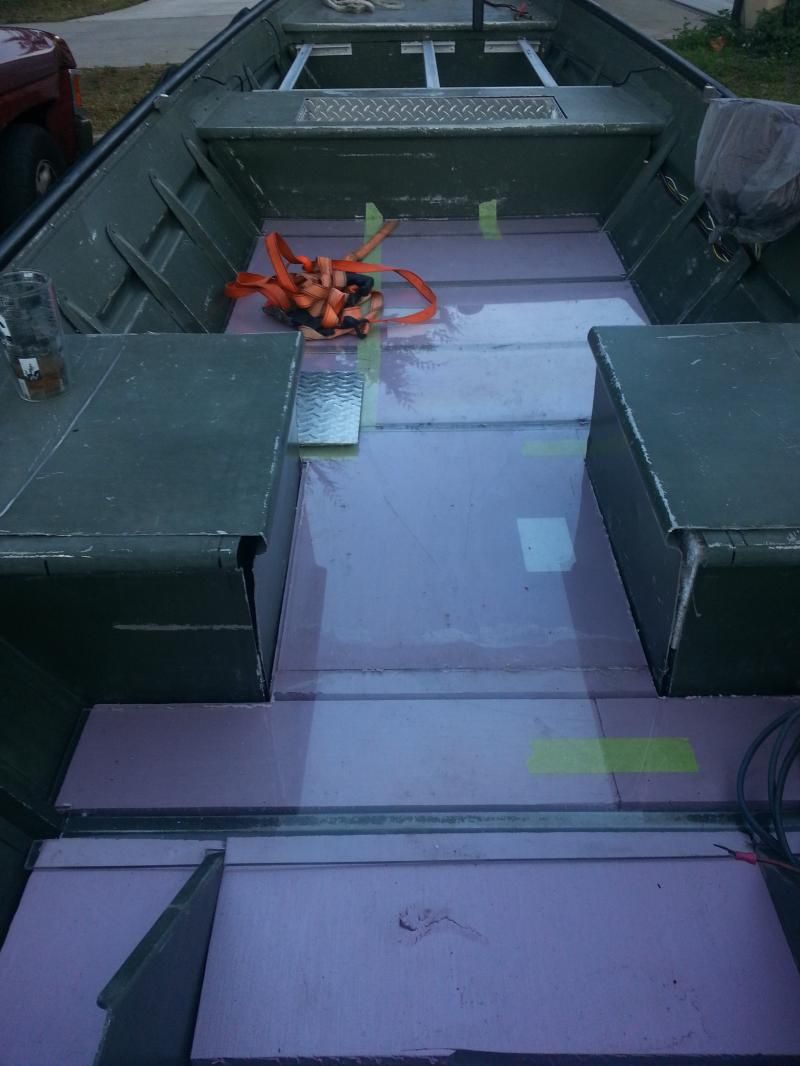
next up was back to working on flooring. first was figuring out what was out there i could use AND afford... after a lot of looking i ended up with some closed cell owens corning insulation.. and i scored some lexan from helping a friend move a few things from one storage unit into another one. for now it is just cut and laid on the floor. i plan on using some SBT blacktip turf as final flooring. once the turf is on the lexan then i will screw the flooring down. I figured to go turf for several reasons..
It floats, not much but i think ANY additional flotation i can add back in anywhere will help me with getting back where i need to with flotation. and turf is kinda spongy, im sure dad and i both will appreciate a comfy flooring..

continued ......
 
not sure how long of posts i can make so i broke it up.... next up was a switch box. i used an old "waterbox" i had for a few years now i got from wally world, some NIB old jet ski thru electrical box fittings i had lying around, a RAM mount that i havent used in a while, some of the lexan i used for flooring left over, a $10 fuse panel from advance auto, and welll you'll see...
the start of the switch box......

a lil 5200 to keep the box waterproof..
mounted and in middle of wiring the boat...


front deck frame 90% completed.....

found a NIB ground block i had lying in a tool box... just used 5200 to secure it to the rib.

that's it for now other than some sanding and painting i've been plugging away at...
 
It's been a while since opportunity was present to move forward on the boat, finally got some turf put in.


still need to turf the fronk deck, and the rear seats , can't do the seats until i finish framing the port one, and i tried my best to stretch the turf as far as i could in layout but another sheet is still needed to complete the turf.

next was finish welding the livewell, the divider just slides out of the guides. wanted to have it removable for ease of cleaning.


I am feeling nervous about the livewell though, it's 10.5"x11"x27.5" and i do not know wtf i was thinking when i decided to do the plumbing for this thing but i put an overflow on each side of the well so that no matter which way the boat rocked the well would not overflow. with that though i installed a thru hull going straight out to the sides of the hull... here's is where i believe i made a huge error...

I am not sure where the waterline will be once the boat is loaded and do not know what to do if i find the waterline is up to the thru hulls. Sorry for the ignorant question but if the water is up to the thru hulls then i am in big trouble right?
and i still did not address drainage for the livewell yet either. I was thinking of simply drilling a hole at the bottom of the stern livewell wall in the middle in line with the runner that goes to the boat drain hole and using some kind of stopper as a plug.
is this ok?
anyways, things not pictured that i have been doing are... had to get 3 new tires for the trailer, got a led all around light (pictured on hangers above), led nav lights are "in the mail" and thankfully NOT coming via a slow boat from china, bought a wally world 300 denier boat cover, led light bar in flood/spot/flood pattern also in the mail, bought a Backwater Swomp lite that is not even in the mail yet and i am wondering why...it's been a week and i have no tracking or anything yet showing signs of shipping activity (note to self:gonna have to call them today), and lastly got a new battery. I hope the battery is going to be ok it is all i could afford, just a cheap Duralast 29DP-DL it says rated @ 210 reserve cap.

SO on my short list is......
1)frame up the rear starboard seat so that both seats are finished and can turfed
2)come up with how to complete framing for around the livewell
3)cut/hinge/latch/and turf accesses for the livewell pump, and area under front deck that is framed and decked already
4)wire up bilge and all around light (the boat had a socket and wires for all round but i need to test to see if any good)
5)find a momentary switch and wire up the livewell lights

sorry bout the long post just been a while since anything has gotten done.
 
I like the switch box you made! That's pretty ingenious. Boat is coming along nicely. I am no expert but if the holes are below the waterline couldn't you just patch them with something like bondo, then water seal them?
 
thank you. well got the seat finally framed in,

I've had plenty of time to think about what handles i wanted for the hatches. i knew i didn't want a handle that stuck up much and while just a simple canvas loop appealed to me, i decided to rob an old unused Alice pack...


SO i actually got both hatches completed, and turfed just forgot to take a pic. Some previous owner had installed this bar on the bow, and while cutting off this 1/2 moon so it would be straight across

The mailman was ever so kind enough to drop off some goodies...


Time for a break and a brew while i share a couple thoughts on the lights. The navs are Genssi. They are the larger 5050 leds, 3M backed adhesive, no indication on plugins or wiring which is hot or grnd. now the black paint on the upper hull has never been in water, it is fresh paint. prior to installation of the nav lights i used Prepsol just to ensure no films or dust were present. After initial installation all appeared well. But in short time in noticed that the strips were not adhering well. SO, i was thinking MAYBE the 3M was the pressure sensitive type like on the Blacktip turf. kept going back and applying pressure every couple hours to no avail.
I ended up taking the strips off and 5200'd them on and then taped up until it dries. Anyways, they are waterproof but not USCG approved. The light bar installed easily,bar brackets/adjusters seem to be of decent quality, but while installing i noticed at one end what appears to be part of the optics "seal" is not in place. I plan on taking it apart and giving it the 5200 treatment to ensure a seal.
The bar is nothing fancy a cheap unit boasting CREE chips. Brand is U-Box, this one is in flood/spot/flood. and no, i do not plan on using this as a continuous bow light. This is for when in backwaters and no other boats around.
That's all for now and i'm hoping to pick up the motor thursday
 
Here's the turf/tarction matting https://www.shopsbt.com/jet-skis/traction-mats-seat-covers.html it is " sheet goods" under the jet ski mat selection.
The diamond plate is 5mm thick and goes to 7-8mm where it is raised for the plating heights. It gets warm but not what I call hot or near unbearable.this is my first time using black, I've always used their Gray turf in what is called "diamond cut". I have noticed this black does get warmer than the Gray but thats to be expected I supoose.
It also is not like Hydro Turf in rhe sense that Blacktip turf comes with 3M pressure sensitive adhesive applied.
 
Looking good!
Best thing you could have done was to put a floor over the ribs. I started out with the ribs, and it didn't take long to decide they were not the best thing to be walking on.
 
Quick question, how should flooring be fastened to the hull? Screws or rivets? If screws, self tapping or just predrill? Sorry for the newbie question, but this is the first time i've done a floor.
 
Either will work - however I would suggest SS screws they are much less labor intensive if you have to pull the floor up for some reason - Just on screw and most of the time re-useable with rivets drill out and replace every time - JMHO
 
Thanks, yes the plan was stainless just didn't know which was preferrd to use. Picked up a lil something from freight yesterday.

It actually came boxed I had already removed it.
Transom bracket mounted up

And finally it has an engine

The fuel tank wont be staying in that location, its just there to run my break in. I wont know tank location until I get on water and see how balance is.
It's so nice to finally have a motor and im very impressed with the quality of the longtail.
 
You go with the long tail just for fishing or you knocking ducks down too? You got some work done there yourself. Im liking the lighting.
 
below is how the livewell is set up, mind you i have never done a boat livewell before and after seeing some done the goal was to make something very simple. i want to know if this is correct please.


Green = thru hull fittings for 3/4" hose
Blue = 3/4" hose
Puprle = livewell aerator pump IIRC it is a Tsunami at-500
Red = some kind of inline scupper valve
Lower brown= thru hull water pickup w/screen cover for 3/4" hose
Upper brown = livewell intake

Here is what i have been looking at for a scupper. https://www.marineparthub.com/ILS750DP_Th_Marine_Inline_Scupper_Fits_34in_Hose?src=Google&gclid=CJn2x4jdlsgCFQyPHwodxLsD1Q
are these any good? is there something better that isn't expensive? is this the right product IN CASE my waterline is regularly up to the two green thru hulls on the hull (overflows), .
i am asking because i feel like an idiot because of not thinking about where the waterline will be on this boat once fully loaded and i fear that i made a huge error and am trying to come up with a way to prevent backflow into the livewell overflows before i get on the water.

thank you in advance for any thoughts /advice.
on another note... yesterday was productive, got the front light bar, navs, bilge, and l/w pump wires ran/soldered/heat shrinked/fused/and switched. I bought a new all around but could not get it to come on using the socket that was already installed on the boat when i bought it though. i hope it is just a bad base because i cannot find the receipt for the all around light i bought (45 freakin bucks).
oh, and yes if you notice i have not incorporated a drain for the l/w yet. I had in mind only two different ways to approach this,one was to just use a hand siphon pump that i could just let the hose over the side of the gunnel OR this....
have a plug inside the l/w right near the bottom of the stern facing l/w wall and simply let the water use the "runner" that goes right to the boats rear drain hole.
 
went out last night initially to just see how the hull sat in water/ where fuel tank needed placed/if battery needed moved. About the setup, nothing fancy at all just a poor mans 1436 2001 alumacraft rivet, swomp23, 2 x 6 gal fuel tanks, one group 29 batt, one little lawn tractor batt, a 45lb. backpack, and myself. So, about 350lbs, including myself and if i add mtr that's another 155lbs.
1am here i am at the launch, boat isnt sitting horribly low to my surprise. so i figure wth, why not see how she rides since it floats.
now mind you this is my first round with a MM, i smacked the port led nav light at the launch like an idiot, luckily the remaining strip stayed lit up.
the lake i launched on is is about 10.5k + acres and i would NEVER done a maiden run if it was daytime or windy out on such a tiny *** hull but it was calm and no boat traffic.
I had to download a speedometer app and after i was out in narrower water got pegged out at 21mph. she got on plane easily without struggle and throughout the rpms the prop never tried to walk on me, just a very slight pull to the port on the handle.
I did not set the cav plate yet as i just spur of moment decided to test the waterline only after i got the bilge hooked up.
boat did not plow really, i had the backpack (45lbs)on the front deck, 29batt (60lbs) under the deck in front of the middle seat, 6 gallons extra fuel in a stand up jerry just rear of middle seat, 6 gal tank in rear @ transom....
not complaining about speeds at all but after all the reading i fully expected to not have the coconuts enuff the open her wot, i am pretty sure the low speeds are due to cav plate angle, prop was biting a bit deep. and i could probably spend more time on load distribution.
anyways, about 3am i went down a lil path i never been down, thought it was a cut through, ended up being a dead end. 6'+ tall grass on each side and only a lil 4' wide swatch. ok, so i'll push pole myself around.....NOT, the 14' pole i had didn't even think about hitting bottom , *^@%!!
well, this is gonna take a while i think to myself as i begin the slow process of getting outta the mess i was in. i did ok for a newbie took about 10-15 minutes to make a big a$$ turnaround and get back into open water. decided no more playing in the field in a new setup, unfamiliar territory, wild turkey, and where there's about 420 alligators per shoreline mile.
tried the standing up thing, it was ok, not too horrible but i definitely need to make some kind of grab bar.
all in all i ran through 7 gals of fuel, and screwed around for about 6-7 hours and other than wanting a different throttle and more stable boat im happy with it all.
 

Latest posts

Top