12ft semi V-hull project

TinBoats.net

Help Support TinBoats.net:

This site may earn a commission from merchant affiliate links, including eBay, Amazon, and others.

Coersum

Member
Joined
Feb 16, 2015
Messages
22
Reaction score
0
First, I had started a thread on iboats but after reading way more posts here, I figured it fitted much better here so here it is:

A few weeks ago, I got an old 12ft tin, not sure of the make since there is no plate or decals showing. I believe it to be a Sears (my guess from pictures).

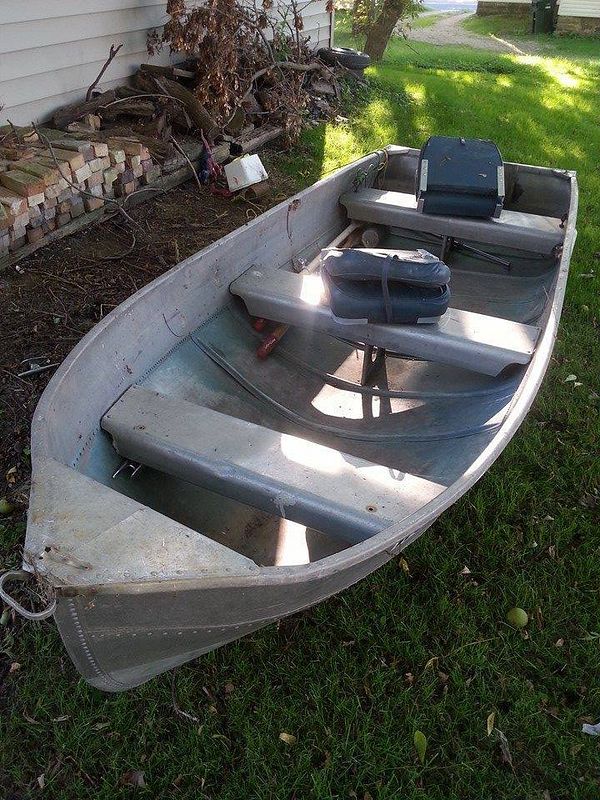
12ft boat + everything in picture below (oars, anchors and seats) + 3HP (Tanaka 300) outboard for $200 delivered (I have a trailer waiting to be fitted).

I plan on doing a small mod for now, that thing is tiny at 11'6" and I don't want to add too much weight (maybe more later) and budget is low.

This is how I got it (seller picture):


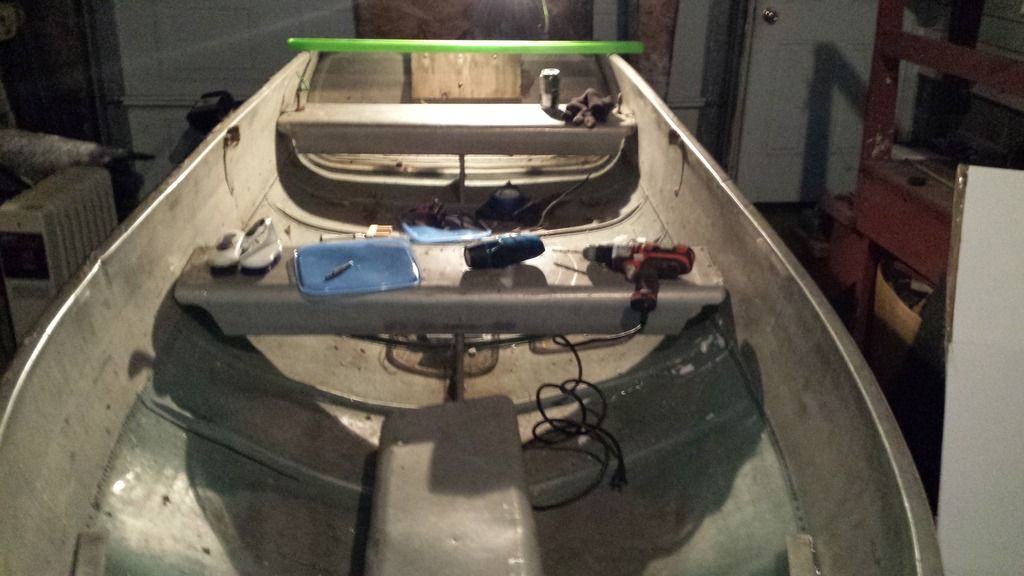
Started stripping it down:


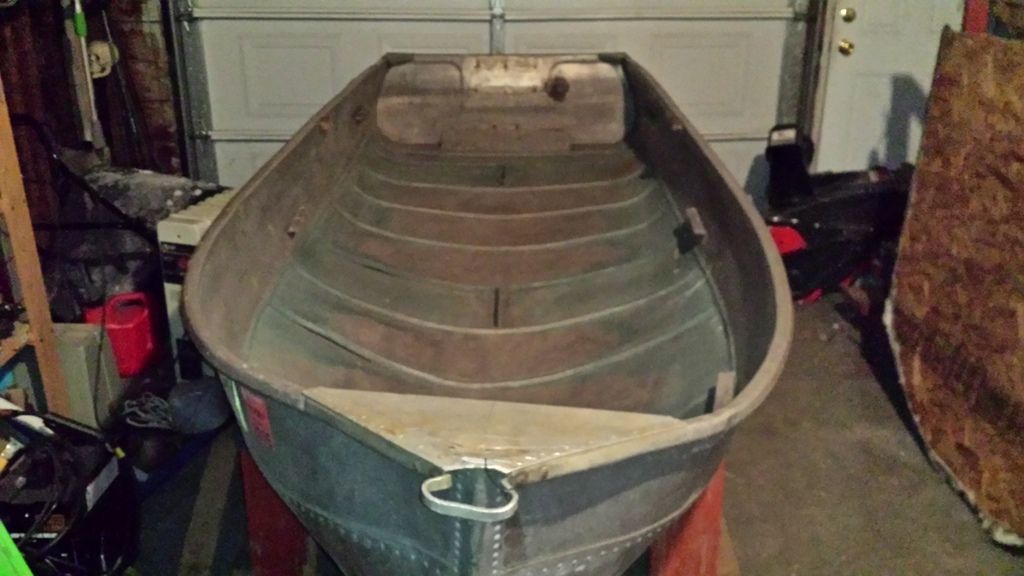
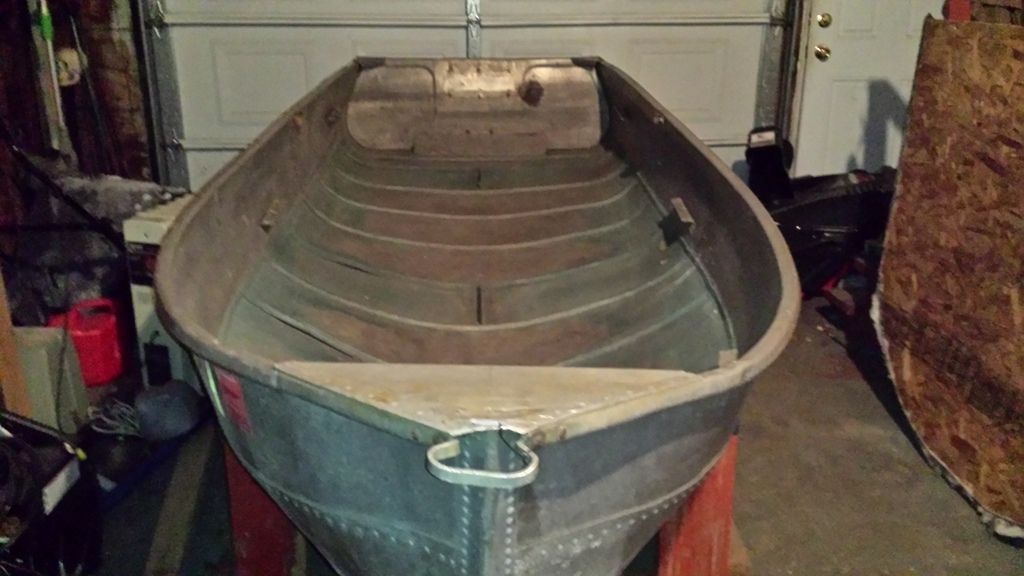
Then tried to fix the bend up front:

from this:

to this:

(Not perfect but will do)

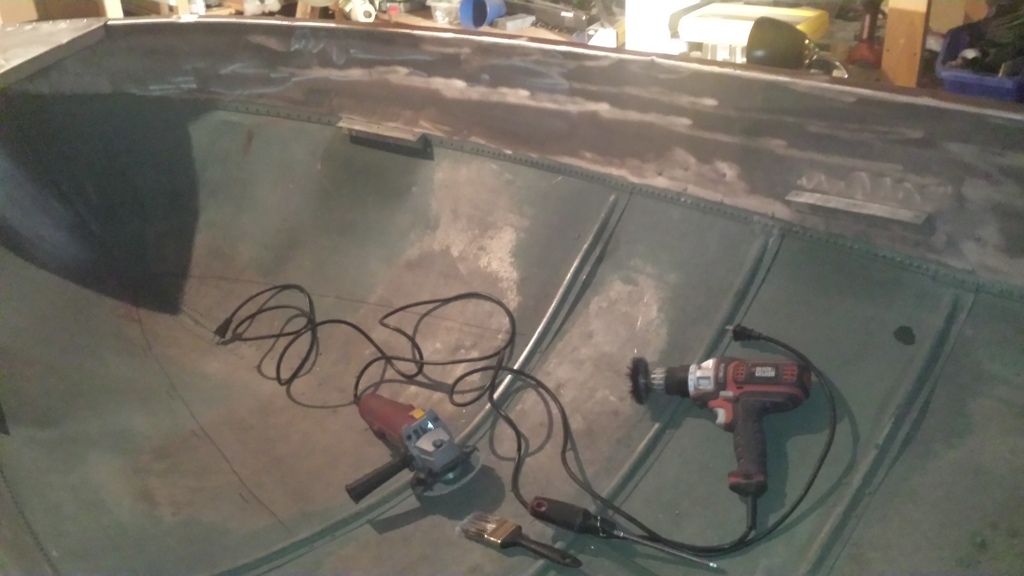
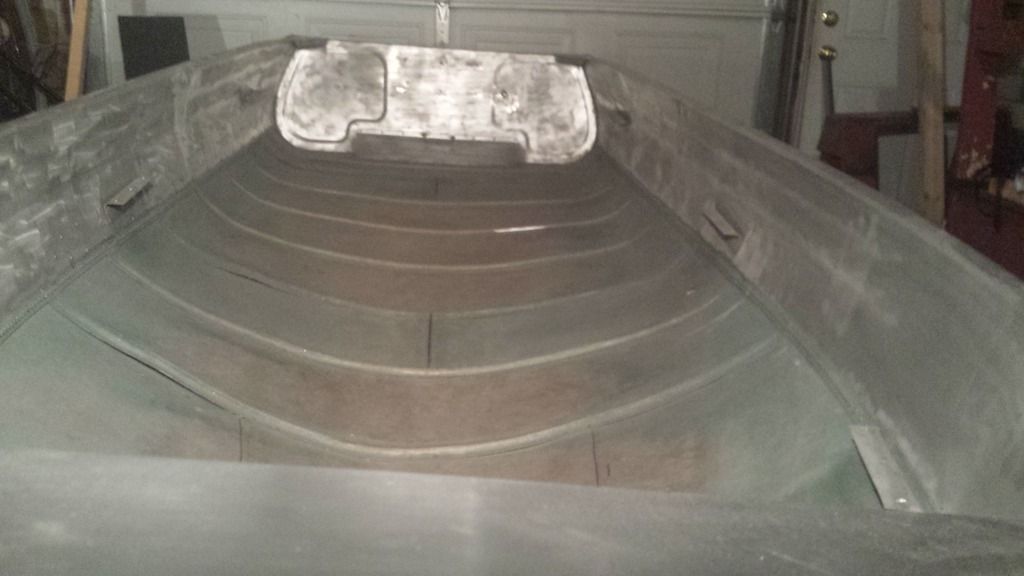
Onto some sanding/grinding top part of sides inside and out:


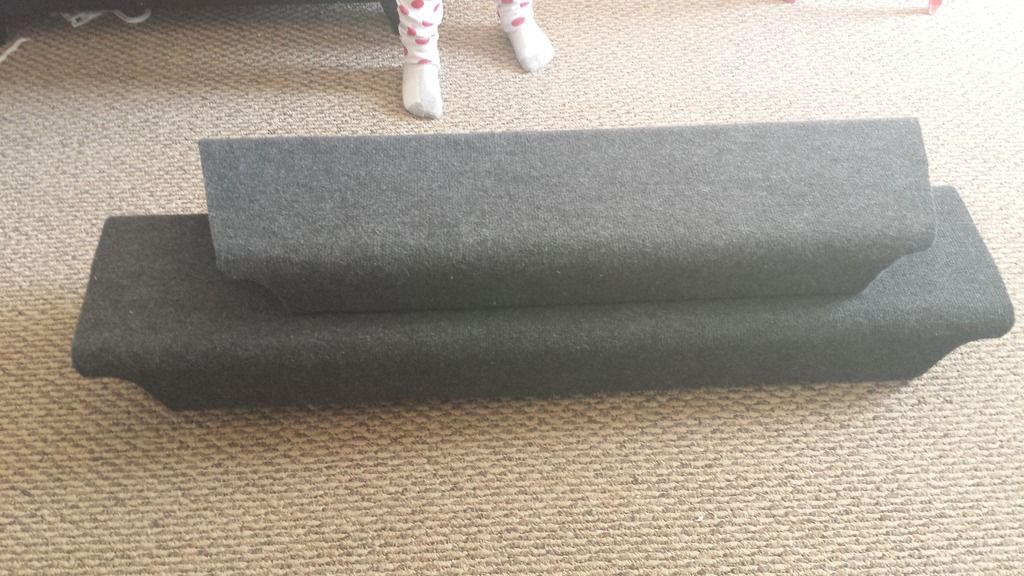
I was planning on adding 1/2" carpeted plywood to the benches, but after consideration, I decided to carpet the benches directly (used outdoor carpet glue + outdoor carpet I already had from a previous project), saves about 10-15lbs (which I might use later on for a low floor). 2 seats down, 1 to go.


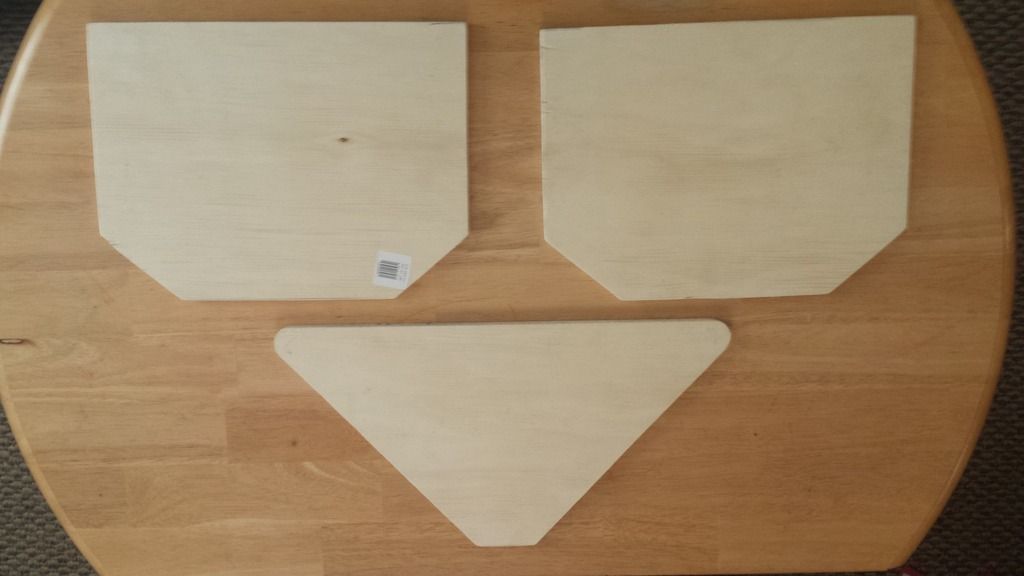
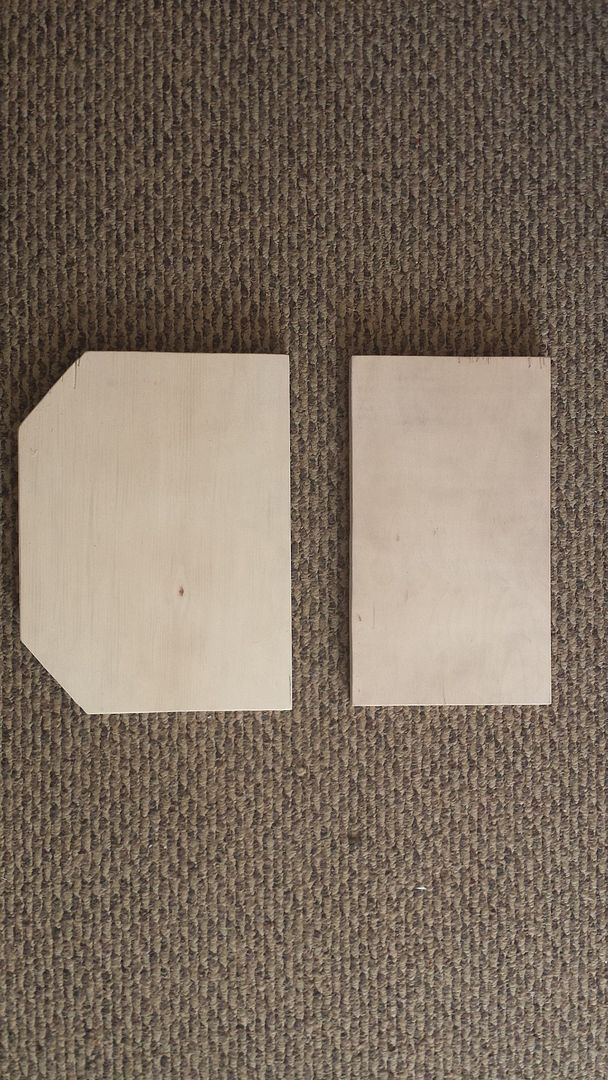
Bow piece and outside transom pieces (1/2" exterior grade plywood):


Transom outside pieces gluing, will be fiberglassed over before installation:

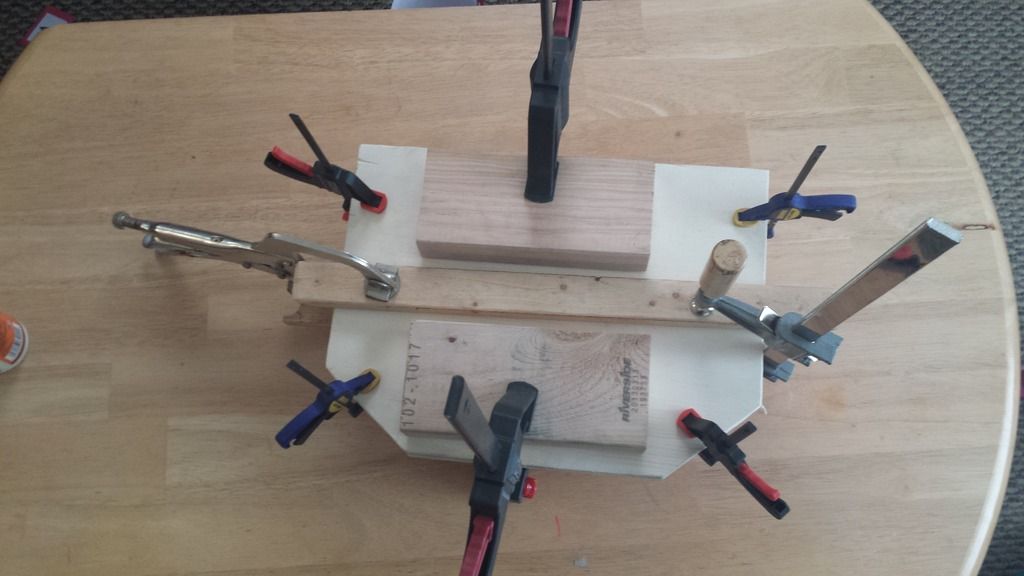
You never have enough clamps...

Transom pieces ready to be glassed (when I decide to get into that):


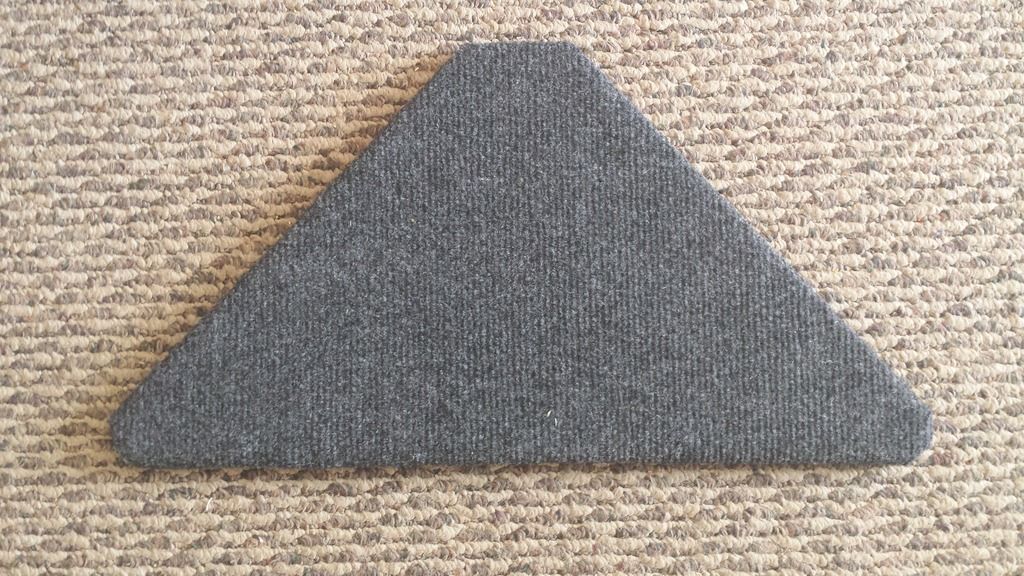
Bow piece, sealed, then carpeted:


We are finally having "painting" weather here in WI, so yesterday I started with light coat of etching primer, then aluminum primer. Inside will be brushed/rolled with Hammered grey and outside top will be navy blue (all rustoleum). Bottom will be sanded then Mag & Alum polish from "Mother's".

I have a deep cycle marine battery + box + old 28lb. TM to put on it. Will most likely reuse the old seats on it. I also have the lights from a previous boat that I will be installing + homemade pvc rod holders. Also thinking of making custom sized cooler in front of the bow seat in glassed pink foam. The battery will be located in between middle and bow seat.

I was able to do a small leak test when cleaning the boat and didn't notice any leak but that was not thorough at all (ice is melting on the lake so might try it soon).
 
Can someone help me figure the make ? From shape of seats, transom and ribs/green colored bottom, I think it might be a sears but I could never find what this left over round mark is from:


It is on both side of the boat, the registration cards says "JON" :)
 
Nice progress, especially like the carpet wrap, can't wait to see the final result
 
I like it, I honestly am not sure of the make. Did it come with any paperwork? My 12' sears actually came with a title, and decals, so that helped me a lot. Good luck, and I look forward to seeing the outcome.
 
gawdzuki said:
I like it, I honestly am not sure of the make. Did it come with any paperwork? My 12' sears actually came with a title, and decals, so that helped me a lot. Good luck, and I look forward to seeing the outcome.

No Sadly, there is nothing, all the registration certificate say is "Make: JON", "YEAR: 0000"

All the hull has is the serial number (6 digits number), no plate or anything else.
 
Did a little more painting this afternoon, this time I tackled the floor of the boat:

Using 1 Quart of Hammered Gray:

Which btw only covers about half of what the can says...


Close-up with sunlight:


I might do the rest of the inside + transom the same, not sure yet, all I know for sure is that I need another quart... Also, little thing about that stuff, if you can't coat it within 4 to 7 hours after, you have to wait SEVEN days to coat again...

This stuff goes on thick!
 
Wow.. You're right.. Yours is identical to mine. LOL down to the dents in the bench seats. Transom is the same, Oar locks, floor ribs, splash guards, and all, except yours is in much better shape than mine started out.
Just read thru your thread and I'll be keeping track of your progress. :D You even chose to put your battery the same place I did on mine. Keep up the good work.
 
Coersum said:
Can someone help me figure the make?
That is definitely a Sears hull, with that front handle and stern corner pieces/profile nailing it.

I've had 2 or 3 in my life and still have one down in the boatyard, still covered by a good 3-4' of snow. Ahh heck, it used to be 5-6' of snow WITHOUT drifts, so at least I'm seeing progress! I want to go there and check out my big boat, but don't want to have to use snowshoes to get there, lol.

But I'll snap some pictures for you when I do ...
 
You also may have read in another post by me where I once on a floor into one of them, but only 18" wide. Just enough to move around safely, yet adding little weight, plus it kept the floor as low as possible.

FWIW I find those tins in particular to be quite tippy ...
 
DaleH said:
You also may have read in another post by me where I once on a floor into one of them, but only 18" wide. Just enough to move around safely, yet adding little weight, plus it kept the floor as low as possible.

FWIW I find those tins in particular to be quite tippy ...

Yes this is half the reason why I am unsure about the floor (the fact that those little boat are tippy and the weight). If I do add a floor, it will only be about 2" to 3" off the bottom. Another idea was to make a curved floor so that I don't have the ribs in the way when walking, forming pink foam with heat in between the ribs (already did one to test) and topping it with 2 layers of 1/8 plywood glued together with epoxy for both rigidity and form "keeping" since it would be curved to the top of the ribs.

Another idea I also tested is to do like this guy did on his 12 ft https://forums.iboats.com/forum/boat-repair-and-restoration/boat-restoration-building-and-hull-repair/359418-1968-12-foot-mirrocraft-aluminum-boat-mod to keep the floor as low as possible.

For now, I might just use foam mats in between the ribs, rubber mats being as heavy as a wood floor to reach the half inch needed to come to the top of the ribs.
 
Finished painting the outside top sides (rustoleum navy blue rattle can, no more cans for me!!).


I called it good enough, it really doesn't look all that bad, but a boat with lots of dings will show with gloss paint :D


Checked with a seat put in and it is dark (much lighter with sun, this is in the garage) so the rest of the inside will be lighter grey.


I decided on rolling a light grey color on the top inside + railling (in to do list for this weekend).

Bottom of the boat (below navy blue) will be lightly sanded with 300-400 grit + mother's alum polish (the spot I did is so much smoother and will glide on the water).
 
Looks great. May be worth doing a leak test before you put a lot if tine into polishing the bottom. Perhaps you already did. I'm almost at leak test on mine, so it is on my mind when I view other's threads.
 
boguesounder said:
Looks great. May be worth doing a leak test before you put a lot if tine into polishing the bottom. Perhaps you already did. I'm almost at leak test on mine, so it is on my mind when I view other's threads.


I am not going to do anything to the outside bottom till I get to leak test it.. till this week we had weather in the teens and lower, this week it's like spring is early and I get the chance to paint (or would have had to wait till may/mid-may to get 50+ deggrees here in WI). This is why I am trying to get painting done while I can.

I want to wait at least till the inside paint is done "curing" which is a week, in case there is a leak. There hopefully should still be holes in the ICE next to the boat launches. I did a quick test with water in the boat but wasn't all that thorough).

Thank you for the reminder :D
 
Did the first coat of the inside sides yesterday, it's called quicksilver, it's a blueish grey, closish to battleship grey.

Looks much more blue than it really is in the picture:


Second and final coat today. Also did some work on the trailer, shortening the tongue (got a new coupler for it too) and will shortening the back (had a 15ft boat on it before) and will be installing new lights later on.
 
fishin_magician said:
Man this boat is really going along.... Great job...

Thank you, I got a bunch done this last week (even though it doesn't look like it) because we have had higher than normal temperatures, trying to get all the weather dependent parts now :) Shortened the front of the trailer, installed a new Coupler with Grade 8 nuts and bolts (this thing won't come off).

Little update:

Finished painting the inside (had to retouch hammered grey after I got done with the quicksilver, nothing bad, lines looking sharp now):


Installed the bow piece using SS mechine screws/nuts through the railling:

(I need to trim the carpet on the right side in the pic better because that's going to bug me lol)
 
My Trailer is.. less than great I would say, the back tubes are rusted out pretty good, the rest seems to be in ok shape. For now I am going to cut off 8 inches in the back. (it looks worse than it is because we tried to weld a support on the left side but failed and it rusted a bit (didn't paint it, planned on doing something else this year).

For now I took (cut/grinded the welds which was no fun) the angle bar fromt he bar off, cut off 8" then will be bolting it back on (with maybe a bit of weld too).


I have been looking at the Harbor Freight Trailers,

Harbor Freight Boat Trailer: https://www.harborfreight.com/600-lb-capacity-boat-trailer-with-8-inch-wheels-and-tires-5002.html
image_22640.jpg

12ft 8" (I don't know if it include the bunks sticking out of the trailer or not). Should fit my boat nicely, might need to get 12" tires to be highway worthy. $299 (with coupon) + $70 in 12 inch tires = $370 (that is bit over what I'd like to spend).

Harbor Freight Folding Utility Trailer: https://www.harborfreight.com/1195-lb-capacity-48-inch-x-96-inch-heavy-duty-foldable-utility-trailer-with-12-inch-wheels-90154.html
image_21301.jpg

11ft 8", so unless I extend the tongue, about a foot and half will be sticking out in the back of the trailer. Already has 12" tires and cheaper than the boat trailer $225 (with coupon).

I've read mix reviews about them, since it will only be fresh water, I think they should last quite a while. Adding a $90 extension to the utility trailer will make it fit a little bit better.

I have looked on craigslist for months (actually since last year) and everytime trailers are way more, way too big (18'+) or all rusted out.
 
I've got that heavy duty utility trailer and it has served me well for a few yrs now and served my brother for a few yrs before I bought it off him. I got it because I was getting ready to move from California to Georgia. It was overloaded but made the trip just fine. I'd give it 5 stars for sure.
 

Latest posts

Top