1984 Pike Attacker rebuild

TinBoats.net

Help Support TinBoats.net:

This site may earn a commission from merchant affiliate links, including eBay, Amazon, and others.

bonz_d

Well-known member
Joined
Mar 27, 2013
Messages
216
Reaction score
1
Location
S.E. Wisconsin
Picked this boat up a few months ago thinking it would be a quick project to get back on the water while I completely rebuild a 1988 Alumacraft Classic 16. It was just a bare hull and trailer that someone had already started to strip out to rebuild. This is a short shaft transom that had a Mini Jacker already on it for a long shaft engine. So again I assumed it wouldn't take much to get it on the water. Wrong!!!

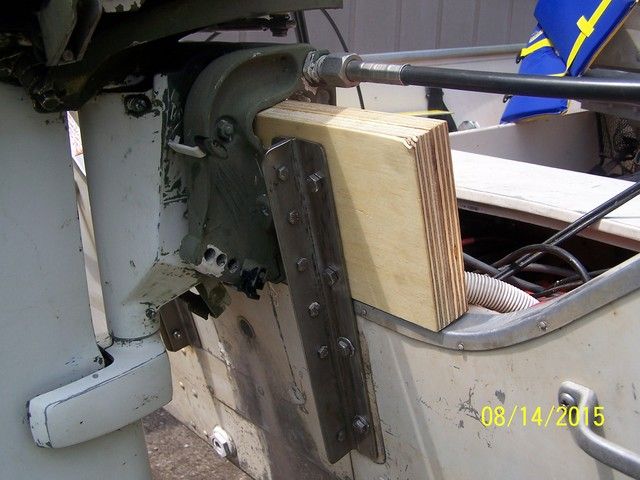
Found a very nice 1994 Johnson 30hp and put it on, ready to go. Not! Even with the Jacker on it the engine was too low in the water and was throwing up a huge spray from the lower unit. Tried raising the plate and it helped but did not eliminate it all. So I took off the Jacker and built a plate. Took 22" to get the Cav plate even with the bottom of the boat and it was still throwing spray. So now I suspected that the flotation foam was soaked and weighing the boat down too much.

After all this I decided the season was done and I would tear into it. Opened up the compartments were the foam is and started ripping it out. Got towards the bottom and sure enough wet foam. From the bottom up into the foam about 3". Got that all out and then started to tear into the transom to repair and rebuild that. Which is where I'm at today.

Here are some pictures for you all.

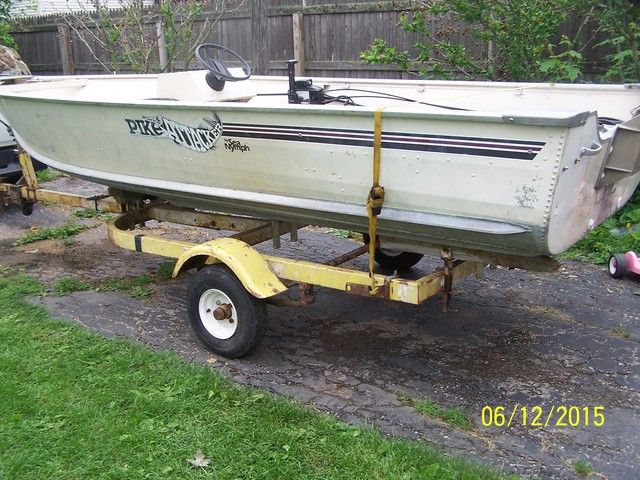
What it looked like when I got it.


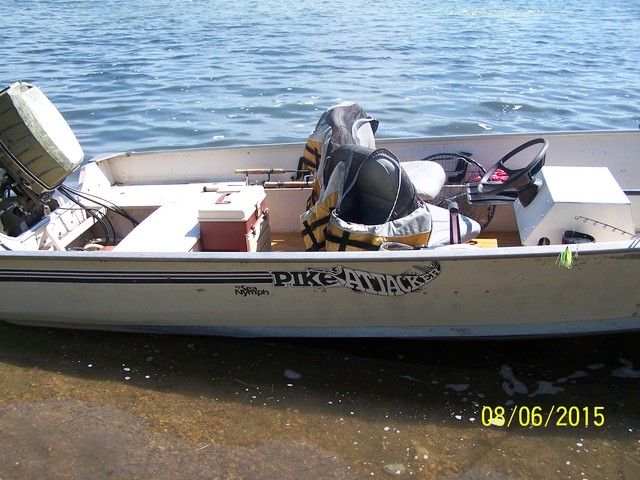
With a new deck and on the water.


The home made plate.


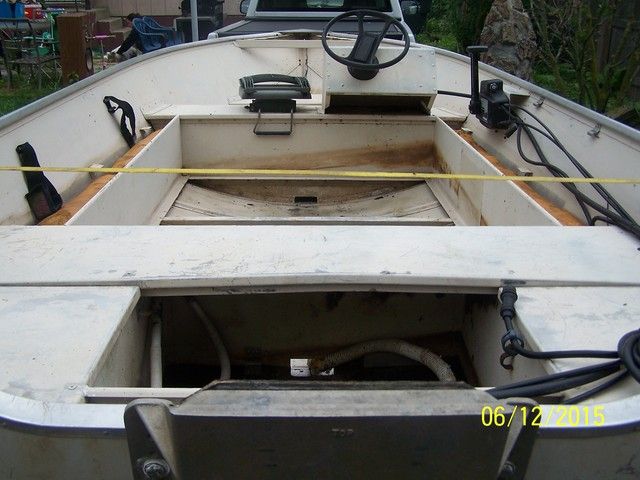
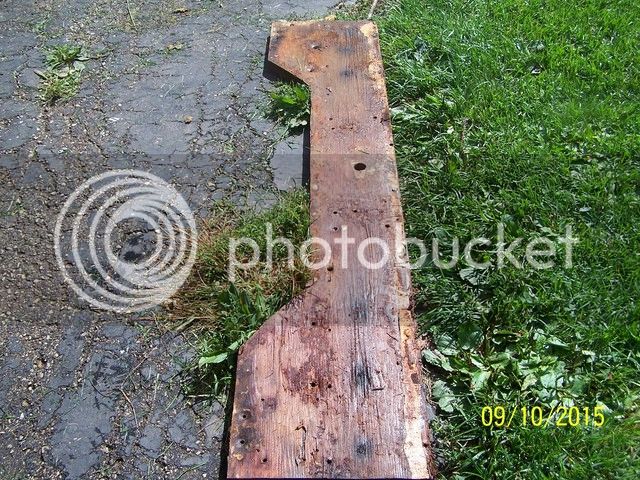
Foam and transom out.


Finally got a break in the weather and got back to it. So far I've got the plywood cut, glued and rough fitted. Then was able to use a salvaged pcs. of stainless to close up the transom so at least it will look nicer. Got that cut up and rough fitted today as well. Tomorrow I hope to start drilling holes and finish up fitting everything.


Thanks for looking!
 
May be too late ... but you really should do something to insulate the SS from the aluminum. Hopefully you're not using it in saltwater, which would greatly accelerate the galvanic corrosion.

A good, thick paint product like POR-15 or Steel-Flex and using adhesive-lined heatshrink on bolt bodies with nylon washers under the bolt heads & nuts would do the trick for you, i.e., insulate the 2 dissimilar materials from each other, thereby breaking the electrolytic connection.
 
Thanks for the tip. As of right now I'm still fitting everything, all will be painted under the stainless and using nyloc nuts on all fasteners.

As for use, the closest salt water is over 1000 miles away, hehe :LOL2: . Closest big water is Lake Michigan.

Again this was supposed to be a quick easy project to tide me over until I finish my Alumacraft Classic 16 but has now turned into another rebuild. Sure haven't gotten much fishing in this year. Original plan was to use this for the season, finish other boat then start on this one and do the rebuild and mods.
 
Well I've finally have gotten everything rough fitted and the engine back on so before I proceed any further I'm going to try and give it a test run today to see if I've gotten the transom height right and if it has cured the spray issue I am getting from the lower unit. I will post up results when I'm back!


The test went very well. Transom is as solid as a rock and the spray issue has improved though not completely gone. I believe I'll leave the transom as-is and now try with some different sized shims to see if I can improve it more.

On to the next phase. Will now strip it all down, finish up the transom and then start cleaning it up for paint.
 
Had it out on the water again the other day this time adding a 1/4" shim under the engine, really didn't see any change in the spray or the performance other than when the engine was trimmed up to the second hole I was starting to get a little bit of prop blowout at WOT. Moved down to the 1st hole and it went away.

So I guess I'm going to leave it as-is w/o the added shim and run it.

Today I've gotten it all stripped down and started washing it out. Tomorrow I'll go at it with the brushes and 3M pads with some strong detergent and hopefully get some paint on the interior this week while the weather is still nice.

I haven't tried it yet on an aluminum boat but have used this on plenty of trailers so I'll see how it turns out and how durable it is. Nice thing about it is it costs me nothing.

 
Thanks and you can sure bet I will keep the pictures coming.

Just talked to Tech support at Rustoleum and they tell me with proper prep this paint should work just fine on aluminum so I'm going to do a test panel today and will post results as soon as I know something. BTW will most likely be using a roll-roll method 1st.
 
As promised. These are sort of test pieces for the Rustoleum DTM acrylic paint. as stated earlier I've used this paint on steel trailers with very positive results but have never tried it on aluminum. Rolled on pretty well with a foam roller yet still has a slight texture to it. Might be putting it on too thin? But it is the exact color that I wanted and is an almost exact match for the color of the Tempress seats I'll be using. Again I'm not certain how durable this paint will be on aluminum but I'm about to find out!


Starting point


Etching primer


2 coats
 
Thanks, I'm thinking this stuff will work just fine on the interior. It's a semi gloss which also should be good as one wouldn't want it too shinny on the inside.

Now I'm thinking of trying to spray it to see if it comes out a little flatter though I've never sprayed a water based acrylic paint so I might have to play with it some to get it down.
 
Well something didn't work with this paint. Went out this morning and it was full of little bubbles and the paint peeled right off in one big sheet. Even pulled most of the primer with it.
 
So I'm working on this paint issue and would like to thank johnny for the help and suggestions =D>

Today I went back to finish up some work on this transom and have gotten the plywood sealed on one side. To do this I use a recipe I learned from another fellow boater that goes like this.

Mix 1 part spar urethane, 1 part boiled linseed oil and 2 parts mineral spirits. Apply until it pools and then remove excess. Let dry 48hrs then apply multiple coats of straight spar. Coat heavy on ends and holes.

I have used this mix on a good number of transoms and the plywood for decking and it has help up very well and seals the plywood almost as good as epoxy at a much lower cost.
 
After having a discussion here with johnny and this problem I think I've gotten the paint failure sorted out and today gave it another go. Was able to get most of the interior painted before it started getting late in the day and hope to finish up the 1st coat tomorrow before the next cold wave comes thru.

Doing this with a fine foam roller and have to say I've learned a little bit while doing this. Paint can and web site says it should cover with one coat but to me it still looks blotchy so now I'll wait to see how it looks with a second coat.

From what I see it looks as if it will have the right amount of sheen and texture for being on the interior without being too glossy.

Will try to get some pictures up tomorrow after I've finished.
 
Sorry it's taken a little longer than I expected. Still have a few touch-ups to do. I like the color and the slight texture though today while looking at it in the sun there are a few spots that I can still see roller marks. Guess I have to work on my technic. Also still have the helm to paint also but I'm pleased with it so far.


Enjoy!!!
 
Progress has been moving slowly as of late because the temps are up and down though I have brought the helm console and a couple other parts into the house and have gotten them painted. Looks like my technic is improving as well.

Will also report that so far there have been no mishaps and this time the paint seems to be adhering well. Still need to get back out there and finish up the transom work though I've been kind of putting it off because I think I'd like to paint the transom exterior before I finish it and attach that pcs of stainless. I think that it would look more finished if done that way and then I also wouldn't have to disassemble it all again to paint.

But thanks to everyone that is following this. Any suggestions please chime in!
 
Finally got the Alumacraft out of the garage and the Pike moved in over the weekend. Had to vac. out all the leaves that have been falling and dry out a little water before moving on.

Was able to get some more paint on it and started cutting and fitting the plywood for the covers that go over the side flotation boxes. Got the 1st one cut and fitted and used that as a pattern for the other side. It didn't work! The other side is approximately 3/4" smaller over half the length. I just figured they would be roughly the same dimensions for both sides. Oh well.

Plan for tomorrow is to get one more coat of paint on the bilge area in the stern, finish fitting the plywood and then sealing it with the sealer formula I've been using. Then moving on to finish up fitting and drilling the new transom wood and the SS cover that will close it up.

One observation I've made is that this paint I've been trying is taking forever to harden up. There are spots that it still scratches easily. Never noticed this while using it on steel trailers.

I'll try and post some more pictures tomorrow.
 

Latest posts

Top