Alumacraft MV1448 Seadoo IB jet, Still jetting

TinBoats.net

Help Support TinBoats.net:

This site may earn a commission from merchant affiliate links, including eBay, Amazon, and others.
Console Round IV

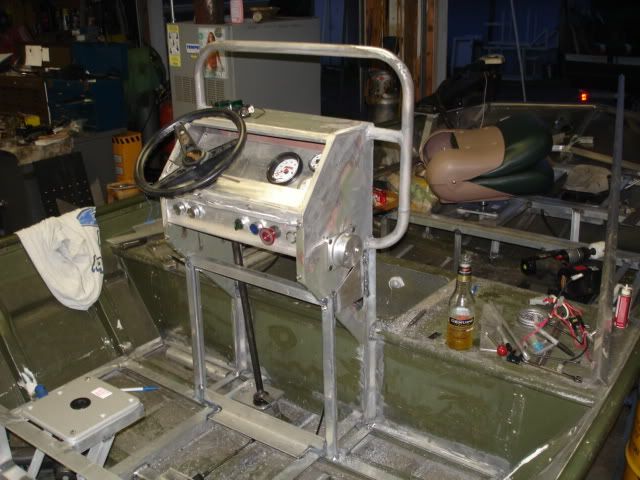
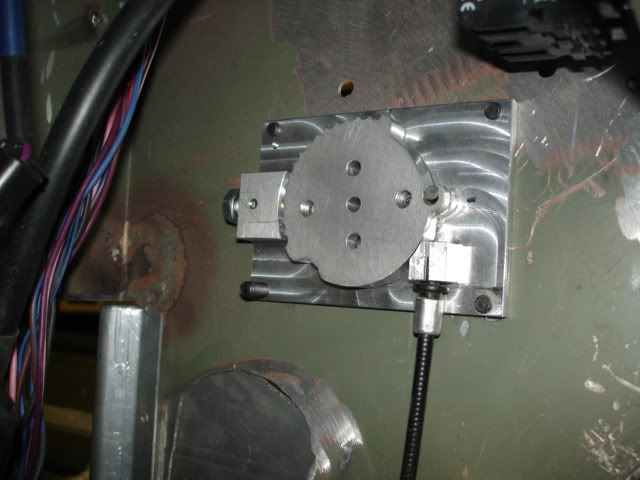
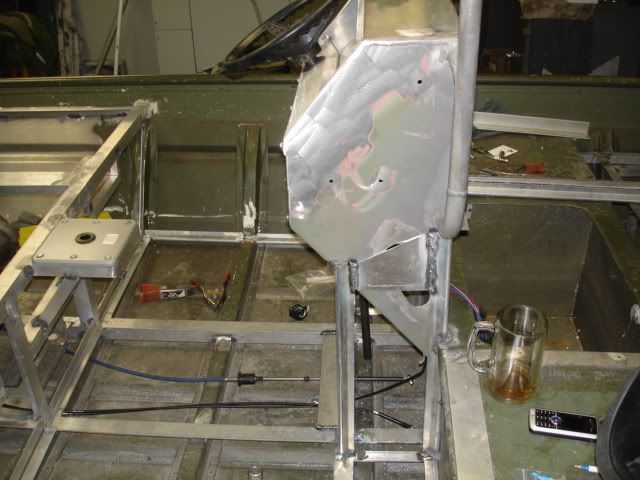
Doesn't seem like much got done, but the console mounting sides are done. I put the motor and pump back in and routed the steering, throttle and choke cables and played with the exhaust a little more. I also added the steering shaft below the U joint. The console will be removable when done if needed.

Further... If I have enough room I'm thinking about adding another panel under the switches to install a stereo. I also added a toe board for the floor which hopefully a fish won't flop over and get lost under the floor...
DSC06567.jpg~original


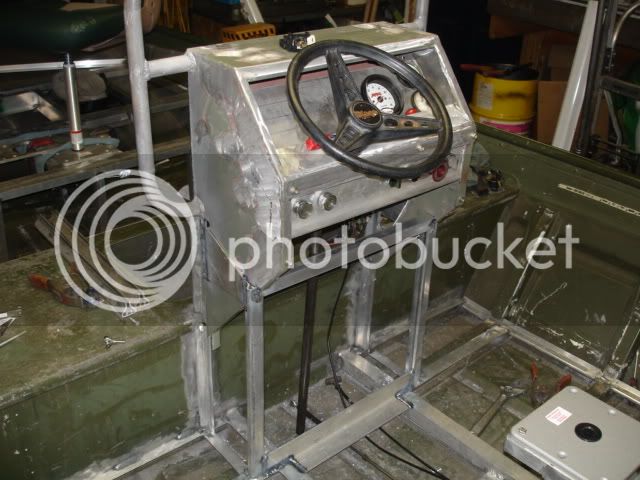
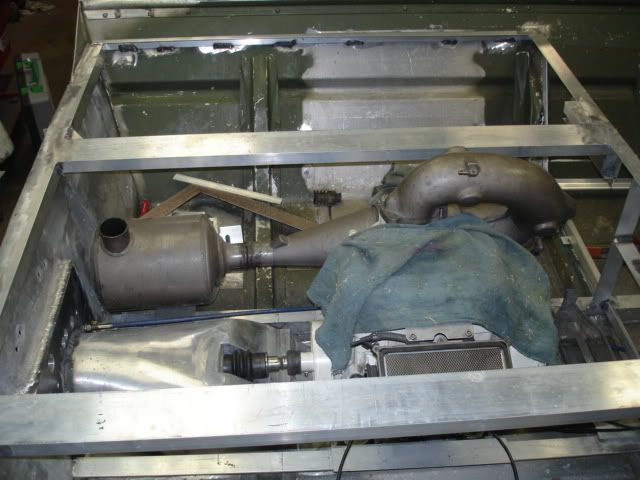
Motor back in the hole and I decided to just stick the muffler on the back of the expansion pipe. benefit being the port rear storage just got so much larger.
DSC06568.jpg~original


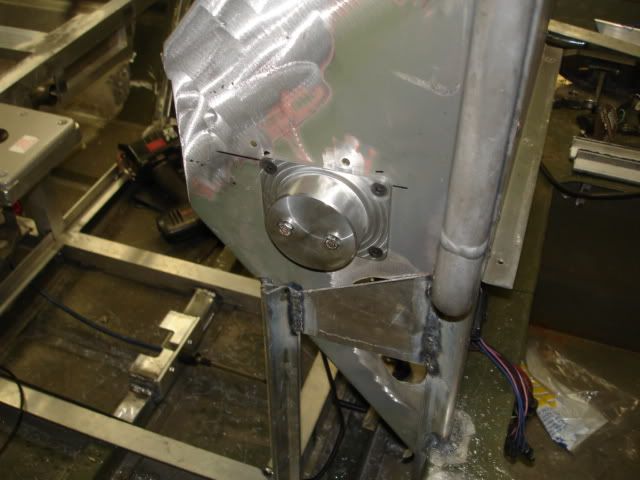
Throttle lever is going to have to mount around the two holes in the side, a little lower than I wanted, but I only have so much cable to play with. I'll just have to make some kind of Ed Roth cool azz handle to give 'er some fuel with...
DSC06569.jpg~original


More to come Monday if not sooner, got to work sometime...
Jamie
 
maybe a real silly question.... why did you shorten your shaft on the TM? You could adjust it to whatever height you need with your adjustable bracket right?
 
dude, that is freaking awesome. i thought about inboard 2 stroke power for my boat as well, but i didn't have the money to got hat route. cool to see someone doing it. looks good.
 
Baptist, the trolling motor was too tall sitting in the boat, it was always poking me in the face and the cable was a nuisance so off with the head. I wanted it to sit flush ith the deck when deployed and not hit rocks. Now I have to tie it down when stowed so it doesn't bounce, but it's out of the way. Now if it'll only work...

Heavy, there are a lot of these out there, just not much coverage on the net...

Jamie
 
Did a bunch of work to my uncles new to him '01 Ranger Cherokee with the 90-65 jet today. Pretty cool 16' wide body aluminum boat which is nice, but just not real user friendly. Maybe I'll throw some pics up about how not to drive up on your trailer... Needs fenders and side bunks now from the PO.


Todays effort on my boat was limitted to making the steering cable sheath holder. :clapping

Made the part out of a chunk of 2" x .250" aluminum angle and a chunk of 2" x .1875" flat stock to make a clamp to hold the stock Seadoo sheath nut assy. Up in the top right is the steering shaft so that bearing and arm are tomorrows project.
DSC06578.jpg~original


More coming.

Jamie
 
Bassboy, no adoptions, I just put this up so guys can see how easy some of the stuff is when you think it through.

Darn. I would love to have a mill to play with, and smallies to catch. Wouldn't that be the life......


You have fab options with that mill that a lot of us have no practical way of reproducing. I could create so much more out of the abundance of aluminum billet scraps that the local scrapyard has a tough time reselling at surplus price had I the mill setup like you.

Keep us posted with this, I am real interested in seeing the rest of it.
 
Finished up the steering setup today and some other things too.

Used the mill to make the bearing plate and bolted it to a chunk of 1.5" angle so I can remove it if needed. The arm is stainless and I get around 160` of turn on the wheel lock to lock like this. Now on to the throttle...
DSC06579.jpg~original


Also slightly off topic, I made a pair of side guide for my uncles '01 Ranger Cherokee.

Made them out of some scrap 1.5x.125" angle and some 2"x.125" square tubing, again scrap stuff. Drilled board mounting holes every 6" along the angle.
DSC06583.jpg~original


Used a sawzall to notch the top of the stands and then bent the flaps up to close the gap and welded it solid. Turned out pretty nice. Decided to put these on to help keep the fenders from getting mangled...
DSC06584.jpg~original


More to come.
Jamie
 
Hey man, I forgot to ask you the other day... You mentioned your jet ski motor has no reverse. How will you get it off of the trailer at the boat ramp?
 
Not a problem, I put the skis on the trailer in front of the wheels and just back off the end of the ramp, the trailer drops slowly onto the skis and the boat floats free. The end of most ramps are washed out and there are little mini ramps of stones so guys can get back up so if you don't hit at the same spot as the last guy you go up to the frame and the spring perches keep the trailer from coming forward enough for the tire to ride back up the edge. I did this after ripping the axle out from under the trailer one night at Williamsport. One perch slid on the frame, wisted the axle and blew the tire out. Had a buddy bring his tow truck and we pulled the axle back straight and ran it to my uncles house with the flat, about a mile. (found out later that Walmart has that size tire and wheel for around $50 in stock).

Some other cool things about this setup is the bunks are as low as they can go and I flipped the axle to be over the springs to lower the boat as much as possible to make loading and unloading painless. The rub marks on the boat were from the stock narrow axle. I had to make a new one to widen it around 8". The fenders are going to be the bottom of a 55 gallon plastic drum (tougher and slicker than metal).

DSCF0316.jpg~original


DSCF0317.jpg~original


For loading I just put the trailer in far enough for the back roller to get wet and push the boat out in the current and walk back on the trailer to guide the keel onto the roller as the boat drifts down and then just pull it up on the bunks which are covered in UHMW plastic, painless.

I can splash it in under a minute and get it out in about two. Really cool on double wide ramps to see the look on the other guys face when the trailer goes off the edge and then pops back up once the boat is out of the way and they are still struggling to get the boat to move because their bunks are still out of the water and they are afraid to go off the ramp. I'd highly recommend the skis to anyone.

Jamie
 
Throttle Round I

Todays project was the throttle controls. Excellent learning experience on the mill. Made the first two peices, one the flange and the other the cable actuator. I still need to make the handle and end cap that holds everything together.

Pic is from inside the console looking at the back side of the throttle. The flange plate has two stands, then one on the left is for the detent ball and spring that I hope will hold the throttle in position and the other smaller stand is to hold the sheath. The slot for the sheath hasn't been milled out yet. On the shaft, the left side has ribs for the detent ball to ride against and the left has a saddle for the cable end to go into. Throttles closed in the pic.
DSC06585.jpg~original


Throttle open...
DSC06586.jpg~original


Apart. There's a lot of time playing with the cad/cam programs and thinking about how to make this stuff. I could have went out and bought something, but I wanted to make it so I could learn some more stuff.
DSC06587.jpg~original


Tomorrow I'll try to get the flange plate finished and maybe the end cap.

Jamie
 
Throttle Setup Round II

Spent some time this evening making the stop detent plunger and also modifying the cable mount so it would work correctly.
DSC06589.jpg~original


Throttle open
DSC06590.jpg~original


From the sides. The console sheetmetal goes between the plates.
DSC06591.jpg~original


The showy side. The black oxide allens will be replaced with flathead screws. Overall the plate is only 3"x4".
DSC06592.jpg~original


I may get to make the cap tomorrow if things stay quiet around the house.

Jamie
 
Good day today, fixed two other boats and even got my throttle just about finished. :banana

Throttle round III

Made the cap out of a chunk of 1.5" x 3" inch aluminum, half an inch of it's behind the flange plate. The other inch made a nice cap. I have some ideas for the handle, just need to get to a lathe to make some stuff. Thinking about using a Hurst T shifter handle for the throttle.

DSC06601.jpg


DSC06602.jpg


DSC06603.jpg


The best part is it works great :clapping

Now I guess I'll finish up the fuel and exhaust systems and get the poor thing wired so I can splash it in a week or so.

Jamie

Starting to feel like I'm talking to myself...
 
Ranchero50 said:
Starting to feel like I'm talking to myself...

I may only speak for myself but I don't respond because there's not much I can add other than unreal work, awesome job, etc. I always look forward to watching your work, even if I don't say much. So keep on reporting, man, you're at a totally different level.
 
Thanks, I see it's getting views, but someone questioning something here or there may bring up a problem that I haven't thought about.

Jamie
 
I would ask questions if I understood it... I am pretty much learning from you - so I guess you're going to be the guinea pig! But believe me, you are getting the views, its just most people are like me probably and are in awe at your craftsmanship.

So, with that being said - AWESOME JOB!!
 
Top