MMF'S-1990 Tracker TX-17 Alum Build (FINAL PIX 10/22/11)

TinBoats.net

Help Support TinBoats.net:

This site may earn a commission from merchant affiliate links, including eBay, Amazon, and others.
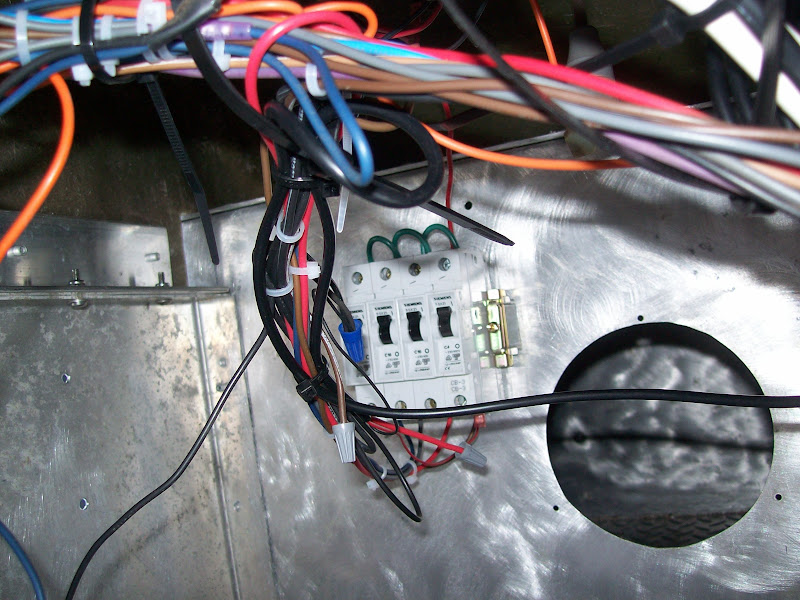
Got a good bit done to the boat today, got a little fustrated at one point on the wiring. I reused the original fuse block assembly which "looked" good, wired up my console switches and sorted out unused wiring then went to the battery compartment and cut off the fuse block to battery terminals and fuse. I replaced the main fuse with an automatic circuit breaker and crimped on new terminals to positive and negative, then I went to fuse block with my meter and found zero volts on the buss. I traced it back to the original tracker multiwire connector and found the pin for the 12 volt main line was broke off in the female connector so I butt spliced the wire to the buss. Tried the running light switch and NO lights, so I went to the fuse for this circuit and found highly oxydized fuse clips. I sanded them with no good results so I finally made the decision to rip out the old fuse block. I had some DIN rail and some Siemens circuit breakers of the proper amperage in my building so I installed all of this and re-terminated all of the wires. Finally I have voltage where it is supposed to be! Oh well, so much for trying to re-use old crap. Forgot to say I installed an under console horn as well.

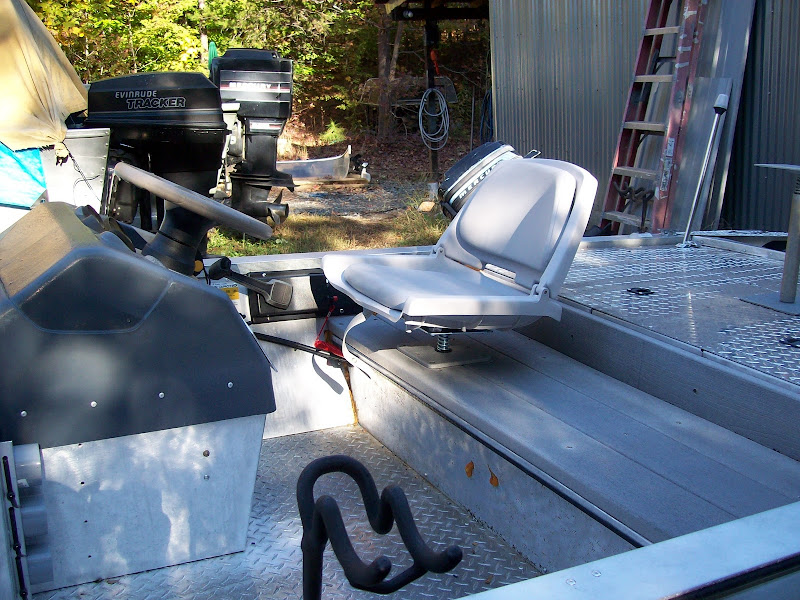
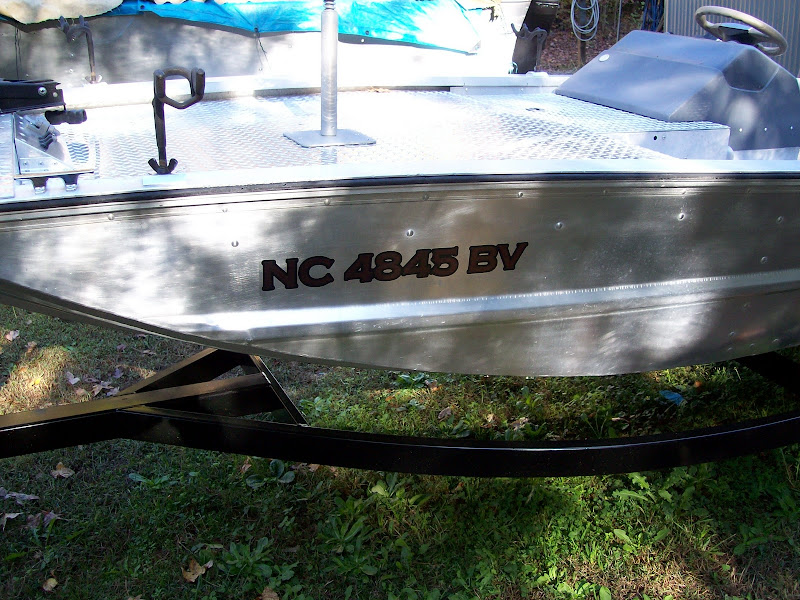
Got my drivers seat base drilled and installed too, then riveted the BIA plate on the inside wall of the boat and installed the HIN plate on the rear of the transom.

I still need to make a new bilge pump MTG bracket and wire it up and I will add interior lights, fuel compartment lights and switches. Daylight is getting shorter and soon they will change the time and make the daylight even shorter! Still alot of little ends to tie-up before I can say "let's go fishing"....... :p
 
Got my bildge pump bracket made and the pump wired in, so now I am making a transducer mounting bracket like the one on my Sea Ark. I have a little Hummingbird 586C color depthfinder I got in a trade for some outboard parts I will be installing. Getting ready to rain here for a couple of days so I will wait on clear skies. :)
 
Wiring is fun, especially when someone else hacked it apart first. I ripped all of mine out and started over. I'm curious to see how yours came out.
 
Derek said:
Wiring is fun, especially when someone else hacked it apart first. I ripped all of mine out and started over. I'm curious to see how yours came out.
Hey Darek, the original wires were still in good shape, though I re-terminated all of them, did do a couple of butt splices on low current draws. I will still probably pull in 2 extra #10 MTW wires when I pull my transducer wire thru the 3" PVC pipe to the battery for spares. The biggest draw I have is the troll motor and it is on separate (+) (-) #10 ga. original wires. The smaller troll motor I am going to use does not draw boo-koo current so I will probably be alright. On most troll motor applications I usually pull a #6 or a #8 ga. wire when I am wiring from scratch. I am just being lazy using the old wire, usually I rip it all out too and re-do everything. I do wiring for a living at my work place and I am tired of it when I get home! Thanks for the reply!

PS....went to my shop and finished my transducer bracket and will mount it soon as I see sunshine again instead of rain. :)
 
Got my transducer bracket mounted to the transom and bolted with 2-3/8" bolts, like my Sea Ark. Will pull in the wiring maybe tomorrow as it is still raining. Mount the depthfinder next and wire, then mount my rod holder bases and then time to fish!!!!!! :D
 
sorry for no pictures lately, I am out of re-chargable batteries so maybe I can get some more today.

I have the tranducer bracket made and installed, pulled in transducer cable thru PVC pipe and mounted the depthfinder head and wired up. Today I will drill and tap transducer bracket for some nylon cable clips to hold the transducer cable as it goes up the bracket into the top of the transom. #10/32 SS screws will be used for this.

Cleaning off some paint on aluminum rod holder bases and getting ready to mount 6 of them. I must go to hardware and get a few SS bolts for the ones up front, 4 of them will be fastened with #12 SS sheet metal screws because you cannot get to the underside of the gunnel in these places.

Pics coming soon........... :)
 
Well, I finally have "everything" finished on the boat except for the rod tubes which I can do anytime! I suppose it's time to put it in the water and see if it floats or sinks! I have been hearing some good fishing reports on crappie, perch, and catfish lately so I am licking my chops thinking about eatin' some good ole fried fish and hushpuppies or grits! Can I possibly get a volunteer to take it out for a quick spin from the dock?.... #-o probably not since most are too far away, so I suppose I will take the risk and see what happens before the water gets too cold! :)
 
Got my rod tubes finished yesterday evening, made two brackets out of aluminum angle and riveted to the boat to serve as "strap supports" for the tubes. I used large size (1/4") T&B black wire ties to attach the tubes to the brackets. The Thomas & Betts wire ties I used are sunlight resistant and will not rot when exposed to the elements. They also have a SS locking tab on them which lets you really torque down on the strap and hold tightly.

I was really wanting to take the boat out for a spin today but I've got to do a little work on my towing vehicle because it's spark knocking, I think I have a knock sensor not working or a defective distributor module, we'll see. :)
 
HERE ARE SOME FINAL PICTURES OF MY FINISHED PROJECT AT THE MOMENT......

TRANSDUCER BRACKET FINISHED AND MOUNTED

TRACKER%252520FINISH%252520014.jpg


ROD TUBES INSTALLED

TRACKER%252520FINISH%252520003.jpg


ROD TUBE BRACKET DETAILS

TRACKER%252520FINISH%252520004.jpg


TRACKER%252520FINISH%252520005.jpg


HELM SEAT

TRACKER%252520FINISH%252520006.jpg


BOAT NUMBERS WON ON TINBOATS FOR UGLIEST BOAT NUMBER CONTEST, THANK YOU!

TRACKER%252520FINISH%252520007.jpg


TRACKER%252520FINISH%252520008.jpg


FINISHED PROJECT

TRACKER%252520FINISH%252520009.jpg


MINIATURE CIRCUIT BREAKERS INSTEAD OF FUSES

TRACKER%252520FINISH%252520011.jpg


FRONT ELECTRICAL PANEL WITH SILICON BOOTED SWITCHES AND HUBBELL TROLL MOTOR WEATHERPROOF RECEPTACLE

TRACKER%252520FINISH%252520012.jpg


TRACKER%252520FINISH%252520013.jpg


Even though it has been a major task, I enjoyed working on this project and I wish any other tinboaters the best of luck with their similar builds you do. If I can be of any help to anyone, please post a reply and I will do my best to help if I can. Good luck to all and thank you Tinboats for allowing us to post here!! :) :)
 
Very very nice Mike! I really like the natural aluminum finish. Circuit breakers are a nice touch too, I went that route on my boat as well. :) Now we want to see some fish pics! =D>
 
Jonboat Jerry said:
Very very nice Mike! I really like the natural aluminum finish. Circuit breakers are a nice touch too, I went that route on my boat as well. :) Now we want to see some fish pics! =D>

Thanks Jerry, I will go out to fish buts it's going to be a few more weekends as my wife has plans for next weekend. I might carry it by my local water resivoir and do a "trial" run 1st to check for leaks and running condition of the motor as well, then I will be a little more secure about an all or partial day fishing trip, non-the less, I will post some water pix soon.

Can't wait to see your project finished too! It's looking very nice! :)
 
:oops: well,I carried the boat to Moss Lake in Kings Mountain, NC to do a test run. Motor ran beautiful at home after I cleared out (externally) some crud that was in the carbs but when I got to the lake and cranked the motor it was skipping on a cylinder so I said to myself, "a little more trash, maybe it will clear", but NOT, at a low speed, I had to "shove it" in reverse and give a little gas to get away from the dock, then to forward, attempted to steer and turned to the "left" and the boat went to the right, "what else" I thought, it was really kind of funny to realize the sector shaft was on the wrong side of the rack. I had been turning it many times at home and never noticed it! STUPID! :LOL2: , but easily corrected. Boat ran well for about 5 laps across the lake then I slowed it down to check the idle and it quit, would not start back so I trolled with the trolling motor back to the dock. Took the three carbs off yesterday and looked in the fuel bowls and crud in the fuel tube wells. The last time I ran the motor I "ran out" the gas then tilted the motor up, when I did some crud in the bowls went into a pocket where the "pick-up" well is on the inside of the fuel bowls. The main fuel tube and the idle tube go inside this "well" and any pieces of crud will stop up the tubes easily if any trash is floating around.
I cleaned the carbs good today, low speed and high speed side and will bolt them back up tomorrow.

PS......FYI.....the OMC manual says to NOT soak these carbs in carburetor cleaner because the aluminum carb bodys have a sealant sprayed on them at the factory to keep porosity leaks to a minimum and the carb cleaner will attack it and remove the coating so it is recommended only to "spot clean" the carbs and blow out the orifices with compressed air @ no more than 25 PSI.

OMC has some real sh**** carbs and I remembered how much crap I had experienced with them from the past, but alas, I cannot do anything about it so I will just cry! :x .....anyway I will install them back tomorrow and maybe run the motor if I have the time after work.
 
Derek said:
Looks great dude. Congrats =D>

Thanks Derek! :D

The good thing about my boat trial is the boat did not leak :shock: , but I had it out only about 1 1/2 hrs.
I forgot too, that I discovered I have the tranducer is located down too far in the water and it was shooting a rooster tail from it. I will have to raise it an inch or so. I was trying to make sure I had depth-finder operation while going high speed, I must "fine tune" the correct position so it will work at both high and low speeds.

More later.......
 
Kinda sounds like my first trial run. Motor ran great on a stand at home, I think we dislodged crud when mounting it to the boat. Although mine wouldn't even start the first time at the lake. #-o
I can only imagine what you were thinking when the boat turned the wrong way. :LOL2:
 
Derek said:
Kinda sounds like my first trial run. Motor ran great on a stand at home, I think we dislodged crud when mounting it to the boat. Although mine wouldn't even start the first time at the lake. #-o
I can only imagine what you were thinking when the boat turned the wrong way. :LOL2:

It was funny Derek, makes me wonder why I do some things without looking good (the obvious!).
Re-mounted carbs today and hooked everything back up, cranked motor and still skipping on a cylinder. Hooked the timing light up to all three cylinders and good fire to all, will do an actual spark test tomorrow. Could be a plug not firing (fouled) but it did not "read" fouled on my meter. I have bought brand new plugs before that had an internal malfunction in the plug itself, straight out of the box!

Motor had excessive smoke like there was unburned fuel going on, I hope the NOS fuel pump I bought does not have a hole in the diaphram though it was "new" it sat on the shelf a number of years, that could be the case. Worst case scenereo is bad piston rings on a cylinder but I would not think so since it ran so fast on my test run.

I will post my findings later..........
 
I don't know how much smoke you are getting but mine smokes a lot more on start-up but usually cleans up within a minute. Wouldn't the bad piston rings shown up on the compression check, if that was the problem?
 

Latest posts

Top