Alumacraft MV1448 Seadoo IB jet, Still jetting

TinBoats.net

Help Support TinBoats.net:

This site may earn a commission from merchant affiliate links, including eBay, Amazon, and others.
Yeah, I cheated and applied a layer of silicone to the welds and even drilled some 3/8" drain holes through the old transom. I also installed to support bars to keep the insulation 4" off the bottom. You aren't supposed to have regular floatation within 4" of the hull incase you get a fuel spill and it should keep the stuff from ever getting waterlogged.

Jamie
 
Got the new trolling motor from the UPS guy this morning around 10am, spent the rest of the day getting the darned thing attached to the boat. Figured I might get lucky and it would bolt into the same place as the old one, NOPE...

After flipping it every which way I finally decided to add some 1.25" tube to the gunnel and make a trolling motor mount 'wing' so I could get four bolts holding the troller to the boat. After the tube was on I added a 1/8" plate on top of the existing plate and drilled the holes for the troller base. The outer ones were a pain, one ended up going through the original gunnel tube and the front one needed another plate welded to the bottom to draw up against. First pic was around 2pm, the others around 4:30
P1010169.jpg


As you see, it sits about 5" forward of the old troller. I'm not sure what I'm going to do with the extra shelf.
P1010170.jpg


Notice the bug splatters across the bow... :)
P1010171.jpg


Once the photo op was done I popped the floor panel in to cover all the extra holes and reran the power to the troller. Got some supper anf hit the water around 5:45.

At first I wondered why they would give you 18' of control cable or even wireless controls but make you hit the button on the troller head for auto, but after running the boat I realised you don't hit the auto button again. I'm pretty impressed with it. It worked great as a hold in current. Aim the troller upstream and dial the speed down so so we could fish areas that we used to drift by to fast. Get a fish hooked up, speed her up a bit and it held fine at 2-3. In the slackwater areas, dial it down around 1 or 2 and keep the troller aimed parallel with the bank and fish. Maybe hit the turn button once a minute to fine tune it. Once we wanted to move on just roll the speed up to 10 and the boat flew across the water Oddly once you got where you were going the autopilot had trouble when I dialed the speed back down. Usually we ended up sideways or worse. Only real gripe is the dang head of the troller is above my eye level when fishing so it's going to get lopped off at least 12". 55lb Powerdrive V2 with Autopilot, $560 to the door as a refurb with a one year warrentee seems well worth the money since I don't have to do the Captain Morgan while driving and fishing.

So other than two grumpy kids it was a good trip.

Jamie
 
Glad you had a good trip and your liking ur TM.
My trolling motors long as well,just to chicken to cut into it.I stand up when fishing but still smack the odd lure up against it.If I'm not quick,can get a nasty backlash.
All that extra wire on mine is just coiled up and wire tied.
 
Yeah, but this is just obscene. The troller is about a foot higher than the console when deployed. It looks rediculous.

I'm not sure what I'll work on today, last one of the vacation so maybe I'll work on the back deck or maybe the trim tabs I want to add.

Heck, maybe I'll just go lounge around all day...

Jamie
 
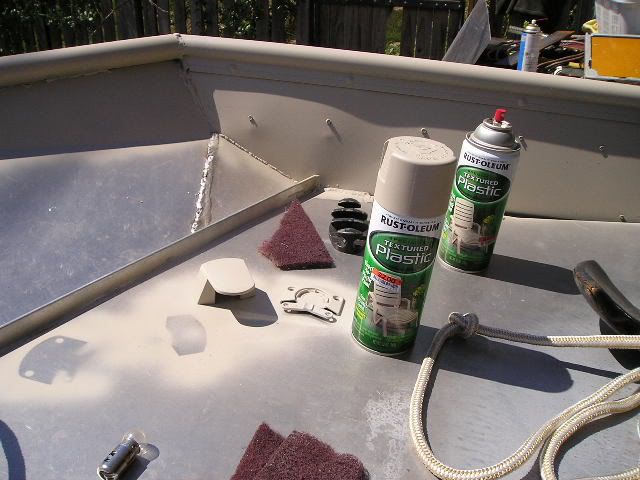
Ok, well so much for the easy life. Decided to stop at the local Big Lots this morning to see if they had any lock hasps for my new garage door down by the shed (the door fell down Wednesday as we were going fishing and I had to put another one up Thursday which is why we didn't go fishing then). Naturally they didn't have any hasps this time but they did have a bunch of returned cans of Rust-oleum's specialty paint in textured plastic, colored sandstone for $2 a can.

P1010172.jpg


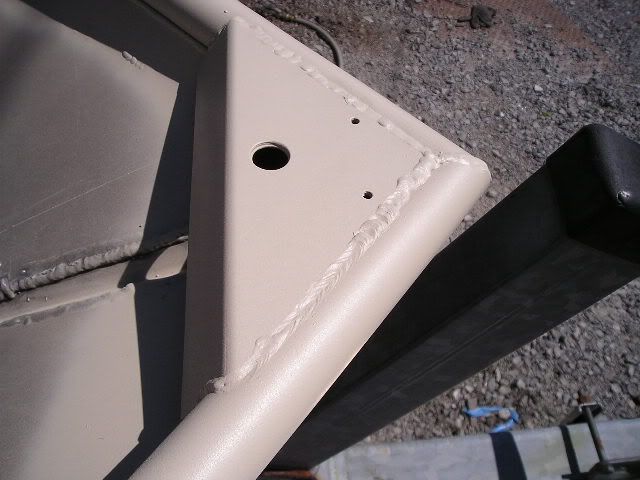
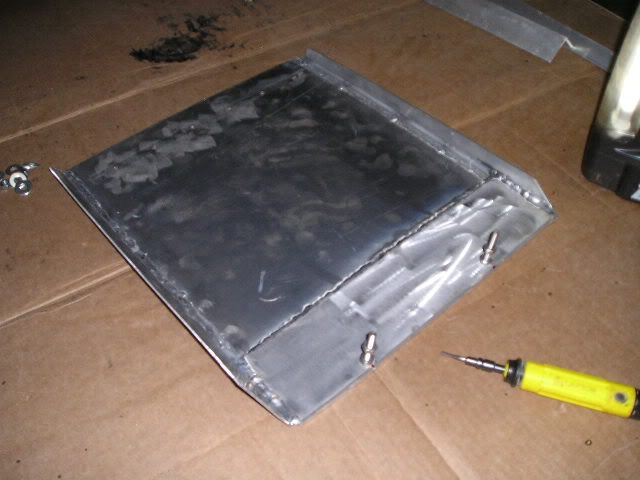
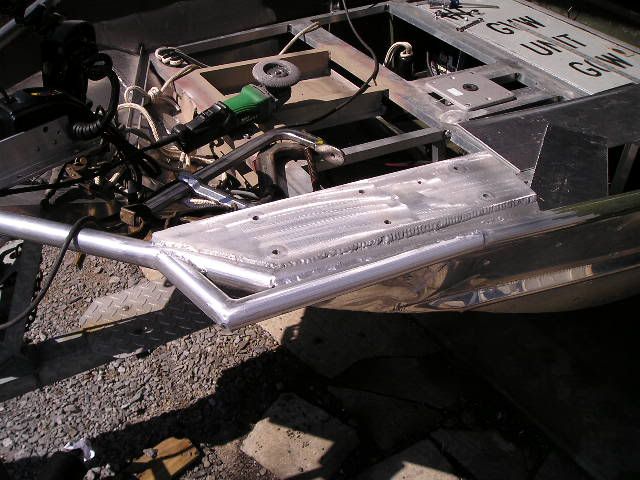
I sprayed the hatch lids and liked the anti-glare effect so I used three cans painting the gunnel caps and other interior bits that won't get paint. The paint is pretty tough and even feels good.
P1010174.jpg


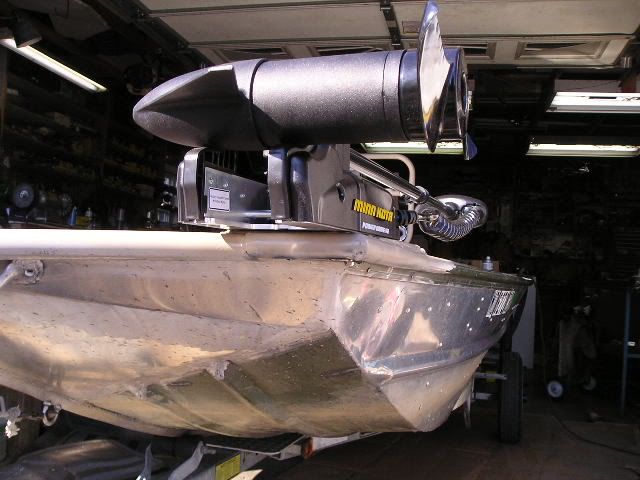
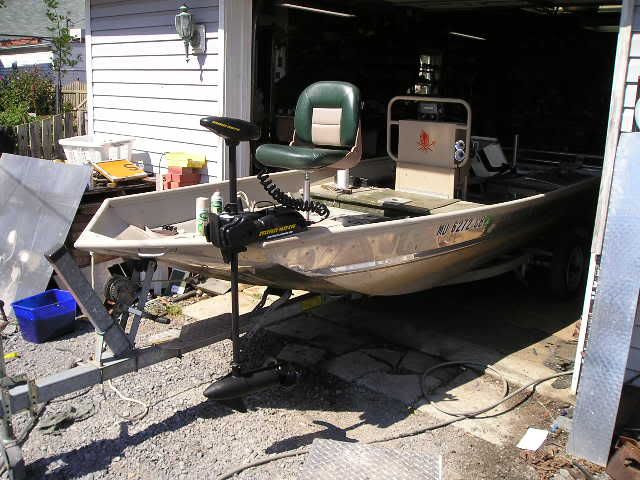
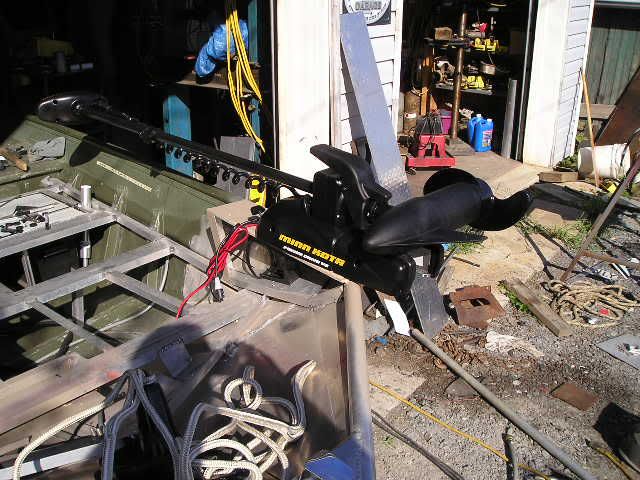
After letting my pointer finger recover I decided to tackle the trolling motor. Yesterday I couldn't see the autopilot LED on the troller's head so thought about 16" less would be nice.
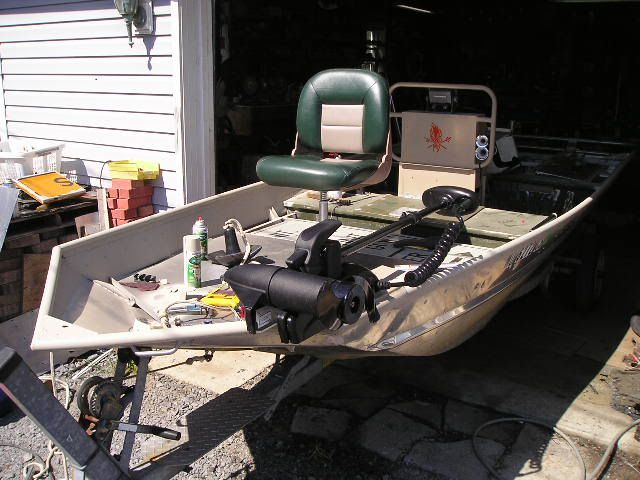
From this:
P1010173.jpg


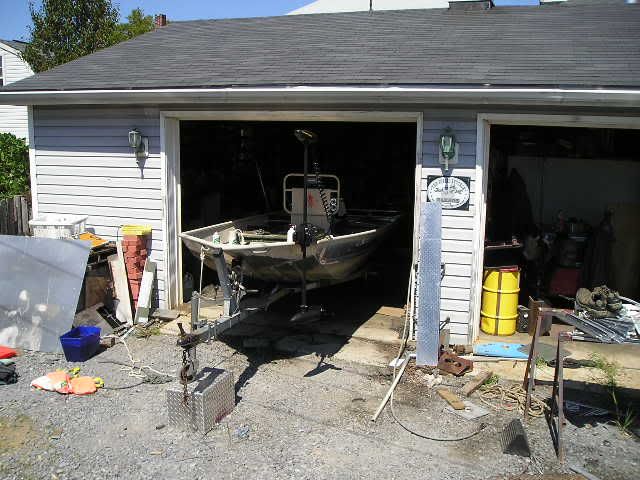
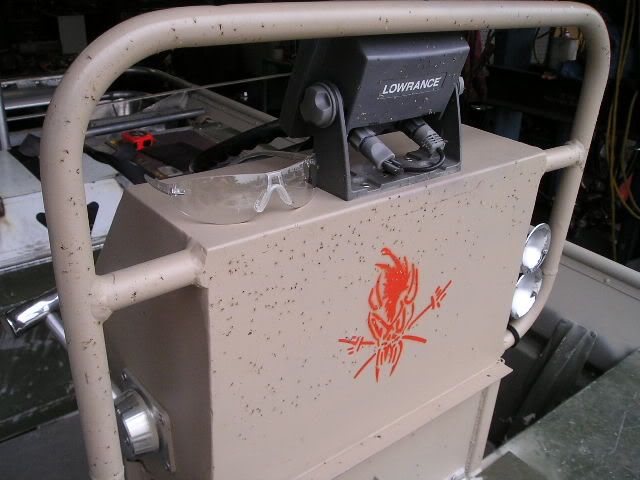
To this in about an hour:
P1010179.jpg


How you ask?

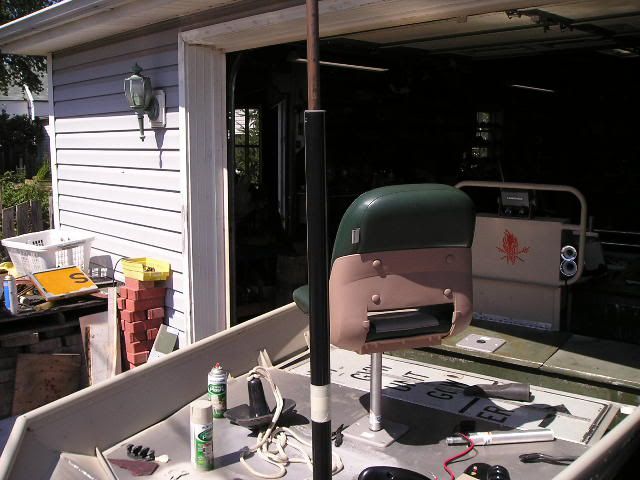
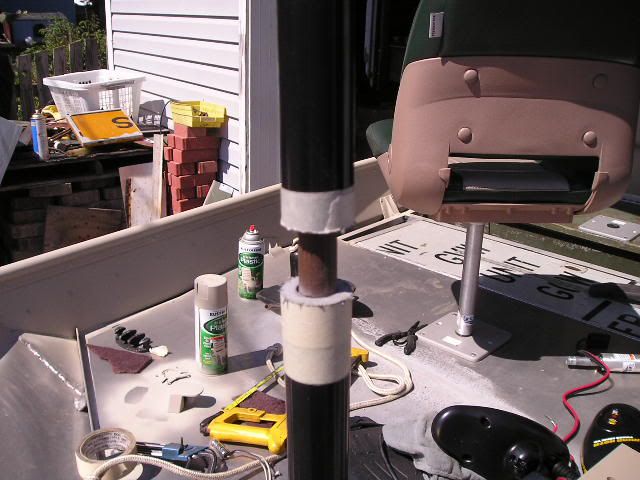
First I unplgged the power and then pulled the head off. Pretty simple, four phillips screws removes the top cover and a 3/16 machine screw holds the head to the shaft. Then using some masking tape I wrapped the shaft where I wanted it cut, then dropped down 1/2" and put another wrap of tape as a cut guide. I found out that these Minn Kota shafts are .650" ID so I used a short length of 1/2" copper pipe to protect the wires (the copper shavings show up brightly if you cut into it). Marked the depth of the cut before putting the pipe in so it was deep enough.
P1010175.jpg


A minute or two of hack saw with a fine tooth blade lopped the excess shaft off. Use a hand file and clean up the cut edge.
P1010176.jpg


I then marked the depth of the old mounting screw and marked it on the tape. Then stowed the troller to make sure I remounted the head on aligned with the motor since the head is supposed to point the way.
P1010177.jpg


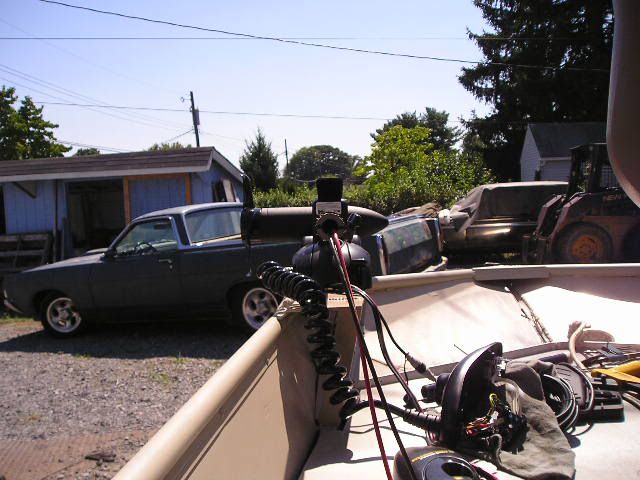
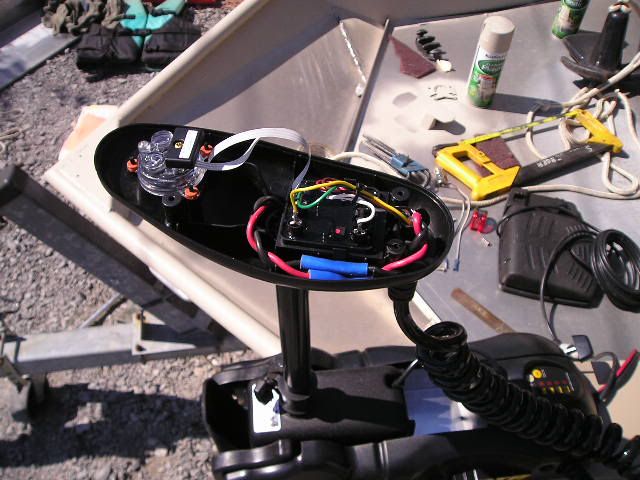
Then I pin punched the hole positions and before drilling I put the head on to verify the marks aligned with the head screw hole so the screw would go through. After verifying, back on went the copper pipe and while holding it drilled the two 3/16" holes through the shaft. The copper pipe wiggled when the drill bit hit it so I knew I was through. Finally, remove the pipe and clean up the holes before putting the head back on. Verify the head is aligned with the motor and bolt everything down. I shortened the wires and used yellow female 1/4" spade clips to reattach the drive wires. Note the autopilot compass and control board.
P1010178.jpg


Finally reassemble and stow it. Even though shorter the troller stows quick and easily. The extra wire coils away and isn't an issue.
P1010180.jpg


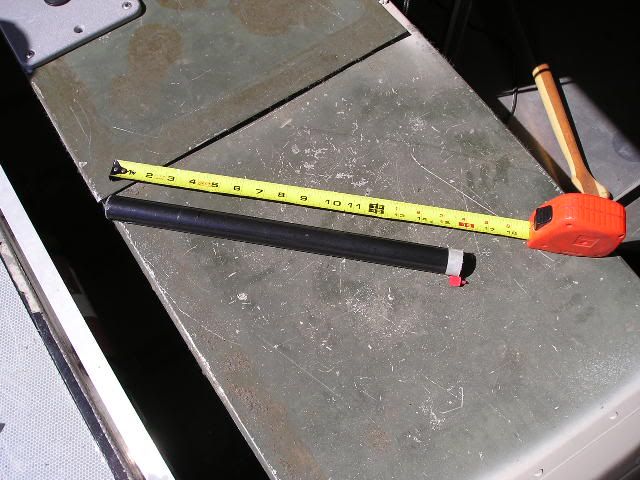
Proof in the pudding, 54" - 16" less shaft makes for a good comfortable fit. Shame you can't find the 40" shaft models very often.
P1010181.jpg


Jamie
 
Made a trip solo this evening. Had to trim it all the way down but it still went pretty good. I was running into a stiff headwind and the front end was really light feeling. Boat handled a bit skittish so I backed down and took it easy. 6000rpm was 50mph, 5000rpm was 45. Coming back down in mill pond waters I trimmed it up a bit and it hit 60+ and around 6500rpm before I had to pull out of the throttle.

So tomorrow I'm going to weld on some trim tab mounts, 2" x .250 angle with mounting holes for the tabs. I'll heep the angle the same as the transom and just make them longer or shorter to get the correct feel.

Jamie

Oh yeah, a 15" and 11.5" smallies were the best of the evening.
 
Trim tabs, Version 1

Still fighting the porposing demon and decided to play with tabs vs. modifying the pods themselves. It didn't porpose before the pods and new trolling motor install. I'm not sure if it's because of the pod design, the fact that the pods extend the planing hull or even the aerodynamics of the boat acting like a wing.

First a pic from the solo evening trip. I was hitting bugs and it felt like rain coming downriver. I think I killed thousands of gnats. There were twelve stuck to my safety glasses.
P1010183.jpg


Ok, this wasn't some cheap import wing (it would have been a more interesting story) but a section of fan blade from a big *** fan (google it). The lines are cut marks.
P1010182.jpg


I welded two chunks of 2" x .250" angle to the pod and some struts inside to support the load.
P1010184.jpg


Figured this angle wouldn't be too bad...
P1010185.jpg


Results were the hull would not plane, the pump cavitated and blew out and the nose just about went under when it did hook for a couple seconds. Anchored under the Rt 11 bridge and removed them. Took off and with both kids on the front it would still porpose with the 2" angle on the back. We were pushing into head winds going up river and the pump was grabbing air over 45mph. I did about an hours worth of fishing while the kids swam, picked up a couple nice smallies (11-12" guys) and once they were ready to fish the front came through with wind and lots of it... we beached the boat on a sand spit and went exploring hoping it would die down. Nope. Trip down river was into the wind again, had the big one leaning over the front of the hull with the little one in the front seat to keep the nose down. Still cavitating around 40mph in white caps!!!

Hit two patches of calm water and trimmed it up and the boat flew along pretty well. Some more trim and we had a nice rooster tail with the boat slowing to around 45mph. I'm kind of at an impass on this thing. Thinking about making some 4" and maybe 6" flat plates to try for tabs and then extending the pods to match the hull bottom if that doesn't work. Possibly cutting the bottoms out of the pods if that doesn't work, maybe a 2" gap between the hull and pod bottom, maybe more.

Jamie
 
To bad you couldn't make them pods moveable(up/down).
Maybe when your motoring there hurting you,just thinking they could be lowered when in real shallow water or running slow?
 
Trim tabs version 2...

Spent the last couple days thinking and researching porposing and how it would relate to my adding pods on the back of the boat. The one thing that keeps coming to the top is references to center of mass (COM) and center of bouyancy (COB). The COM is just that, the COB is the center of the wetted hull. As the engine thrust pushes the hull I can trim the nozzle up causing the COB to move aft. From what I can understand once the COB moves too far aft, away from the COM the COM causes the nose to drop moving the COB further forward. The nozzle trim lifts the hull again cycling the COB back and forth causing the porposing. One of the things that causes porposing with regards to my adding the pods is a rocker in the planing hulls bottom. I'm pretty sure that by starting the pods 1" above the hull bottom and ending up 1.5" above the hull bottom at the pods cap that I created a pretty big rocker in the hull and that this rocker allows the hull to porpose where it didn't before.

Since the 2" trim tab mounts on the back of the pods had no effect I decided to make a combo pod floor plate / trim tab to remove the rocker and perhaps add some hook to keep the nose planted at high speed. The tab will mount to a 1/2 x 3/4" x 12" mounting bar 1.5" behind the front edge (where the holes are) with button head phillips screws so the tab can deflect for adjustment.
P1010186.jpg


I decided to make them 15" long to reuse the other tab mounts as a adjuster bracket.
P1010187.jpg


Just noticed my tags are dead...
P1010188.jpg


7/16" wrench will allow adjustments to tune the hull.
P1010189.jpg


I have the other side to make tomorrow and then water test it in the evening. Should be interesting.

Jamie
 
Awesome to see someone really putting some thought into their build.. I can't imagine how many "back to the drawing board" moments you must have had so far :lol:

Keep up the good work!
 
I noticed in one of your pics that it looked like you grounded some wires to your hull. I was always told not to do that? Is there a reason why you did, and why are you NOT suppose to? Not really sure, i just was always told to run the grounds back to the battery or a buss bar. I know this isnt a "normal" build, so i dont know if it makes a difference or not.
 
I did a ground from the engine to the hull more for bonding than anything else. All the electrical circuits have their own ground wires.
 
Trim tabs V2 Day 2.

Spent part of the day getting the right side done. Surprising how quick it went compared to figuring out the first one.
P1010190.jpg


P1010191.jpg


Got finished around 3:30 and it took an hour for the silicone to set up so we were on the water around 5pm. It was windy and choppy. Had my oldest and one of my friends went along. With them on the nose the boat didn't do so well, cavitated a bit and just didn't want to go very well. Did some people moving and the boat ran better. Got up river and had to go reserve fuel...

Did some fishing, caught a very healthy 16" smallie with a 11.5" girth.
P1010193.jpg


P1010192.jpg


Before dusk fell I dropped them off to do some camera action. My friend Scott had his video camera along. Here's some still from my camera.

Trimmed up as high as it would go running around 45mph
P1010197.jpg


P1010198.jpg


P1010201.jpg


Trimmed level, very little wake and just scooting along.
P1010203.jpg


I've decided that I will be getting a good HD camcorder and getting some video to post up.

Jamie
 
Finally, finally, finally, have video... First time with the camcorder but you get the point.

A quicky at the ramp.
https://www.youtube.com/watch?v=kWgiKzuJCKU

Some running video.
https://www.youtube.com/watch?v=FWlR_tUdKBU

I've been tinkering away, adjusting the floatation pod trim tabs and just having fun with the boat. I am thinking about adding a second fuel tank on the port side since these things go through the fuel pretty fast...

Enjoy,
Jamie
 
Couple more videos are up, search ranchero50

https://www.youtube.com/results?search_query=ranchero50&aq=f

Raw feeds from the camcorder, of a short three minute walkthru we were playing around with and a 15 minute trip back down river in calm water pacing a great heron, through a shoot, around weed beds, running some geese, dodging goose poop bombs, passing some hunters in a duck boat, almost hitting a beaver and finally back to the ramp under the Rt 11 bridge, most of it around 45-50mph.

Jamie
 
Been busy, uploaded full HD video of last Monday and Tuesdays trips (9/13-14/10). The higher quality uploads really make even the low def viewing much better. These are all uploaded raw off of the camcorder.

https://www.youtube.com/watch?v=wa4QSaMx5-E

https://www.youtube.com/watch?v=YV2a5M3rSEw

https://www.youtube.com/watch?v=PCg3rqnpwaw

https://www.youtube.com/watch?v=Unemubda9UA

https://www.youtube.com/watch?v=efa0_38beyQ

Took the boat out this evening as well, follow along. (low def for now)

Part 1
https://www.youtube.com/watch?v=CL7H7NKeK5A

Part 2
https://www.youtube.com/watch?v=xAQFYkxWdF8

Part 3
https://www.youtube.com/watch?v=bK0oquEjuBA

We left the house around 4:30pm, hit the water before five. We got a nice days worth of rain Friday so the water was up a bit. I wasn't filming the trip up and just out of curiousity stuck the nose up the riffle to the next level, about a 2' climb over 50' that usually has exposed rocks all the way up but this time they were covered. Figured I'd just bump one and drift back down but once almost all the way up I blipped the throttle and put it on plane and popped over the berm and away we went. Made it another mile or so dodging some nasty stuff, fish walls, riffles and other obvious chutes going up. I was actually laughing as we cut throughthe last bad spot and leaving off the throttle when we hit about half planed out.

Took almost an hour to fix the hull, then fished a bit. I hooked a nice bass on Nate's rod and he brought it in but once it got to the boat the line came untied. So we watched a 14-16" fish with a 3" firetiger lure hangin out of his mouth scraping the bottom trying to get iot loose for five minutes before we lost sight of him.

Coming back down it was too dark to film and I was getting spooky about the water but it all went well. Sacrificed some tin and a lure making things go better perhaps. We came down a decent drop off at an old railroad tressle (maybe the old bridge structure) and I was sure we were going to take some over the bow but didn't, felt like hill hopping in a car. Finally pulled a sharp left to hit the original chute and we were on the way home, eating bugs and dodging rain drops. I ran the boat wide open and it didn't leak more than normal.

One interesting bit, with the left trim tab missing that side ran about 3" lower vs. the right side. I was surprised to see that much difference. I'm going to UHMW the hull this winter, thinking 3/8" covering so we can run this skinny stuff with ease.

Jamie
 
just spent about a hour reading this and in a word WOW, wish I had the ability to pull this kind of a build off.
 
Thanks guys. You know, I really haven't updated the thread in a while because the boat is working excellent as it is. Had it out twice this week, three folks in one day and it fished comfortably. The cooler air is helping the engine make more power and it's going through the water so fast that it's not picking up leaves or loose weeds which is a big plus as the water gets cooler. Went out with just the oldest son on Monday and we were running mid 50's on mill pond water, boat felt like a hovercraft just skimming along.

I opened up a bay in my 18x36' shed so the boat is comfortable down there. I want to bring it up to the big garage later and get more done. I'm having second thoughts about sealing the floatation pods since I whacked the rock last month, might do a big hinged cover or just screw the pod caps down.

Still trying to save up for UHMW, maybe tax time if all else fails. The only real downer for this build is I'm only getting an hours run time on a 8 gallon tank of fuel so I may install the second tank on the port side for longer trips. I think it's rated for 45 minutes at WOT per tank.

Jamie
 
Well, it's official, the boat is put away for the winter. Drained the engine of water and dosed the fuel. The battery has been in my '70 F350 so it'll stay in use.

Otherwise I have lots of stuff to do during the cold months. Currently working on an aluminum bed for my '70 F350 dually. Supposed to do a body swap on a '88 Thunderbird Turbocoupe next month and I have a couple diesel swap projects to make parts for.

It never ends...
 

Latest posts

Top