1436 SeaNymph

TinBoats.net

Help Support TinBoats.net:

This site may earn a commission from merchant affiliate links, including eBay, Amazon, and others.
Well... it's been hard finding time for the boat lately. But, between organizing a kids Halloween party at work (125+ kids), and my 5 mo. old son coming down with a 104 temperature for half a week I found some time for progress.

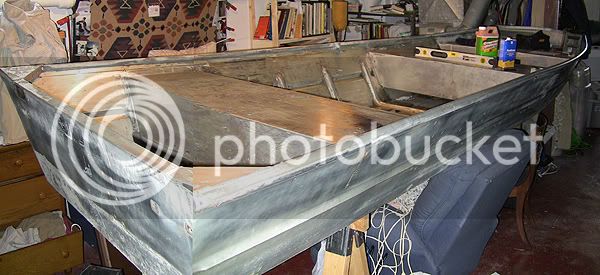
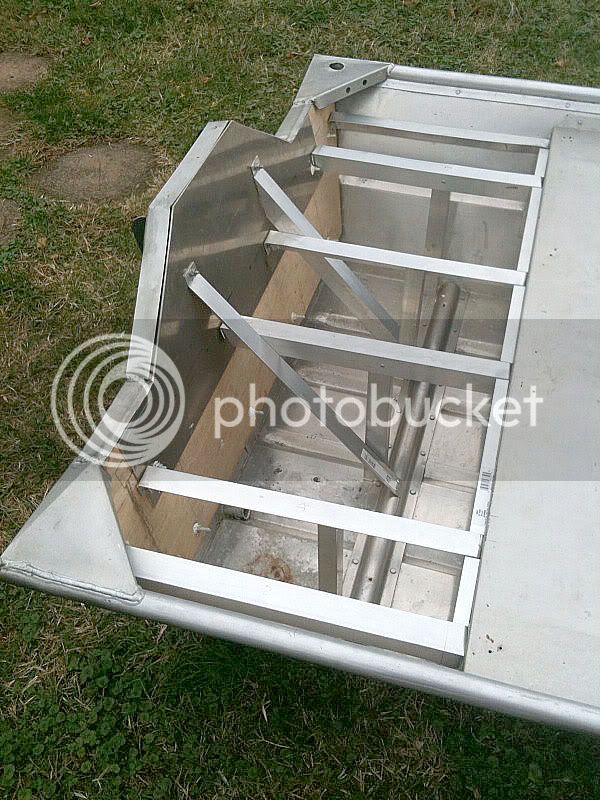
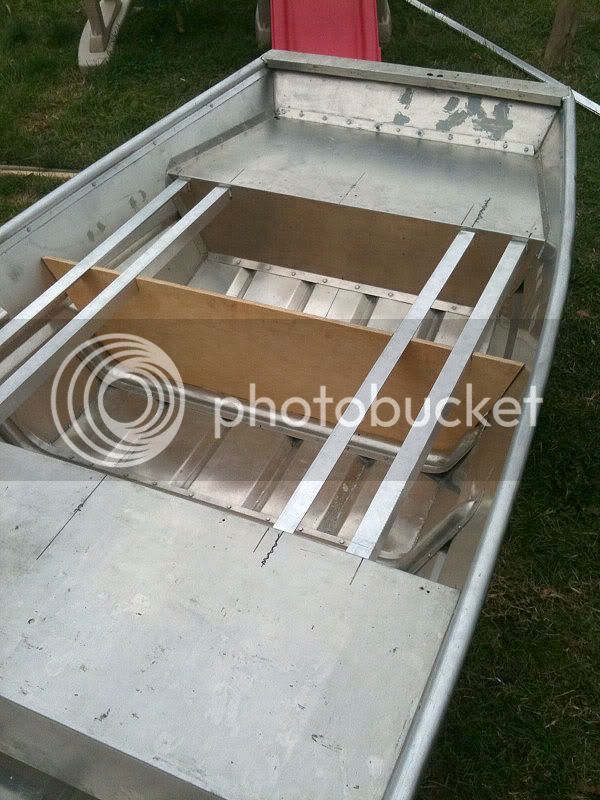
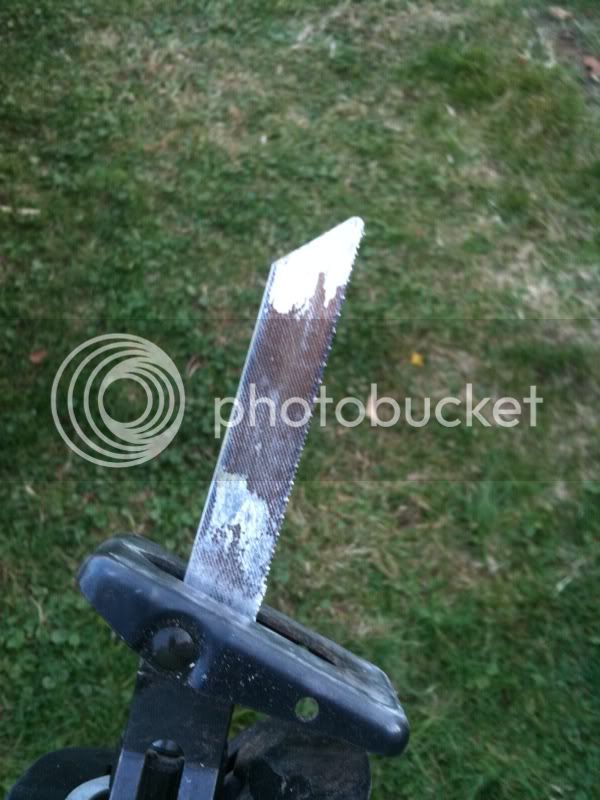
Most of the steel hardware has been removed. Still working on that. Plus, I managed to remove the old transom.
IMG_0307.jpg


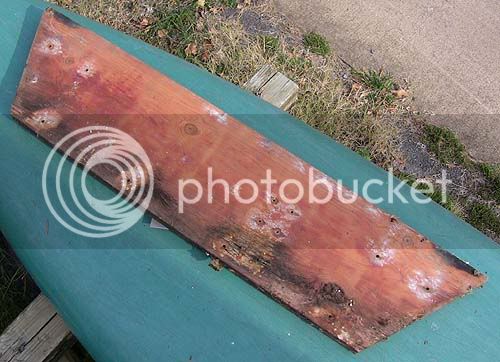
The bottom edge is pretty rotten. I poked it with a key and could nearly push it all the way through. Here's the stern with the transom board removed.
IMG_0304.jpg


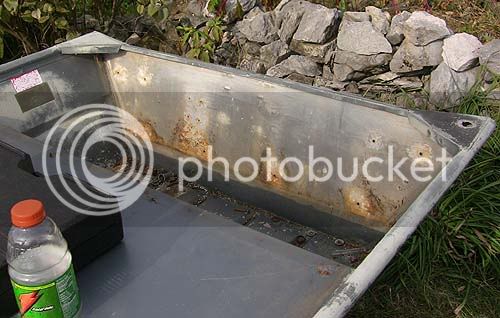
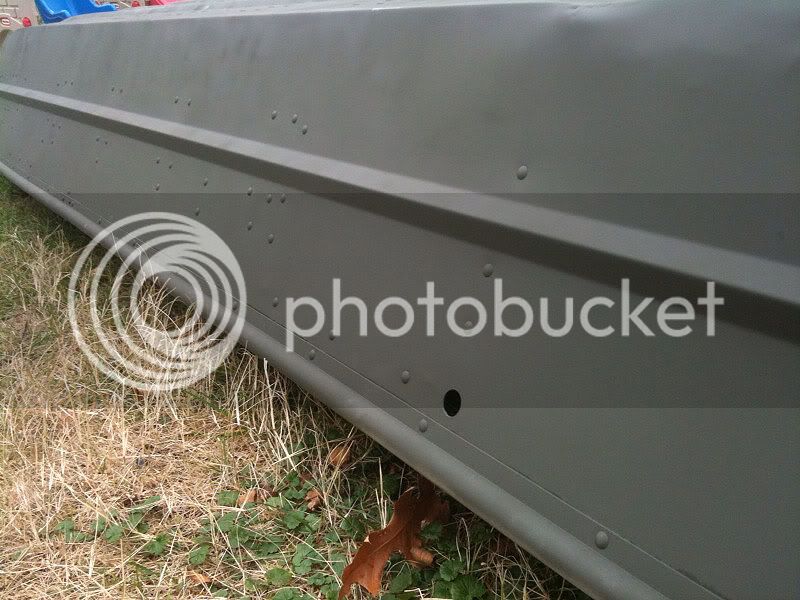
Here's a hole through the hull where the previous owner had installed a pick up truck bed tie down. (just behind the seat) Since it is in the back of the boat I plan to widen this hole to install the bilge pump discharge. I don't have a drill bit wide enough. Does anybody have a good idea on how I can widen this, or should I just go get the bit?
IMG_0303.jpg


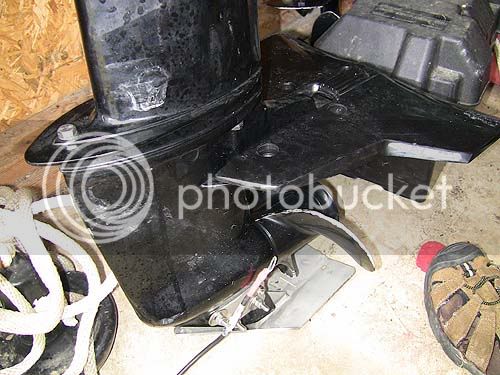
And now, the part that has me all excited and chomping at the bit to get out on the water! I picked up this 2004 15hp 4stroke with electric start last night. Paid $1,250 for it. The previous owner said it's hardly been used and I believe him. I took the cowl off and the insides are in mint condition. He seemed like a standup guy and his property was kept up immaculately so I figured he's honest and obsessive about keeping things in good condition. I've been looking for a motor like this for quite some time and the new one's range from $2,800 - 2,500. So I figure I got a fair deal.
IMG_0311.jpg


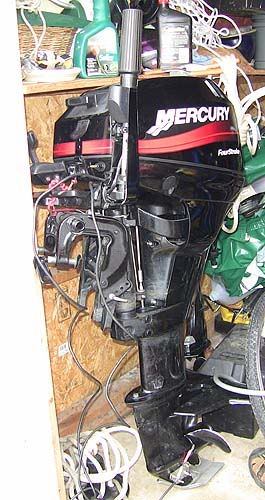
It also came with a gas tank (full of gas), a prop guard and one of those whale tail thingys. What is the purpose of those? Should I keep it or ditch it?
IMG_0313.jpg


Well that's all for now...
 
The boats coming along nice.Good score on the Merc.The bit question.I'm not sure exactly what type you're looking at,but an electric jig saw would work.As soft as aluminum is and as close as the hole is to the top you could use a wood coping saw with a fine blade.I have a rope carbide blade for my hack saw that didn't cost but a couple dollars.Got it a Lowes.These are just some idears to think about next shopping trip.I hate to spend money on a tool I'll only use once.The whale tail question.I can't remember the exact name for that but they act like a hydo plane for the outboard.It helps to get the transom up on plane faster.It isn't nessasary on a light boat that floats on top of the water.It'd be great on a deep V or fiberglass boat.I wouldn't remove it unless it made the boat feel unsafe or unstable.
 
Great buy on the Motor :lol: , I agree the newer ones that I have seen are around 2,000 or more also. On the hole, let us know what you end up doing, I need to cut a hole for a bilge pump in mine and I am curious as to how to do that.

Marc
 
This is a good deal and it's exactly what I use just a different brand.It will also come in handy if you need to hang a new door in the house,change door knobs,or install dead bolts.
https://www.harborfreight.com/cpi/ctaf/displayitem.taf?Itemnumber=38425
 

Attachments

  • hole saw kit.gif
    hole saw kit.gif
    20.4 KB · Views: 971
ben2go said:
This is a good deal and it's exactly what I use just a different brand.It will also come in handy if you need to hang a new door in the house,change door knobs,or install dead bolts.
https://www.harborfreight.com/cpi/ctaf/displayitem.taf?Itemnumber=38425
I use cheap hole saws for aluminum all the time. If you take the center bit out, you can make nice round disks to patch holes too. Of course, a drill press really helps with this.
 
BassBoy
I dunno if you do this,but when I use hole saws on aluminum, without the center bit,I start the cut by reversing the drill.Soon as I get a kerf started,I switch over to forward, and finish the hole as normal.It helps keep the metal or hole saw from walking or wiggling around.
 
ben2go said:
BassBoy
I dunno if you do this,but when I use hole saws on aluminum, without the center bit,I start the cut by reversing the drill.Soon as I get a kerf started,I switch over to forward, and finish the hole as normal.It helps keep the metal or hole saw from walking or wiggling around.

Great tip! Thanks!
 
How much larger does the hole for the bilge pump overboard discharge have to be? You might be able to get away with just getting a reducer fitting that steps-down in size from the bilge pump discharge hose.
 
Cheeseball said:
My bilge discharge hose is 3/4", so that makes for a 1" hole for the fitting. Is it ok to reduce the hose on the bilge?

It may cut back on flow and up the pressure.I don't know if the back pressure would hurt the pump.Some will wear out fast.It may spray the water out due to the restriction,kinda like putting your finger of the end of a garden hose.That be a good way to run some one out of your fishing hole.Pull along side of them,hit the bilge pump switch,and spray the boat taken your fishing hole. :LOL2:
 
ben2go said:
It may cut back on flow and up the pressure.I don't know if the back pressure would hurt the pump.Some will wear out fast.It may spray the water out due to the restriction,kinda like putting your finger of the end of a garden hose.That be a good way to run some one out of your fishing hole.Pull along side of them,hit the bilge pump switch,and spray the boat taken your fishing hole. :LOL2:

lol...I think I might just stick with the 1' fitting and drill the hole. :wink:
 
I am falling back on what I know about pumps.I've never used a bilge pump in one of my boats.I have only operated them in other boats that I have been on.
 
Well... I've been away from the web for a while. My PC was out of commission for a quite some time. But I'm up and running again. Now don't think that I've been a slouch either. After the weather turned cold I resorted to moving my boat into my very small basement. (my wife loves this) I've been slowly stripping the old paint off my boat using a citrus stripper. It works fairly well. Not as good as the heavy duty stuff, but it can be used indoors without the noxious fumes. It still has a strong smell, so I've been applying only small 2' x 2' patches of the stuff at a time to keep the smell down. I don't have much time to work on it. I come home on my lunch hour from work (I live about 300yards from where I work) to apply the stripper and then scrape each patch in the hour I have after work before my wife gets home with the baby. Then of course dad time begins :wink: Working in the basement is very cramped but I just about have the entire inside of the boat stripped.

IMG_0383.jpg


I've also been working on another project to help get my storage shed cleaned out and organized.

IMG_0381.jpg


I built this motor rack using some scrap lumber I had.

IMG_0380.jpg


My storage shed is still quite packed full of crap. But I did manage to get my motors up off their skegs!

IMG_0382.jpg


So, anyhow... I'm getting all phsyced up for the spring season and I want to get this puppy seaworthy soon, so look for further updates.
 
Well it's been quite awhile since I last updated this thread, but I have made a little progress. Earlier in the summer, with the help of some friends got the stripping done. Nothing new on stripping that isn't covered in other threads... stripping paint sucks.

Jamie (Ranchero) took time out from his jet project and helped me out with his welding skills and I now have my raised transom. https://www.tinboats.net/forum/viewtopic.php?f=13&t=8525&hilit=cheeseball+transom

Recently, I've found the time to prep the outside of the boat, prime and lay down a few coats. I started with sanding the whole outside with 440g sandpaper then a wipe down with acetone. I then used a self-etching primer laying down three thin coats. I let that dry then applied the paint in five thin coats and then two thick coats. Wet sanded with 600g and applied four more coats. Here's the result before the final wet sand.

photo4.jpg


photo2.jpg


photo3.jpg


After the paint dried on the outside I started doing some framing work for the front and back deck. The back framing is all but finished. The raised transom is pretty solid too. I weigh about 195lb. and I can stand on the top of the transom and it won't budge.

photo1.jpg


The front deck framing is still a work in progress.

photo.jpg
 
VBTravisD said:
That aluminum work is awesome!

...what are ya planning on doing with that 5 hp!?

Thanks! I'm keeping that motor. I have a 1236 that I use that on. It's nice to have when the river gets low low...
Why are you looking for a motor?
 
Maybe some of you guys who have done some metal work could give me some advice. I have a nice piece of aluminum that the previous owner of my boat had used as a deck. I've decided not to use it in my design, but want to cut a piece off. Maybe I'm doing something wrong, but it is very hard to cut. I've been using my sawsall and it seems that it should not be this hard to cut. The metal 3/16". What I'm I doing wrong do I need a different blade? Should I oil the blade while cutting? Or is cutting sheet metal that thick that hard and I just need to keep at it?

It took about 25mins of cutting to get this far.

photo6.jpg


photo4-1.jpg
 
no that's not right at all. You should rip right through that metal. For example, I used my sawzall and cut up a '70 Dart Swinger so that I could toss it piece by piece into my Power Wagon and haul it off for recycling. I went through 3 maybe 4 blades. We use a sawzall to cut the A & B pillars and roof structures of cars when we need to extricate victims and the hydraulic tools can't get deployed fast enough. A sharp blade will take off a dozen roofs before it needs to be swapped out.

Either your blade is dull or your metal is not resting on the sawhorse enough and its vibrating too much? Dunno, but the amount of cut you made there should be a few minutes not 25. The blade doesn't look like its missing teeth but maybe replace it anyway?

Looks like a Milwaukee saw? You should be able to throw that thing at just about anything and cut it up so the saw shouldn't be a problem.
 

Latest posts

Top