
CMMahy
New member
Hello everyone! I figured I'd finally stop lurking and introduce myself on the board with a quick write up on my boat project that I started last summer.
Here's the back story on the boat. It's a 16', Canadian made Naden aluminum boat that my parents bought when I was only a year old. It was originally a side console model, but that has long been removed and sold off, turning the boat into a tiller only model. The upside to that, is it doesn't have the usual center bench, which gives it a nice open floor space. The boat doesn't leak, but it needed some major work in the near future, so my parents gave it to me last summer, when they upgraded to a new Lund Fury. I was super happy to get the boat, even in that condition, as I've fished my entire life out of it, and have caught countless thousands of walleye and pike out of it over the years.
The main things the boat needed were new a new floor and benches, as the wood had dry rotted, and this caused everything to sag, which cracked and broke a half dozen mounting brackets for the benches, and deformed all the floor stringers. The boat also needed a new transom core, so that was going to require some major surgery. I decided to make some improvements along the way, with permanently mounted trolling motor batteries and charger, and a front casting deck.
I apologize in advance, I didn’t take any pictures of the boat before diving into it, and in retrospect, didn’t take many decent pictures of the repairs I had to do on the inside.
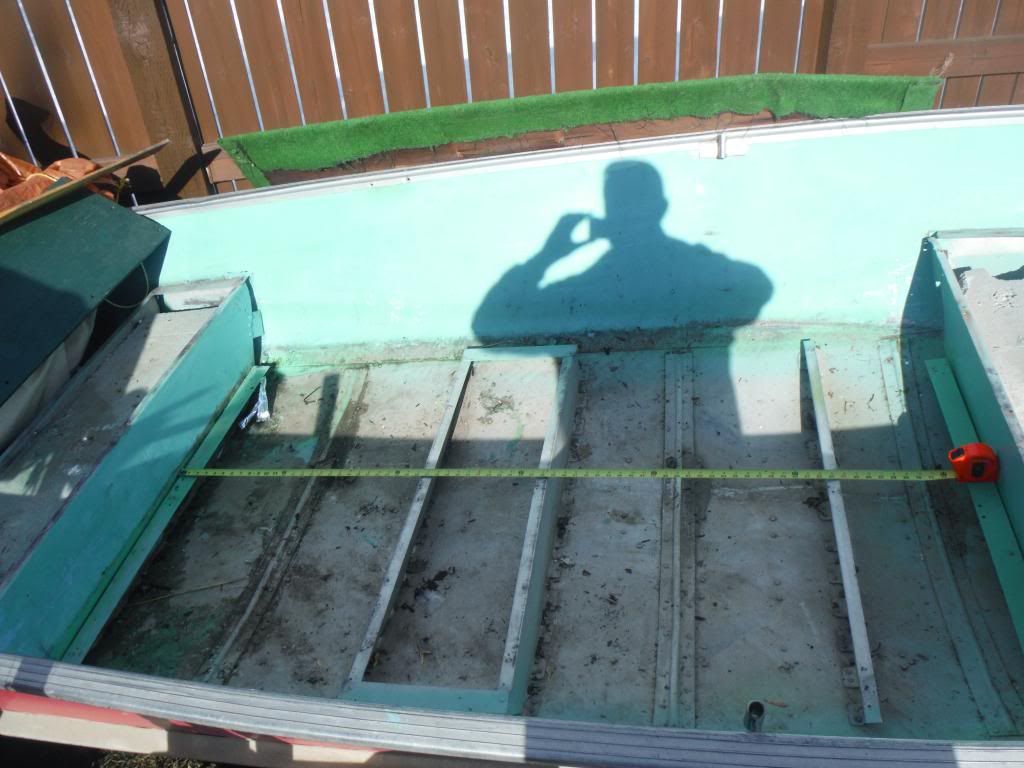
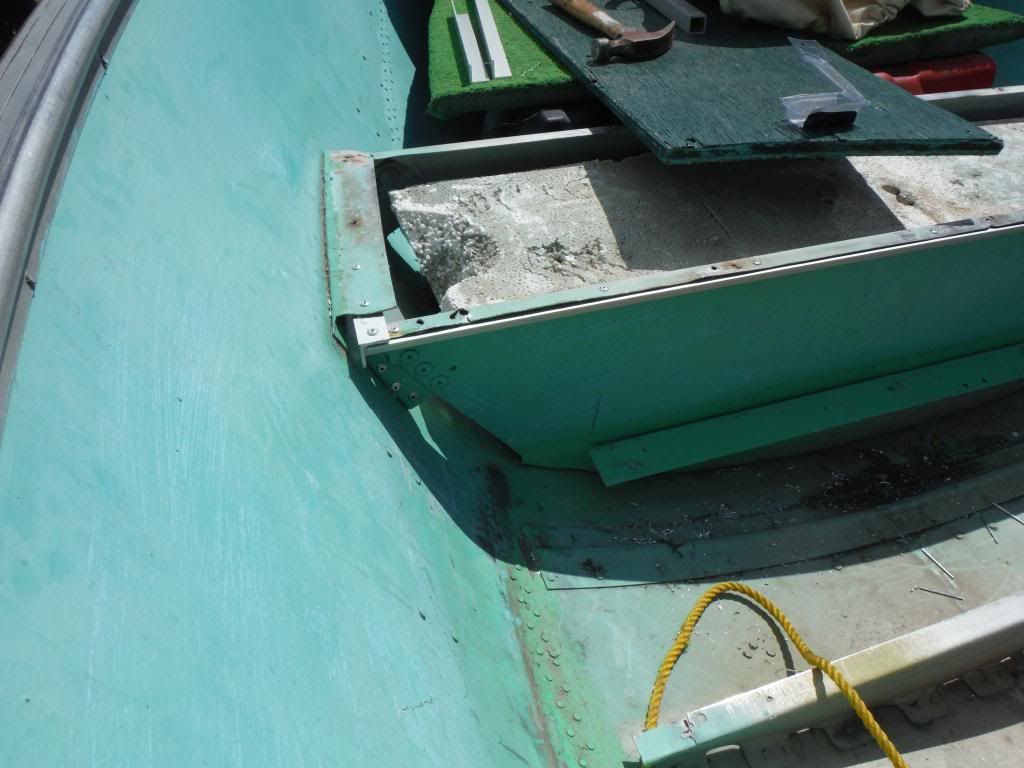
First I stripped the interior out of the boat, and started taking stock of the damage.
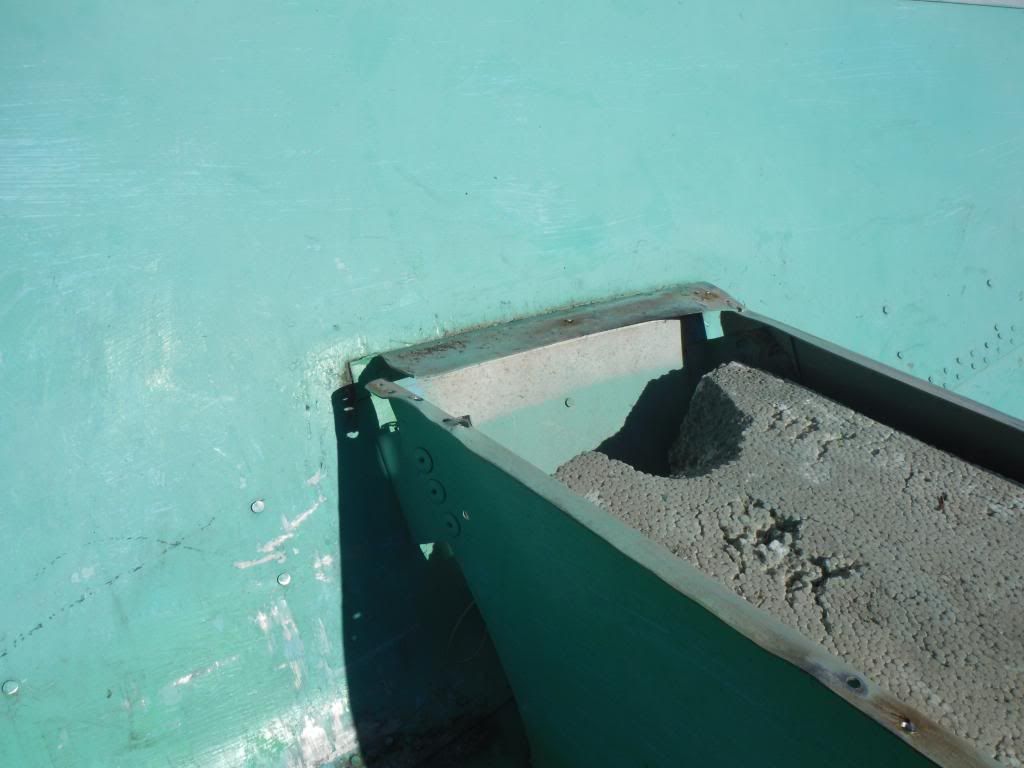
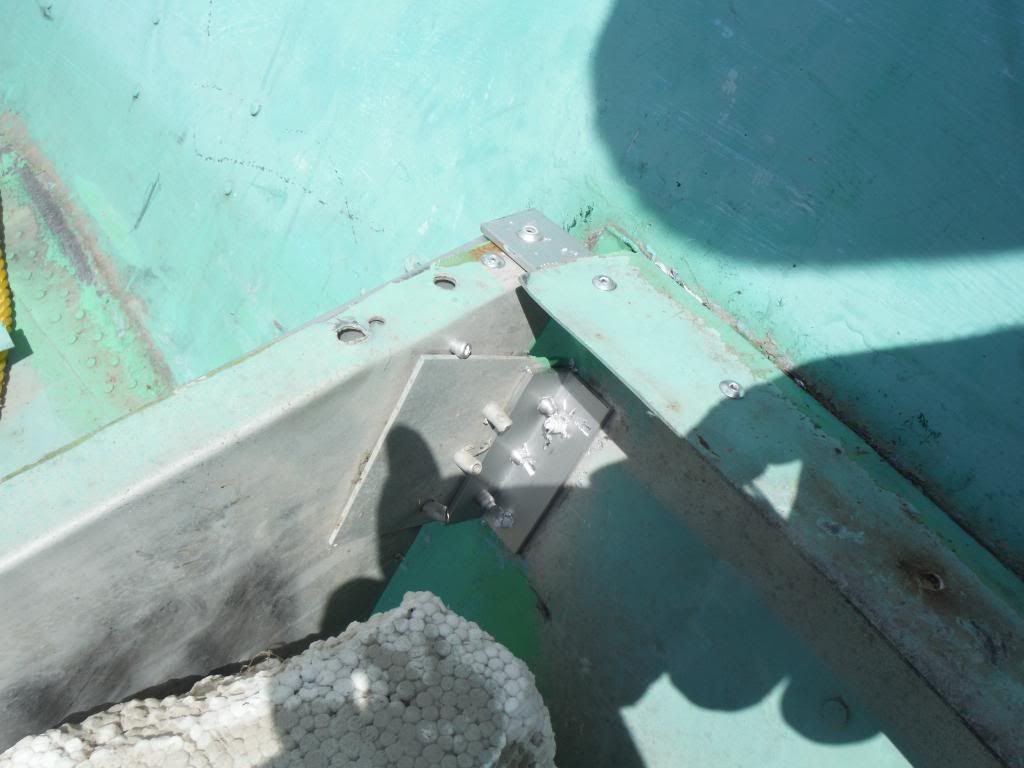
This corner of the front bench was probably the worst part that I found.
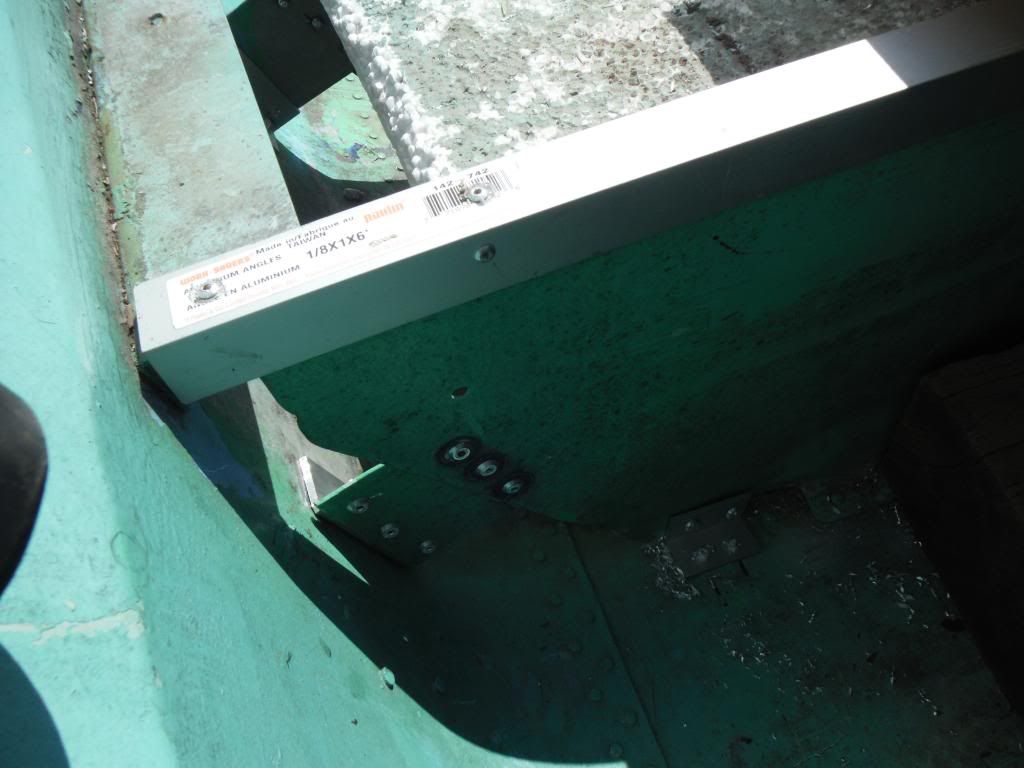
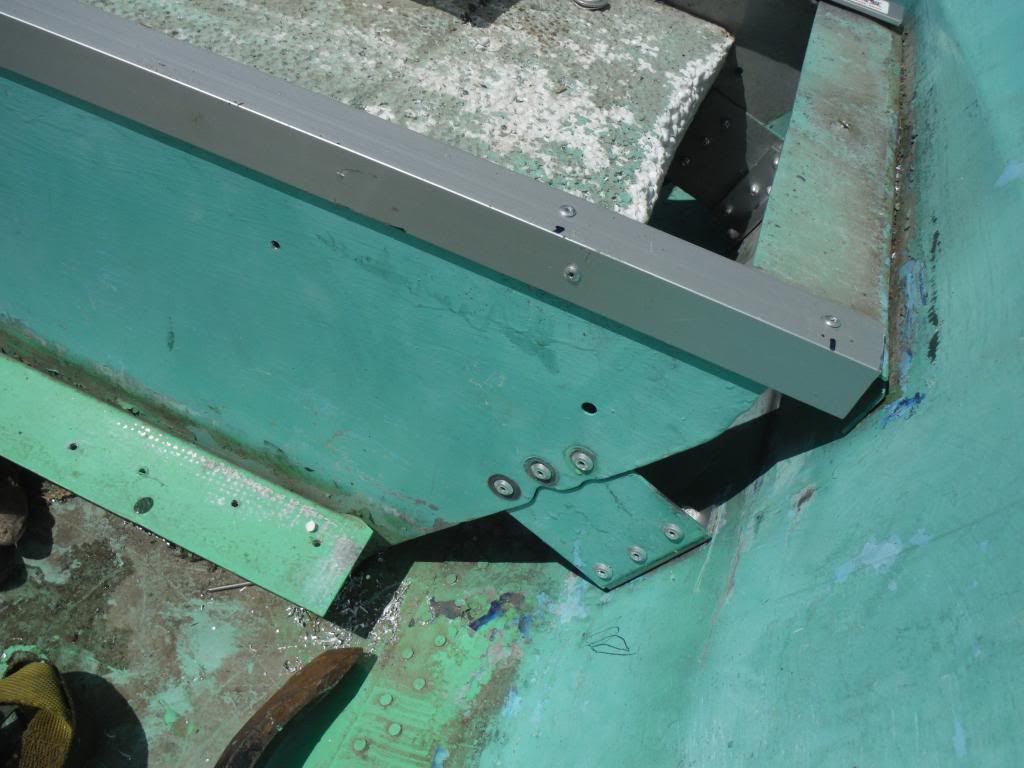
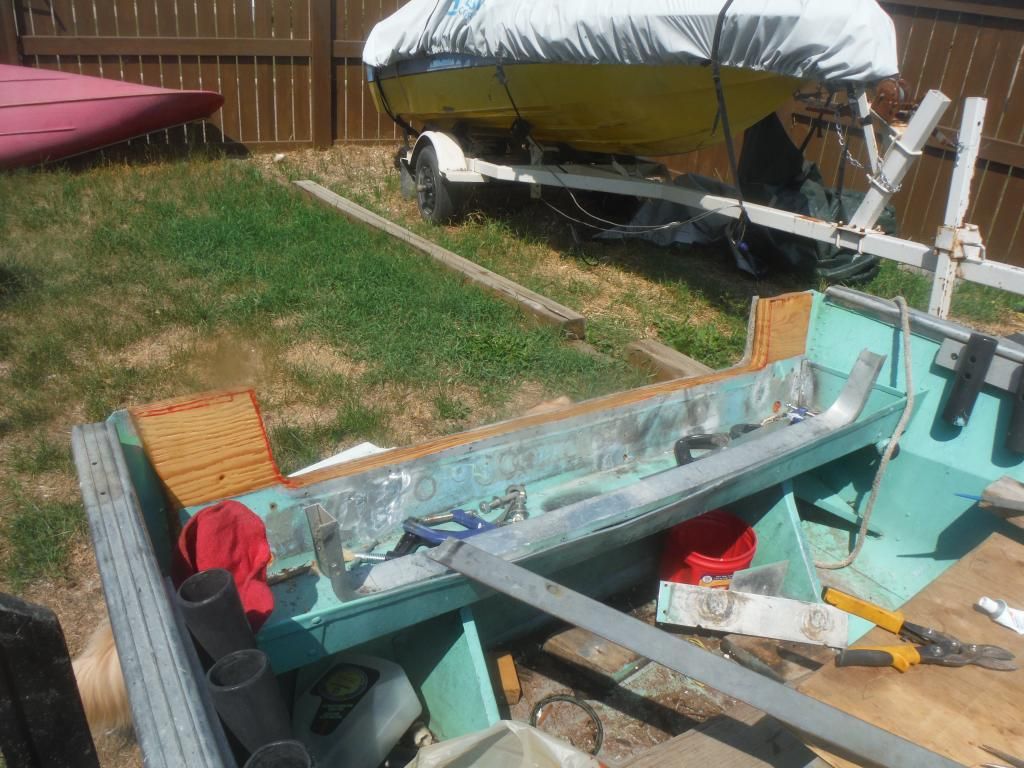
I reinforced the sheet metal bench edges with 1" structural aluminum angle, and used small pieces of that to rebuild the cracked brackets.
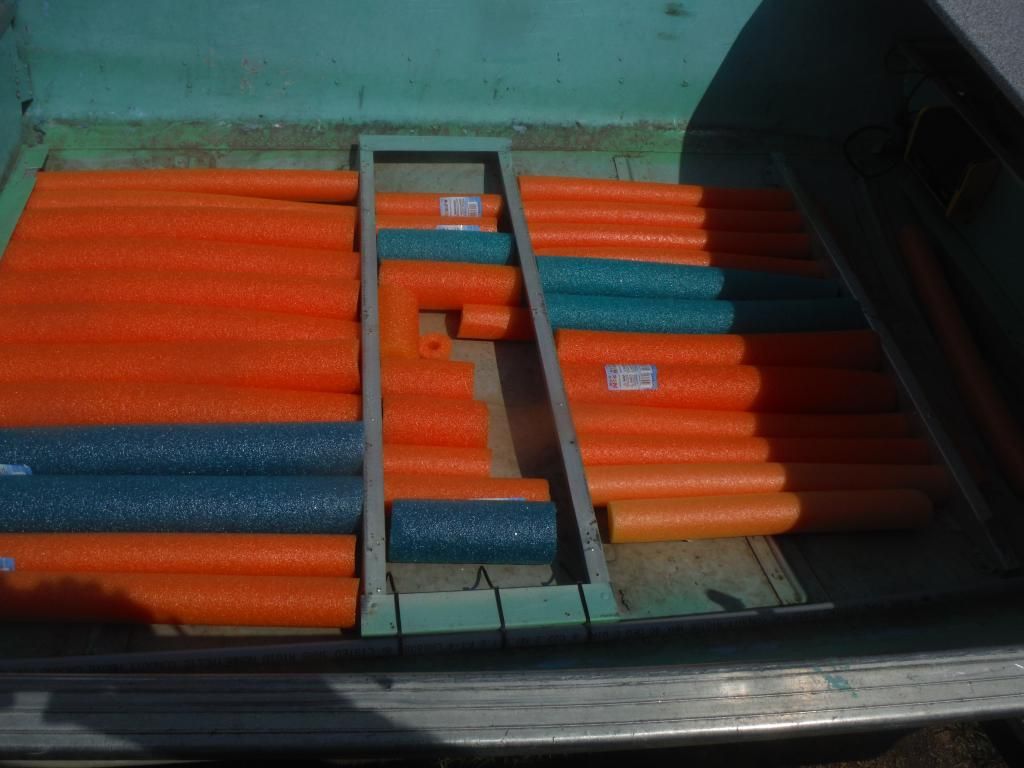
I also used lengths of 2" aluminum angle to reinforce the thin, sheet metal angles that the ends of the floor sheet mount to, and lengths of 1" square aluminum tube to reinforce all the floor stringers. While the floor was out, I cut up about a dozen pool noodles to fill the gaps under the floor for extra floatation, in case I ever swamp the boa (an idea I shamelessly stole from other peoples builds on this board).
Then I turned my attention to the transom, to see how bad it really was. This is all that was left of the wood core:
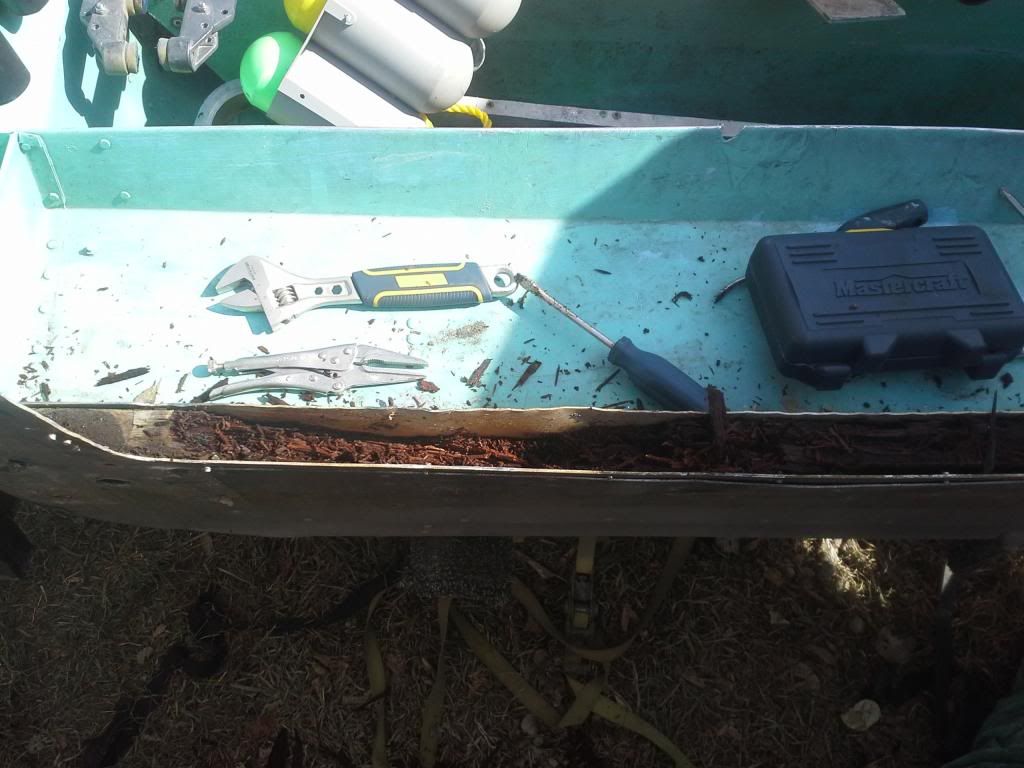
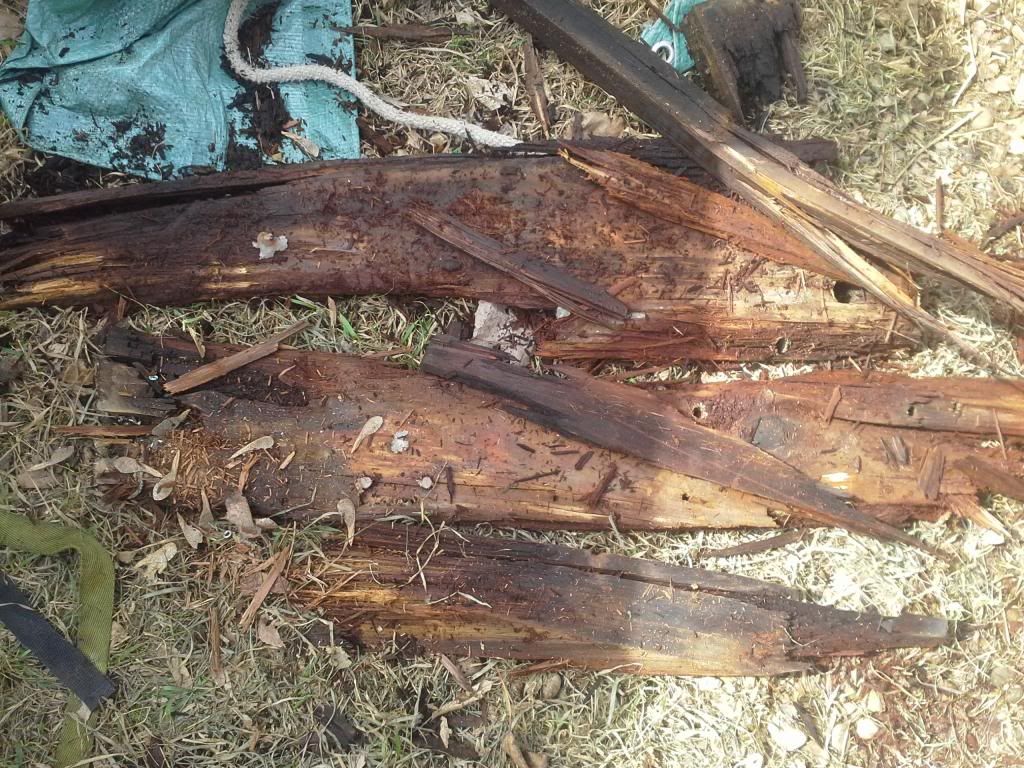
Right from the factory, the old transom was just a plain 2x10 piece of lumber, with some small loose chunks of 2x4 to fill up the sides. It was all held together with plain galvanized hardware with no attempt made at the factory to try and seal the up either. I made a new core from laminating 2 sheets of 5/8" plywood together, and sealing it up with Spar Urethane. I made a full width, one piece board that went from the corner caps all the way down to the bottom.
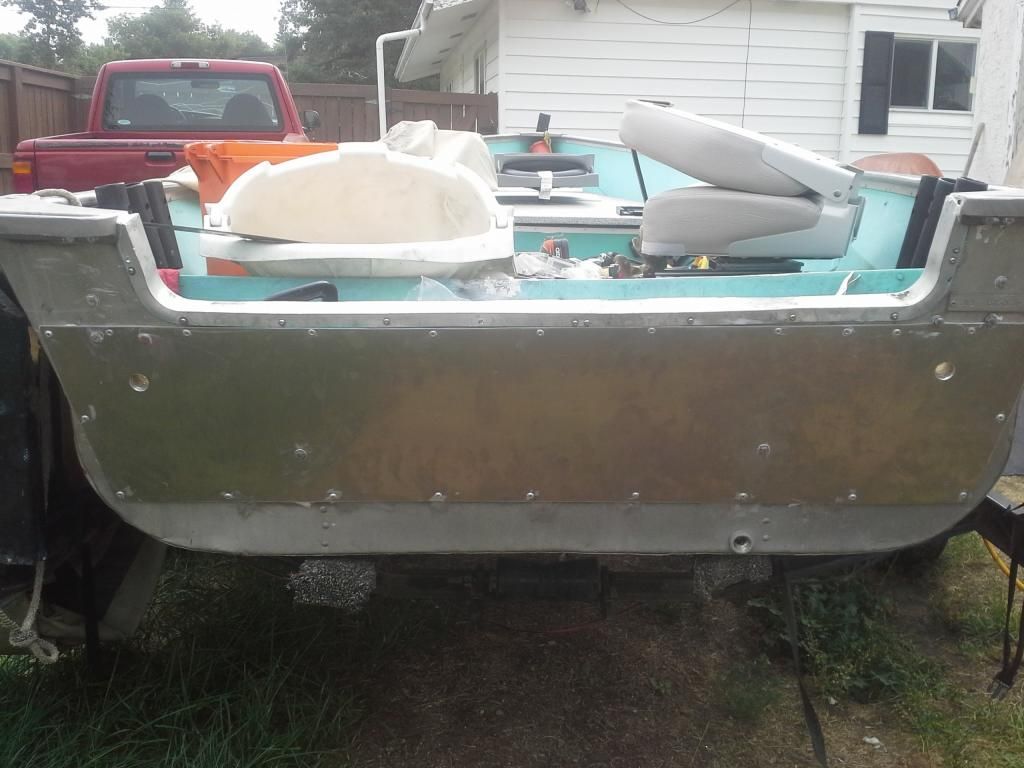
I also made a full width doubler plate on the back, to fill and seal some of the holes that had accumulated in the boat over the years, with all the different motors that have been mounted back there. The plate is just some generic 3/16" aluminum a local supplier sheared to size for me. I'm not sure exactly what grade it is, but it isn't 6061, as I didn't feel is necessary to spend the extra $$ for the added strength.
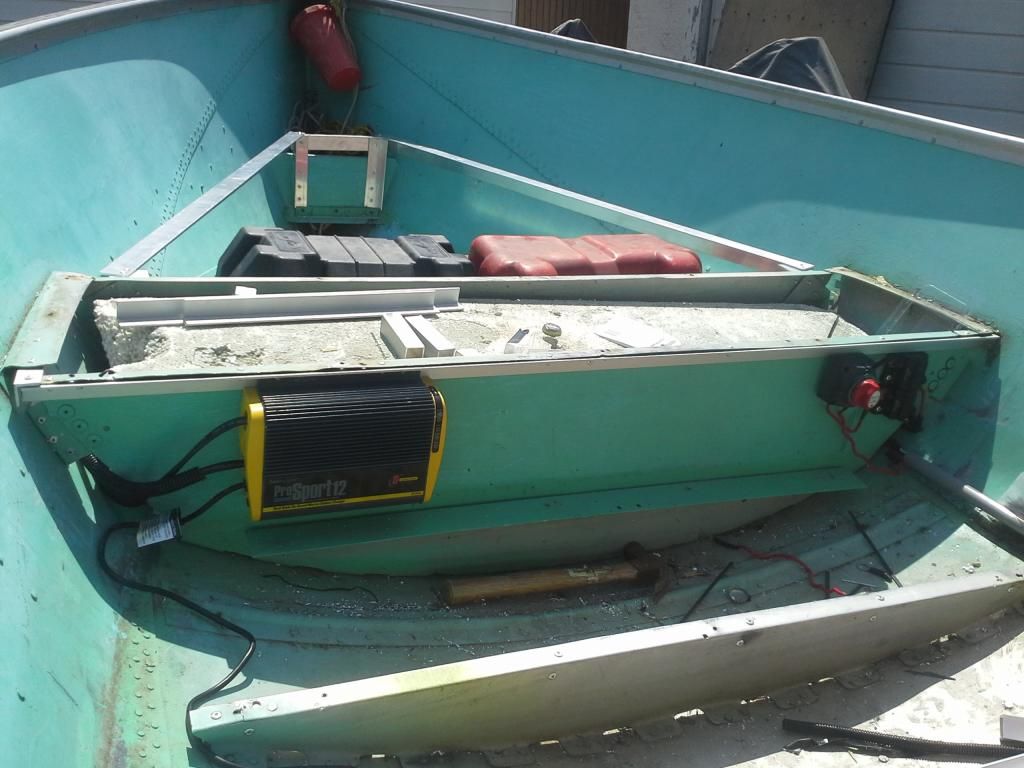
I framed in the area from the front deck forward, to create my casting deck. I also mounted a pair of deep cycle batteries, wired them through a selector/shut off switch, to the back for my electric trolling motor, and mounted a 2-bank, onboard battery charger.

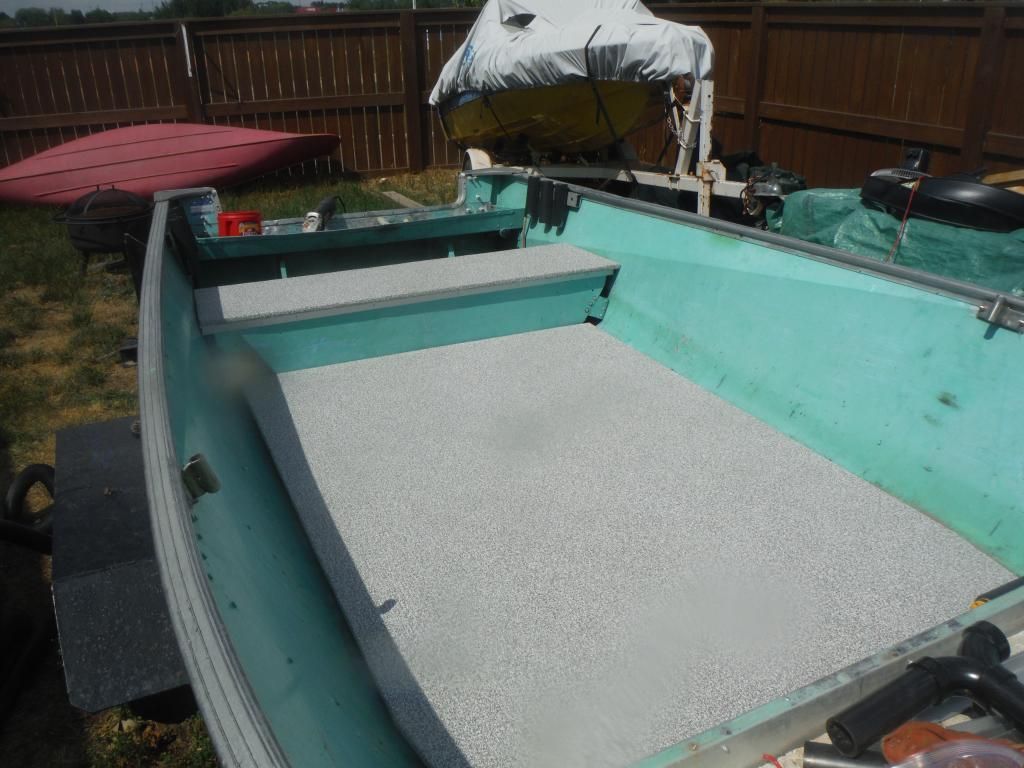
I had to laminate two more sheets of 3/8" plywood together to make the front deck, as it was 4 1/2' by 5', and a standard sheet of plywood is only 4' wide. Once that was glued up, it, the floor and the back bench were sealed with Spar Urethane and wrapped in Nautolex, marine vinyl flooring
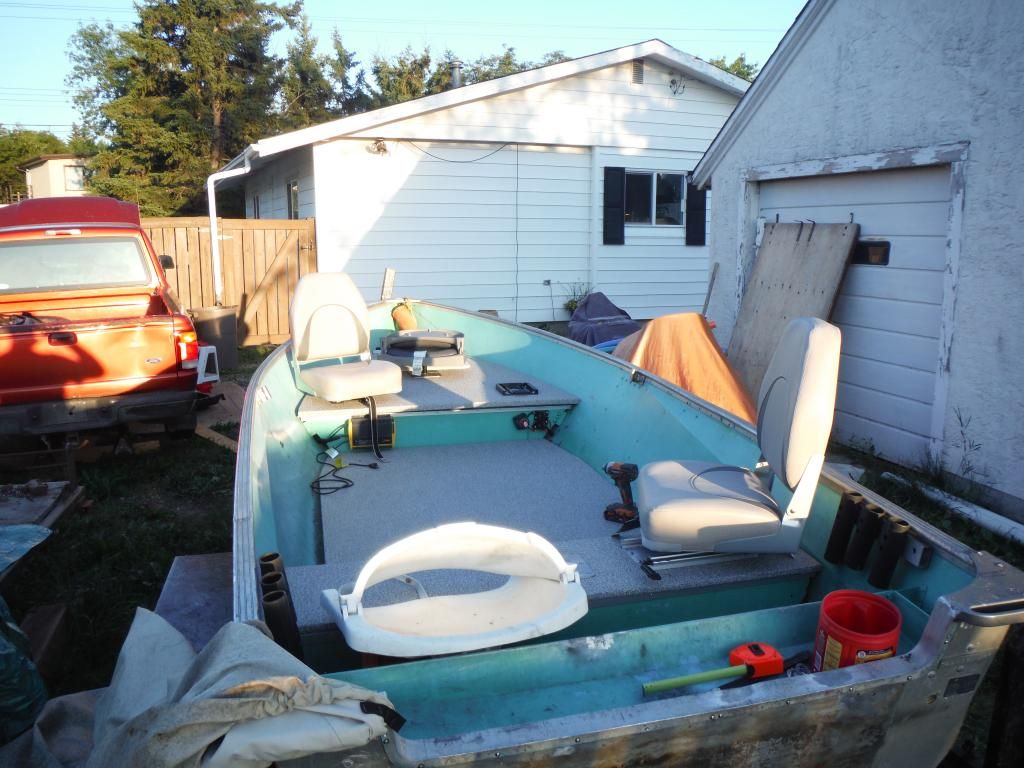
Once that was done, I cut the hole for my front deck hatch, and started mounting my seats.

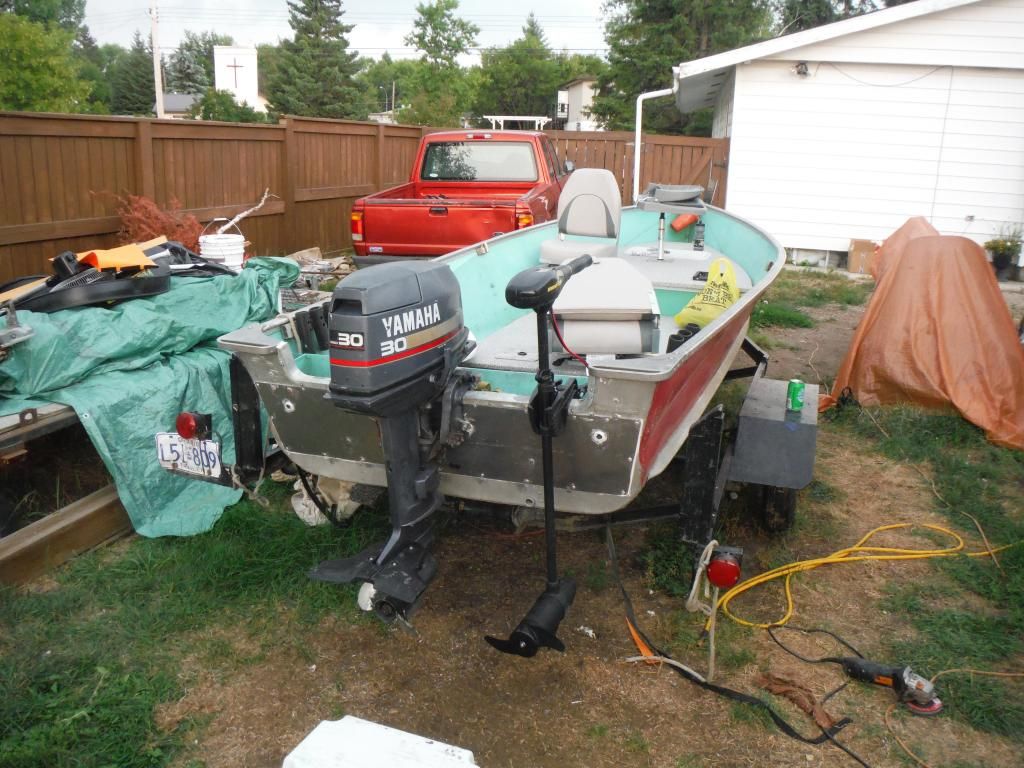
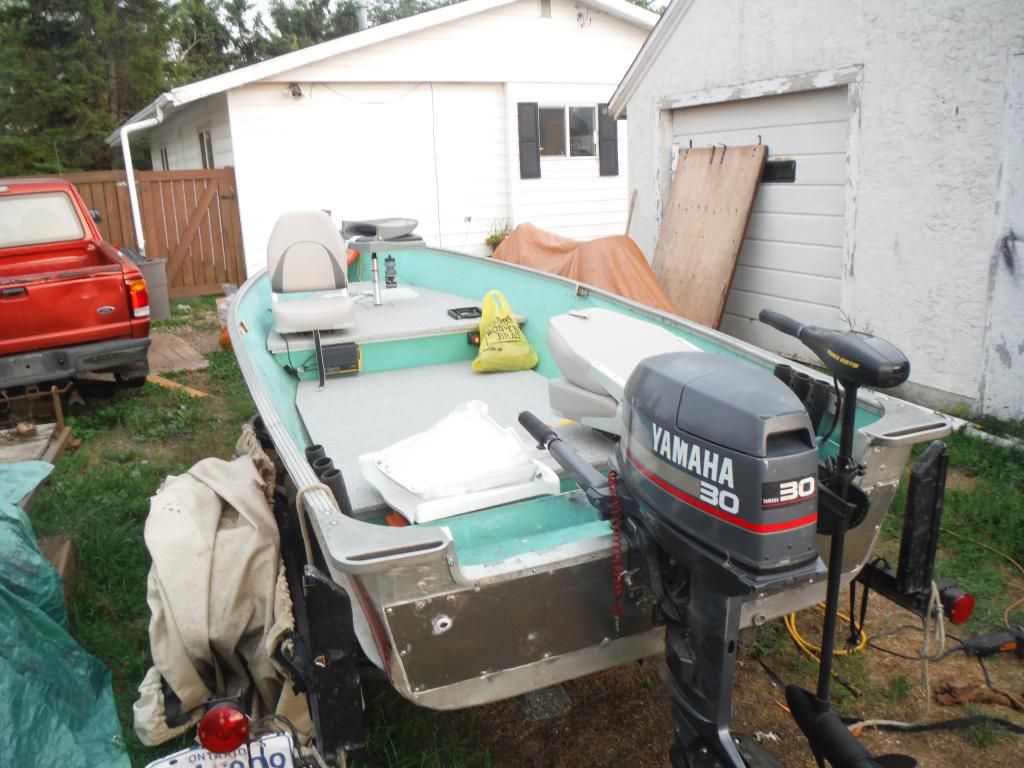
Then it was just mounting the outboard, and the boat was ready for water.
Here's the back story on the boat. It's a 16', Canadian made Naden aluminum boat that my parents bought when I was only a year old. It was originally a side console model, but that has long been removed and sold off, turning the boat into a tiller only model. The upside to that, is it doesn't have the usual center bench, which gives it a nice open floor space. The boat doesn't leak, but it needed some major work in the near future, so my parents gave it to me last summer, when they upgraded to a new Lund Fury. I was super happy to get the boat, even in that condition, as I've fished my entire life out of it, and have caught countless thousands of walleye and pike out of it over the years.
The main things the boat needed were new a new floor and benches, as the wood had dry rotted, and this caused everything to sag, which cracked and broke a half dozen mounting brackets for the benches, and deformed all the floor stringers. The boat also needed a new transom core, so that was going to require some major surgery. I decided to make some improvements along the way, with permanently mounted trolling motor batteries and charger, and a front casting deck.
I apologize in advance, I didn’t take any pictures of the boat before diving into it, and in retrospect, didn’t take many decent pictures of the repairs I had to do on the inside.
First I stripped the interior out of the boat, and started taking stock of the damage.

This corner of the front bench was probably the worst part that I found.

I reinforced the sheet metal bench edges with 1" structural aluminum angle, and used small pieces of that to rebuild the cracked brackets.


I also used lengths of 2" aluminum angle to reinforce the thin, sheet metal angles that the ends of the floor sheet mount to, and lengths of 1" square aluminum tube to reinforce all the floor stringers. While the floor was out, I cut up about a dozen pool noodles to fill the gaps under the floor for extra floatation, in case I ever swamp the boa (an idea I shamelessly stole from other peoples builds on this board).

Then I turned my attention to the transom, to see how bad it really was. This is all that was left of the wood core:


Right from the factory, the old transom was just a plain 2x10 piece of lumber, with some small loose chunks of 2x4 to fill up the sides. It was all held together with plain galvanized hardware with no attempt made at the factory to try and seal the up either. I made a new core from laminating 2 sheets of 5/8" plywood together, and sealing it up with Spar Urethane. I made a full width, one piece board that went from the corner caps all the way down to the bottom.

I also made a full width doubler plate on the back, to fill and seal some of the holes that had accumulated in the boat over the years, with all the different motors that have been mounted back there. The plate is just some generic 3/16" aluminum a local supplier sheared to size for me. I'm not sure exactly what grade it is, but it isn't 6061, as I didn't feel is necessary to spend the extra $$ for the added strength.

I framed in the area from the front deck forward, to create my casting deck. I also mounted a pair of deep cycle batteries, wired them through a selector/shut off switch, to the back for my electric trolling motor, and mounted a 2-bank, onboard battery charger.


I had to laminate two more sheets of 3/8" plywood together to make the front deck, as it was 4 1/2' by 5', and a standard sheet of plywood is only 4' wide. Once that was glued up, it, the floor and the back bench were sealed with Spar Urethane and wrapped in Nautolex, marine vinyl flooring

Once that was done, I cut the hole for my front deck hatch, and started mounting my seats.


Then it was just mounting the outboard, and the boat was ready for water.


 Enjoy!