
lbursell
Well-known member
Well, here's my second attempt to post pics. Guess my first try is floating out there somewhere in cyberspace. Anyway, here's another try. Hope it works and I don't crash the site. [-o<
Got this idea from BassBoy 1 and after stumbling across an old walker at an estate sale, figured I would be needing one pretty soon. (Motor stand, not a walker, yet.) Got the walker for a whole buck. I think they were just happy to have somebody haul it off for them. Wal-Mart supplied the plastic casters for less than 3 dollars each. Had some other scrap stuff laying around from other projects around the house, so the whole motor stand comes in for less than 12 bucks.


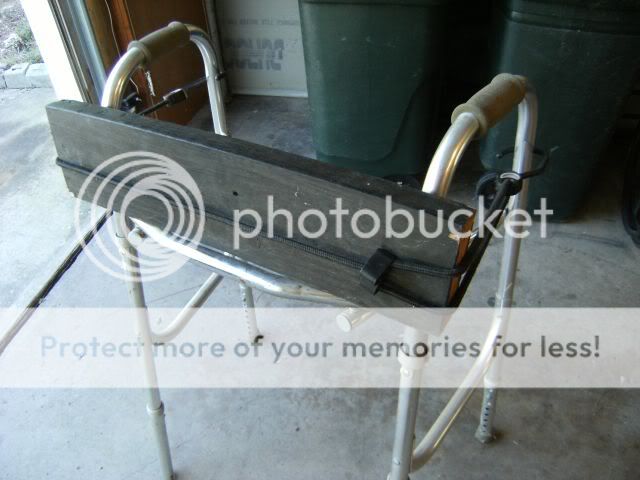
Scrap piece of 2 X 6 pulled out from an old patio cover because the rest of the board was starting to rot.
When you need an extra set of hands, bungee cords are the best thing since sliced bread.

Upside down, to mark locations for drilling holes.

Couple of lag bolts and washers from the scrap bucket.
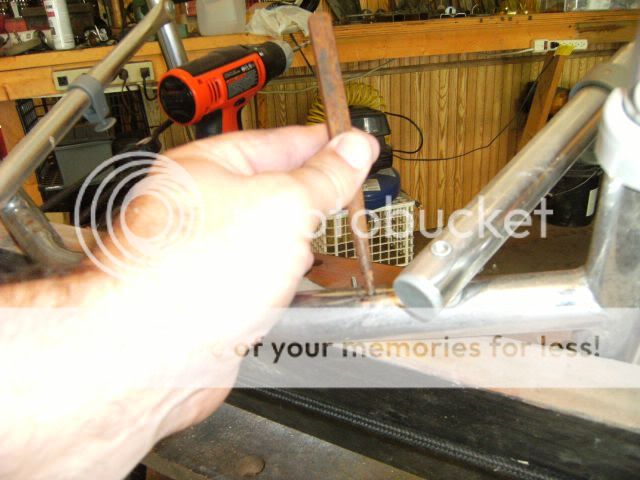
Hammer and nail set to tap a dimple where you want to drill your holes so the drill bit doesn't slip.
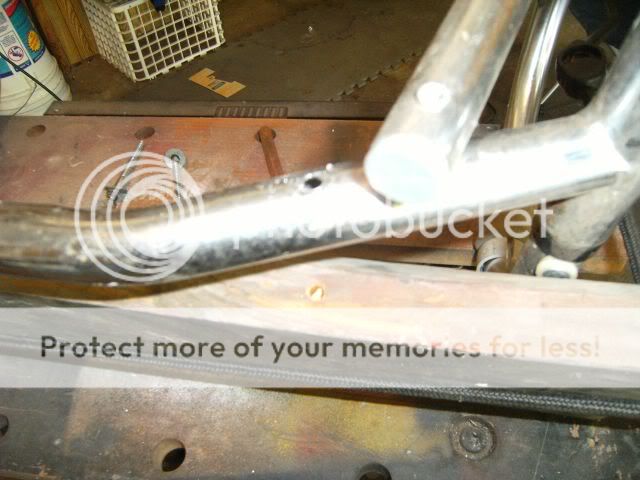
Hole through the frame and into the wood to keep everything lined up.
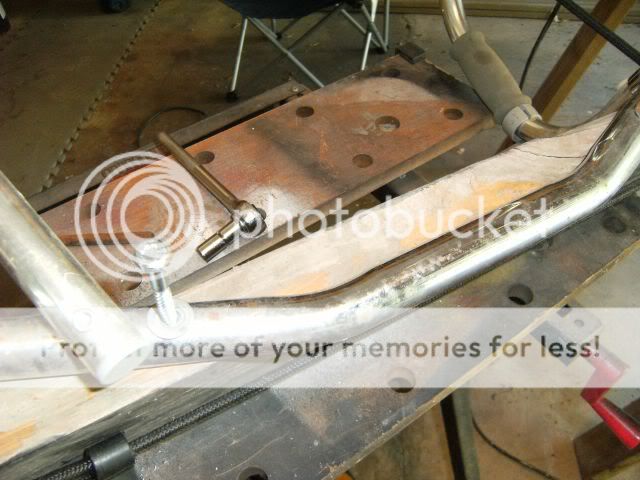
Lag bolts and washers to attach the frame to the wooden motor mount. The washers keep the aluminum frame from collapsing.

Bottom view of the well worn walker. Don't think they ever heard about the tennis ball trick. Removed all of the rubber feet.
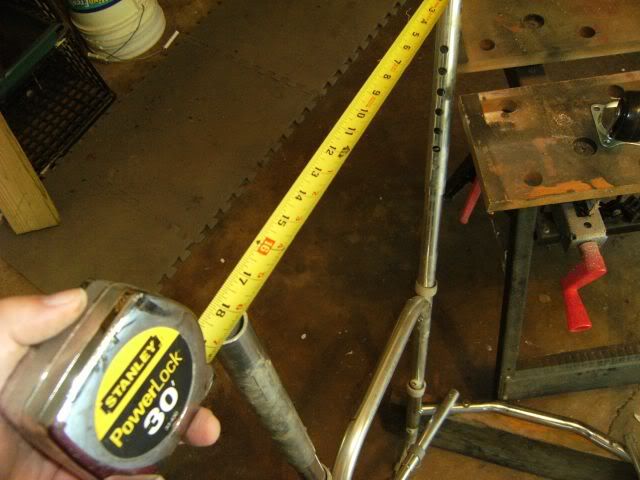
Measure from front leg to back leg to get the length of the base.

Another piece of scrap from an old door frame. All the nails and caulking were removed, of course.

Transfer measurement to scrap door frame and cut two equal lengths.

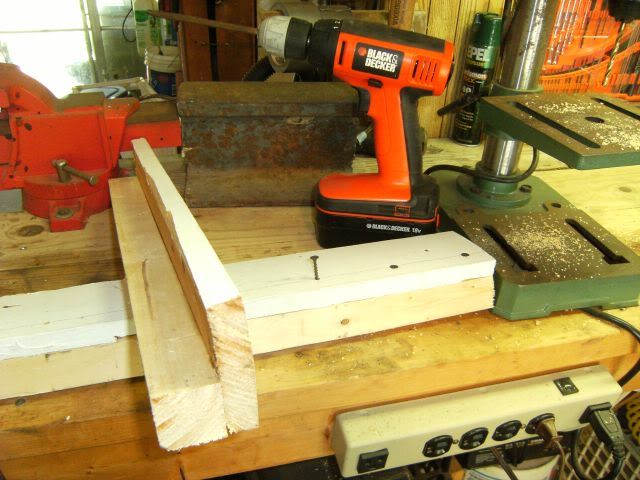
Another piece of scrap 2 X 2 to be attached to each of the door frame pieces.

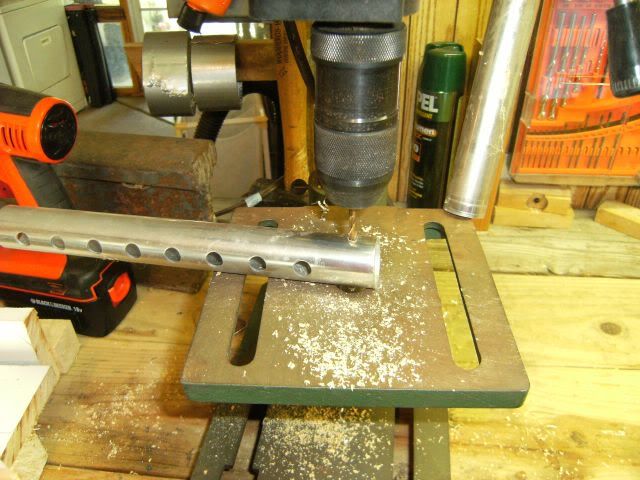
Pre-drilling holes to attach the 2 X 2's to the door frame. Note the pencil line to keep the holes all in a line. I may have gotten into a little bit of overkill in my hole spacing.
Attaching the two pieces of the motorstand bases.
The bottom portion of the walker legs are removable. Drill a hole approximately one inch from the bottom to attach the legs to the base.
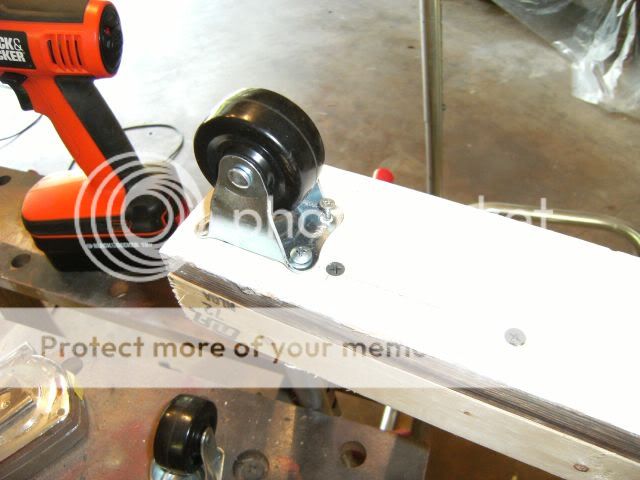
Plastic casters from Wal-Mart. I didn't like the way it rolled around with the fixed casters, so I replaced them with swivel casters on all four corners. Much better for moving around now.

Legs attached to the base and squared up on the floor.
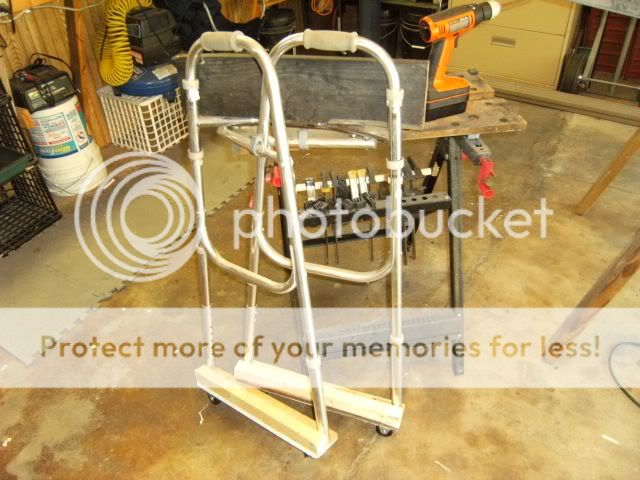
Every thing assembled and folded up.
There you have it. Besides holding up the motor, one of the best things about this idea is that when you're not using it, it folds mostly up and can be put out of the way. Thanks again to BassBoy 1 for the inspiration.
Got this idea from BassBoy 1 and after stumbling across an old walker at an estate sale, figured I would be needing one pretty soon. (Motor stand, not a walker, yet.) Got the walker for a whole buck. I think they were just happy to have somebody haul it off for them. Wal-Mart supplied the plastic casters for less than 3 dollars each. Had some other scrap stuff laying around from other projects around the house, so the whole motor stand comes in for less than 12 bucks.
Scrap piece of 2 X 6 pulled out from an old patio cover because the rest of the board was starting to rot.
When you need an extra set of hands, bungee cords are the best thing since sliced bread.
Upside down, to mark locations for drilling holes.
Couple of lag bolts and washers from the scrap bucket.
Hammer and nail set to tap a dimple where you want to drill your holes so the drill bit doesn't slip.
Hole through the frame and into the wood to keep everything lined up.
Lag bolts and washers to attach the frame to the wooden motor mount. The washers keep the aluminum frame from collapsing.
Bottom view of the well worn walker. Don't think they ever heard about the tennis ball trick. Removed all of the rubber feet.
Measure from front leg to back leg to get the length of the base.
Another piece of scrap from an old door frame. All the nails and caulking were removed, of course.
Transfer measurement to scrap door frame and cut two equal lengths.
Another piece of scrap 2 X 2 to be attached to each of the door frame pieces.
Pre-drilling holes to attach the 2 X 2's to the door frame. Note the pencil line to keep the holes all in a line. I may have gotten into a little bit of overkill in my hole spacing.
Attaching the two pieces of the motorstand bases.
The bottom portion of the walker legs are removable. Drill a hole approximately one inch from the bottom to attach the legs to the base.
Plastic casters from Wal-Mart. I didn't like the way it rolled around with the fixed casters, so I replaced them with swivel casters on all four corners. Much better for moving around now.
Legs attached to the base and squared up on the floor.
Every thing assembled and folded up.
There you have it. Besides holding up the motor, one of the best things about this idea is that when you're not using it, it folds mostly up and can be put out of the way. Thanks again to BassBoy 1 for the inspiration.

")