Floor Templating

TinBoats.net

Help Support TinBoats.net:

This site may earn a commission from merchant affiliate links, including eBay, Amazon, and others.

BigTerp

Well-known member
TinBoats Supporter
Joined
Jun 20, 2012
Messages
2,062
Reaction score
0
Location
Falling Waters, WV
My next order of business in my build is to get the floor and front deck framed out and my aluminum sheet cut. What have you guys done to template out the floor? I have a bunch of cardboard I've been collecting from work that I plan to use to template out my floor this coming weekend. Would this be a better approach than say measuring my dimensions and cutting my aluminum based off of that? My floor will be one large rectangular piece extending the entire width of the boat. But I need to cut my aluminum so it fits around the ribs that extend up the gunwale. This is why I'm thinking a template would be the best way to figure out my dimensions.

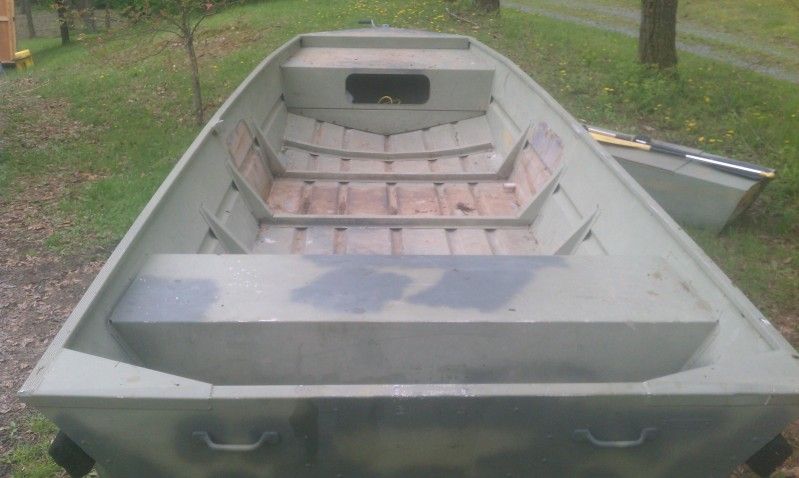
Here is what I'm working with.

My floor will extend all the way to the farthest rib towards the bow in this picture (the one that doesn't extend up the gunwale). From that rib fore I'll be adding a small extension to my bow deck.
IMAG0747_zps8000adb2.jpg


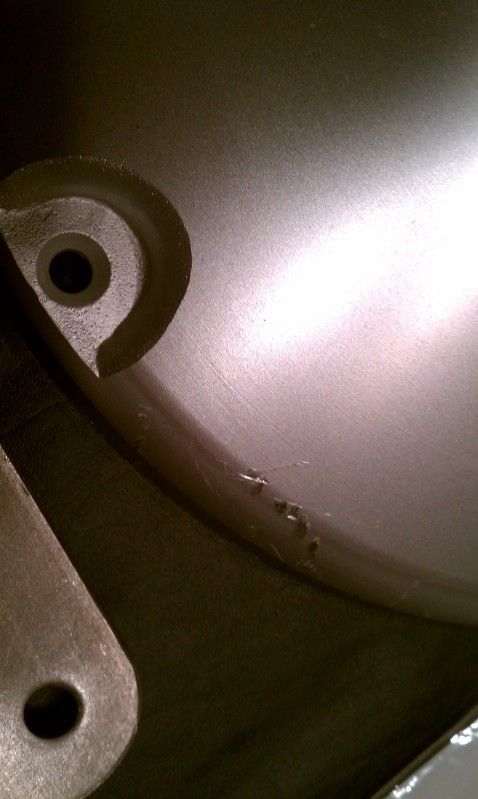
My floor will butt up against the rear bench. The rib right before the rear bench sits about 1-2" in front of the bench. I'm thinking of cutting a piece of foam board to fit in between the rib and the bench to prevent my aluminum from creasing/bending. Would like to put a piece of angle in there, but there isn't enough room to use a rivet tool. Is foam the best way to provde support in that small area?
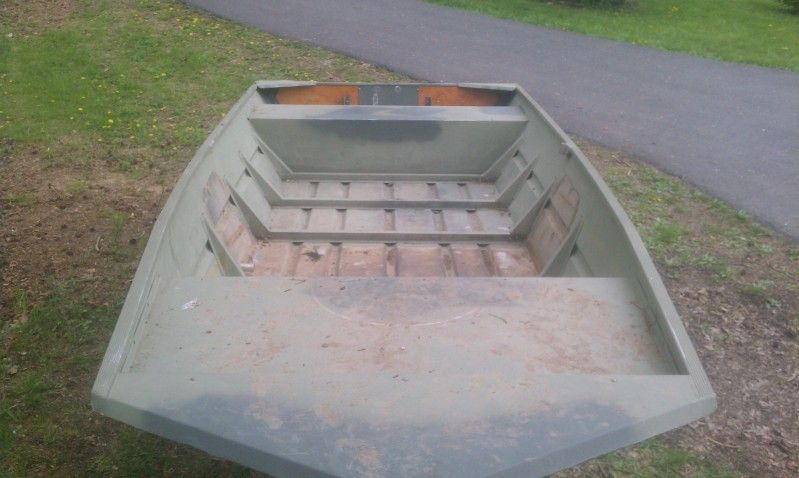
IMAG0748_zps42425e8a.jpg
 
the easiest way would be to find some cardboard and duct-tape it together to get a good template you can lay onto your aluminum.

Foam can work well for support, it dries hard and also provides floatation
 
1)get a piece of cardboard as long as the floor you want & wide enough to sit on top of the rails sticking out past them at least an inch.

2)trace the shape hull onto the cardboard by running your pencil down the outside of the rails

3)cut the cardboard in 1/2 lengthwise

4)put the 2 pieces inside the hull where you want the floor, slipping them over top of each other to get the correct width

5)tape them together

6)trace this shape onto your floor material & cut it out

:mrgreen:


after having cut out the notches for my floor. i will say that it takes a LOT of cutting & fitting, fitting & cutting, then cutting & fitting, fitting & cutting, cursing, etc...

honestly, if I do it again, I will cut the floor to the size inside the ribs, and just put sides on the hull, then calk the seam with 5200 rather than trying to spend the time to cut out the notches for the ribs & have it not look like dog crap. mine turned out ok, but i only had to cut out 4 rib notches...
 
that's a very good point, my ole 1436 was way outta whack, i mean like almost 2 inches. i had to open up all 4 of my notches about 1/2" bigger than the rib, when i actually wanted it to fit tight to the rib. this was because i counted on it being relatively square when i started cutting & i didn't cut one notch at a time. big mistake!
 
Thanks for the replies!! Mine seems pretty square, at least the portion where my floor is going. Good point though, and reinforces my thought of having one complete template to work from.

I have a ton of cardboard from work. What I planned to do was use smaller pieces of cardboard to cut around the 8 rib sections. Lay them in place and then use larger pieces of cardboard to fill in the rest of the floor. Tape everything together and that SHOULD give me one large template to use when cutting my aluminum. I'm guessing as far as cutting the notches for my ribs I should start off on the smaller side and keep cutting and fitting until everything is snug (like chevyrulz said)?

I'll be laying foam under my entire floor, which will help support the edges along the gunwale where I don't plan to have any angle. Just trying to figure out what is the best way to support that small gap between my bench and rib.
 
What did you guys use to cut the notches out of your aluminum? I have access to a circular saw, but that's not going to work to make the final cut for each notch, if that makes sense.
 
Measure and graph you ribs onto the cardboard, add an inch, then cut and fit. It's a real PITA to cut the full sheet of cardboard in the boat.

Ask yourself how you are going to support the outer edges between the ribs and how you are going to hold the metal down. I welded angled metal at the corners for my bottom and sides to rest against. I added a couple sheets of rigid foam between the ribs to help make up for my missing rear seat.
 
[url=https://www.tinboats.net/forum/viewtopic.php?p=321946#p321946 said:
Ranchero50 » 22 minutes ago[/url]"]Measure and graph you ribs onto the cardboard, add an inch, then cut and fit. It's a real PITA to cut the full sheet of cardboard in the boat.

Ask yourself how you are going to support the outer edges between the ribs and how you are going to hold the metal down. I welded angled metal at the corners for my bottom and sides to rest against. I added a couple sheets of rigid foam between the ribs to help make up for my missing rear seat.

Thanks Jaime. I'm going to run foam under the entire floor which will run all the way to the gunwale to support the outer edges of my aluminum between the ribs. I was originally going to rivet a piece of angle between each rib, but the gunwale has to much of an angle and it wouldn't even be close to square. I'll also be adding a few pieces of angle between each rib for my floor to rest on. I'll be using blind rivets to attach my floor to the angle and ribs.

By bubby is letting me borrow his jigsaw with a metal cutting blade. Hopefully that'll work ok for cutting out the notches in my aluminum for the ribs.
 
for the notches, use an angle grinder

i thought the jig saw would be the ticket, but after 3 blades only got me 3" into my 4' cut, i realized it wasn't. these were bosch blades too (not cheap)

i did use the jig saw here & there to clean some things up, but i did 95% of mine using my tile work tool, the makita angle grinder. things speeded up once i discovered diablo metal cutting wheels @ home depot.

the diablo ones are thinner than the dewalt & other brand ones from lowes or harbor freight, so they cut faster, although they do wear out a little quicker & are a little easier to break. many a metal worker has ended up w/ metal cutting blades in their face or chest, so be careful man. go slow, keep your vitals to the left or right of the wheel, inspect the blade for notches or cracks, if it's not wearing evenly or gets damaged because you cut to fast or twisted it or it hopped or something, it can explode, throwing shrapnel pieces of the cutoff wheel material. obviously, wear your safety glasses. i went through about 10 or 15 cut off wheels on my build without incident, just be mindful of the danger & you'll be fine

in my build i cut all my hatch doors, notches, & length/width cuts using my angle grinder. i am told you can use a cabinet blade on a circular saw, but i didn't wanna buy a $40+ blade just to make a couple cuts i can make almost as straight using $5 in angle grinder blades

my 1/4" thick diamond plate didn't need support on the sides, the span from rib to rib is short enough that there's minimal flex. i did have to support the front & back though, for that i 5200'd & self tapped a wooden ledger to the benches. i 5200'd the wood to the floor & sides as well. & before i 5200'd it, i ground off the factory paint so it was scuffed up bare aluminum that the 5200 was adhering to. that wood ain't goin nowhere! otherwise, under my floor there is no foam or anything. only the factory ribs, i didn't feel it necessary to put struts in the middle connecting the ribs, the floor is solid too, not bouncy or saggy. my diamond plate is pretty stout tho, it's 1/4" thick & military grade, it came from a military base tear out. i swear i've never cut any aluminum that was this hard, it was like cutting steel
 
Thanks Chevy!! I planned to use the jigsaw and cleanup with an angle grinder. I'll take your advice and start with the grinder. I have .125" aluminum, so hopefully it will go smoothly. I've worked a bit with an angle grinder, but those things do scare me a little. I'll give the diablo wheels a try.
 
no prob man, i was scared to death of my angle grinder & my chainsaw the first few times i used them. i still respect them, but i'm confident in them now after some experience.

i just try to keep in the back of my head the whole time i'm using them, the fact that they'll cut through me, a hell of a lot faster than they cut through wood, stone, & metal. slow & steady, don't rush, & don't work tired with dangerous tools


another tip i picked up doing mine. at first, i was cutting w/ the angle grinder, then trying to clean up the cuts with the angle grinder using the grinding stone, then finishing smoothing the cut w/ a hand file. but i found, that if i just go straight from the rough cut w/ the diablo cut-off wheel, to the hand file, it is much faster overall & gives a much smoother final result & i get to skip the whole grinder stone step. the grinder stone tends to hop around & remove material quick, so unless you wanna take off a bunch of material, the hand file works great on aluminum

lastly, for a cut, i mark it w/ sharpie, score the sharpie line with the grinder cut off wheel to get a guide trench, then proceed to cut on through the material. i was scoring it about 1/3 through the plate before plunging through to make the actual cuts. it seemed to be easier to follow my marks if i score it 1st
 
I may be missing something...and I am really a novice at most of this...been struggling with my own rebuild...

but you said there was a small space between the rib just in front of the rear bench but there was not enough room to use a rivet tool to attach a peice of angled aluminum.

I apoligize if this seems elementary...but why don't you turn the aluminum over...with the angled peice attaching to the rear bench pointing up, thus allowing the aluminum decking to rest on the angled peice?
 
Thanks again Chevy!! The advice has got me much more confident in tackling this than before. I'll practice by hacking up a few pieces of angle with the grinder first (have some to cut anyway) before I tackle a $150 piece of aluminum sheet Hopefully I can at least get my template done and floor cutout this weekend.

Good idea on the angle. For some reason that never crossed my mind :oops: I guess I was thining about making everything flush with the bench?? There will be less than 1" of angle showing above the floor on the bench, which I can live with. It'll get painted along with the floor/bench anyway.
 
Hmm, 1/8" sheet over a 18" span you may not need any extra support other than some built up 1" rigid foam under it. Cut some 1" wide strips of foam to figure out your final spacer thickness, then use silicone to make a foam sheet metal laminate and screw the sheet to the ribs 10" OC. Put a bead of silicone on the rib and let it dry to minimize vibrations and you should be good to go and able to pop the floor out when you poke a hole in it.

I have .100 on some of my floor and it doesn't give noticeably with a 12" framing gap.
 
Thanks Jamie!! I already have my angle, and ordered enough for floor supports, so I'll go ahead and add 1-2 supports between the ribs just because. I'm also pretty rough on things during hunting season by getting in and out of the boat alot weighed down with hunting gear and heavy waders. So the extra support may be a good thing. Going to make a sort of square with some of the angle to give most of my screws something extra to bite into when I install my captains seat. Not sure what the best way is to install my pedestal? Any suggestions on what type of screws to use when I install my captains seat?

Here is the adjustable pedestal I'm using for my captains seat. It will be installed towards the bow deck for a stick steering setup. Has a 12" diameter base. Only have 1-1/4" of space below deck. Trying to figure out the best way to install this pedestal.
IMAG0802_zpsf9b05855.jpg

IMAG0804_zps09e70d8f.jpg


It is 1-1/4" from the top of my ribs to the hull. I'm planning to using foam board from Lowes under my floor. I'll need sheets of 3/4" and 1/2", which they have. They don't carry 1-1/4" though.
 
[url=https://www.tinboats.net/forum/viewtopic.php?p=322060#p322060 said:
BigTerp » 30 minutes ago[/url]"]Not sure what the best way is to install my pedestal? Any suggestions on what type of screws to use when I install my captains seat?
I wouldn't use screws, I would through bolt it with stainless hardware using nyloc nuts.
 
[url=https://www.tinboats.net/forum/viewtopic.php?p=322071#p322071 said:
chevyrulz » Today, 9:37 am[/url]"]
[url=https://www.tinboats.net/forum/viewtopic.php?p=322060#p322060 said:
BigTerp » 30 minutes ago[/url]"]Not sure what the best way is to install my pedestal? Any suggestions on what type of screws to use when I install my captains seat?
I wouldn't use screws, I would through bolt it with stainless hardware using nyloc nuts.

My problem with this is being able to get under my floor to use bolts and nuts. This pedestal will be permanetly installed on my floor. Getting access below deck to secure my hardware is where I'm running into problems. I want to be able to attach the base not only to the sheet, but also to some angle and possible a rib for extra support. Maybe bolting it directly to my sheet will be plenty sturdy? If so, I can just bolt the base to my sheet before I rivet down the floor.
 
[url=https://www.tinboats.net/forum/viewtopic.php?p=322090#p322090 said:
BigTerp » 23 minutes ago[/url]"]I can just bolt the base to my sheet before I rivet down the floor.
that's how i'd do it

if you feel like you need extra strength, looking at your pedestal's bolt pattern, i see that you can add 1, 2, or 3 sticks of angle underneath that base & have it line up w/ the holes

i think it will be fine without angle under it, if you locate it over a rib so that the rib doesn't sit below a bolt hole. by that, i mean have a rib just in front of or just behind the center of the pedestal. since you won't be able to access the hardware, i'd make sure to use stainless hardware & nylocs & check the torque before installing the floor. ideally, mount the hardware with the nuts on the top side & then have some1 tack weld the bolts in place before you install the floor so you'd be able to remove & reinstall the base if necessary.

if you don't weld the bolts in, you can always just cut the bolts off from the top & remove the pedestall, but then you won't be able to reinstall the pedestal without pulling the floor.

o yea, & use some big washers on the bottom between the bolt head & the bottom of the floor, that's cheap insurance
 
That all makes sense. Now that I'm thinking about it, I should have plenty of .125" sheet leftover. What I might do is cut a 12" x 12" square piece to put below the floor and bolt my base thru the floor and then thru the extra piece. That should sturdy it up a bit.

I'm going to blind rivet my floor to the ribs and angle supports I'll be installing. Should be plenty easy to pull the floor if I need to get my pedestal out.
 

Latest posts

Top