HELP:new gear oil leaking out of prop.

TinBoats.net

Help Support TinBoats.net:

This site may earn a commission from merchant affiliate links, including eBay, Amazon, and others.

dbelanger24

Member
Joined
Aug 10, 2013
Messages
22
Reaction score
0
Location
Maine
hey guys! new member and new boat owner here so bear with me!

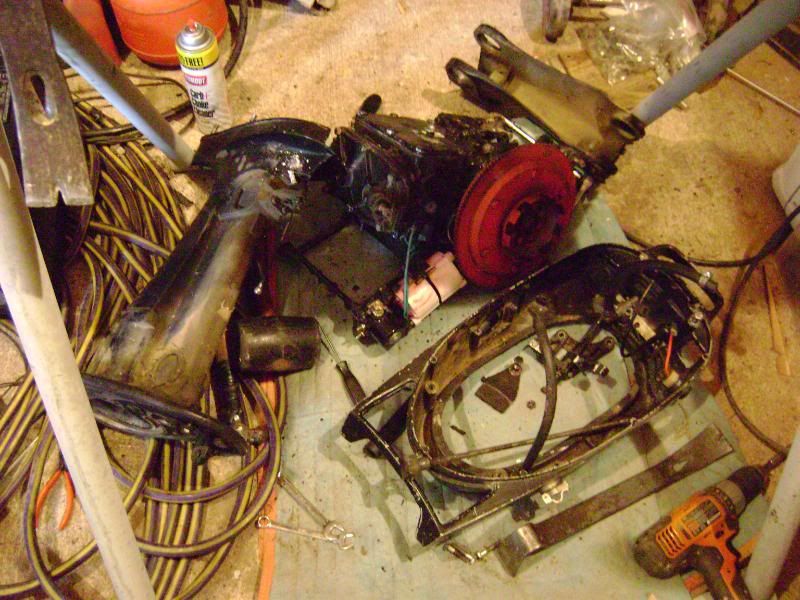
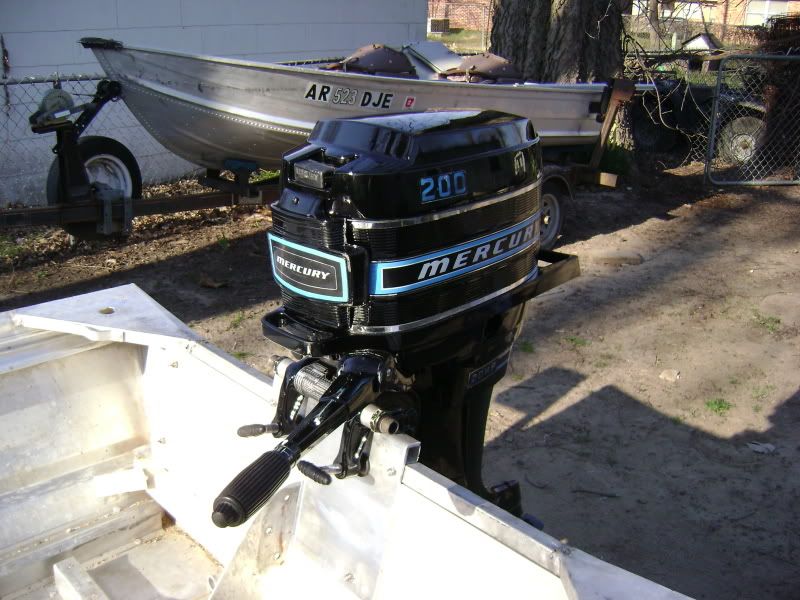
while I'm waiting for my parts for the recoil to come in I decided to change the plugs and the gear oil in my mercury model 200 20h.p. today.

I knew I had a small leak of oil coming from the prop all winter. Just thought it was a small leak. Finally got the boat going and didn't bother checking it until today (I only ran the boat for maybe and hour this year, until the pull string and recoil broke in the middle of the lake). I knew I had to check the oil but it was just one of those things I kept putting off.

I began by removing the bottom screw and found nothing but water coming out NOT GOOD. Removed the top to vent it and got a TINY bit of oil to run down into the pan. guess that's what I get for not checking it!

I put the bottom screw back in and began putting new oil in (which I did from the top screw because it threaded onto the oil tube) I pumped 8 ounces in (calls for 8.2) and watched all of it either pour out of the prop or out of the vents (not sure exactly what they are since this is my first motor) I assume these vents are for letting water in to cool the oil which is cooling the gearing. these vents are just forward of the prop and there's 6 of them on each side of the lower unit.

my best guess is that I should have put the oil in the bottom screw and seen if the oil would have came out of the far left (smaller screw)

Of corse I figure I need a new seal in the lower unit housing that's a given. But I cannot figure out why the oil is coming out of those ports. doesn't make any sense.
 

Attachments

  • IMAG0561.jpg
    IMAG0561.jpg
    522.3 KB · Views: 658
  • IMAG0564.jpg
    IMAG0564.jpg
    669.3 KB · Views: 658
  • IMAG0563.jpg
    IMAG0563.jpg
    818.4 KB · Views: 658
not familiar with mercury outboards but im 90% sure the 6 holes on each side of the lower are the water intakes wich cool your engine and have nothing to do with cooling the lube that's in the lower unit. and if its like a Johnson or evinrude you fill the lower unit with lube from the bottom hole with the plug removed from the top hole and when its full the lube will start to come out of the top hole at wich point you will stop squeezing the lube in the bottom hole but keep your lube tube in the bottom hole and put the top plug back in and then with your free hand have the bottom plug ready so you can remove the tube and put the bottom plug in quickly. by putting that top plug in with the tube still in the bottom hole you have time after removing your fill tube because the top hole don't let air in creating a vaccum affect. youll lose a drop or two putting the bottom one back in but without the top being in you will loose too much replacing the bottom plug and not have the amount needed. I think that far left screw is what holds the yoke and cradle wich controls the shifting of forward,reverse and neutral gears....but like I said above im not familiar with mercs but I cant imagine theyre much different than OMC's post what ya find out because im curious now.... you could go to marineengines website and look up your motors parts diagram and find out what they are for sure.........post your findings as im curious now lol! good luck


just looked at the pics again.......I don't think that screw to the left of the top plug is for the yoke and cradle, its up too high above the lower gears....
 
Pic 1, If you look down in that hole you will see a socket head bolt. I don't remember what size allen wrench fits it, but once you unscrew it, a small plate on the bottom side of the cavitation plate will drop and reveal one of the rear bolts that connects the lower unit to the drive shaft housing. There are 2 bolts and 1 nut that need to be removed to drop the lower unit.

Pic 2, The 6 holes on each side of the lower unit are the holes where water enters the motor and is picked up by the water pump for cooling the motor.

Pic 3, The large black plastic screw is a flush port and has nothing to do with oil for the lower unit. If you put oil in that hole it's going to run out as fast as you put it in. The small stainless screw just below and left of the flush screw is the upper hole used for checking and filling the oil in the lower unit.

I sold my 1975 Merc 200 earlier this summer when I upgraded to a 25hp Mariner. My 200 was in pieces when I received it so I took it the rest of the way apart.

DSC00226.jpg


I went through it from top to bottom, converted it from remote to tiller steer and added electric start. Then I gave it a paint job and put it all back together

db896448.jpg


I think I still have a manual for it here somewhere, so if you have any questions about it you can PM me if you like.
 
ok so that's what I figured, I put the oil where it doesn't belong. that oil should run right out when I run it in gear in the water correct? I don't see any reason why it would hurt it. usually I just look up parts diagrams for these kinds of things but marineengiine.com doesn't have anything from the lower cowling to the prop. thanks for the help! I ordered the oil seals and o rings for the lower unit last night! should be done this week.

[url=https://www.tinboats.net/forum/viewtopic.php?p=325848#p325848 said:
JMichael » 13 Aug 2013, 08:17[/url]"]Pic 1, If you look down in that hole you will see a socket head bolt. I don't remember what size allen wrench fits it, but once you unscrew it, a small plate on the bottom side of the cavitation plate will drop and reveal one of the rear bolts that connects the lower unit to the drive shaft housing. There are 2 bolts and 1 nut that need to be removed to drop the lower unit.

Pic 2, The 6 holes on each side of the lower unit are the holes where water enters the motor and is picked up by the water pump for cooling the motor.

Pic 3, The large black plastic screw is a flush port and has nothing to do with oil for the lower unit. If you put oil in that hole it's going to run out as fast as you put it in. The small stainless screw just below and left of the flush screw is the upper hole used for checking and filling the oil in the lower unit.

I sold my 1975 Merc 200 earlier this summer when I upgraded to a 25hp Mariner. My 200 was in pieces when I received it so I took it the rest of the way apart.

DSC00226.jpg


I went through it from top to bottom, converted it from remote to tiller steer and added electric start. Then I gave it a paint job and put it all back together

db896448.jpg


I think I still have a manual for it here somewhere, so if you have any questions about it you can PM me if you like.
 
oh and since you've worked on the same motor as mine.... if you did a compression test could you tell me what's normal or "good" for compression in this motor? I don't have the service manual yet

[url=https://www.tinboats.net/forum/viewtopic.php?p=325848#p325848 said:
JMichael » 13 Aug 2013, 08:17[/url]"]Pic 1, If you look down in that hole you will see a socket head bolt. I don't remember what size allen wrench fits it, but once you unscrew it, a small plate on the bottom side of the cavitation plate will drop and reveal one of the rear bolts that connects the lower unit to the drive shaft housing. There are 2 bolts and 1 nut that need to be removed to drop the lower unit.

Pic 2, The 6 holes on each side of the lower unit are the holes where water enters the motor and is picked up by the water pump for cooling the motor.

Pic 3, The large black plastic screw is a flush port and has nothing to do with oil for the lower unit. If you put oil in that hole it's going to run out as fast as you put it in. The small stainless screw just below and left of the flush screw is the upper hole used for checking and filling the oil in the lower unit.

I sold my 1975 Merc 200 earlier this summer when I upgraded to a 25hp Mariner. My 200 was in pieces when I received it so I took it the rest of the way apart.

DSC00226.jpg


I went through it from top to bottom, converted it from remote to tiller steer and added electric start. Then I gave it a paint job and put it all back together

db896448.jpg


I think I still have a manual for it here somewhere, so if you have any questions about it you can PM me if you like.
 
No, the oil you put in the wrong hole will not hurt it and it will wash out with use or just continue to drip/drain on it's own as it sits there. As stated by someone else you need to remove both of the stainless screws to drain the oil in the lower unit or to add new oil. Any time you add new oil, you want to add it in the lower screw hole until it starts to run out the top hole.

If I remember correctly, mine had 105 psi compression on both cylinders. Be sure you have both plugs removed and the throttle held wide open when you do your compression check.
 
the threads on the tube do not thread into the bottom screw...I loose a lot of oil just trying to get it in.

[url=https://www.tinboats.net/forum/viewtopic.php?p=325848#p325848 said:
JMichael » 13 Aug 2013, 08:17[/url]"]Pic 1, If you look down in that hole you will see a socket head bolt. I don't remember what size allen wrench fits it, but once you unscrew it, a small plate on the bottom side of the cavitation plate will drop and reveal one of the rear bolts that connects the lower unit to the drive shaft housing. There are 2 bolts and 1 nut that need to be removed to drop the lower unit.

Pic 2, The 6 holes on each side of the lower unit are the holes where water enters the motor and is picked up by the water pump for cooling the motor.

Pic 3, The large black plastic screw is a flush port and has nothing to do with oil for the lower unit. If you put oil in that hole it's going to run out as fast as you put it in. The small stainless screw just below and left of the flush screw is the upper hole used for checking and filling the oil in the lower unit.

I sold my 1975 Merc 200 earlier this summer when I upgraded to a 25hp Mariner. My 200 was in pieces when I received it so I took it the rest of the way apart.

DSC00226.jpg


I went through it from top to bottom, converted it from remote to tiller steer and added electric start. Then I gave it a paint job and put it all back together

db896448.jpg


I think I still have a manual for it here somewhere, so if you have any questions about it you can PM me if you like.
 
I never tried to use a pump or one of the screw in tips on mine. I bought the oil in a bottle that had one of those tapered plastic tips that you cut the end off of. The lower you cut the bigger the hole is. You have to be careful not to cut the tip too far down or it won't fit in the whole. Then you just press the tip into the screw hole and hold it firmly while you squeeze the bottle to force the oil in.
 

Latest posts

Top