Lowe 1436 mod and resto FINISHED NEW PICS!!!!!!

TinBoats.net

Help Support TinBoats.net:

This site may earn a commission from merchant affiliate links, including eBay, Amazon, and others.
I got the old rotted transom wood out today. I was a little nervous cutting the corner supports off but all went well and when they get welded back on it should look like they never came off. The wood just fell apart when I took it out. It was much worse than I thought. It was completely water logged and this boat has been garage kept the last couple months. I do have a question about the new transom wood though. Mine is only 8" tall and 1 1/2" thick. Would it be better to buy a 2 X 10 and rip it down to 8" to fit or is laminating plywood to get to the 1 1/2" still better? Obviously, the solid 2 X 10 would be simpler (and cheaper) but if the ply is a better route then thats how I will go. I want the strongest option and years of use.

Heres a pic of the old transom tore out.

Boat9.jpg
 
Moderaters, will you please move this to the conversions and mods forum? I dont know why I started it in the boat house. Thank you.
 
Here is a rough idea of what I want to do. This is just a rough draft and is not to scale by any means.

BoatLayout.jpg


The grey areas are the decked areas. The floors are gonna be carpeted as well. The trolling motor will be much more centered. I have a pretty good idea of what I want but I am open to any and all suggestions!!
 
Finally got the transom done and installed. After I got it built, I decided I didnt wanna see natural wood color on the areas that will be exposed when its all complete so I gave everything a coat of "Special Walnut" stain and then hit it with 3 coats of spar urethane. I cut all the original rivets out and bolted everything back together with 1/4" stainless hardware. Turned out really nice, I love the color of the wood now and it should give me many years of service. Next step is to find a weld shop so I can get it ready for paint!!

The corner supports are not welded in place yet, just put them in place for the photo.

Boat10.jpg


This piece will come back off for paint, just wanted to see it in place!!

Boat11.jpg
 
BassBlaster said:
Moderaters, will you please move this to the conversions and mods forum? I dont know why I started it in the boat house. Thank you.

Gotcha moved over BB. Sorry, I didn't catch it earlier.

Nice work on the transom. That thing looks great.
 
I LIKE YOUR CAD DRAWING WHAT SOFTWARE ARE YOU USING, I HAVE AN OLD BEAST THAT I'M GOING TO START ON AND LOOKING SOME CAD SOFTWARE TO USE FOR SET UP.
NICE JOB ON TRANSOM
 
sgtfletcher said:
I LIKE YOUR CAD DRAWING WHAT SOFTWARE ARE YOU USING, I HAVE AN OLD BEAST THAT I'M GOING TO START ON AND LOOKING SOME CAD SOFTWARE TO USE FOR SET UP.
NICE JOB ON TRANSOM
Thanks. The little drawing I did on Microsoft Paint. Pretty simple to use. I'm not familiar with the program at all and I was able to do that in about 10 or 15 minutes. Its not even close to being to scale but gives a rough idea of what I want to accomplish.
 
If you do decide on the camo pattern. Try this one and let me know how it works :) I just got my new project boat but since the wifey and I are moving, its been put on hold for a while.
You can find the free camo boat stencils here at: https://www.outdoorwriter.net/?p=361

It should look like this when you're done though. Good luck on everything, I've got the same boat, just in a little worse shape than yours. BTW, I am also the owner of OutdoorWriter.net, so try not to bad mouth my pattern too bad :)
 

Attachments

  • stencilthumb.jpg
    stencilthumb.jpg
    143.9 KB · Views: 2,178
I am about the same stage you are. Have heard good things on airplane stripper--kinda leaning that way. Has anyone used it and does the power washer help? Can you buy it at a retail store or online only? Little man looks ready to go fishing now!
 
mdhall said:
BTW, I am also the owner of OutdoorWriter.net, so try not to bad mouth my pattern too bad :)
No bad mouthing here, I like it. The pattern I chose is very similar but I havnt ordered the stencils yet. I may just go with yours. What do you call your pattern? Thanks for the link!!
 
I been wirewheelin like crazy! I wish I would have went the same route as you. Much less work!!!
 
So, here we are a year later and my boat still looks exactly like the last pics I posted. Been really busy with the new baby and all. Ive jumped back into my little boat project with both feet though.

Just ordered my steelflex and have purchased most of the primer and paint that I'll need. I took the boat to work in March because there was a TIG welder there for awhile and a buddy said he would get my welding done for me. Well, it sat there for three months and no one touched it except for someone to run into my trailer. I finally got fed up and brought it back home. Now I have to redo one of my fenders on my trailer. I located a local guy that welds on boats in his spare time and I will be dropping the boat off to him in the next couple days.

Just wanted to give an update and get my thread back to the front page so I can start adding new pics (hopefully in the next week or so).

I do have a couple new questions though...

First, since I sandblasted the boat and its been setting as bare aluminum for a year, is there anything I need to do pryer to priming and painting besides cleaning? I have read that aluminum in raw form starts to oxidize almost imediately even if you cant see it.

Also, if you are familiar with member Dixie Boyles build, I am really loving the openess of his rig. I have allready removed the front mini deck/bench that comes stock and it will be replaced with a small deck/storage area. Mainly for a place to mount the TM and FF and have a bit of storage space. It will not be a fishing platform but will put the structural integrity back in the nose of the boat. What are your thoughts on removing the center bench to get the openess like in his boat? I know structural integrity is the issue but will adding a floor and covering the sides do anything structurally? For what it's worth, this is a 100% aluminum build. The only wood that will be on this boat is the transom.

Thanks guys and I'm looking forward to updating my thread and getting this little rig on the water!!
 
So I took my boat to the welder today expecting to drop it off. When I got there he said lets pull it in the building and have a look. He finished all the welding I needed done in less than 2 hours and then charged me 70 bucks. Of course I hooked him up with a nice tip for doing such a great job for such a great price!! If anyone is in need of welding in the Central OH area, I can hook you up with this guy. He is a super great guy to deal with.

Steelflex came the other day so we'll be chugging along soon!! Updated pics to come, battery is dead in camera right now.
 
Hey BB. Gonna be in Columbus next weekend for my daughters softball tourney. W ould like to check out your boat if you have time. I finished my boat last year, but that was before I found this site so I never posted it. let me know, maybe we can get together.
 
Hey there fishinmich, should have sent me a PM, I'm on everyday but havnt checked this thread casue I didnt have any updates. Sorry.

Been working on the boat all weekend.

Yesterday, I pulled it out of the garage and put it on some horses. I put 4 or 5 inches of water in it and found several leaky rivets. I marked them all and brought the boat back inside for some rebucking. After that I spent a couple hours with my grinder and a cup brush cleaning up the bottom of the boat. I sandblasted last year but it has sat bare ever since. I wanted to make sure I got all the oxidation off so I would get a good bond with the steelflex.

This morning, I woke up ready to steelflex. Ive kinda been dreading it after reading the "everything steelflex" thread front to back. That thread had me a little gun shy!! I'm here to say, that stuff isnt near as hard to work with as let on by some folks in that thread. It definately isnt the same as painting but its not bad at all. Then again the temps were around 90 today with roughly 90% humidity so I'm sure the humidity gave me a little more time to work with it than some others have experienced. I dont have any pics of the process because I was a nervous wreck and didnt want to have to deal with the camera. Also the stuff is REALLY messy and I wouldnt have touched the camera anyhow.

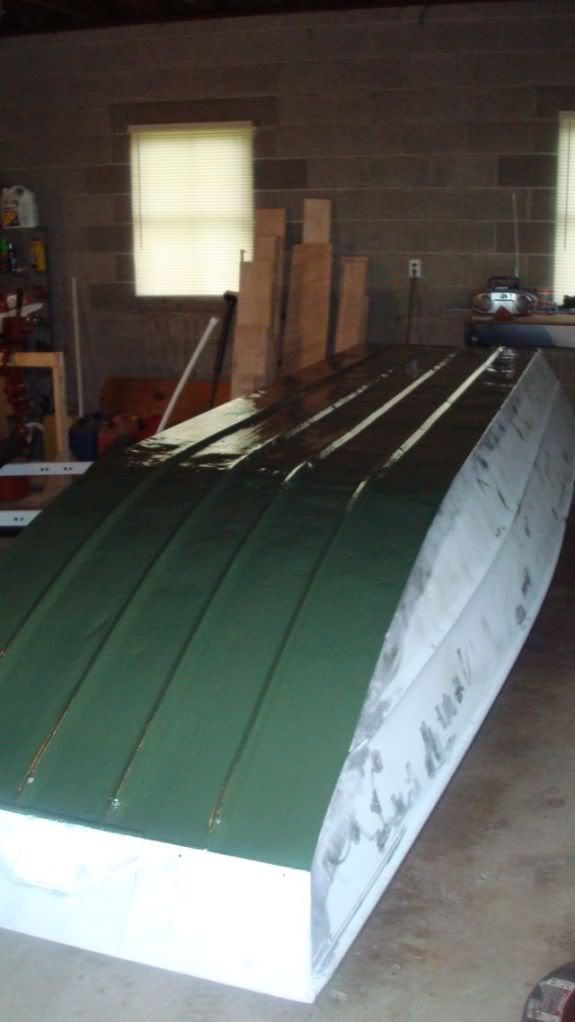
I didnt like the olive drab color that I chose after seeing it on some other rigs here. I was looking for something a little closer to what todays olive drab is. I chose to not use all of the pigment. I used a little less than half of the pigment. Its still darker than I wanted but overall, I'm happy with it. I'd call it more of a forest green than an olive drab or army green which is what I believe thier olive drab really is. Also, lots of people steelflexed thier entire boat with 2 coats and still had some left over for touchups. For the life of me, I cant figure that out. I must have gotten a little carried away with it. I only did the bottom of my boat, 2 coats and I used the entire gallon. Actually had to go back and scrape the cans to get the last little bit to finish up. I did have about a half a cup get wasted after mixing up too much at the end of the first coat. I gaurantee it not to leak!!!! LOL

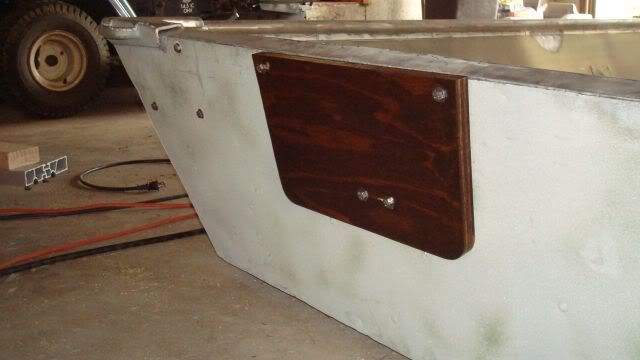
Heres the end result after finishing the steelflex...

DSC01411.jpg


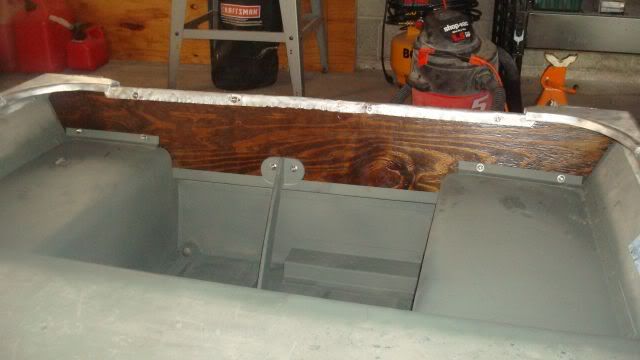
When I get the boat flipped back upright in the next day or so, I'll get pics of the welding I had done. I completely forgot about it when I had it flipped upright yesterday.

Were chugging right along now. I ordered a ton of stuff from Bass Pro that has all gotten here so I just about have everything I need to completely finish my project. Hopefully she'll be done in time for the fall Crappie bite!!!
 
Congrats on your new baby, and your boat is turning out great! Your pics-and boat name-have motivated me to take the kids out fishing today-beautiful day for it! Good luck on your mods-love the Microsoft Paint drawing.
 
So, got some more work done today. The wife had the day off so I had a free evening for a change. I usually have my kids every evening cause the wife works second shift. Its great that I get to spend so much time with my little ones but it really hurts the boat progress!!

After work today, I spent another couple hours with my grinder and cup brush, cleaning the rest of the oxidation on the areas to be painted. I also got it primed with the self etchng primer. Tomorrow, I plan to hit it lightly with some 400 grit and start laying the paint to it. It will be camo. I ordered stencils from Reelfoot Custom Camo. I'm using a pattern called "River Bottoms". Should match up pretty close to the camo seats I purchased. I'm excited to finally be making so much progress on the boat after waiting for a year to get the welding done!!

Sorry, still no pics. I ran out of daylight. I actually finished priming with the porch light, lol. I promise to take pics tomorrow of its current state and pics of each layer of the camo paint as it goes on. I havnt seen any threads really about camoing a boat so I'll take lots of pics and if my paint job turns out good, maybe I'll do a little write up.

Thanks for looking.

Oh, BTW, my birthday is Sept. 29. I have set my deadline for a complete project for the weekend following my birthday. The fall Crappie bite should just be heating up then!!! The clock is tickin'!!
 
I had the same issue with the steelflex. I have a 1438, I put 2 coats on the entire outside of the boat and I had to order an additional 2 quarts because I don't think I got it thick enough on the sides. I also used about half the pigment and ended up with a similar color. looks good!
 
Top