Weldbilt 1752 build (Finally complete)

TinBoats.net

Help Support TinBoats.net:

This site may earn a commission from merchant affiliate links, including eBay, Amazon, and others.
Update:

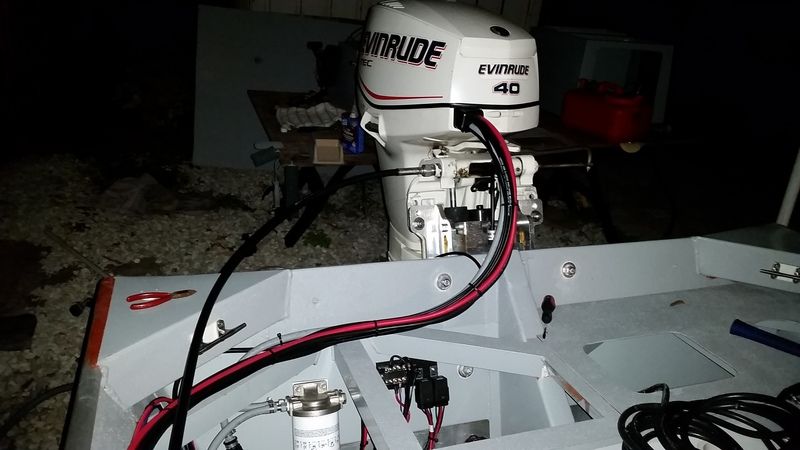
Lots has been accomplished in the last couple weeks since I checked in. Once I got the engine hung, I start d working on the rigging. I bought new shorter shift cables from Amazon, and a shorter 12' steering cable. Turns out the steering cable was too short and I had to exchange it for a 13'.

The starting battery has been relocated up front for better weight distribution, and that called for an upgrade to the existing batter cables. I purchased about 17' of 2/0 battery cable for the run. I had a heck of a time fitting it through the rigging gromet, but I made it work.


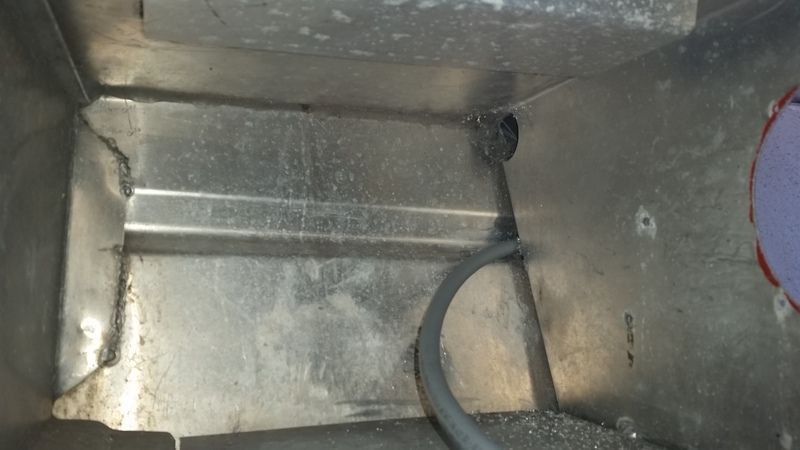
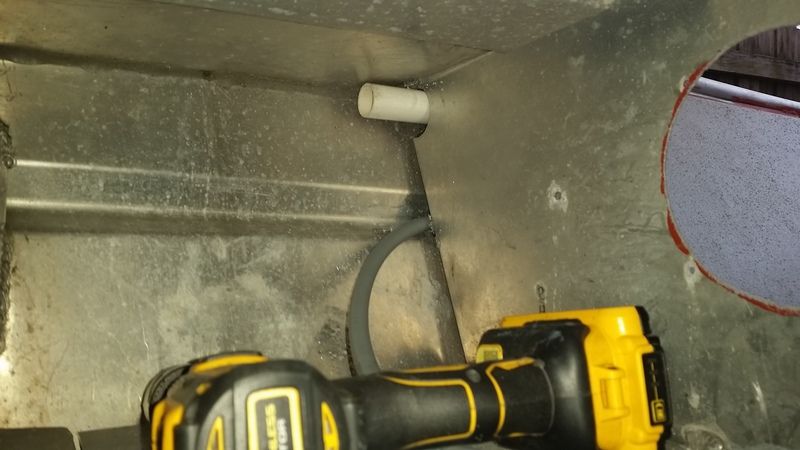
I ended up running some 2" PVC up front as a rigging tube for the starboard side. It was originally 1", but that quickly filled up.


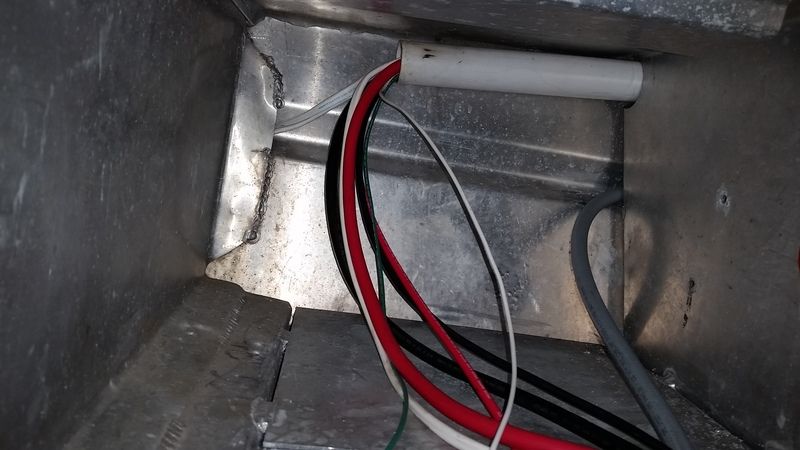
I ended up having to run two 2/0 battery cables, two 8 gauge wires for the jack plate, two 16 gauge wires for the fuel sender, and a 16/3 cable for the starboard nav light and spot light.

I also decided to relocate the primer bulb from above the rear deck, to below. This was just to make the rigging cleaner looking.


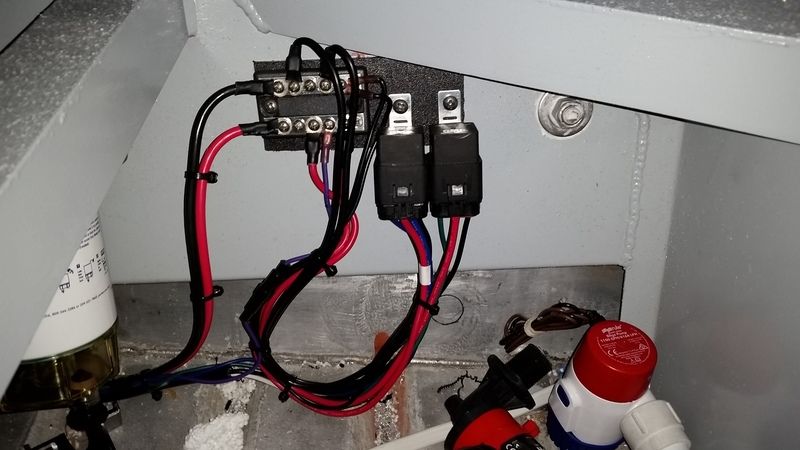
Because of the higher amperage draw from the jackplate, I decided to power it with the starting battery. This will leave the house battery to power the stereo, lights, bilge pump, livewell, and fishfinder. I had to modify the harness slightly to accommodate the longer run to the starting battery, and adding a bus bar was really helpful for connecting the 8 gauge wires, to the smaller 16 guage wires for the relay. I was disappointed in myself for mounting the bus bar so high. It didn't allow me enough room to make my ground wires look pretty...Oh well.


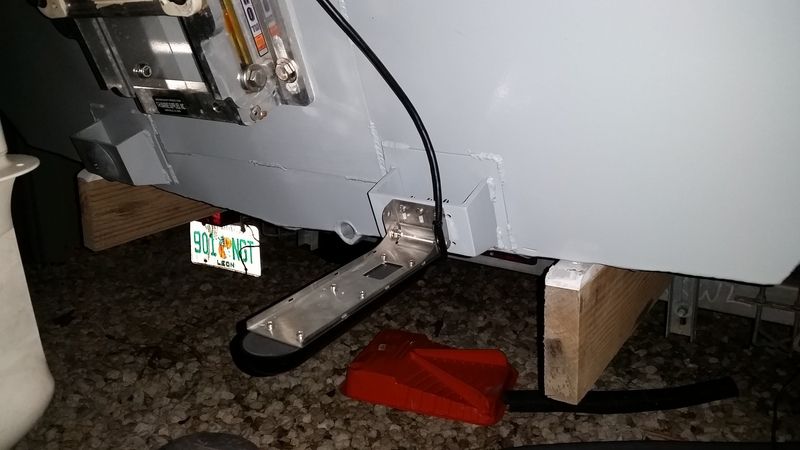
Back in November I replaced the GPS/fishfinder on my 23' Mako. I ended up getting a Lowrance Elite 7ti, and I love it. So...I'm getting rid of the Elite 7 unit I had previously on the boat, and decided it'd be much cheaper if I just buy the transducer, power cable, and mount for the Elite 7ti, then transfer the display from one boat to another. This works out perfectly, because I always remove the display and store it inside when I'm not using it. Here's a pic of the totalscan transducer mounted. It's a behemoth. On my Mako it doesn't looks so big, but on a Jon boat it looks HUGE.


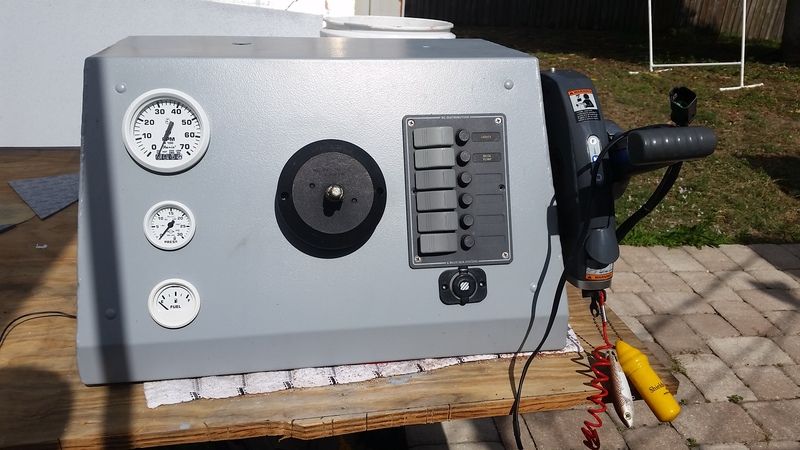
Guages are also finished. I went with the Faria Dress White series. Got the system check tach, water pressure in the middle, and fuel on the bottom.


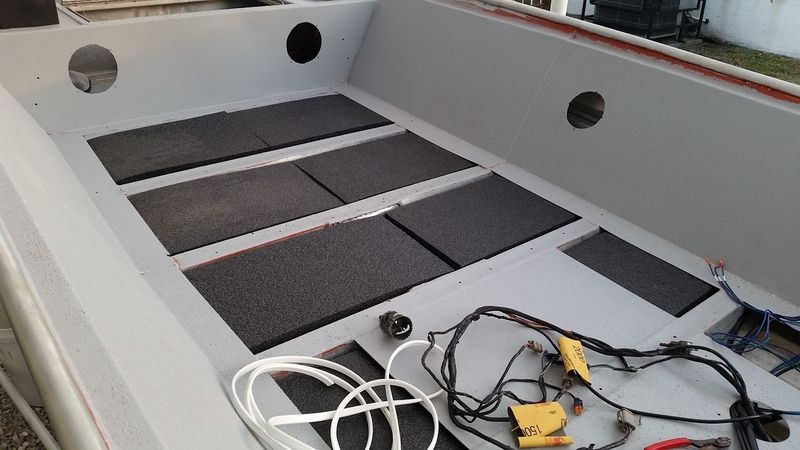
I ordered closed cell foam on eBay as advised by another member on here. I ended purchasing 10 pieces of 24" x 10" x 2". I almost fell over when I got it...I.coukdnt have cut it better if I measured. I took it out of the box and slid it right into place. No trimming or anything.


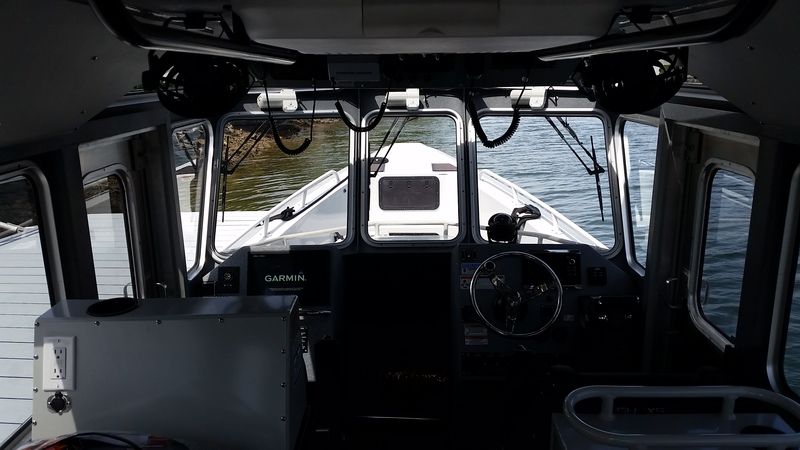
On a side note, we got a new boat in my area, so I drove down to check it out. It's a 33' 1000 Brunswick. It's strictly used for extended offshore patrol and special details. It's fully enclosed, with AC, and a generator, so the engines don't have to be operating the whole time. She carries 307 gallons of fuel!


Alright, that's it for now. Stay tuned!
 
Boat looks great. The close-up on the bottom of the motor makes the prop look damaged, could just be a shadow but you can't have a beat up prop on a beautiful build like this. Sorry about the jack plate issue, I find that the big box stores don't feel they need to keep customers happy. They should have at the very least gave you a $50 gift card for your trouble. Foam looks great, I had to manipulate mine to fit but that guy on ebay sure was a cool find. :p
 
Thanks Chuck! YES the prop is pretty damaged. 243 hours of running around the flats has taken its toll. I've been looking hard at a new 4 blade aluminum Turning Point prop. Or, I may go with a Rogue 4 blade stainless. It depends on how much money I have when im finished.

I still need to purchase a power cable and bracket for the fish finder, a Kenwood Bluetooth marine amplifier, and a pair of speakers.
 
Funny you mentioned that, i installed my speakers yesterday and I bought the power cable to my Bluetooth Marine Amplifier today. I got the Pyle amplifier not the Kenwood.

Sent from my SM-T217S using Tapatalk
 
I looked at the Pyle long and hard. Ultimately it came down to the Kenwood's bridged power...90W RMS. I haven't decided if I'm going with a single pair, or two pairs of speakers.

Anyway tonight I mounted the circuit breaker up front for the jackplate and terminated the wires.


I also mounted my underwater lights. These things are soooo bright! I'm thinking about mounting another one in the middle...Perhaps in white.


Update:

I've completed a good chuck of the wiring. Last night I ran my 6/2 cable for the trolling motor, and installed my Battery Tender trolling motor plug. I ran some 1" PVC down the port side as a rigging tube for the trolling motor wiring, as well as the wiring for the port nav light, spot light, and speakers. Running the wires was been the most difficult part besides painting. I found that doing it at night was easiest, because I could shine a light down into the holes I drilled for the nav/spot lights, then look through the other holes to see what I was doing.

This is where the port side inspection cover will be. It's dead even with the console.


From inside the front storage compartment. The other end of my rigging tube.


6/2 cable for the trolling motor. (That's 6 gauge, 2 wire)


Previously, my 8 gauge trolling motor wiring came out this hole. This is where the Battery Tender plug will go.


Back side of the plug. Heat shrink applied and a couple thick coats of plasti-dip just to be safe.


I couldn't get into that space with any of my rivet guns, so after scratching my head for 30 mins, I realized I could disconnect one arm of the rivet gun and still use it...problem solved.


All finished. It looks crooked as hell, but it's not, I promise.


And a couple pics of the nav/spotlight wiring.


Also found a new prop. It's a Turning Point 4 blade aluminum 13.5x15. picked it up from West Marine with a hundred for a cool $100.


And it probably didn't need it yet, but I replaced the anode on the lower unit...Just to be safe.
 
I just bought a 1548 from Backwoods Landing...what a bunch of great guys! They were really personable and I love the boat...great price and value compared to the others I priced. I'm looking to put a floor in my boat soon. Looks like you used 1/8 in aluminum. I'm going to try to do the same and cover it with marine vinyl to make it cooler on our feet...Awesome Job....have you got final pictures?
 
Phil I'm still working on it. I'm snagged on my livewell drain, so when I get that figured out I can lay the floor down, and wire everything up.

I used .090 for the floor to save a little weight. It seems to be rigid enough, even when it wasn't riveted down.

The guys at Backwoods are really nice to deal with. I had a SNAFU with my boat a little over a year ago. You might want to check out my thread titled ISSUES WITH MY WELBILT.
 
I'm finished wiring the front of the boat! Spot lights are mounted finally! I had been debating on whether to use the stainless brackets that came with the lights, or make my own aluminum brackets. I decided to stay with the stainless.

I used a waterproof cable gromet used for RG58 coax. It worked perfect for the light cable. Then I used a 10-24 aluminum rivnut to secure the light bracket to the bow. A stainless bolt is used to fasten the bracket, so I figured if I have issues with corrosion, the rivnut can be replaced without affecting the hull. I used a nylon 1/4" washer to insulate the stainless bracket from the aluminum rivnut, and to aid in swiveling the light if I need to aim it to the side or something.


This is just one light. Should be plenty of light with both of them lit up!


New decals came in today for the engine. They're 2014+ decals, but my engine is a 2009. Still a perfect fit. Took about an hour and a half to get them right, but MAN do they look sexy!


Thank Man! awesome posts. I am going to put a floor in mine...where did you get the materials for your floor and did you cut it with a jig saw?
 
I bought mine locally. I don't remember what I paid. But they had a break there. I just brought in my factory floor and they cut it to size. I had to take an orbital sander with 80 grit to fine tune the corners.
 
I ended up having to spray the last few little corners, nook, and crannies with Tiff Coat, but I'm finally finished. I got my custom decals and FL numbers in from Boat US. And after thinking about it, I decided to add a white underwater LED in the center of the transom.

The Alumacraft console is on order. Not sure when it be here, but my old G3 console is for sale in the classified section.


I had been thinking about how to mount the bilge pump for months. I bought aluminum stock and made several brackets, but nothing looked or functions well enough. I finally decided to 5200 the bracket directly to the floor. The piece of starboard is only there to keep the bracket from sliding around.


Fuel tank is painted, bolted in, and hoses hooked up. Just need to connect the wires for the sender and ground.


Ok, steadily making progress.

The last week or so I've been working on finishing up the wiring in the back, along with a few cosmetic details.

I added a glove box up front inside the front storage compartment. I had to fabricate a piece of starboard to keep things from falling out when I open the door.


I also engineered a solution to my need for lighting in the bigle. There's a lot of plumbing, wiring, filters, etc. back there, so if a problem arises, I'll need a well lit area for service and repair. I wanted some sort of switch to activate when the latches are opened, rather than an extra rocker switch on the console, which I didn't have room for.
After searching for automotive door jamb switches, a d trunk/good light switches, I came across the neat 12v magnetic switches used for security systems. I found them in amazon for $6 and change.


They're​ super easy to use. B+ goes to the common terminal, then your load will go to either the normally open, or normally closed terminal. I selected the normally closed terminal, so that when the magnet is placed next to it (when the hatch is closed) they​'re open, and when the hatch is lifted, he contacts close.

The switches come with adhesive strips on the back, and holes for mounting with screws. I chose to use silicone to to secure them, that way it sealed up the back of the switch ( I had doubts that the back side was water tight.)


The switches are only rated for 500mA, so I had to be careful in selecting a light that drew less. Even for LEDs these days, 500mA isn't a heck of a lot of current. I chose a surface mount 3 LED module with three 1W LEDs. Each module only draws 300mA.


Here's a couple pics of the bilge area. I riveted the deck down right after taking these.


Where did you get the rubber mat in the bilge area from?

Sent from my SAMSUNG-SM-G890A using Tapatalk
 
I got it from my local Home Depot. It's just some anti fatigue mat. I also put it under my fuel tank to prevent any vibration. It seems to hold up well in the sun. I would think want to walk it, but it makes a good liner for any hatches to keep the noise down.
 
Very cool build! I'm running the Kenwood Bluetooth marine amp you mentioned in bridged mode on 2x 6.5". It is loud and clear with just the two speakers...that may change when on the water but I don't expect much difference. I just finished the build so I hope to get on the water this weekend and find out.
 
Ok it's FINALLY finished...mostly. I don't have time to post all the pics I have, and I apologize for not keeping the thread updated, but here's a few teaser pics until I can post an entire update.


WOW! Awesome!!!!
Hats off to you...I know there is a lot of time a patience involved....
 

Latest posts

Top