Monark 1644 mods!

TinBoats.net

Help Support TinBoats.net:

This site may earn a commission from merchant affiliate links, including eBay, Amazon, and others.

Apex Predator

Well-known member
Joined
May 6, 2012
Messages
52
Reaction score
0
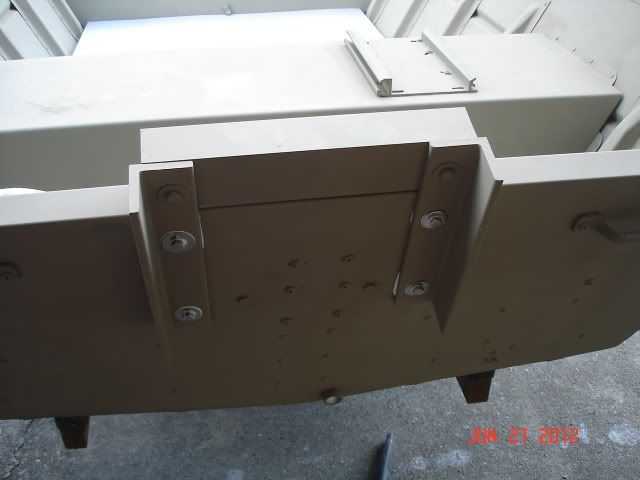
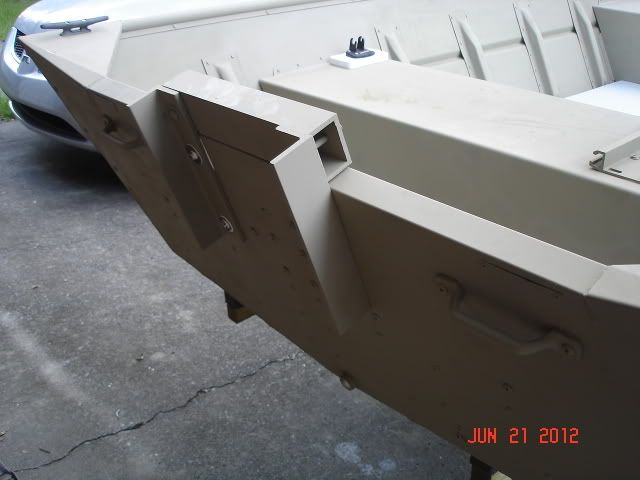
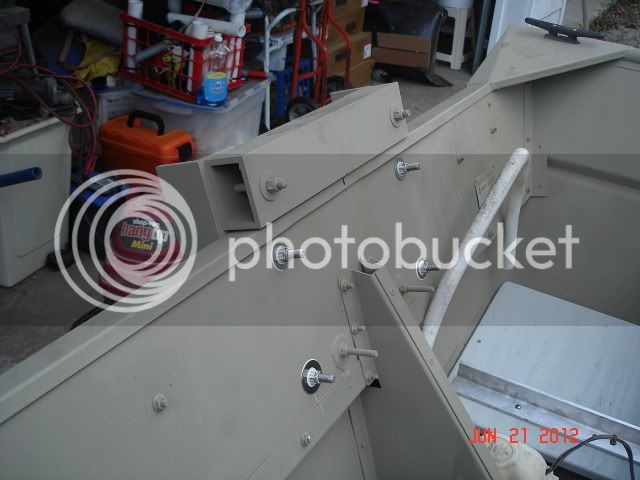
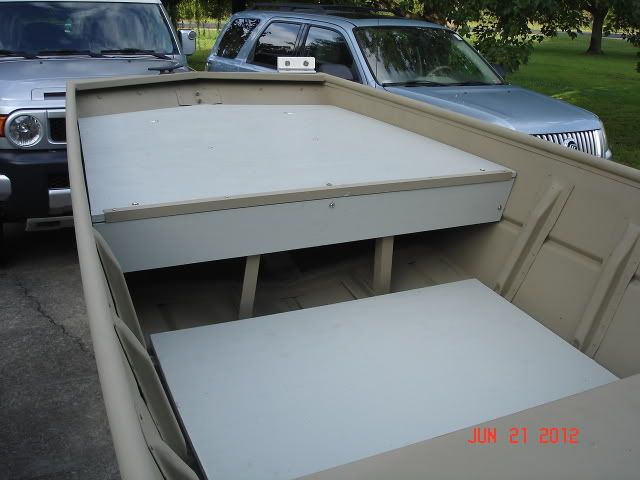
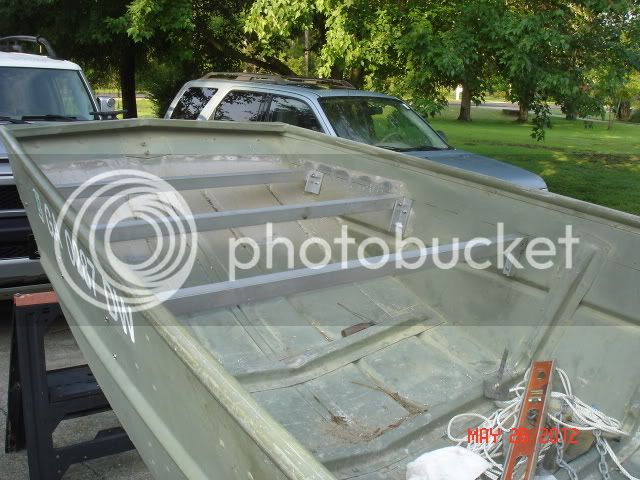
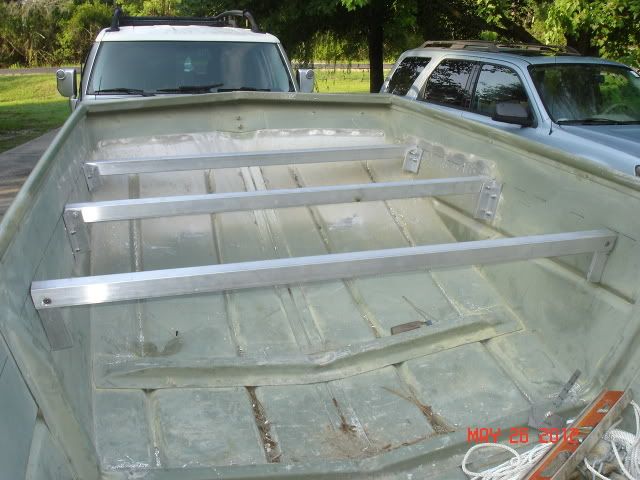
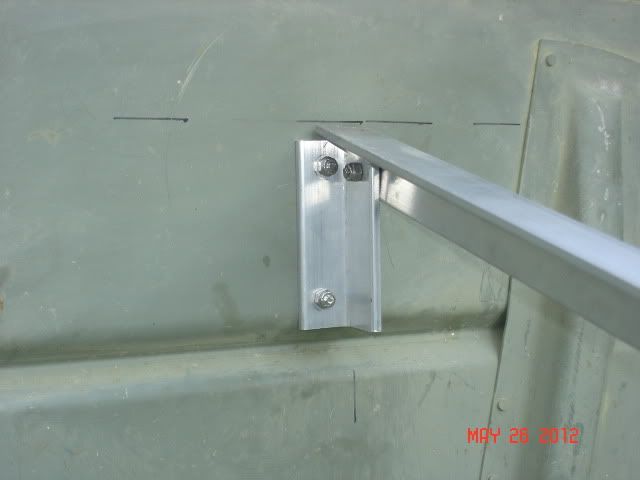
I've started to work on my jon boat. I'm installing a floor, and building a usable casting deck on the bow. A trolling motor will also be mounted on the bow, after my deck is finished. I decided to use aluminum angle for the framing, so subsequent wood replacement will be easy. I am using 1 1/2"X 1/4" thick angle. This stuff is stout! I'll have about 36 feet of it in the boat, but all that angle still only weighs 30#.

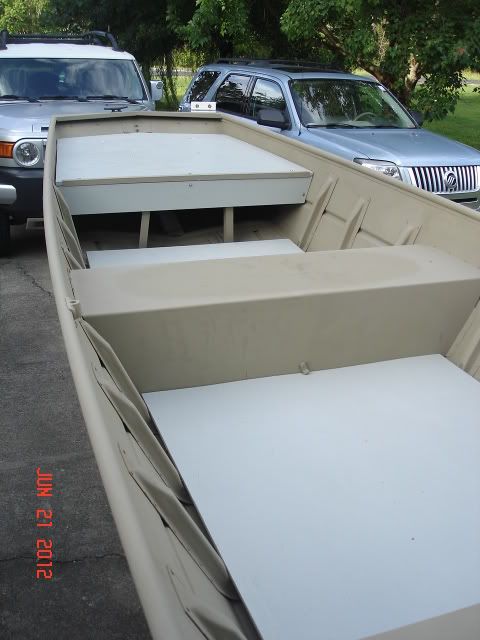
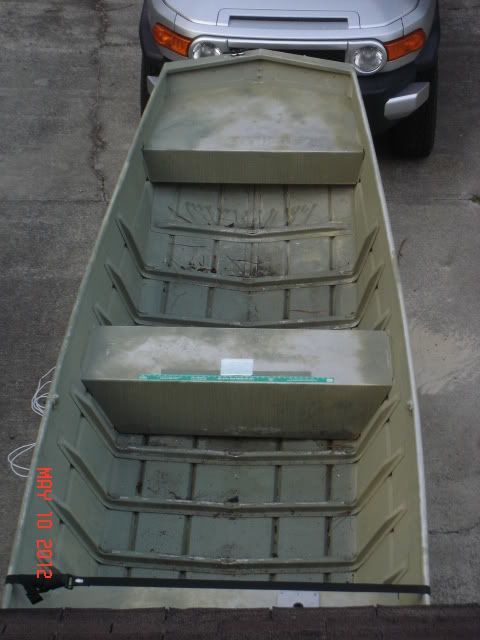
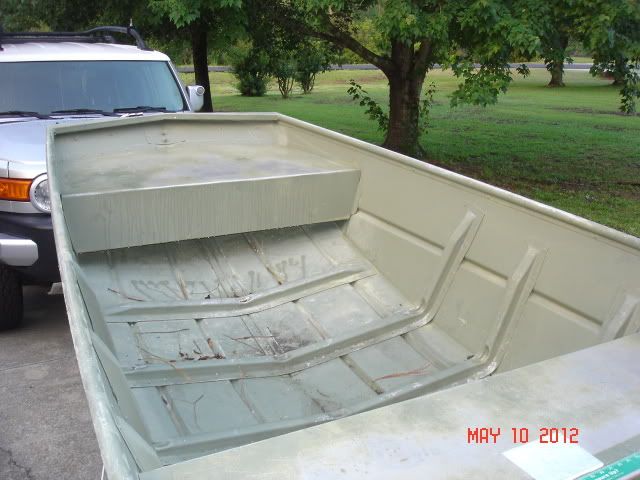
Here are the before photos.

MonArkJonBefore.jpg


MonArkJonBefore5.jpg


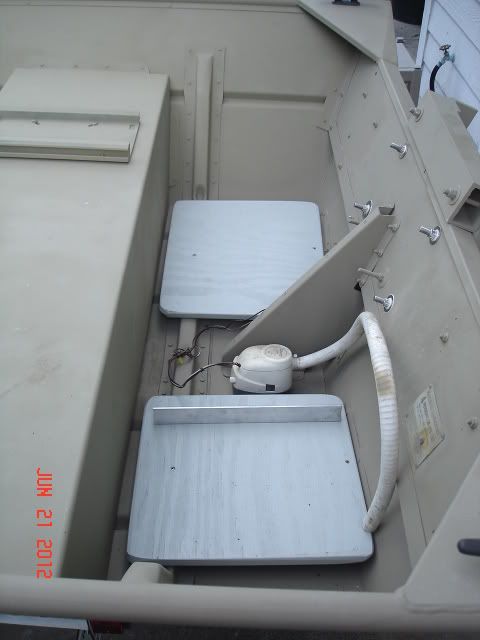
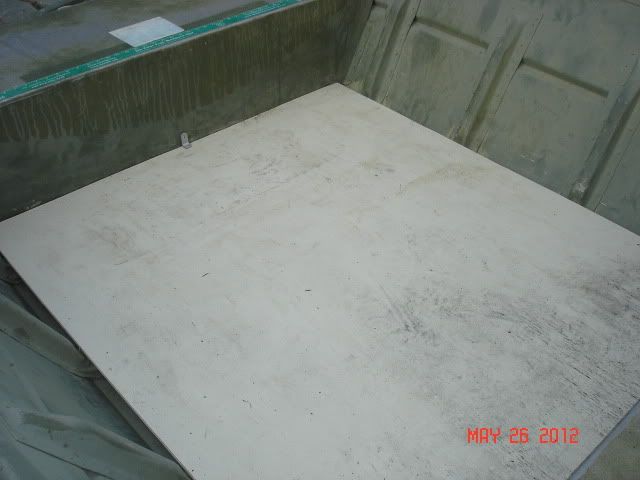
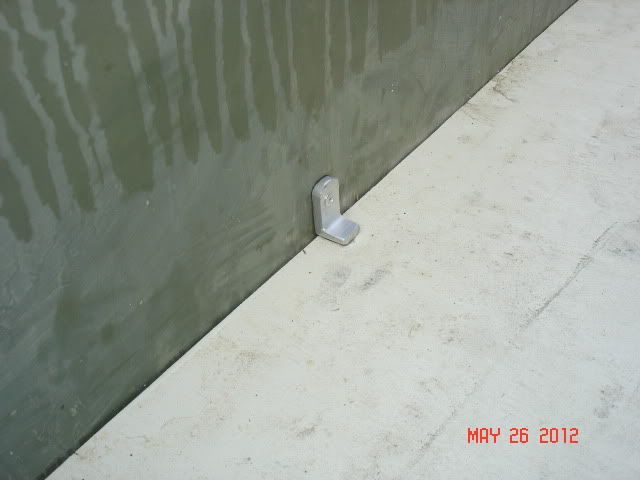
I used the angle across the ribs on the floor. They are riveted and braced in the middle. The ply is 15/32 on the floor and is solid as a rock! I designed two little swivel locks to keep the floor from blowing out on the highway. Works like a champ!

DeckMods1.jpg


DeckMods2.jpg


The front deck will be 3/4" ply, since I don't want any flex where my pedestal seat will be.

DeckMods5.jpg


DeckMods4.jpg


DeckMods.jpg


I'm debating whether I want to close in the rear of the bow deck. If I close it in I'll need to either split the top ply and install a hinge, or buy some flush mounted hatches. I'm thinking of leaving it open and just mounting an upright piece where the front of the floor ends. I'll have my trolling motor batter box, and storage for PFDs and such under there.
 
Looking good, I've got a sweet spot for Monark/SeaArk boats. What motor do you plan on putting on the back?

Good looking FJ btw, like the silver.
 
She has a 25 electric start Mercury on the transom. She will run 30 mph. This thing is rated for a 35hp, but I can't see the need at all. Last weekend I had her right at max (900lb total) load and she had no problems planing and running 25 mph. I love my FJ Cruiser. Best vehicle I've ever owned!
 
just curious as to how you removed the original front deck, It looks like you just took out the rivets, is that correct? if so, are you just replacing them with more rivets to seal the holes?
 
I ground the rivets down to the level of the seat, then popped the seat off. I plan to buck what's left of the rivets to swell the post and make them water proof again. Most of the rivets look solid, but some got a little loose when prying off the seat.
 
This project is coming along nicely! All the framing is done and most of the decking. I will take some more photos and post. I've figured the total weight of my framing and decking. I used a combination of 1 1/2 X 1/8" and 1 1/2 X 1/4" aluminum angle, for a total of right at 41' of material. The ply is 1/2" and 3/4", depending on the location. Total weight of ply is 94# and framing comes to just under 29#. That's a total of 123# of additional weight. I can't see getting it any lighter for what I wanted. This boat has a weight capacity of 900#, so it wasn't a big deal. If camping or such where I wanted to maximize my payload, I can always take out the front and rear floor and save 60#.
 
My motor was 3" too low on the transom, so I fabricated a riser from 3"X3/8" angle and 2"X3"X1/4" rectangle tube.

ModsJune124.jpg


ModsJune125.jpg


ModsJune126.jpg


I've got her all painted, plywood decks in the floors, and my new front deck is almost finished. I still have to add the front seat pedestal, and install my battery platform under the front deck. I built a trolling motor mount for the bow, but forgot to take any photos. I also re-wired the trailer, and mounted new bunk boards.

ModsJune123.jpg


ModsJune122.jpg


ModsJune121.jpg
 
The motor riser works well. I was getting 29 mph before the mods. After raising the motor 3", so that the cavitation plate is even with the bottom of the hull, and adding 150# worth of decking, framing, trolling motor, and battery, I'm still getting 28 mph. I'm happy!

7-11-124.jpg


7-11-123.jpg


I also built a trolling motor bracket for the transom mount Minn Kota Riptide 50. I connected the same male plug to my battery charger, so charging is a breeze with the battery remaining in place. I still need to paint all the aluminum on this new bracket.

7-11-122.jpg


7-11-121.jpg


7-11-12.jpg


7-11-125.jpg
 

Latest posts

Top