1648 Monark Fly Fishing Build

TinBoats.net

Help Support TinBoats.net:

This site may earn a commission from merchant affiliate links, including eBay, Amazon, and others.

pjcalla

Active member
Joined
Jul 11, 2013
Messages
36
Reaction score
0
I've been lurking on here for awhile, joined to ask about some boats I found on CL a few weeks ago, and finally have my own boat to start modifying. I found a Monark 1648 flat bottom on CL from a member on here (I did not know he was a member until he sent me the link to his build). Anyway, I'm looking forward to this build, and need to get some things done before I go on vacation. I am heading on a vacation to MI in a month, and want to take the boat with me. I'm sure things will come up while fishing that I will want to change, modify, etc. from my original plan.

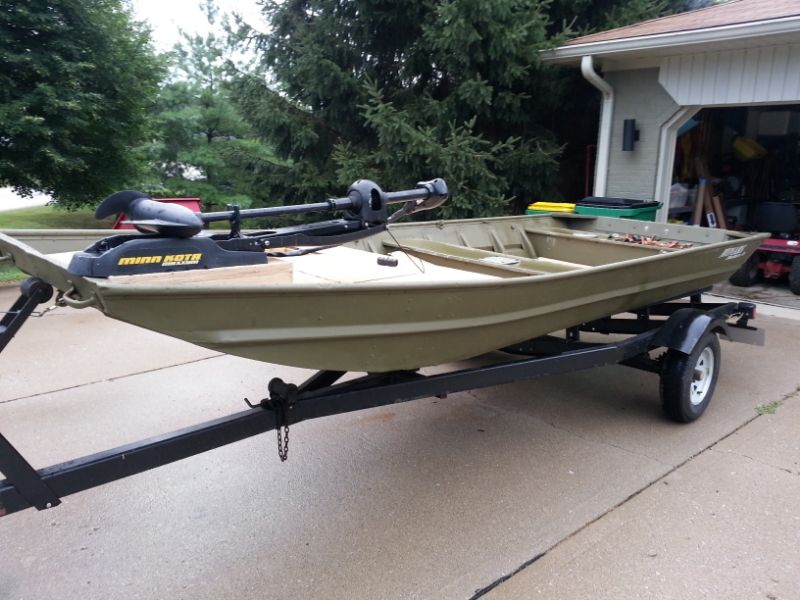
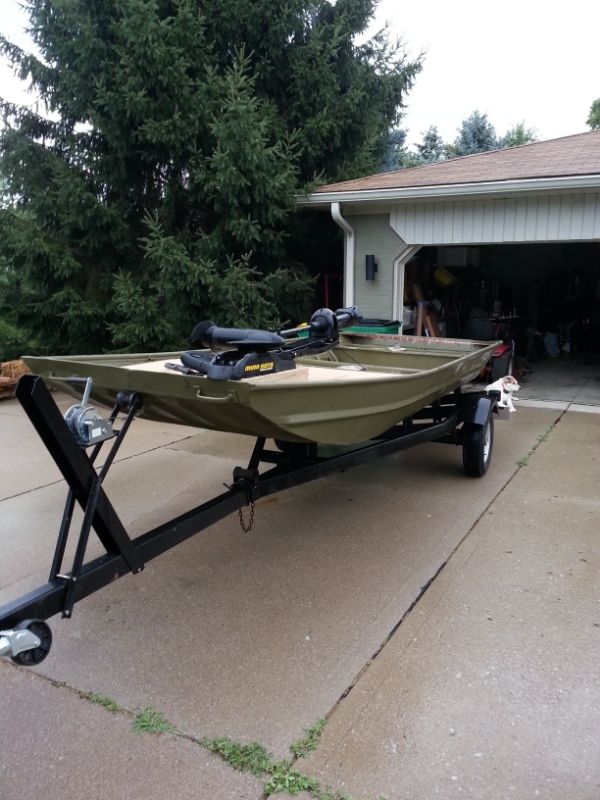
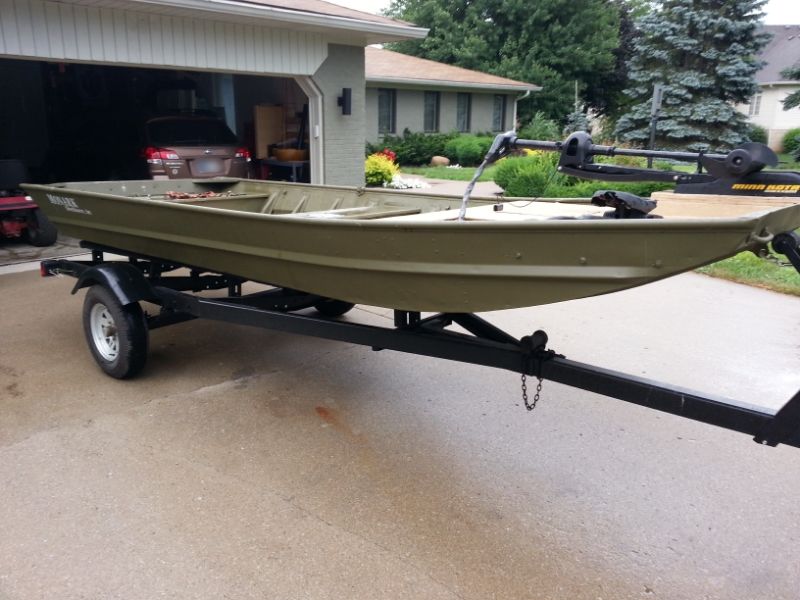
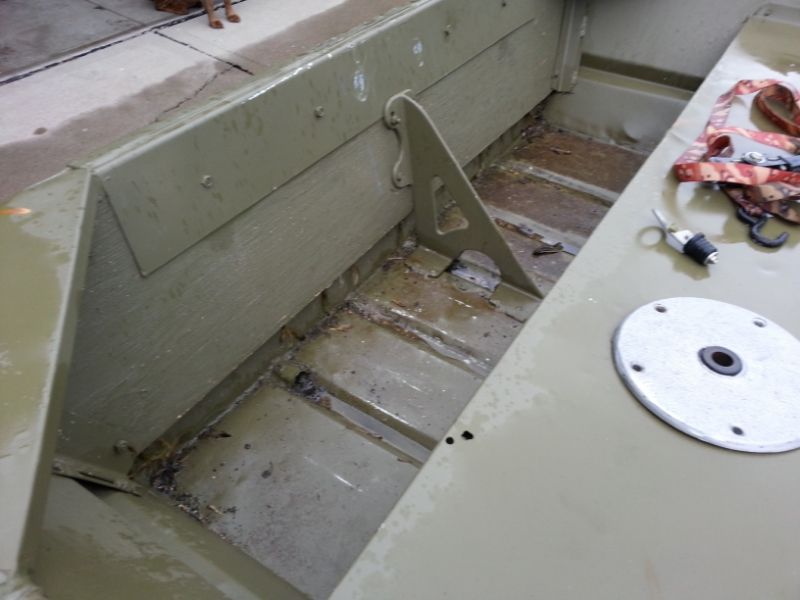
The boat came with two trolling motors, trailer, etc., and really was ready to fish, with the exception of deep cycle batteries. The boat already had a front deck, floor, and the transom was completely redone within the last 6 months and hadn't even been in the water. The deck and floor were made out of wood, and done correctly, but I just couldn't leave it alone. :D He gave me five, 4' X 8' X 1/8" sheets of composite sandwiched between aluminum to use.

Here are some pics when I got it home:


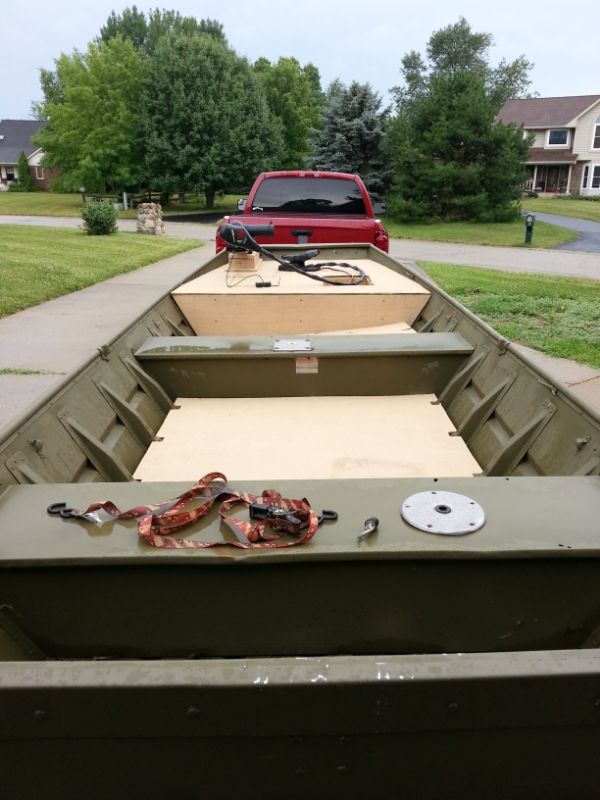
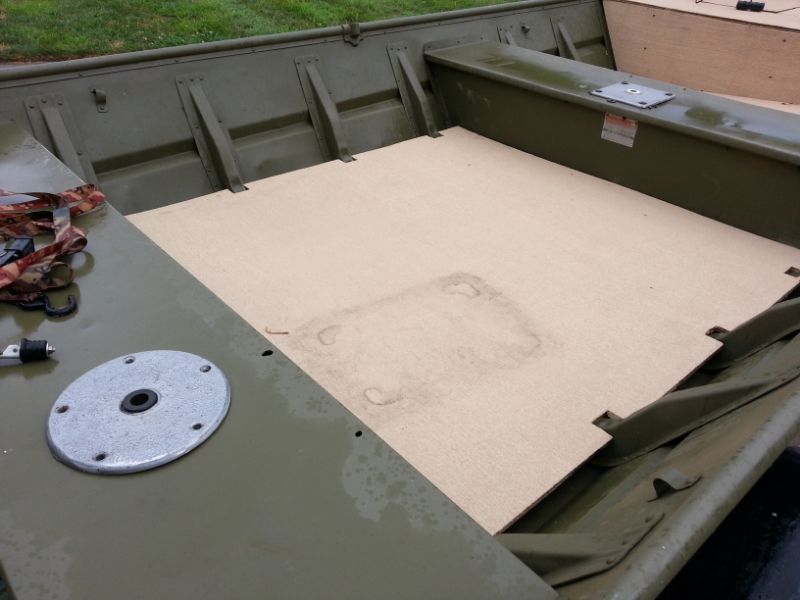
As you can see, I could have just bought two batteries, and been on my way to the lake. Since I don't have an outboard yet, I wanted to lighten up the decking, floor, etc. so that my two trolling motors would be able to push me around a little faster. So, I decided to take out the wood to see what I was working with.


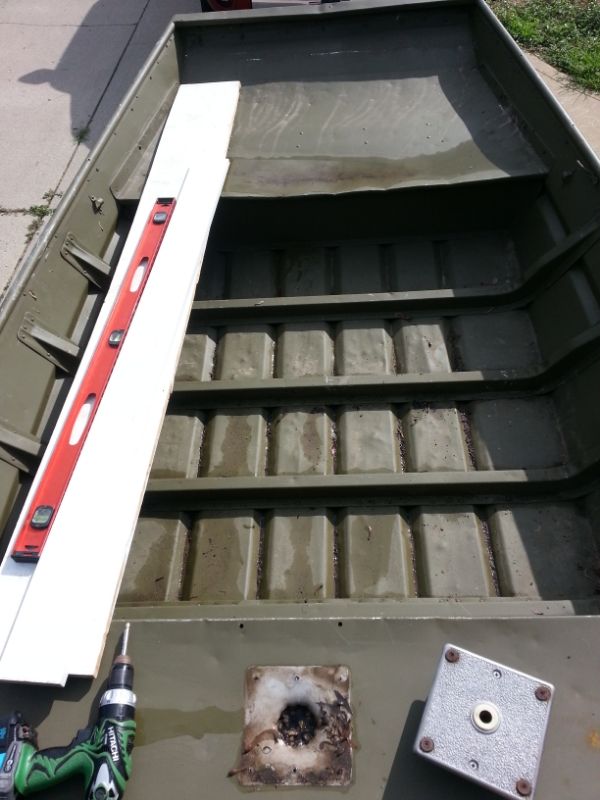
The front factory deck is pretty beat up, but it shouldn't matter, since I will be decking over it. I have thought about taking it out, re-bracing it with aluminum stock, but I've heard some horror stories about doing that. It would give me more storage room, but I don't want my boat to fall apart. Has anyone done this before and been successful?

I then performed a leak test. I filled it up with about 3" of water, let is sit overnight, and came out to find the boat does not leak! The previous owner told me that, but for my peace of mind, I wanted to know for sure. Actually, there was one little spot that leaked about the diameter of a grapefruit overnight. I'm not worried about that small of a leak.

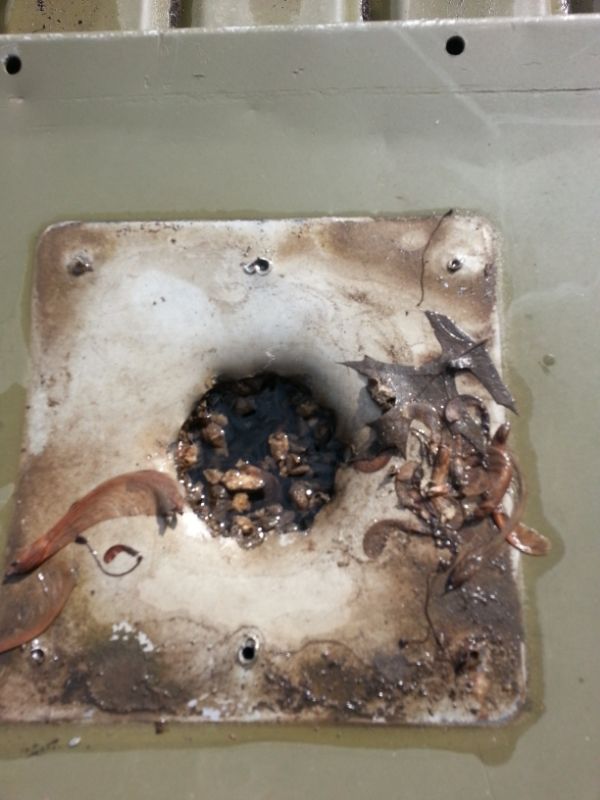
After I drained all the water out, I started looking into the bench seating. I took the seat bases off to find that the foam was soaked, and holding water.


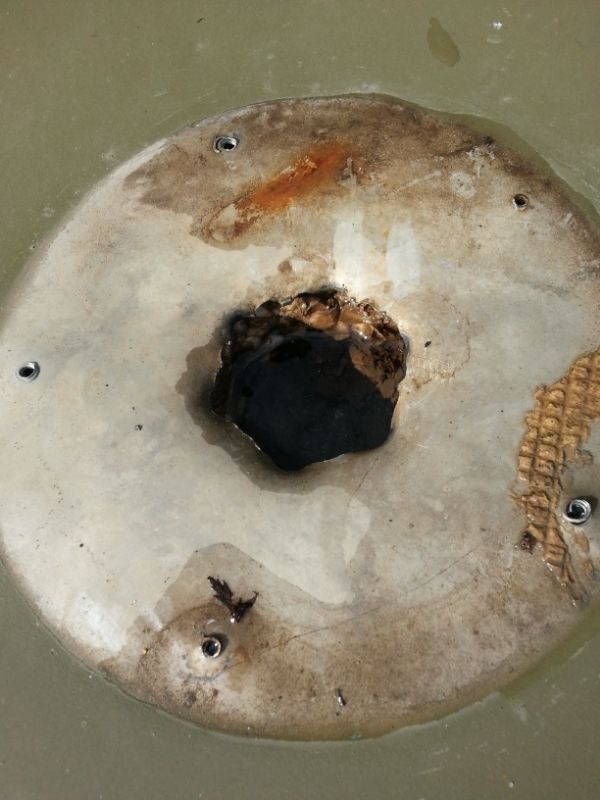
Well, that ain't going to fly, so I took out the middle bench first. I have never taken rivets out, but found it to be not so bad. Here is a pic showing the inside foam from the middle seat.


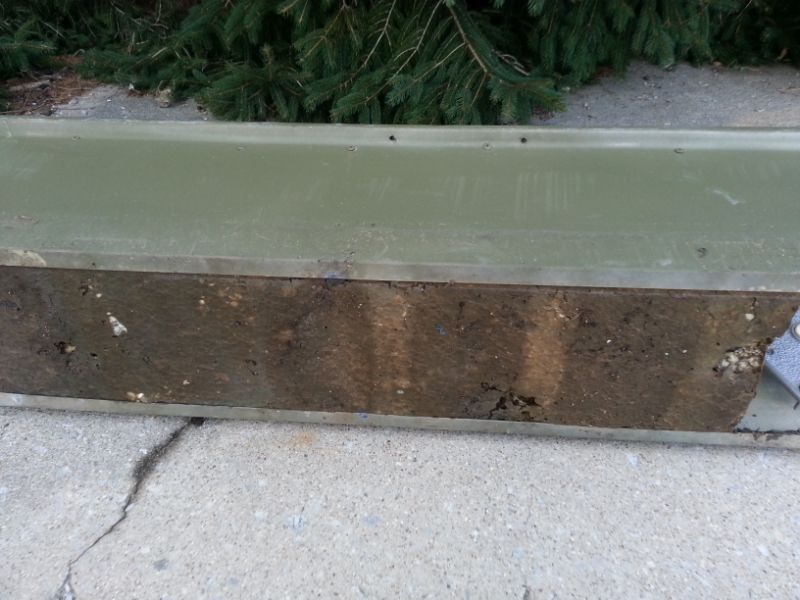
I then pressure washed the boat, and that's where I'm at now.

I plan on taking out the rear seat, to get the wet foam out. I'll put the rear seat back in, but not sure about the middle. I know there are two sides to that argument, but who knows?

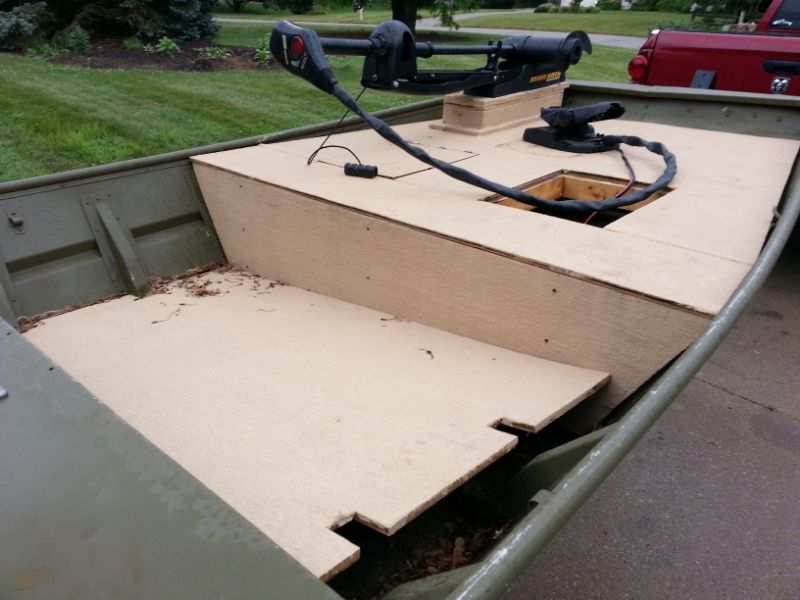
Now, my tentative plans for the boat are to make it into a fly fishing river boat. I like the idea of a "flats" style boat, though this will never see salt. If you know fly fishing, your standing line always finds something to wrap around and get tangled, often when you are hooked up. Anyway, I'm thinking large front casting deck with a trolling motor and a rear casting deck for a second person. Not sure about the outboard, if I want tiller or console. I know console adds obstacles to get my line hung up on, but I like the idea of having a steering wheel. As for seats, my current thought is to add the bases under the decking, with the seats/posts in storage bins under the deck. That way, I won't trip over/get my line caught on the bases, but will have the option if I get tired, or if someone would rather sit. I plan on using aluminum stock/angle to frame up the decks, and the aluminum/composite sheets for the decking.

I really want to get at least the front deck and flooring in before my trip, so I can use the boat. So, I guess I will be ordering some aluminum tubing, rivets, and screws in the next few days and get started.

Sorry for the long-winded post, but I'm really excited to get started. Thanks for looking, and I appreciate all comments/suggestions/concerns, since this is my first boat. Tight loops, tight lines.
 
Made a little progress last evening. Between working and a new baby boy, my time is very limited. I am lucky to get 30 minutes of work done every few days. Hopefully, I will get some done this weekend. Yesterday I removed the rear seat and foam. I then pressure washed the boat for the second time, getting most of the dirt/crud out. It still needs another good wash, then I should be good. I also washed the interior of the seats where the foam was. They will need to be washed at least one more time.

I've also done a lot of brainstorming while trying to get my son back to sleep in the middle of the night. I keep thinking of different hatch types and layouts, but still cannot make up my mind.

There was approximately 7 cubic feet of foam in the seats, so that will be my minimum goal of replacement. I figure it will take a 4' X 8' X 2" and 4' X 8' X 1" of foam to get to 8 cubic feet. I will use the 2" between the ribs on the floor, and the 1" in the rear seat. I have also started sourcing my aluminum for the framing...dang that stuff is getting expensive! At my local Lowes it is $25 for 8 feet of 1" angle. I need to find a better source. I will be checking my local metal shops as well as trying to find some recycling/scrap centers.

In the meantime, I will (hopefully) get my foam this weekend. My plan for the weekend includes cleaning up the bare aluminum that was hidden by the seats with a wire wheel or grinder. Then I will shoot it with some primer and paint. I also want to cut my foam, and if all goes well, start making a template for the floor and cutting the ACM panels.

I'm still undecided on how big I want my front deck. I'm thinking by laying out the floor in the middle, it will give me a better idea of the area I'm working with. I'm also having trouble coming up with a plan for the "level" of the deck. I will be looking at more examples on here to see how others' have turned out. Anyway, thanks for looking, and since you all like pics, here is where the boat stands now.


I got quite a bit of work done this weekend, all things considered. I cleaned up the bare aluminum where the bench seats were with a wire wheel. Washed out the entire boat again with a power washer. Got my foam for my floor cut and put into place. I still have some more fine tuning for it to sit completely flat against the ribs. Some of the dings on the bottom are causing a couple of the panels to rock, but I should have that done today. I also primed the exposed aluminum with two coats. I have to wait 48 hours to put the top coat on, but it turned out well, I think. I also measured, re-measured, and measured again the size of my deck and layout, so I can figure out how much aluminum tube to buy. I also sourced my aluminum, and will be getting my tube sometime this week (hopefully) after I calculate how much I need.

My goals for this week are to finish the foam (flush fit the floor and install in my rear seat), top coat the primed aluminum, get aluminum tubing and frame the front deck, get the flooring and decking cut to size. I also want to get guide-ons for my trailer done. This is a pretty big "wish list" for the week, but hopefully I will be able to get it done. I also need to pick up a rivet tool (I'm hoping my FIL has a pneumatic one, or my hands will definitely be sore).

I essentially have three weeks to get this project done. I'm hoping to have the boat floating in two weeks, that will give me a week to run electric and troubleshoot any other unforeseen problems. I really enjoy this site, and it has been an invaluable resource. Thanks for looking.

Now, for the part everyone wants to see:


The blue tape is where my decks will be.


I secured my aluminum tube yesterday. I bought ~75' of 1" square tube for $2/ft. I also bought some angle that I will make into brackets. I am thinking I'll at least get the front deck done with some left over for the rear. I started to lay out the tube to get an overall feel of how it's going to go together. When I was laying the "stringers" from the bow, I noticed a little problem. Since my front factory deck is kind of beat up, and angled, I'm having a hard time coming up with a plan to get them mounted. I have a plan that I think will work, but if any of you can let me know how you'd do it, it will be greatly appreciated. I'd like to get other eyes on it, maybe the solution is simple and I just don't see it. Thanks.


I've been neglecting this thread, so I feel it's time for an update. I've been busy working on the boat the last two weeks, when I get a chance. A couple weeks ago, I decided that my timeline was just not going to happen. I decided to use the deck that the previous owner put in the boat. I didn't want to rush building the deck, since I really don't know the layout I want yet. Plus, I didn't want to get it all done with the aluminum, then tear it out if I wasn't happy with it. So, with that being said, I still had a lot to do before I go on vacation.

I ended up replacing the trailer bearings, races, seals, dust covers, etc. When I tore into the bearings to repack them, I noticed that the races were starting to pit, and not roll real smooth. I decided it was good insurance to replace all the components, since I don't feel like being broke down on the side of the road on my 800 mile trip with a newborn and my wife.

I ordered some solid rivets, rivet set tool and a bucking bar. I had some trouble setting these at first, but finally got the hang of it. I realized that the rivets I ordered were too long, so I had to cut them down in order to get a good seal. I got the holes from the middle seat sealed up with the solid rivets, then started reinstalling the rear bench.

On the rear bench, I cleaned out the grime with a wire brush, some Simple Green and some elbow grease. I then laid down a couple coats of primer to protect the aluminum if/when the foam gets wet again. I filled the seat with foam board then started to reinstall it. Well, after getting 6 rivets in on each side, it became apparent that I had cut the foam a little too wide. I could not get the seat to compress enough to get the final three rivets in on each side (port and starboard). So, I had to remove 12 rivets (again), cut the foam then reinstall the rivets. I will not make that mistake again.

I performed a leak test after that to make sure my seals were good. I have two leaking rivets from the rear bench install. ****! They are REALLY SLOW, but still there. I'm going to put some 5200 on the outside of the hull to hopefully seal them for the time being. This winter, when I complete the build with the new aluminum deck, etc, I will fix those permanently. I just want to get the boat on the water to enjoy it while the weather is nice.

Last night, I did some dry fitting of the old deck, foam for between the ribs and the aluminum panel I will be using for the floor. I also ordered a battery box, navigation lights (cheapo clamp-on for now), and some other things I need before I go out on the water.

My list that has to be completed before Saturday afternoon is as follows (no particular order):

1. Attach the casting deck to the ribs using stainless screws.
2. Cut my aluminum panel to fit between the ribs for my floor and screw it down.
3. Add some sort of non-skid to said panel.
4. Install battery and box and wire trolling motor.
5. Touch up the paint.
6. Skin the rear bench with some aluminum and possibly add a seat.
7. Cut a new hatch for the casting deck and install.
8. Seal up the leaking rivets.

Well, that is about it. Here are some gratuitous pics of the boat as she sits now:


The last couple of days have been productive (they need to be). I received my online order, that included my battery box, ropes, pfds, etc. I also went to Walmart and got my deep cycle battery. I pretty much have everything I need now, just have to put things where they need to go.

Anyway, on Wednesday evening, I started making some guide-ons for my trailer. I used some steel bar (.25"X1.25"X48"), bent them in my vice and drilled holes for them to mount to the trailer using U-bolts. I will then put some pvc that I had laying around over the steel and secure. The steel is being coated in paint as we speak. I also put down a couple of coats of paint on the boat to cover the primer and bare aluminum. It doesn't match perfectly, but it is close enough for a river boat. I also secured the front casting deck with stainless screws into the ribs.

Last night I made more progress on the floor, getting it cut to fit flat on the ribs of the boat. I've read on various forums to make a template with a big cardboard box, then trace and cut the aluminum. Well, I started to tape some boxes I had laying in the garage to form a 4'X8' sheet, then I had an "ah ha" moment, and came up with another option to get the job done quickly without sacrificing a tight fit. What I decided to do was lay the sheet of aluminum on the ribs where it was going to be placed. I made sure that it was level side to side on the front and back of the sheet.


I then started marking the ribs using a piece of angle to keep it square to the widest part of the rib. That way, when the sheet was allowed to sit flat on the bottom ribs, it would not get bound up on the vertical ribs. Here is a pic that shows what I'm talking about:


After marking all the ribs on both sides, I measured the width that the floor had to be on top of each rib so it wouldn't rub on the vertical ribs. It just happened to be 46", which meant that I had to take off 1" from each side. I just used the same piece of angle to mark a line. I got out my trusty angle grinder with a cutting wheel and got to work. This stuff cut like butter, and I finished cutting in about 5 minutes. I was done in about 30 minutes with the floor, and about 15 minutes was getting my tools and saw horses out and put back. I figured that it would have taken me at least that to just get the template made. Here is a pic of the finished product:


I still have to put the foam in and screw it down, but the hard part is done.

The battery box that I bought does not fit under the current casting deck, which pretty much sucks. It will fit under the deck I'm going to build, but for now I'll have to keep it on the floor just outside of the deck. Unfortunately, the power leads from the trolling motor are too short to reach the box. I am going to have to splice some new cable on to make it work, but that shouldn't be too big of a problem.

I've also been thinking about a "non-skid" surface for my flooring. I've looked at truck bed liner, epoxy coatings, etc. I don't want to put too much money into it now, since I will be modifying the layout this winter, plus I only have a day to finish it, so I think I've come up with a solution...anti-skid decals that people use on their bathtubs. I think it will work, but just have to find some that don't look like flowers.

Today, I plan on installing the guide-ons, screwing down the floor, seal the leaky rivets, mounting and wiring the trolling motor as well as touching up some paint. That will leave my Saturday morning to tie up any loose ends, then I will be out on the water!
 
They sell safety tape at Lowes and Home Depot. Its the good non skid type, that would work for you and you wouldn't have to look at flowers or starfish on your aluminum deck.. of course starfish and sea horses might be kinda cool.
 
Good idea on cutting the flooring. Don't know if you plan on having a seat on the bow deck but if you do have you ever thought of putting the battery under the seat? Just build a notch up in the deck and a lid on top of the battery, then mount the seat to the lid.
 
Mojo: I will look at the safety tape, and probably the route I'm going, just thought the bathtub stickers would be cheaper for now. Hell, I don't even know if they still make the starfish, but that may look cool. :LOL2:

DrNip: The front deck is temporary until I get a feel for what I want it to be, then I am going to make it out of aluminum tube and sheet with more storage room underneath for the battery. I am just trying to get it ready to fish for the rest of the season.
 

Latest posts

Top