TinBoats.net
The original aluminum boat site!
You are using an out of date browser. It may not display this or other websites correctly.
You should upgrade or use an alternative browser.
You should upgrade or use an alternative browser.
16ft Mirrocraft V-hull build!!**Finished!!!**
- Thread starter moberg12
- Start date

Help Support TinBoats.net:
This site may earn a commission from merchant affiliate
links, including eBay, Amazon, and others.
moberg12
Well-known member
kfa4303 said:I smell jackplate.
You just won 5 internetz!!
bigwave
Well-known member
Well since it is going to be a pain to get that engine low enough I think you should just turn her over to me.....I hear its real hard to make a jackplate........ :lol:
moberg12
Well-known member
bigwave said:Well since it is going to be a pain to get that engine low enough I think you should just turn her over to me.....I hear its real hard to make a jackplate........ :lol:
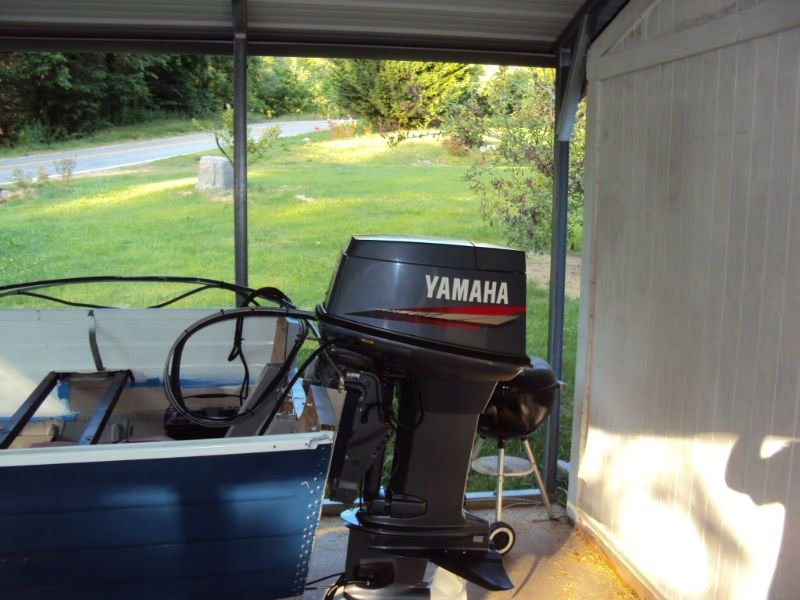
Low isn't the problem :LOL2: I'm hoping to get this thing mounted in the next few days. Right now it is riding around in my Jeep posing as a 200lb missile should I get in an accident :shock:
moberg12
Well-known member
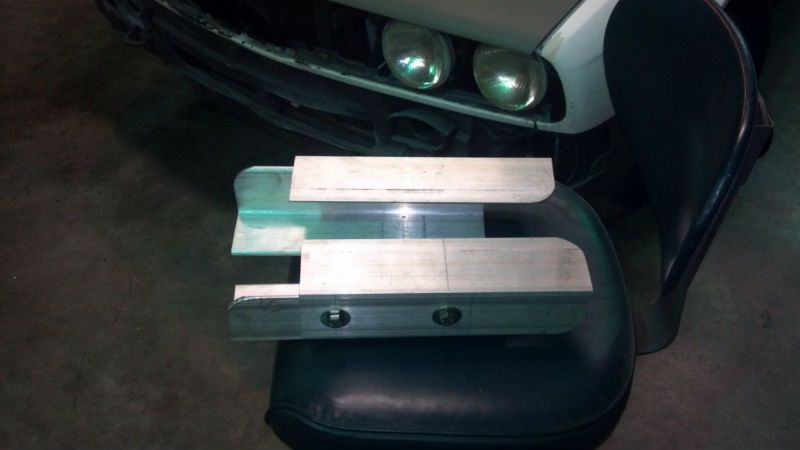
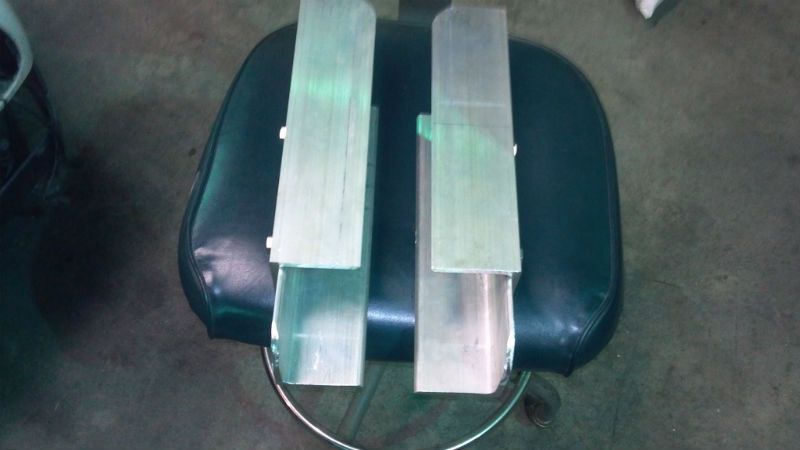
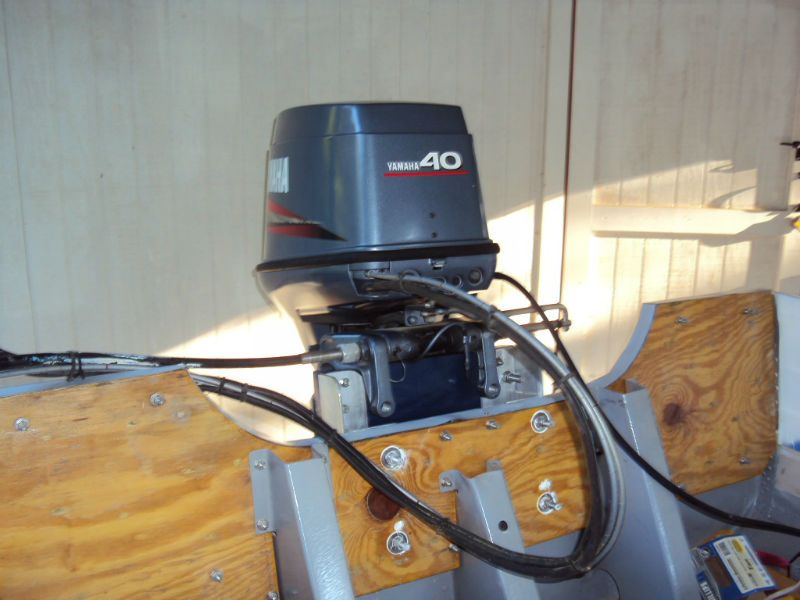
Jack Plate project almost complete! It was actually quite easy to make, I think I'm into this little project for around $75 and more than half of that was for stainless hardware.
Should get the Yamaha on this weekend :mrgreen: If I do get it mounted I'm pushing for a lake test Monday, cross your fingers!!!
Should get the Yamaha on this weekend :mrgreen: If I do get it mounted I'm pushing for a lake test Monday, cross your fingers!!!
bigwave
Well-known member
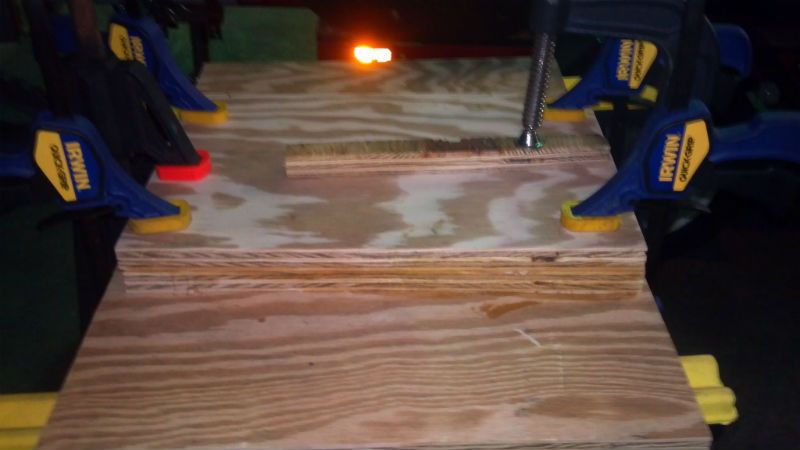
What is the plywood with the clamps on it?
bigwave
Well-known member
What is the plywood with clamps on it?
moberg12
Well-known member
bigwave said:What is the plywood with clamps on it?
It will bolt to the back of the jack plate, it's not really necessary but it will space the engine back another 1.5".
Basically I built this exact jack plate:
https://www.theonlinefisherman.com/forum/6-general-boat-talk/33-homemade-jack-plate
moberg12
Well-known member
All Mounted :mrgreen: Probably no test run tomorrow but I'm getting close!! She cleaned up like new!!
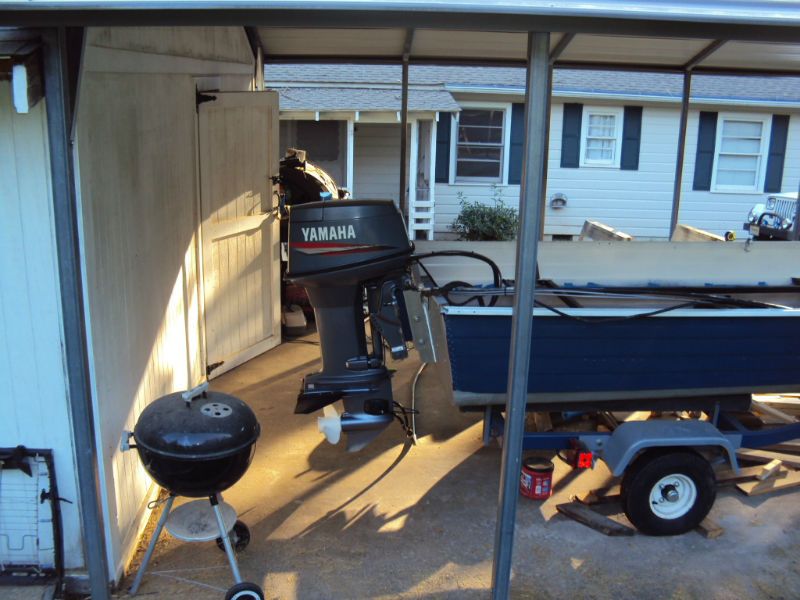
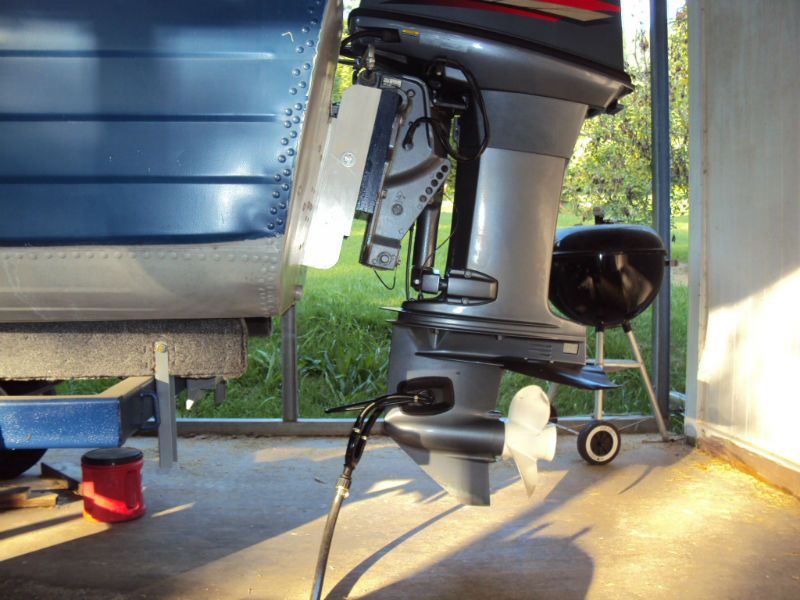
I think I still need to move it up a couple inches, right now it is set to the lowest setting....thoughts?
I think I still need to move it up a couple inches, right now it is set to the lowest setting....thoughts?
jasper60103
Well-known member
Looking good.
I don't have any experience with jack plates, but I would
start with the cav plate about even with the bottom
of the boat, and make adjustments from there.
I don't have any experience with jack plates, but I would
start with the cav plate about even with the bottom
of the boat, and make adjustments from there.
bigwave
Well-known member
I say it looks good where its at, since it is on the lowest setting it looks like all you need to do is adjust the engine out or in a little, like previous poster said try it there and adjust until your satisfied.
moberg12
Well-known member
I'll try it out as is for now!
The good news is I finally settled on a floor coating, white quickrete epoxy with blue flakes with the non slip added. for the price you can't beat it. I plan to put the flakes down pretty heavy to offset the glare from the white.
The bad news is I have to order a shorter steering cable. The cable is dated 1985 so maybe that isn't quite a bad thing.
fool4fish1226
Well-known member
Mo - that engine looks great hanging off the back and I agree it's looks to be set just about right - just tweek as you go.
newporttin
New member
- Joined
- May 30, 2012
- Messages
- 1
- Reaction score
- 0
Hi,
I have the 1976 Deep V Hull like yours, its awesome that your posting the restoration!,
I have a 40 horse also but I moved my console up. Any way, I saw the pics of the decking with the noodles and was wondering how up supported it. What did you do for the middle support?
Thanks!
I have the 1976 Deep V Hull like yours, its awesome that your posting the restoration!,
I have a 40 horse also but I moved my console up. Any way, I saw the pics of the decking with the noodles and was wondering how up supported it. What did you do for the middle support?
Thanks!
moberg12
Well-known member
newporttin said:Hi,
I have the 1976 Deep V Hull like yours, its awesome that your posting the restoration!,
I have a 40 horse also but I moved my console up. Any way, I saw the pics of the decking with the noodles and was wondering how up supported it. What did you do for the middle support?
Thanks!
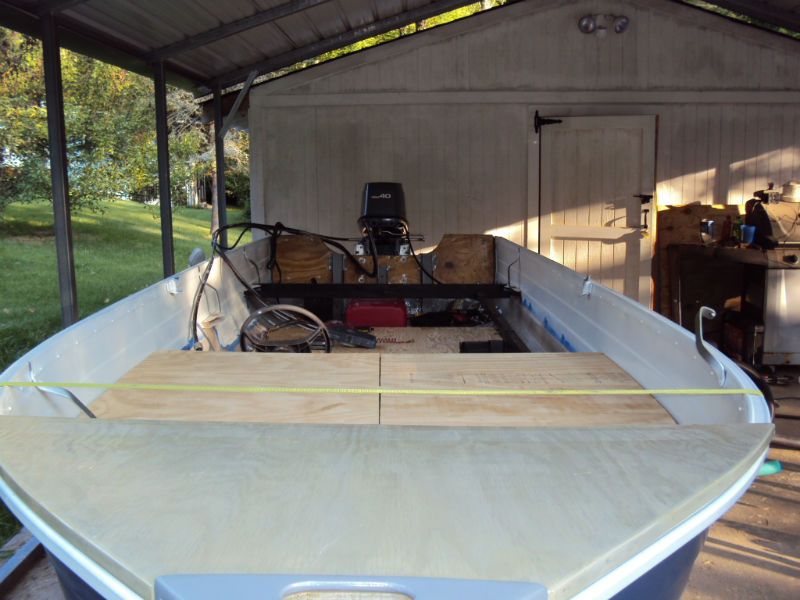
The main floor is a full 4' wide. I messed around with some scrap wood until I got the angles right then I cut 2x2 joists 4' long with the proper angle on each end. I centered each joist then measured down @ the middle to get the height for the vertical support. I used L brackets and rivets to secure the vertical studs to the ribs and then to the floor joists. I used SS self-tapping sheet metal screws down the sides to secure the joists to the ribs. Before I screwed down the floor I ran some conduit under the floor to run wires, and as you saw filled all the extra space with noodles. The finished product is rock solid.
flajsh
Well-known member
Great build.
I'm about to start on my floor and have been looking for ideas. Ive been reading yours and bigs and f4f a lot
Did you build a frame for your flooring or just put the noodles down and attach plywood to ribs?
Just trying to figure how I want to begin the project. :shock:
I'm about to start on my floor and have been looking for ideas. Ive been reading yours and bigs and f4f a lot
Did you build a frame for your flooring or just put the noodles down and attach plywood to ribs?
Just trying to figure how I want to begin the project. :shock:
moberg12
Well-known member
flajsh said:Great build.
I'm about to start on my floor and have been looking for ideas. Ive been reading yours and bigs and f4f a lot
Did you build a frame for your flooring or just put the noodles down and attach plywood to ribs?
Just trying to figure how I want to begin the project. :shock:
I did end up building framing for the floor. I tore up the floor you see back on pg. 5 because it wasn't sturdy enough for me. In those pics I just had center studs running down the centerline of the boat and attached the sides of the plywood to the ribs. At the end of the day it just didn't give enough support so I pulled it up widened the floor a couple inches and added joists. So now there are 2x2's running side to side above every rib, and I added a lot more noodles. Sorry I don't have any pics of that part of the build.
bigwave
Well-known member
Hey Moberg, you said you were going to try that floor epoxy for your decks. Were you referring to the product like cooldeck for pools. I have thought about that stuff too but I would be worried about it cracking. Just curious. When I built pools we used a company called Stardeck here in Tampa....that stuff was bullet proof but we always applied to a concrete surface....never tried it on a wood deck. If you use the right stains you could make that stuff look like marble, granite with the flaky stuff....alll kinds of options.
moberg12
Well-known member
bigwave said:Hey Moberg, you said you were going to try that floor epoxy for your decks. Were you referring to the product like cooldeck for pools. I have thought about that stuff too but I would be worried about it cracking. Just curious. When I built pools we used a company called Stardeck here in Tampa....that stuff was bullet proof but we always applied to a concrete surface....never tried it on a wood deck. If you use the right stains you could make that stuff look like marble, granite with the flaky stuff....alll kinds of options.
I'm using regular quickrete floor epoxy, I already bought a gallon in white, the flakes, non-slip additive, and a gallon of clear. Hopefully I'll like the final results.
Unfortunately the transmission in my Jeep just started acting up so progress will be slow for a while.
Similar threads
- Replies
- 57
- Views
- 8K
- Replies
- 36
- Views
- 2K
- Replies
- 11
- Views
- 1K
- Replies
- 13
- Views
- 656