1977 Lowe Line 1636 Project

TinBoats.net

Help Support TinBoats.net:

This site may earn a commission from merchant affiliate links, including eBay, Amazon, and others.
[url=https://www.tinboats.net/forum/viewtopic.php?p=319955#p319955 said:
BigTerp » 24 Jun 2013, 08:03[/url]"]Got mine painted over the weekend. Was REALLY impressed with the Parkers duck boat paint. Looking forward to seeing how yours turns out!!
Yeah, your boat looks really nice. I cant wait to see how mine turns out either, Im planning to spray mine... which will be a first like everything else. :)
 
So I got quite a bit accomplished this weekend and learned from a lot from my mistakes. So the plan was to have paint going on this weekend, well it didn't happen. I finally finished mounting my front handle which had the start of a stress fracture if you remember. So I cut some flat aluminum bar to create two custom washers. I then sanded, cleaned, wiped with acetone, and primered the washers and handle. Finally I applied a generous portion of 3M 5200 and bolted everything on. Nothing high tech :)
 

Attachments

  • Img_0977.jpg
    Img_0977.jpg
    26 KB · Views: 1,619
  • Img_0974.jpg
    Img_0974.jpg
    25.4 KB · Views: 1,619
  • Img_0880.jpg
    Img_0880.jpg
    31.8 KB · Views: 1,619
So here's where I begin to run into problems. I have all my pieces and parts ready for transom assembly. I fit the transom into position after marking and drilling out all my pilot holes. I start to gather my bolts and 3M 5200, when I realize I forgot to make the outer transom motor plate. CR@P!!! :roll: So I cut out a plywood plate, and realize I need to start applying Spar Varnish to it, there is no way paint will be going on this boat till next weekend, and then I remember GillHunter's transducer mount! =D> So I run to the store, and buy a BPA Free cutting board, cut my motor plate and I'm back in business... oh but wait this also requires bigger bolts, so back to Lowe's for 4 more SS bolts 1/2" longer. I'll post the rest of the transom pics tomorrow.
 

Attachments

  • Img_0970.jpg
    Img_0970.jpg
    50.2 KB · Views: 1,618
  • Img_0960.jpg
    Img_0960.jpg
    55.2 KB · Views: 1,618
  • Img_0958.jpg
    Img_0958.jpg
    46.5 KB · Views: 1,618
So I have all my parts and Im ready to start mounting the transom a second or third time, I lost count. :shock: So I align the transom and start placing the stainless steal bolts thru the transom to hold in place, and low and behold, another issue. The previous owner has drilled another hole in transom, maybe for a quick repair. However its right on top of another hole, which is not enough room for two rivets or pan head bolts. So I need to weld the "new" hole or at least one. I chose to stay with the original.
Img_0962.jpg
So I ran to AutoZone, and picked up a tube of Permatex Liquid Metal and applied as instructed. Clean, rough area, and apply layers of Liquid Metal until the hole is patched.
liquidMetal.png
After it dried for the recommended 3-4 hours, I applied another 1/8" coat to both sides of the transom hole. After another 3-4 hours, I began surface sanding to smooth out the Liguid Metal.
liquidMetal_2.png
Once everything was prepped, I cleaned the patch with cloth, wiped with acetone, and primer'd. Hopefully I can start mounting the transom for the 3rd or 4th time. I keep hearing that saying "Measure twice, cut once" whcih sorta fits. #-o
 

Attachments

  • Img_0982.jpg
    Img_0982.jpg
    28.9 KB · Views: 1,611
  • Img_0983.jpg
    Img_0983.jpg
    19.9 KB · Views: 1,611
Oh it's done! And that will be the last transom I replace for free, but it was fun! I cant tell you how many times i weighed the option of running to boat shop and buying new for 500-800 bucks and call it done. I'm trying to find time to post pics.
Trying to paint today/this evening. And you were right I went thru half a roll of paper towels, pint of acetone, and one favorite t-shirt cleaning up all that 5200. That cr@p gets everywhere!
 
As promised here's the FINISHED transom. I'm so relieved I'm finally done, lets just hope it doesnt leak. :shock:

So after I let the primer dry on the patch, I positioned the transom and placed the appropriated sized stainless steel pan head bolts with generous portion of 3M 5200 into the transom. I fixed each one with a washer and dab of lock-tite before tightening down. Below are a few picks of the transom install.
Img_0984.jpg
Img_0985.jpg
After a good even tighten down, I'm ready to install the (BPA Free) transom motor plate. Finally I installed the bracket support to transom and boat floor and cleaned up the remaining 3M 5200. That is some messy product.
Img_0990.jpg
Img_0992.jpg
Img_0991.jpg
 
Well Im still waiting on my 5200 to cure, therefore paint is delayed. No maiden voyage this weekend. HOWEVER, I fixed the female connector on the outboard, so I'm going to throw it on another boat and see how she runs!
Img_0996.jpg
I also thought about changing the gear oil, but as Ahab suggested don't fix what ain't broke. Being the vacation weekend, why take any chances, so Ill replace the gear oil when I get back.
 

Attachments

  • Img_1001.jpg
    Img_1001.jpg
    59.5 KB · Views: 1,608
Motor ran ok today. I just ran around a cove about 5 mins after mounting the outboard on a 12' V. Started out rough as if it needed to warm up a little, not sure and it has a desire to die as soon as I throw it in gear F or R. Tomorrow ill run it harder and take a few pics.
 
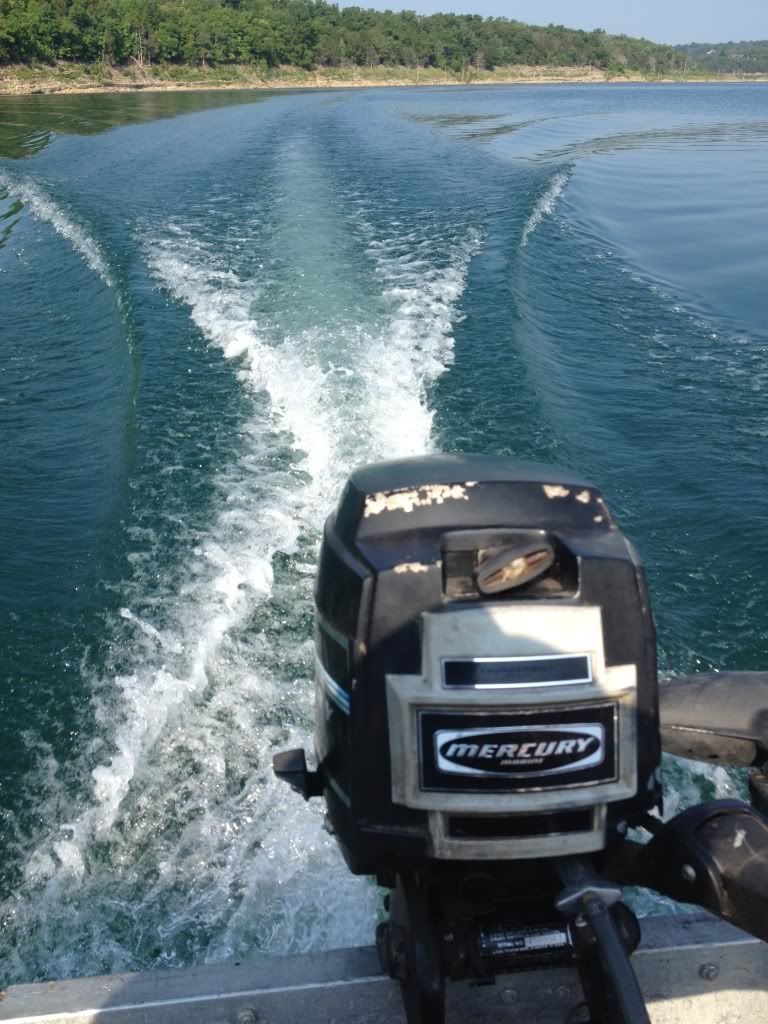
Well motor ran well today! No problems with the shifting. Here I have it wide open with 2 in da boat. Not bad for a '76 Merc 9.8. I think I have some cr@p hanging around in the tank. Towards the end it intermittently throttle up and down like fuel problem. Had vent open on tank, so were thinking tank filter is being choked by sediment. Any thoughts?
180E1650-1ECB-48E0-9C51-A0BFD8949AE1-21779-0000042998CFBB88_zps41f62c33.jpg
 
Looks good, not much got done from 12-13 eh? Per the engine, expect some hick ups. The vibration probably loosened up some gunk in the tank, lines, and even the carb bowl. My '90's Merc 9.9 really woke up once I installed some Boyensen reed valves. Still wouldn't plane out my 1200lb 1448 (thank you water soaked 3/4 ply everywhere).

Good luck and remember that you only have to do it right once. Take your time and enjoy the process.

Jamie
 
Ranchero50 said:
Looks good, not much got done from 12-13 eh?
Yeah we were selling our house and I was preoccupied with honey do's for a few months. :( back on track now!
 
Ok I think the fuel line from the tank to the motor is messed up. I ran it about 3 mins full throttle and it died out. I primed the bulb a few times and fired it back up. If I heard the motor start to choke I'd hit the bulb a few times and good as new. I guess ill try to clean the tank or replace the line.
 
Sounds like the line/bulb is possibly bad. But like Ranchero said, it could be sediment that got kicked up and is causing some clogging issues. At least it sounds like it should be a simple fix.
 
Just wondering how the cutting board transom plate is holding up for you? Looking to do the same with my boat.
 
kylerprochaska said:
Just wondering how the cutting board transom plate is holding up for you? Looking to do the same with my boat.
I haven't taken boat out yet as I'm in process of painting. I had to replace a rotten transom plate and I cut a new plywood one to start coating with spar urethane. That's when I ran across GillHunters transducer mount made of poly cutting board which is always submerged. I figure its plastic, always exposed to water, and strong enough to take knife abuse. It has to hold up to motor mounts. Easy to shape and bolted on with 5200. I think it will hold up great for years. I can give you report in few weeks once pain is cured/dried.
 
I HATE SANDING!!!

Over the weekend I finally finished all the sanding, patching, cleaning, prepping and priming the inside of the boat. What a biach! I did learn that primer + etching cost way more than the premium aluminum primer at most stores. When Lowes stopped carrying primer with etching I started using prof alum primer. Both have good coverage but ill let you know if the cost savings paid off.

Flipped the boat last night and sanded, brushed and cleaned the bottom. Man is the thing chewed up. Looks like PO was doing some dukes of hazard jumps over gravel bars. I almost think he dang near punctured the hull in a few spots. I ran outta time so ill finish up tonight and prime, then it's off to paint.

Did I mention I HATE SANDING!
 
Tonight I sanded a few more troubled areas and missed spots. I washed and wiped the entire hull with acetone. Once dry, i primed all the bare metal and worn areas with Rustoleum professional aluminum primer. Tomorrow I'll wake early, maybe, and roll on the first coat of Parker's.
 

Latest posts

Top