86BassTrackerV17 1st fishing trip w/son 10/11/13 vids p15

TinBoats.net

Help Support TinBoats.net:

This site may earn a commission from merchant affiliate links, including eBay, Amazon, and others.
I used to do backyard redneck boat mods and posted them on another site, I wish I was a member here then. Did it just like you Dave with all the step by step pics and stuff. Just not to this extreme because my boat had to be ready to hit the water during the process. I'll have to see if I kept any of the home vids I made and share it here. I will be following your thread here, keep up the great work. Nice to see you have a decent enought workshop to do this in. I had to do everything outside. I was out there all winter last year replacing wood and carpet and wiring in my old boat in 20 degree weather. :shock: I sold that and picked up the tracker in my sig. I want to mod that as well, make a center console out of it. :D
 
Dave,
I put the ultimate bunks on my trailer in June and Love them, the only addition I made was to add bunk enders
from Cabela's for $12.99 per pair (item # IK - 013509 EZ - Slide Bunk Ender Pads) as I did not like the rear of the bunks being square,
I was afraid that they could damage the boat somehow, depending on the angle of the boat ramp, the bunk enders took care of the matter and now the bunks have round ends. I could not be happier with this combination
Mod looks great
 
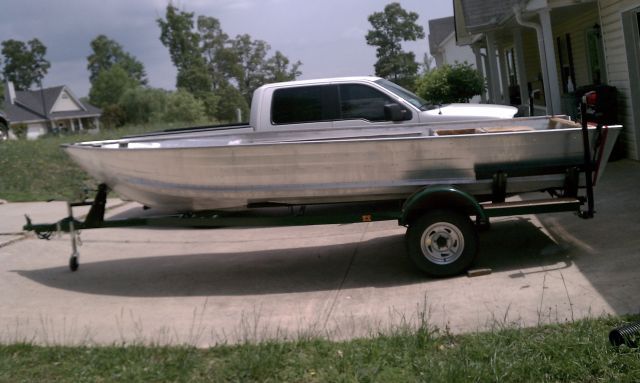
It's been a long time since I've been able to work on the boat, trailer or anything. Last spring a year ago, my 90 year old father came to live with us. He's been quite a handful to take care of, as he's suffering from Alzheimer's, congestive heart failure and just plain old age. But after a long hard year, was able to get back to working on the boat or at least the trailer. Got the trailer completed. I apologize this post won't show my normal detail, but there was just too much to get done and it was done as quickly as possible, as I really wanted to get done.

Last anyone knew, I had stripped the trailer down, started sandblasting it and then took it over to a buddy's house to get some welding done for repairs and strengthening. Once that was done, we disassembled everything and dropped it off at a body/auto repair shop to finish the sandblasting and for paint to be sprayed on everything needing paint. My son was with me when I picked it up and helped me assemble the freshly painted axle, springs and such back to the frame to take it home. About that time, Dad showed up and work got busy, so that's where everything sat until this past two weeks.

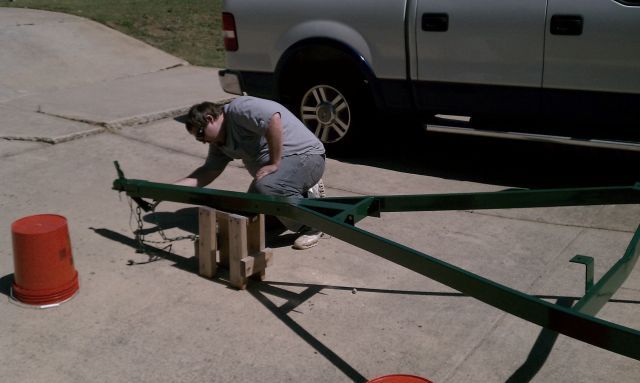
I got a huge amount of help from my son in law, who was very patient with me during the work, as I was very demanding of him about paying attention to detail and doing a good job. We discovered the painter had done a mediocre job of painting the trailer and several areas had paint worn thin, so we decided to clean up any rust, touch up with Ospho paint prep and repaint with brushes. Doesn't look quite as pretty real close up, but it looks great from five feet away, is thoroughly coated with paint and should last a long time. Here's some pics:

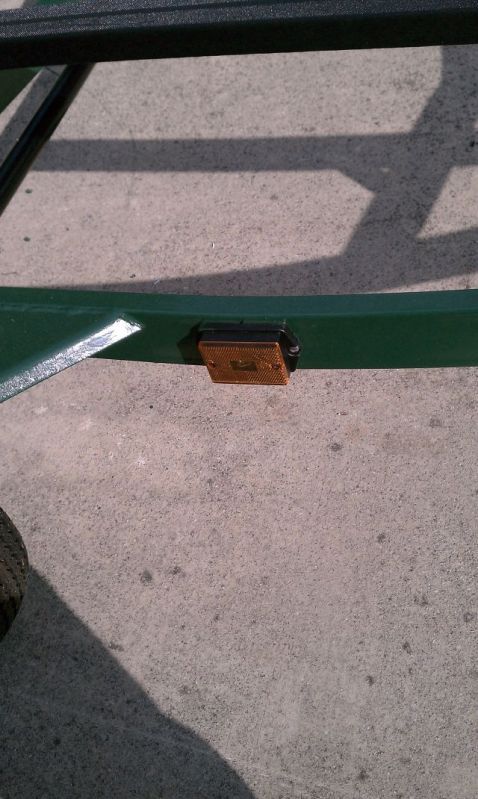
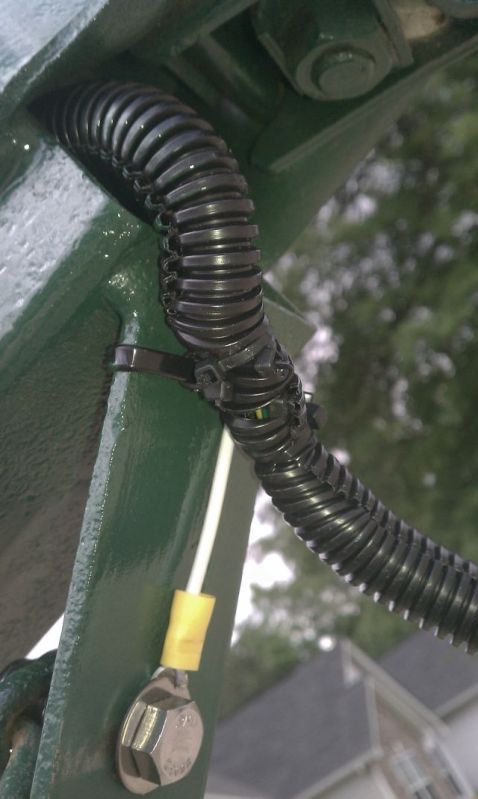
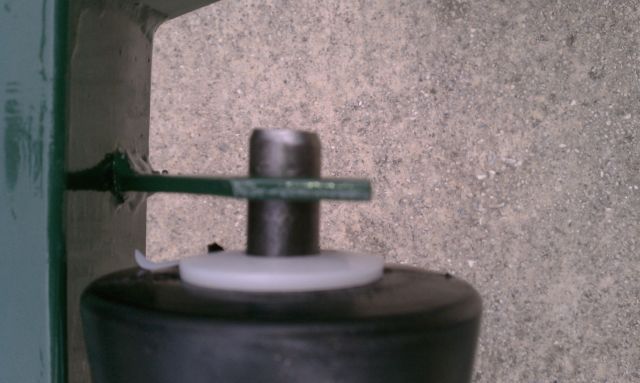
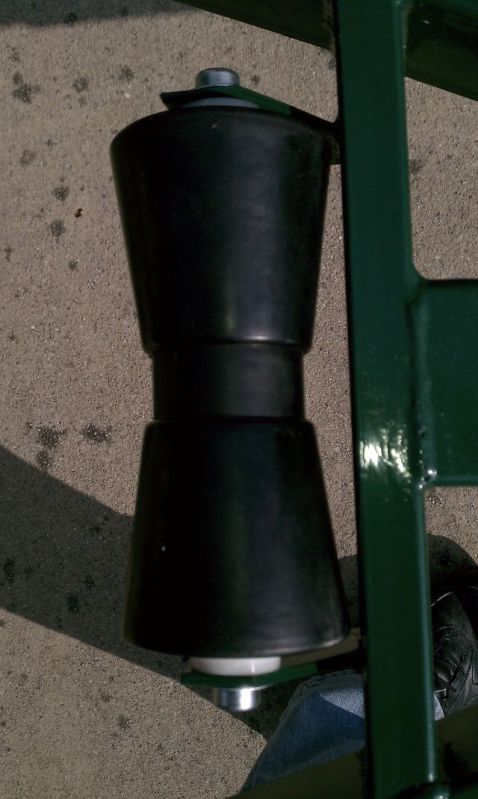
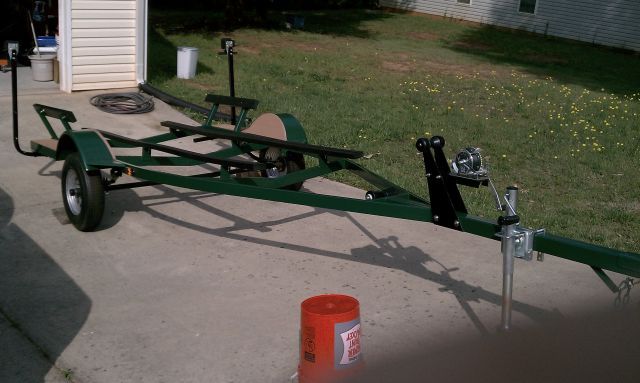
My son in law doing some touch up paint near the front chain and wiring. You can see the keel roller bracket welded in by the trailer factory and one of the bunk supports. The welded-in bracket was made for an 8.5" roller, which are no longer made today and the bunk support only has one hole for a bolt or lag screw.
IMAG0544.jpg


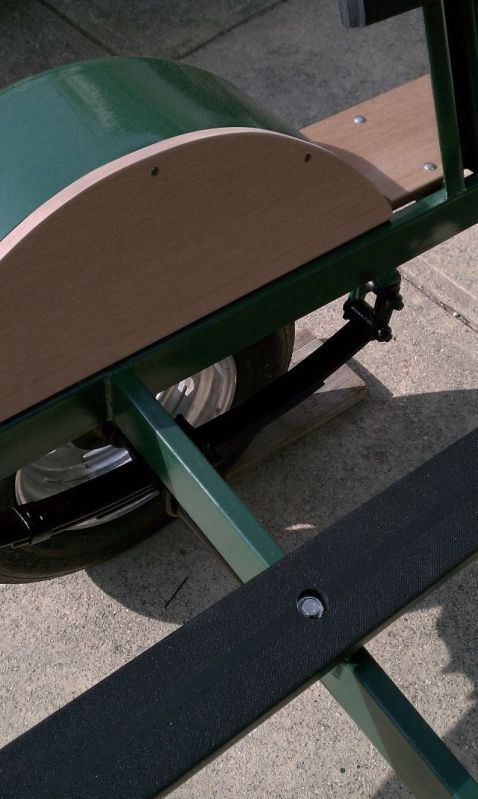
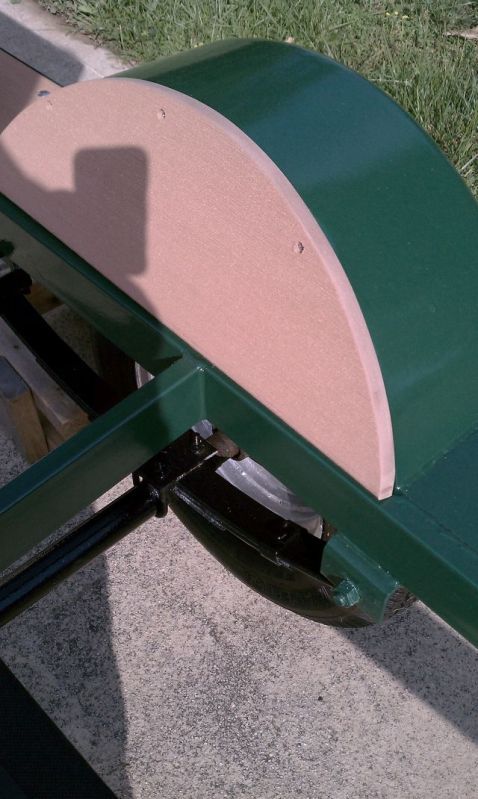
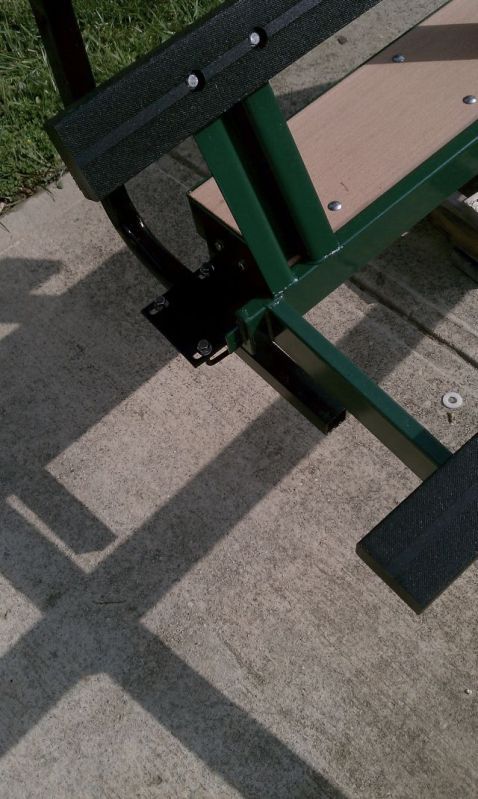
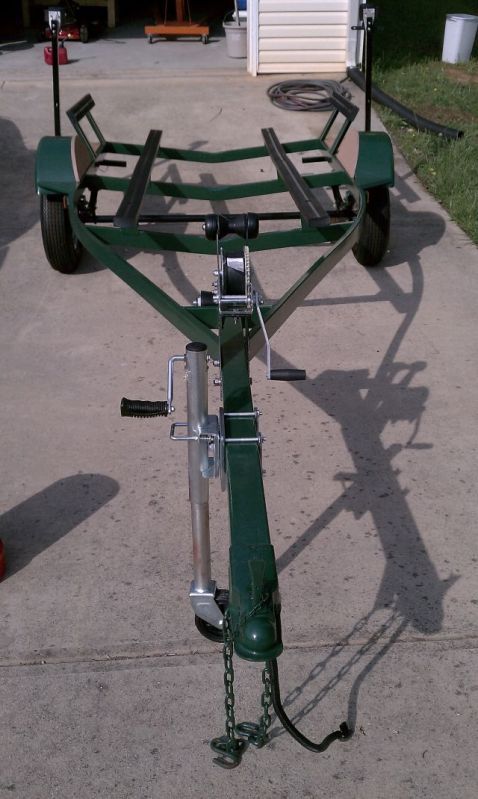
A pic back towards the rear of the trailer. You can see where my son installed the axle, springs and such using the original stainless steel hardware. I made a decision to paint over that hardware because the old stainless steel had rusted some and needed a coat of paint to protect it. Original springs, u-bolts and such were used. The Rustoleum Industrial paint from Home Depot I used to paint the trailer and axle parts is excellent stuff. Covers in a single coat, is very easy to paint with and looks great when done. At around 30 bucks a gallon, it's a lot less expensive than the boat paints and according to information I received from a very old boat salesman, works just as well or better. Tires and rims are new replacements, as originals were dry rotted from years of neglect and rims would have cost more to restore than using new. Note the support brackets for the side bunks and the tire fenders with the tabs to mount additional side support. Originals were carpet covered wood. I used plastic board I got from Home Depot at a discount, as the original purchaser changed his mind after it had arrived.
IMAG0547.jpg


A couple of pics of the side bunks and the replacement steps and additional side support. I used ultimate bunk boards in black for the bunks and the plastic wood from Home Depot to replace the original. To shape the plastic wood/boards, I used a contractor saw, the bandsaw pictured earlier and a palm sander to smooth out the bandsaw cuts. To drill holes, I used a small drill press from Harbor Freight. The materials all cut smoothly. All hardware was replaced with new stainless steel.
IMAG0565.jpg


In this picture, you can see where I drilled and counter sunk to use #6 stainless steel machine screws with lock washers and nuts to mount the side support plastic board through the original holes made by self cutting screws used by the original manufacturer. I thought the #6 screws might be a bit light, but they worked and held great if not over torqued. If any break during use, I'll replace them with a #8 machine screw.
IMAG0564.jpg


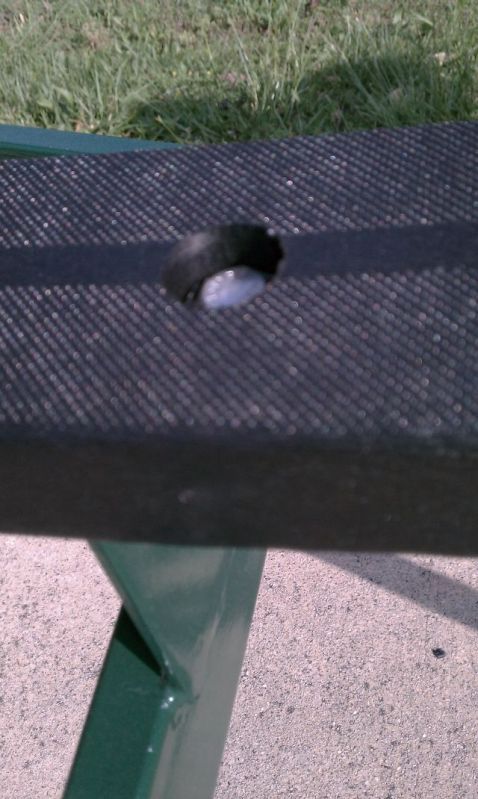
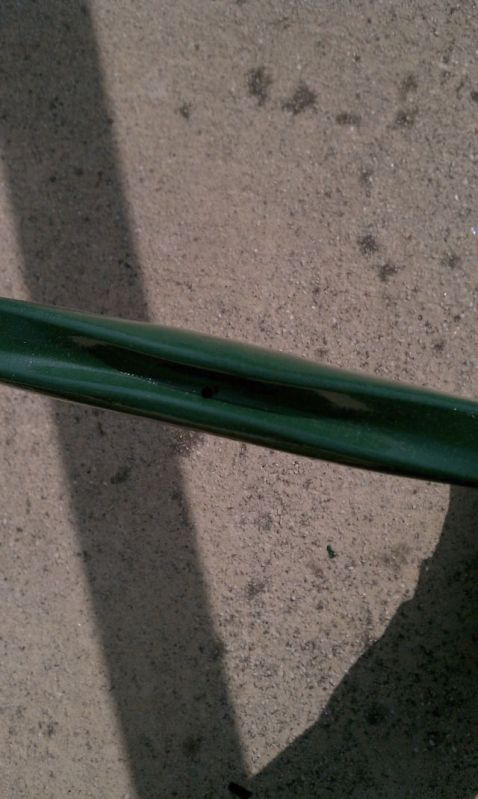
In this picture, you can see the drilled and counter sunk stainless steel bolts mounting the bunks to the trailer. The little blur on the side of the 2x4 in the photo is actually a small weep hole I drilled to drain any water from the area. If the hole clogs with lake water silt, I'll drill it out a bit larger with a larger bit.
IMAG0562.jpg


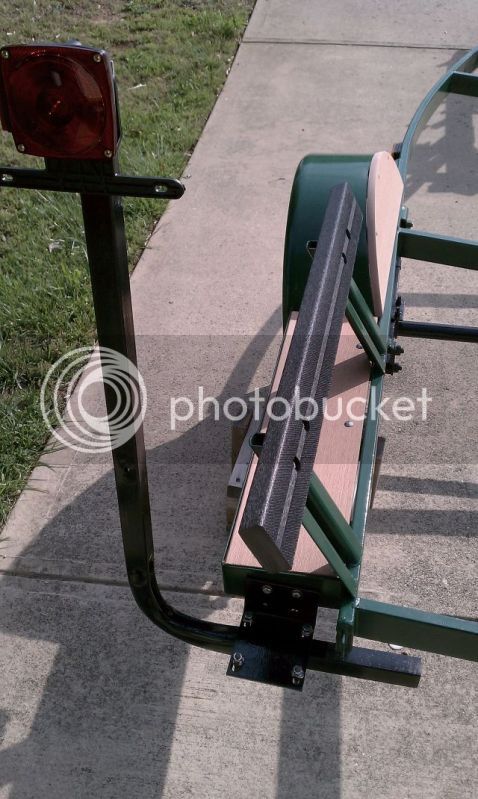
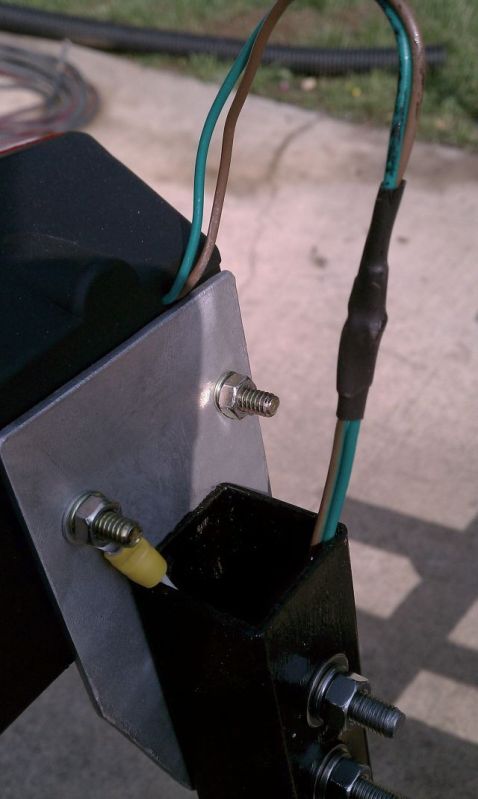
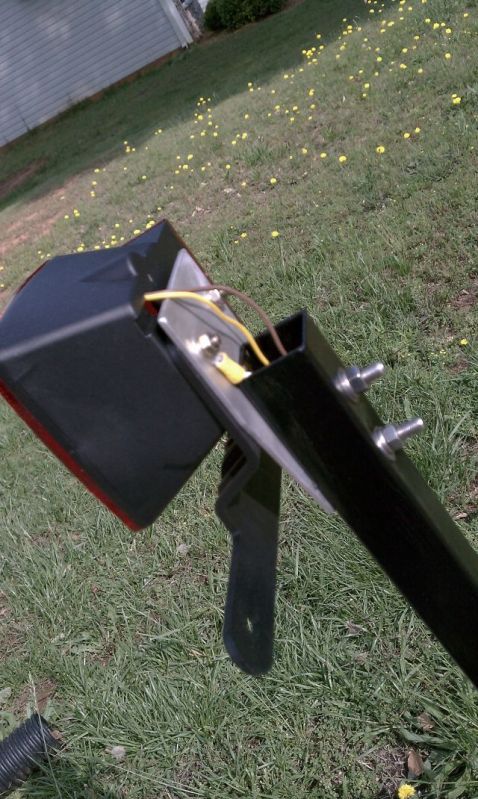
View from the rear, shows the three foot side bunk, the side support and the foot step as well as the left tail light with the license plate mount. If you look closely, you can see the bar the left signal light is mounted on is canted to water will drain out. What you can't see is the weep hole drilled in the bend of the bar to allow water to drain off and prevent corrosion. A little extra work, but I suspect I'll be glad I did that down the road.
IMAG0574.jpg
 
Post continued. It's hard to see in this pic, but the frame had bends to accommodate the V-hull of the boat and the bends had a trough that held water and caused rust/corrosion. If you look close, you'll see a dark spot that represents the weep hole I drilled through the top and bottom of the frame to drain the water out of the frame. Found out it worked when my son in law got soaked from water that had been in the frame for who knows how long.
IMAG0566.jpg


The original owner used these use L-brackets with bolts to mount the tubing for his guide-ons to the frame, then used stainless U-bolts below. I re-used everything, but replaced the rusted out standard nylocks with stainless hardware. Because the U-bolts cleaned up okay, but tended to rust, I chose to paint over them to prevent corrosion. I don't see myself removing them any time soon.
IMAG0575.jpg


The original owner mounted the signal lights by pushing the bolt on the back of the light through a hole in the J-shaped square bar, then somehow managing to put a single nut inside the J-shaped square bar, then tightening it down. I fabricated some aluminum brackets, mounted them to the J-shaped square bar, then mounted the lights to the J-shaped square bar. Seemed to be much more solid. You can see in the picture where the wire has been soldered, then heat shrinked. The ground wire (in yellow) has been tinned with solder, then crimped to minimize corrosion. I wanted to solder it as well, but my soldering iron was not of sufficient wattage to get the job done in the cold and wind the day of install. The plan is to push the wires back down in the frame, create drip loops at the bottom of the frame and wire bundle everything down.
IMAG0568.jpg


A view of the other light with the wires pushed down and the license plate mount visible closer up.
IMAG0569.jpg
 
The side light mounted, working and touch up painting completed. Note: You have to splice to the hot, then remove some paint on the frame for the side light to work with the frame ground. Doing so required some touch up of the paint after the light was installed. All lights worked well. If you have questions, I'll put it off and take a picture of the splice and device used for the splice.
IMAG0563.jpg


Wiring coming out the front of the frame and ending in the plug for the truck. Note the split plastic protection held around the wiring with plastic wire bundle ties and the ground wire tinned, crimped to a connector and held to the frame with a stainless bolt. The original bolt was short and the bolt held the chain on the other side, so was unable to hold the frame ground tightly. I'm sure the original owner had problems. See my solution in the next picture.
IMAG0557.jpg


In this picture, you can see the solution. A nut with washer and lock washer against the frame to solidify the frame ground mount (seen opposite the frame as a small bit of yellow) in the previous picture. Then a washer, the chain, another washer, then a nylock stainless steel nut to hold the chain firmly in place. the double washers around the chain allow the chain to turn and twist, while allowing the nylock nut to hold firmly and not be twisted off, because the washers rotate and the nut stays still.
IMAG0555.jpg
 
A problem I ran into. The original welded during manufacture keel roller brackets were made for an 8.5" bracket, an item no longer manufactured. The closest thing was a 8" roller, leaving a big gap between the roller and the bracket. A lot of roller rod was exposed to the weather, not a good thing from a rust standpoint. Here's a couple pics:
IMAG0550.jpg


Both pics show the same problem, too much gap, even if the hat/cap nuts are installed.
IMAG0549.jpg


I found a solution at Ace Hardware. They carried a nylon washer, 5/8" inner diameter and 1/8" thick. Four of these took up the half inch of exposed roller rod and solved the problem. I greased the roller rod with Mobil 1 synthetic grease, installed the roller, the four nylon washers and the hat/cap nuts. Worked perfectly and solved the problem. The hat/cap nuts were a handful to install with the bracket located in a tight place between the frame. My son-in-law and I used a couple pieces of hard wood board, two wood clamps and managed to get the whole business locked down, then a couple taps of hammer on the hard wood to set the hat/cap nuts and whalah, keel roller installed. Note the nylon washers at one end of the roller, two to an end.
IMAG0561-1.jpg
 
The last keel roller and the wench installed on the original mount. The original setup was badly corroded, in pieces with the original wench and mounting bar in pieces in the boat when I bought it. I found the pieces, cleaned then up, sandblasted them, painted them, bought some new hardware and nuts, replaced the wench, the roller & caps, then re-installed everything. I was able to re-use some of the original bolts, but had to touch paint the exposed threads due to corrosion. The bolt tips are painted black in the picture. In this pic, the mount was mounted in the rear set of holes, which I guessed were the correct ones. I was wrong and we ended up moving the entire assembly to the holes in the frame closer to the hitch. You'll see that in a later picture.
IMAG0560.jpg


A close up pic of the wench. It's axles have been lubed with synthetic oil and the gear greased with water proof grease. Like the rest of the trailer, stainless steel mounting hardware.
IMAG0559.jpg


Left side view of the completed trailer. You can see Mobile 1 synthetic grease on the jack. I also removed the top cap and placed a big wad inside on the gears. Ran much smoother than with the who-flung-dung grease it came with. The chinese made grease fitting wasn't worth much and I plan to replace it with a better made one - it leaked out the side.
IMAG0573.jpg


End view of the completed trailer. I ordered the bottom bunks to be one foot longer than the originals. This allowed them to sit right at the frame in the front and run beyond the boat six inches to the rear with the boat on the trailer. My hope is this will help with support and trailering.
IMAG0571.jpg


All in all, I was pretty satisfied with the trailer's appearance, even with the brush painting.
 
With the trailer done, the next step was to get the exterior of the boat as clean as possible, then put the boat back on the trailer so it can be transported to get an aluminum framed transom welded up. So I needed some chemicals to clean it with.

First up, "The works," a bathroom chemical, didn't work so well with the significant amount of many year old hard water deposits (calcium, lyme, etc.) the boat had from years of sitting in the water at a dock. This stuff cleaned some, but didn't get enough off.
IMAG0577.jpg


Next up, Mag cleaner for rough wheels. This was a mixture of several acids and while it wasn't perfect and required a good bit of scrubbing, it got the job done. I was very appreciate of my son-in-law, who did the hard work of taking the lower sections, allowing me to save my back working on the upper sections.
IMAG0578.jpg


The boat on the trailer ready to go to the welder's and get a new transom. It's been a long time coming and I'm glad to get the project going again.
IMAG0576.jpg
 
Brine said:
Welcome back Dave. Looking good.

Thanks for the welcome back and the compliment. I'm glad to be back working on the boat again. Since the last I posted, I've gained 7 grandchildren in my life. An amazing thing at my young age. Children and children in law have been busy.
 
Dave Your project was one of the first ones I looked at when I started lurking on this site a couple of years ago. Glad to see you are able to start on it again, it's looking great!!

Mike
 
Haven't been on the site for awhile and just read this whole post, and all I have to say is WOW. Great pictures and incredible detail. This is a great thread and congrats. Can't wait to see the finished product!
 
Glad to have you back, I've been watching this build from the beginning and am really looking forward to see the end product. You do great work and do an excellent job of documenting it
 
gillhunter said:
Dave Your project was one of the first ones I looked at when I started lurking on this site a couple of years ago. Glad to see you are able to start on it again, it's looking great!!

Mike

Mike, Thanks for the compliment. For a while I didn't think I was going to be able to for taking care of my Dad. He's finally settled down and now it's more about scheduling and re-thinking what I was going to do. I'm torn between using rivets in many areas as I originally planned or having several things welded.

dkhunter8383 said:
Haven't been on the site for awhile and just read this whole post, and all I have to say is WOW. Great pictures and incredible detail. This is a great thread and congrats. Can't wait to see the finished product!

Thanks dkhunter, always good to have encouragement. Motivates me to finish.

hsiftac said:
Glad to have you back, I've been watching this build from the beginning and am really looking forward to see the end product. You do great work and do an excellent job of documenting it

Thank you for the welcome, hsiftac. It's good when you guys that have watched the build from the beginning speak up. Makes me feel like I didn't get lost. Also motivates me to do good quality work to get a good end result.
 
I love this build and the attention to detail, might have to steal some of these ideas for my future larger offshore build.
 
Dave, how thick are your hatch covers, you could get Bassboy to bend some spines you could rivet to the backside instead of the plywood. Looking good Btw.
 
fender66 said:
Great project....very impressed with the details and great photos too.

Thank you. I try to do a good job with pics, because I've learned so much looking at other's posts on this board, I want those who read my posts to benefit from the pictures I put out.

Gators5220 said:
I love this build and the attention to detail, might have to steal some of these ideas for my future larger offshore build.

Just be aware I'm building for freshwater use. If I were doing saltwater, I'd be using tinned wire and be even more particular about sealing of wiring, touch up painting, etc.

Bugpac said:
Dave, how thick are your hatch covers, you could get Bassboy to bend some spines you could rivet to the backside instead of the plywood. Looking good Btw.

The hatch covers are either half or three quarter inch thick. Not sure what you're meaning about spines and riveting to the backside. Can you elaborate?
 
How thick is the aluminum, they added the wood backing to stiffen them correct? If they were like .080 you could probably just add a spine "stiffener" to the back sides, and ditch the wood.
 

Latest posts

Top