86BassTrackerV17 1st fishing trip w/son 10/11/13 vids p15

TinBoats.net

Help Support TinBoats.net:

This site may earn a commission from merchant affiliate links, including eBay, Amazon, and others.
Real Nice =D> . Really fine looking conversion, can't wait to see the finished floor, since I'm just installing my floor now. You've also presented a very complete set of pics for everything done. great job 8)
 
novaman said:
Real Nice =D> . Really fine looking conversion, can't wait to see the finished floor, since I'm just installing my floor now. You've also presented a very complete set of pics for everything done. great job 8)

Thanks Novaman. I'm not a professional sheet metal worker or anything like that. Just a guy who wanted a nice boat to fish and run around on the lake out of. I had never worked with aluminum at all before this build, so I'm learning as I go. I have worked enough with woodworking to know that tools can make a job a lot easier, so I tend to post the tools I use so folks can use that information and either make the job easier or save money on a tool. So far, it's worked for me. I noticed from checking out your build you've done some of this. I wish I had a few of the tools you mentioned, such as a brake. Several things I'd like to do I have to hire out due to the lack of such tools.
 
Looking good Dave.

How much does the hat channel run? What are the dimensions?
 
Brine said:
Looking good Dave.

How much does the hat channel run? What are the dimensions?

bigwave said:
Very nice work Dave, I would like to know how much that cap channel cost too. =D>

Thanks Brine and bigwave.

The hat channel was made out of aluminum scrap I had. The scrap was bought over a year ago in a big batch I bought with a couple other large sections, so I'm not sure how much it costs. I do know it was 1/8" thick, about 8' long and about 16" wide. I located a local metal fabricator, called them and asked them to do form the channel as a "work in" job. I got a single 2" wide, 1/2" tall "C" channel, 5 sticks of the "hat" channel and 7 sticks of "L" channel done for $100.00. They also gave me back the two left over aluminum strips, which are clean enough to use as spacers, trim, etc.

The dimension of the finished sticks, not including length were:

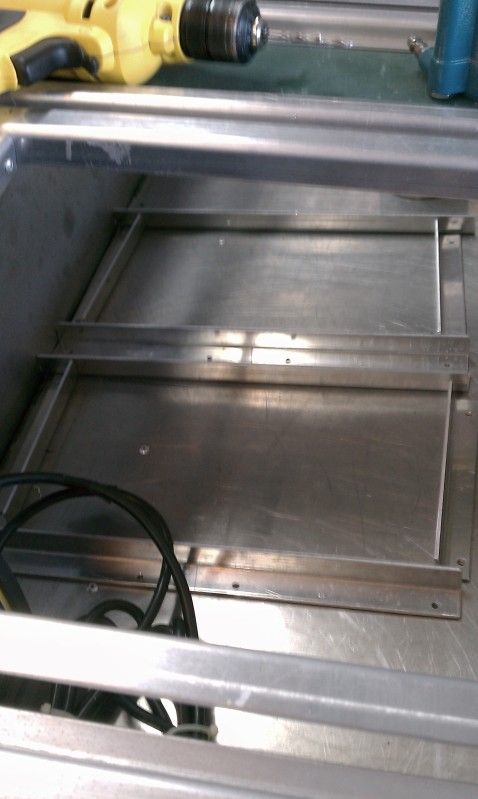
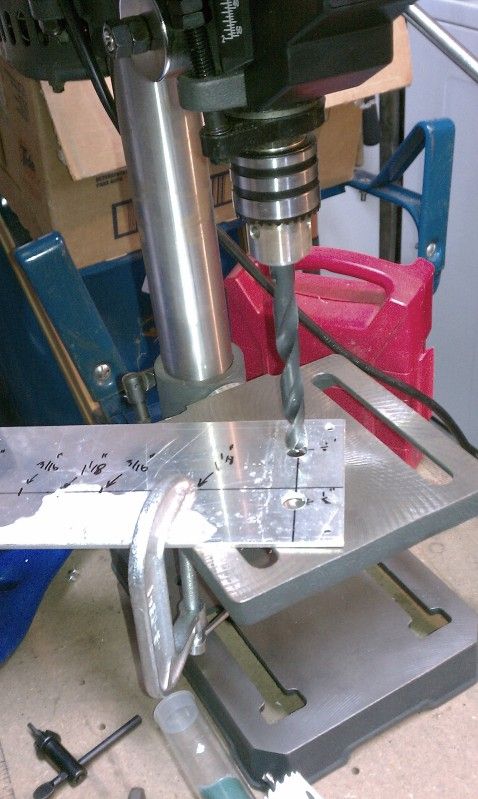
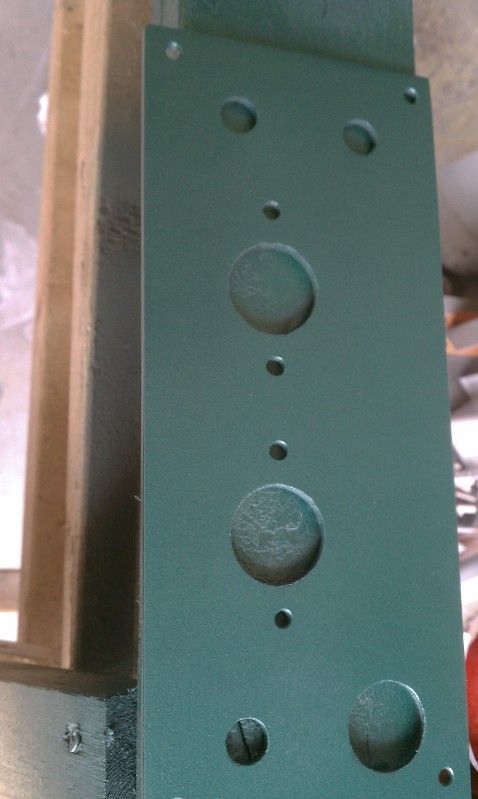
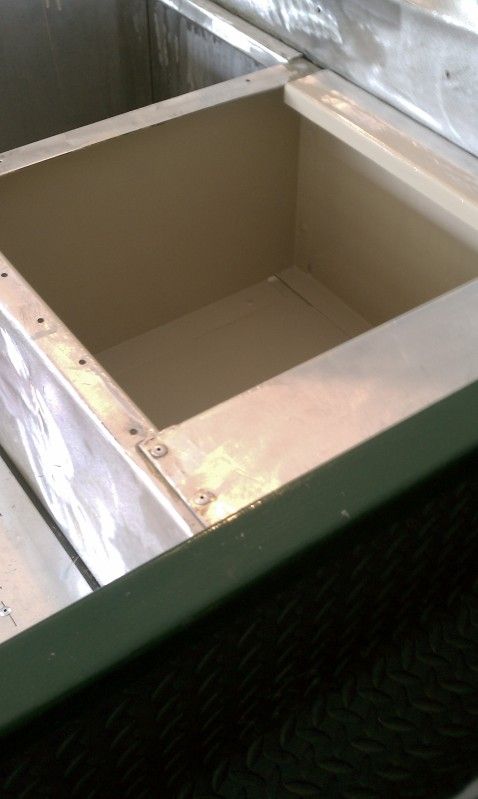
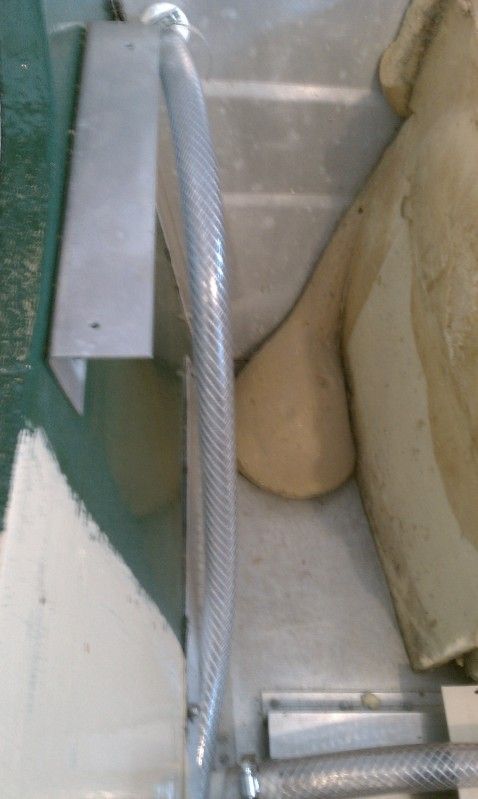
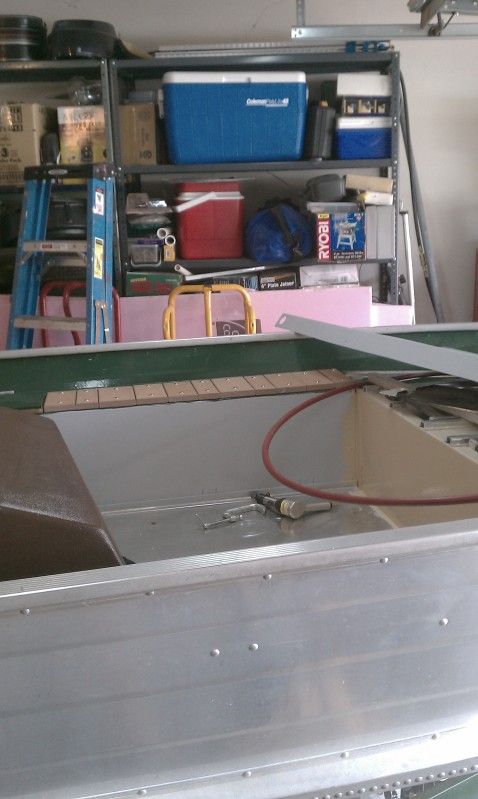
"Hat" channel: 5/8" tall, 1" wide at top, 1/2" wide at bottom. Top will be where the rivets for the deck sheet will be riveted. The bottom is where the rivets are set in the pictures.

"L" channel: Bent at 90 degrees, there is a curve to deal with, just like in structural extruded aluminum, but the strength is there. Each side of the "L" is 1 inch. Note: After using this, If I did it over again, I would make it either 1 1/2" or 2 inches. 1" is pretty tight to get rivets into and if you cut a 1" section to use as a bracket, you can only place a single rivet, where with taller section, you could use two rivets.

"C" channel: 2" wide, 3/8" tall bent at 90 degrees. Thick was made as an "error" by the fabricator, but was useful channel I was able to use in the front section. Turns out if I didn't have it, the "hat" channel would have been too tall to use in that area with the reinforcing backing sheet I used underneath the "C" channel. The hat channel used that way would have pushed the deck above the rub rail. The "C" channel combined with the 1/8" aluminum sheet above and below it gave me a height/thickness of 5/8 inches, a perfect height for placement of the deck sheet above the mounting nuts of the nose cap and allows the sheet to rest on the nuts, giving a bit of support in an area where there was none.

I am not sure, but I think this is much cheaper for the amount I bought than what a couple 25 foot sticks of channel would have cost me had I bought it pre-made from a aluminum distributor. I priced some extruded structural "C" channel online for $68.00/25ft, but the shipping was double the cost of the channel, making the total price unreasonable.

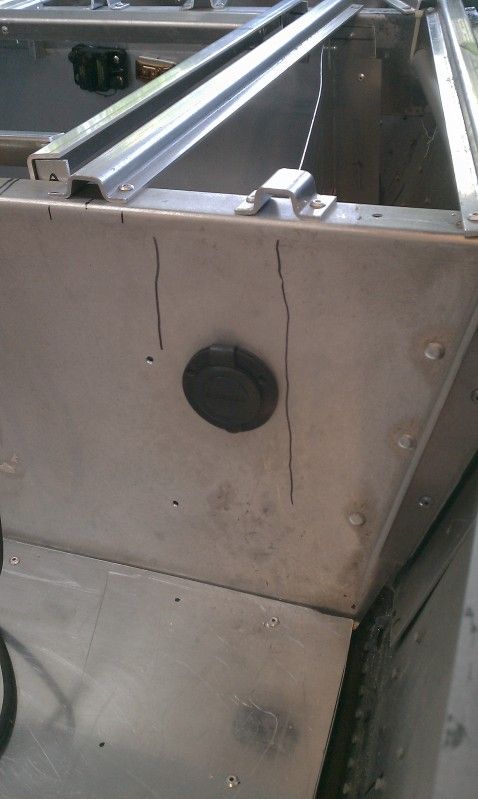
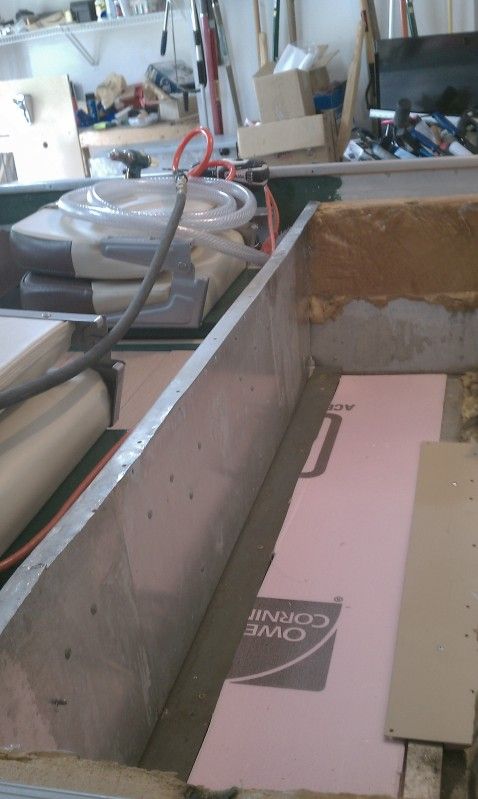
I want to make mention that when replacing rotted wood decks with aluminum, location of the deck height is a consideration to think about, especially if you want to re-use original aluminum paneling, which is cut to fit the thickness of the wood.

If you just throw the sheet down without raising it, you end up with side (and other) panels that are too short to reach down to the new deck without adding a "skirt" or other trim to make up the gap. I made a decision in the console area to not use additional support, because the center to center spacing was good to support the 1/8" thick aluminum, but I ended up with one panel that's too short and I'll have to add some trim to close the gap.

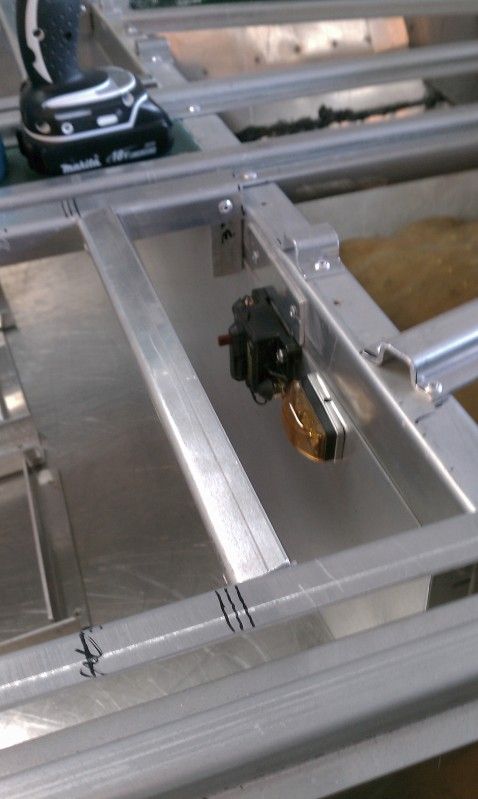
On the fore casting deck, I guessed the original deck height was 3/4 inch and used the channel I had made to raise the deck sheet to that height. On the trolling motor deck, I decided to raise the height where I could use the front cap's mounting nuts as support for the front tip of the deck. I may be wrong on the thickness of the original fore casting deck, it may have been thicker. If so, I may have to use channel or a piece of 1" square aluminum tubing I have to make up the height for the original transition panel I am wanting to keep.

I'm going to hire a man to weld in the transom and I may get him or the fabricating company to make me a new transition panel out of 1/8" sheet. This will make the trolling motor deck much more stable and secure, but will add additional cost. Decisions, decisions.....
 
quickly playing around.

If enough people were interested, I would consider taking a entire sheet of Aluminum and making 10 ft sticks of hat channel out of it. it would be a bit pricey. probably 40.00 each.
 

Attachments

  • daveinga.JPG
    daveinga.JPG
    46.6 KB · Views: 1,391
That's a nice drawing. I've got some work ahead of me cutting up the big aluminum sheets I have now, then I think I'll be ready to do something about the console. I'd like a center console like the one you have drawn up, but routing the steering cable and setting the boat up for a center console would be just a bit to much work to do in my boat. Too many things would have to change that I liked about the boat.

I'm pretty sure I'm not going to use the Bass Tracker console and base I now have, so I'll likely sell that and any related parts to help offset some of the costs of making a new console. It'll make someone who is putting back in plywood floors a quick easy install.
 
DaveInGA said:
That's a nice drawing. I've got some work ahead of me cutting up the big aluminum sheets I have now, then I think I'll be ready to do something about the console. I'd like a center console like the one you have drawn up, but routing the steering cable and setting the boat up for a center console would be just a bit to much work to do in my boat. Too many things would have to change that I liked about the boat.

I'm pretty sure I'm not going to use the Bass Tracker console and base I now have, so I'll likely sell that and any related parts to help offset some of the costs of making a new console. It'll make someone who is putting back in plywood floors a quick easy install.


were the controls on the side of the console, or the side of the boat. I drew this as a side console, Its to short to stand as a center I think. If you give me some dimensions and stuff I can edit and adjust.
 
Bugpac said:
were the controls on the side of the console, or the side of the boat.
The controls were mounted on the side of the boat.

I drew this as a side console, Its to short to stand as a center I think. If you give me some dimensions and stuff I can edit and adjust.

It may be a day or two, I still have to figure out what height and such I want the console to be.
 
Well, decided to go a different way on the console, cost and a need to get done returned me to standard console. Will still add some mods later on, but that's the one I'm going with. In the meantime, here's some progress 6-16-12:

Mocking up electricals - charger socket
IMAG0687.jpg


Mock up - battery trays
IMAG0692.jpg


Mock up - breaker and LED light
IMAG0694.jpg


Old casting deck panel
IMAG0703.jpg


Drilling new casting deck panel
IMAG0699.jpg


Painted new casting deck panel
IMAG0709.jpg
 
Progress 6-16-12 continued:

Panel painted, mocked up and ready for lettering (Lot of work in making a panel)
IMAG0736.jpg


Lining rod locker (Wish I'd used a different adhesive, but it worked well in the long run.)
IMAG0715.jpg


Rear storage compartment painted, will be floored like rod locker above later on.
IMAG0729.jpg
 
More Progress on 6-22-12:

Adapting inexpensive trailer LED lights to work with boats. These lights were water proofed/potted, but used a tab for the ground against the trailer. I replaced the metal tab with a soldered in wire and potted the finished areas.
IMAG0751.jpg


Here's the stuff I used to pot/waterproof the LED board with:
IMAG0754.jpg


Completed panel with switched installed and ready to go into boat. The Rustoleum Hammered green paint and stick on vinyl letters has been over-coated with clearcoat to prevent them coming off.
IMAG0747.jpg
 
More progress 8-20-12, yes, I've been slack on my posting. I've been busting tail trying to get boat finished and ready to fish.

Installing bilge (one auto and one manual bilge pump) and aerator pumps, glued to bilge floor with goop.
IMAG0772.jpg


Running bilge and live well exhaust hose
IMAG0773.jpg


Good tool to save wrists when tightening hose clamps.
IMAG0771.jpg


Trim wire bundle repair in process - the yellow bundle ties remind me of what needs repair/replacement. Blue tape is label/identification tags.
IMAG0766.jpg


Console wire bundle repair in process
IMAG0763.jpg
 
More progress 8-20-12:

Replace rod locker rotted wood with Trexx board leftover. Heavy, but cheaper than hiring someone to make a new locker door. Used stainless steel screws.
IMAG0762.jpg


Adding flotation to rear deck area. Pink board replaced old open cell foam chunks installed by Bass Tracker.
IMAG0761.jpg


Installing cleaned/painted/refurbed fuel/battery deck.
IMAG0760.jpg
 
Progress from 9-16-12, yes, I know I've been slack. Boat is almost finished and more pics to come.

Old console panel, plastic, crumbly and showing it's age
IMAG0821.jpg


Replacement aluminum panel mocked up and ready for paint
IMAG0822.jpg


Rebuilt console wiring bundle, ready to be installed and connected.
IMAG0825.jpg


New fuse panel added to replace well worn old fuse panel.
IMAG0826.jpg


New tach replacement cable installed, ready to be connected to control wiring.
IMAG0827.jpg
 
More progress pics to follow as soon as I can get pictures taken. Most of back deck is done, installing front casting deck and trolling motor deck tomorrow. Once I do that, then everything else is clean up, paint and start installing accessories like trolling motors and fish finders.
 
fool4fish1226 said:
Dave - The boat is coming along great keep up the the good work :beer:

F4F,

Thank you for the compliment and encouragement. Your "A Little Snookered" boat has been one of my inspiration boats when I come on the forum. I'm putting on the front decks and will be putting down the Grizzly Grip this week.

I went with aliphatic coarse to insure traction and durability. I would have went with the fine, but my wife has some issues related to vision and I want to make sure she has the best in traction I can give her without going to carpet.
 
Top