Alumacraft 1436LT Conversion

TinBoats.net

Help Support TinBoats.net:

This site may earn a commission from merchant affiliate links, including eBay, Amazon, and others.
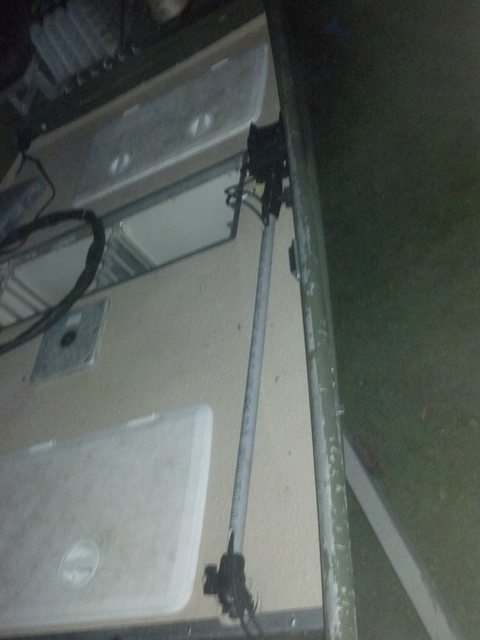
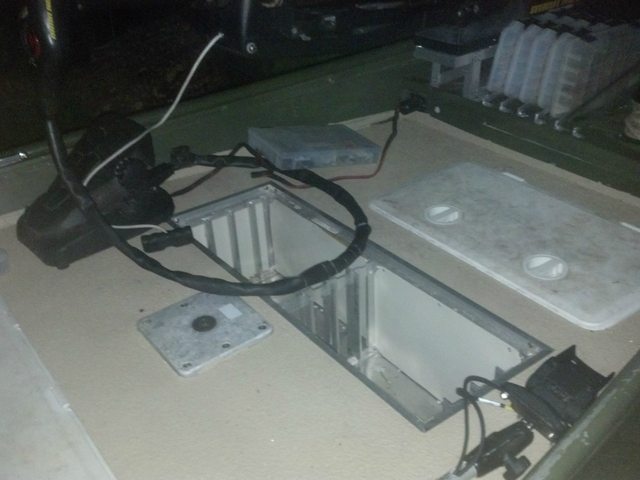
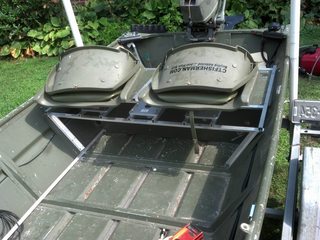
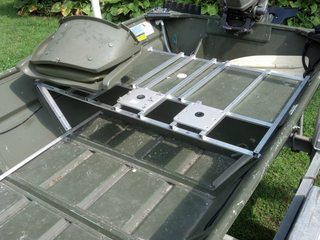
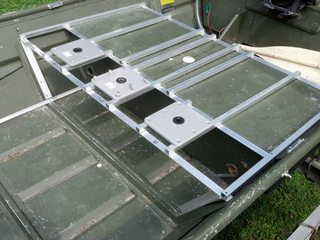
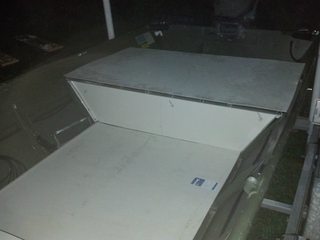
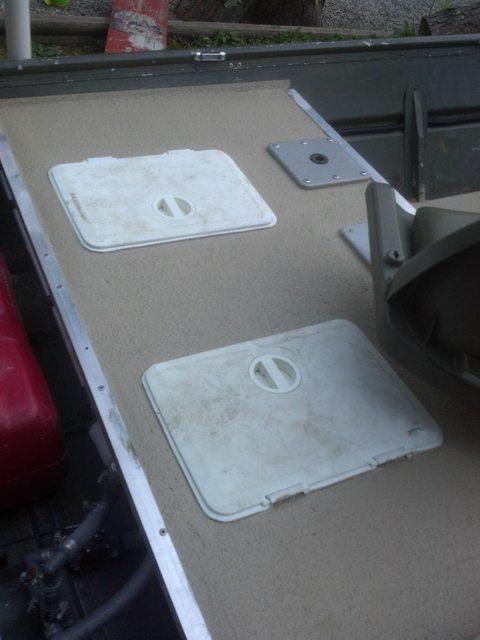
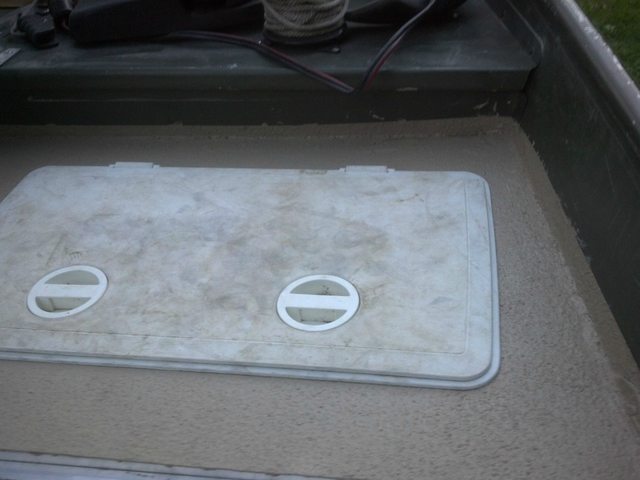
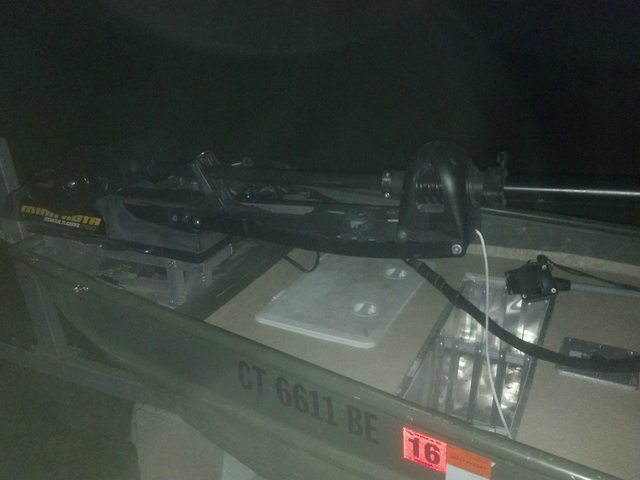
Well - installing the 24v motor was...disappointing. The quick-release mount from MinnKota is awesome, I love that I can completely remove the motor just by pulling a pin and removing a bracket, on the downside I dropped it prop-guard down on the deck and of course it punched right through. Fortunately it missed the hatch, as I'm sure it would have had no problem going through that. So...new sheet of FRP, which I would have needed anyway to finish the rear so no biggie there, but I didn't cut out the bow nearly as well so I now have a 3/8" gap along the side above the front storage bay - oh well, I'll fit a piece of scrap in there and use some fiberglass to touch it all up... Fortunately mounting the batteries in the bench with the new hatch was easy - so that clears the deck off. Tonight I hope to get the supports for the livewell in place so I can drop it in and start the seat framing.

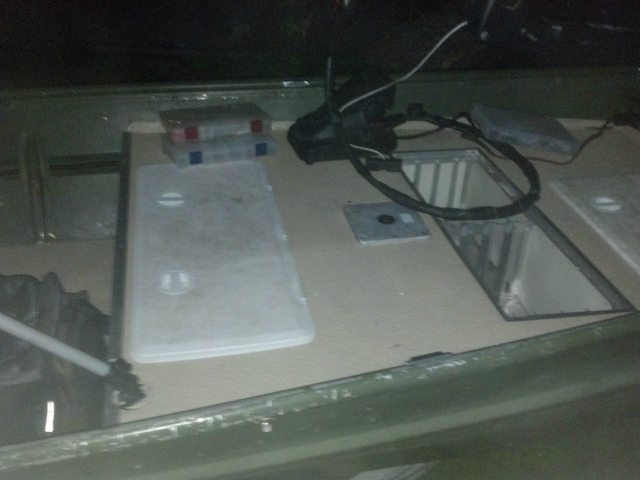
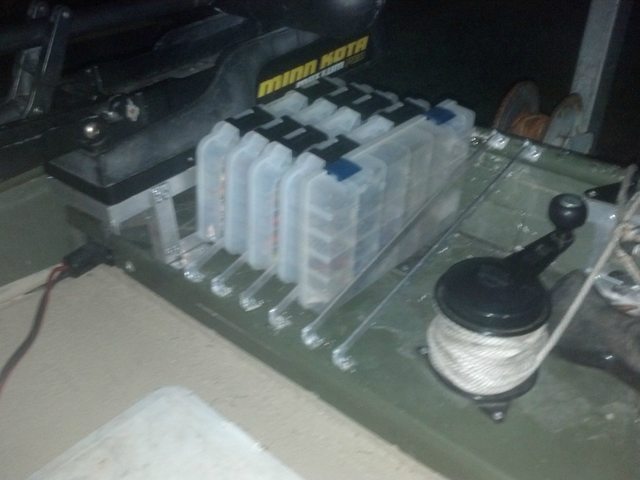
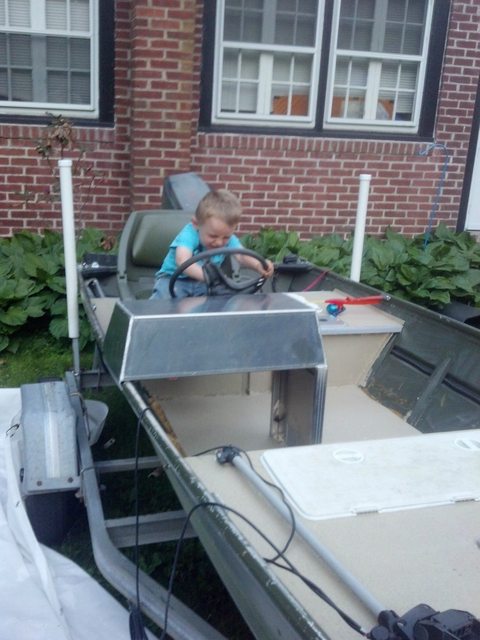
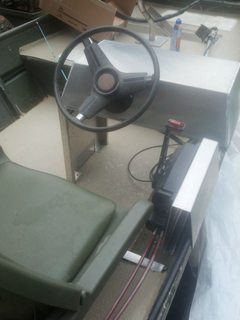
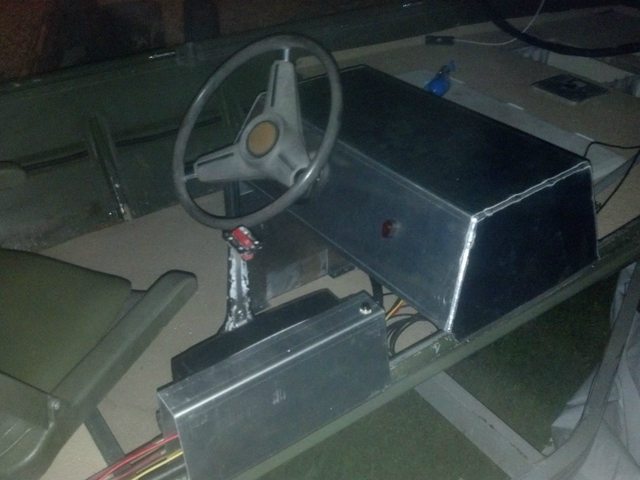
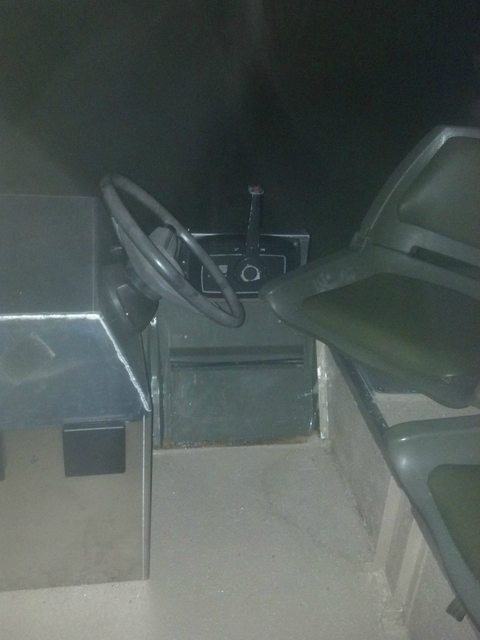
Final product is marginally resembling my original design - though I dropped the middle seat mount, added two to the rear for travel and moved the livewell to the rear.
 
Thats too bad, at least it was backed by foam and didnt punch through the bottom of the boat. I'd like to see some pics of your battery set up. I would have done the same but wanted to use my seat for the live well.

I have found twitch panels that have built in breakers for around $50, thought of mounting it on the rear of my middle seat with the wiring inside. I'd bend a piece of aluminum around so I have access to it then add foam around it.
 
Will do when I get in tonight - it's just a hole cut big enough to install the 1330 Tempress hatch - which conveniently has and opening which is 1/2" wider than 2 size 29 batteries side by side...
 
I finally found on ebay the parts I need to convert my tiller to remote steering, so I'm going to build a little side counsel and install my steering wheel and finally finish the layout of the boat as soon as tax season is over. Then I can finally apply the Tuff Coat to the final decking surfaces (I had it on an earlier rendition, but the edges were terrible and nothing lined up nicely so I tore it out & redid the FRP.) I saw BigTerp's thread with his beautiful custom made hatches, which I'm thinking I'm going to get for the rear engine compartment as my make-shift setup looks like crap. I'm so far behind updating my build thread it's sad...

Updates since last time - added a rear deck twice, decked the center section, converted it to 24v Maxxum 80# thrust TM with a quick-release bracket & 2 size 29 batteries under a hatch in the center bench - added a livewell to the rear bench with controls mounted on the face of the middle bench, added a port side storage compartment for the 2 part oars I always carry (tube handle & blade separate for storage) added 2 seat mounts to the rear bench in addition to the one centered one so when in transit people can sit 2x2, mounted the fishfinder on a pivoting ram-mount post offset with a 2' section of PVC so i can pivot it back to where i sit when driving (that's going to have to change somehow with the new remote steer, not sure just how yet, probably a clip or bracket for it to sit in just not sure yet)...pictures are somewhere...
 
Found some pics of the rear deck in process from last year. Unfortunately, I have none of the livewell going in or of the hatches installed through the deck afterwards.

M15yGQLm.jpg

loBFQDMm.jpg


The hatches install in the rectangular opening in the frame behind the side seat mounts.

23spNelm.jpg

8MQoyJNm.jpg


These were all before the Tuff Coat was added, so the bow section of FRP has since been replaced. There is a livewell cut into the rear bench with hatches on either side. The area below the new seat mounts has been filled with foam to make up for the foam lost in the bench for the livewell.

I'm working on adding the side console steering helm this weekend (hopefully), but I'm finding there is very little place to store rods on board...apparently I've pushed the 1436 as far as I can. I'm looking at adding a 1" high rectangular cavity along the port side, at least that would let me conceal the tips of my guest's rods on that side (I've already broken one of my own in a moment of stupidity) but the 6 rods I carry are probably going to have to be stored vertically around the side console unless I come up with something.
 
Hello OTW102. Vertically stored rods always get in the way on a small boat while fishing. On My 16' Alumacraft 1648 NCS I usually carry 5 rods for myself. I store 4 of them horizontally on gunnell mount rod holders (up to 8' rod) and the one I am using I store in a vertical rod holder while underway. When I need to carry more rods or my 9' fly rod I use this system from Driftmaster. It can hold up to 8 rods. It is very easy to mount and it is removable.

Nice build so far.

Spud
 

Attachments

  • Driftmaster.jpg
    Driftmaster.jpg
    6.2 KB · Views: 3,340
Hmm...wouldn't be too hard to duplicate that using some PVC...but that's along the lines of what I'm thinking of. I hate to store them vertically, because you're right they're going to get in the way, certainly on a small boat, so they'd only be verticle while I was underway on the gas motor. Perhaps I can situate them horizontally to the port side of my TM somehow, that's where I've been resting them lately, I'd need some sort of configuration of tubes to align everything and protect the tips. There's only maybe 4" from the decking to the gunwale up front, not much to work with.

I was thinking about a 2 tiered layout...with the rear fisherman having spots for 3 rods and my gluttonous outfit allowing me to carry 6 up front...I'm going to play with it tonight and see if I can make something of it.
 
Some more updates (sort of, these pics were from the end of last summer). Taping the boat before applying the Tuff Coat & some of the final results.

Installed the side console and remote steering too - found out that my connectors at the end of my control cables don't mate with my Mariner, so a quick call to boats.net and the right parts are on their way, hopefully here by the end of the week so I can convert it over on time for my trip out Friday at O'Dark-30 in the morning.

Pics are of the result of the rollon application of TuffCoat - very easy to do. I had enough paint to cover the interior sides of the boat, but was too low on primer so I will have to revisit this part of the project once I can get another quart. All in it will require 1 gallon of paint & 2qts of the 2part epoxy primer to cover the entire interior of the 1436 for anyone interested. Also, try not to apply the paint in full-sun, it dries too quickly and cracks a bit, which was ultimately covered up in the 2nd coat but still...

Bad-hair day and child-labor all in one

ltOSnWNl.jpg


Finished view of the rear deck with the hatches to the livewell. I had to shift the seat mounts forward so the posts beneath the deck didn't protrude into the livewell tank.

JSXbmVIl.jpg


Front deck area with my well worn Tempress hatch. In the end the Tuff Coat will run all the way up to the gunwales, but for now it is what it is

PIC1HQIl.jpg


And one from testing the lineup of the console with my little buddy at the helm. Not pictured is the install of the mounting plate for the remote controls - I had to re-bend the flange for the anchoring point for both the console and remote mounts so they wrapped to the outside of the gunwale - this bought me a few inches more floor space clearance by shifting the whole setup to the starboard ever so slightly which allows the seat to just clear the remote control (picture didn't come out clear)

00R9SmGl.jpg
 
Up next is some fiberglass filler to the exposed foam alongside the mid-deck to drain the water to the drain lines in each bay, along with the framing for the port-side hatch that will run from the rear deck to the front. Hopefully the primer shows up quickly - I don't want the deck discolored from the sides by the time I get them painted.

Also to come this week (weather permitting) will be the transom mounted tilt-tube for the steering (so I can disconnect the linkages & remove the motor for carry-in launches) & the hatch-lid for the front tackle tray storage. Tested the final setup with the most recent permanent additions mounted (console, wheel, remote & cables) and all the removable items (motors, batteries, tank, anchor, gear & seats) removed and it's definitely heavier, but still manageable that two people can lift & carry it a short distance to clear obstacles or drop in from the bank. Certainly won't be enjoyable, it's tricky with the side imaging sonar sender protruding from under the bottom, cause you have to be careful not to drag the boat.

For longer carries I made up a boat dolly that slips between the bunks on the trailer and allows me to walk the boat down to the water when no launch is available.

3NZWcOKl.jpg
 
Great build, and very nice detail in description!

As I read through, I was counting up weight addition and was hoping to see a dolly of some sort to support the boat.

You mentioned you'd put it in, and then could leave it there? Any concern about theft?

Nicely done.

=D>
 
Not really worried about theft behind my house - the banks are extremely steep, so there isn't anywhere but from out on the water that someone could see the boat (no visibility of the boat from any road in the area, opposite side of the river is a swamp, so people won't see it from there.) The only ramp to the river is on school property and has a locked gate across it, then the only two carry-in access points are 2 miles in either direction from me. Not to say someone who wanted to steal it couldn't, any hardware store bolt cutters could probably cut the cable I lock it to shore with or the padlocks on the motors, but someone motivated to do something like that would probably be unaware that it was even out there.

That, and the river I'm on has a stigma from being heavily polluted with PCB's & other contaminates by GE for a long time, so there are very few people even out on the water save for the residents and people like me who know how awesome a fishery it has become - hence it needing to be light enough to launch at the carry-top access point up in town.

-------------------------------

I'm so thrilled with the way it's coming together. After getting part way through it last year I got impatient and started fishing it half-complete which I've resolved not to do this year so my itch is getting really bad!!! Weather skunked me from making progress last night, hopefully tonight will be better. I'm picking up some odds and ends today so I will have all the parts & hardware to hook up the remote steering & controls - I want to route a switch for the bilge to the new console along with a kill switch for the motor,a button for the horn and a switch for the deck night lighting. I'm going to leave the livewell controls on the aft side of the middle bench as they're accessible to me from the front seat. With some luck the sun will come back out Wednesday and the little water that makes it by my tired cover will dry up and I can fiberglass the drain routes on the side so they taper to the drain lines run through the foam under the deck to the back of the boat. If not no biggie, it's only 6x 2" wide by 11" long strips along the sides between the middle and rear benches, and it's not like they weren't that way all year last year with no ill effects, I just don't like water pooling on top of my foam for any length of time even if it's only 1/2" deep.

If all goes well and my wife doesn't have jury duty Friday I hope to get it out first thing in the morning for the first time without the tiller. After that I'm still waiting on the port side hatch, and a set of red LED lights to set along the sides for some low-intensity night lighting. I'm debating what to do with the opening over the livewell pump/bilge pump/gas tank. I'm thinking another hatch from Fish-On Fabrications, but that's $$$ that I will have to conjure from outside the normal budget which means more side work and less fishing time.

I'm still searching for a horizontal rod-securing solution beyond the BPS velcro straps that attach to the deck surface as there really isn't any room anymore for rods to be laying out.
 
Everything was wet tonight, so no fiberglass. I did get the engine converted from the tiller to remote throttle & steering. I've got the throttle & shift controls adjusted and dialed in. It worked out nicely - I was able to reuse my throttle arm & pivot so there was no effect on my idle or engine side throttle adjustments. No pictures, as this was a very greasy endeavor.

Unfortunately I broke one of the bolts holding the tiller arm on so I will need to drill into it and tap it tomorrow so that I can attach the steering plate and hookup the steering controls. The cables are in the boat, I just didn't mount the tilt-tube to the transom yet as I want to make sure I have the positioning right. I'm not using the tilt-tube in the motor mounting bracket because I want to be able to remove the motor with basic hand tools should I go to a carry-in launch. Hearing myself think that, I've got rotary steering, so it's actually easier to remove the steering cable with the engine should I need to pull it off and use the original tilt tube...oh well, better flip flop in my decision making now rather than later. This way I don't need to worry about the geometry of the steering being thrown off.

Now where's that wire brush????
 
Grabbed a quick pic of last night's progress on my way out to work this morning. The throttle control box and cables were courtesy of fellow tinboats.net member Barefoot_Johnny and are all greatly appreciated.

...the lack of grip atop the shift/throttle leaver is courtesy of the inept gorillas at the USPS who beat the package like a b@$tard red-headed stepchild - but that's what you get from a bunch of union scrubs accountable to no-one. Of course I can't find a replacement part, so without a value for the damage my claim with the post office went no-where. Oh well, I'm working something up using the broken pieces that hadn't fallen out of the busted up box and a bit of fiberglass and a lot of patience.

fIUucdPm.jpg
 
onthewater102 said:
...the lack of grip atop the shift/throttle leaver is courtesy of the inept gorillas at the USPS who beat the package like a b@$tard red-headed stepchild - but that's what you get from a bunch of union scrubs accountable to no-one.
fIUucdPm.jpg

[-X [-X [-X

Might want to tone it down a bit chief.
 
EZPZ said:
Hello OTW102. Vertically stored rods always get in the way on a small boat while fishing. On My 16' Alumacraft 1648 NCS I usually carry 5 rods for myself. I store 4 of them horizontally on gunnell mount rod holders (up to 8' rod) and the one I am using I store in a vertical rod holder while underway. When I need to carry more rods or my 9' fly rod I use this system from Driftmaster. It can hold up to 8 rods. It is very easy to mount and it is removable.

Nice build so far.

Spud
EZPZ, can you post a pic of the way you have those rod holders mounted? I'm trying to figure something out for my 14 Alumacraft jonboat.

Thanks
 
Last night & tonight's efforts:

Wired in the switch for the bilge pump and I put a kill switch for the motor on the remote bracket since my motor was a tiller up until last night and I still need some way of shutting the motor off. Need to grab more wire looming from Big Lots to pretty everything up.

vFiZ0BYl.jpg


Attached the all important stow-away cup holders (there are actually 2, pictures in the dark don't work as well as I'd often like)

TPI3RsHl.jpg


Remote connections to the motor are complete - the cables I happened upon were all in great condition but 14' long, so they make a loop around the rear compartment before going into the motor. In time I'll splurge for the proper 7' cables, but for the time being they're functional so I'll worry about other punch list items first.

h5QUiyDl.jpg


A view of the Tuff Coated FRP front deck with the 80# Maxxum and quick release bracket from Minn Kota

pnq4dUUl.jpg


And lastly the livewell drain control and timer mounted to the rearward facing face of the middle bench.

QVh95R2l.jpg


--------------------


Up for tomorrow is the fiberglass work to channel any water that gets on the mid deck to the drains & attaching the middle bench trim piece and the 1/2" trim w/ the hinged lid for the front tray compartment.
 
Ran out of time before the rain hit to get the fiberglass done - managed to get the trim all installed, but raced the rain to get everything cleaned up so pics will have to wait for a dry day.

Had the boat out Friday & Sunday last week, still hits 20.5 MPH no matter how much weight I add (full/empty livewell, fishing buddy etc.) so I'm back to looking into a different propeller. Sun is supposed to show itself later today and tomorrow, hopefully the boat will be dry so I can fiberglass the drain channels, then all I have to do is wait for the hatch to arrive :)
 
Trim around the tackle tray box in the front deck showing my extended ram mount for my fish finder allowing me to use it both up front and have the charts and imaging close to my eyes when driving:

40Ew2wWl.jpg


Fish finder mount pivoted up to the console and locked into the grip:

jrtoJ2Il.jpg


Another shot of the now prettied up edges around the tackle tray slots

1Gqxonfl.jpg


A bit of trim on the face of the middle bench - I used the same 1/8" angle as I used in the skeleton of the boat as the trim will be supporting the hatch that is coming from fish-on which will run from the backside of the middle bench to the leading edge of the rear bench and form a narrow compartment over the taper of the port side.

Ip0HI51l.jpg


And a close up of tonights mini-project - rain got behind the cover in a few small areas so naturally it made it to the foam I'm looking to glass over so that work couldn't be done today so instead I spent my time adding slots to the useless little front bench so my 3600 trays finally have a secure home. I brazed little pieces of 3/4" angle to a 1/2" flat 1/8" thick aluminum bar & screwed the angle down to the benchtop and the gunwale. I'll have to come up with a piece of trim somehow to hide the ends where I brazed it all as they are a bit rough. I ran out of 1/2" material, I'll have to pick up a 4' piece from Lowes tomorrow to make two more slats for a total storage of 8 3600 trays on the front bench and 8 3700 size trays in the floor between the seat mount and the front storage compartment. I plan on moving the anchor mate to the side of the boat and using a few pullies to route the rope back to it.

KMWMSTVl.jpg
 
Spoke with the owner of Precision Propeller Repair out of Newburgh NY https://www.fixmyprop.com as I was looking into a stainless PowerTech cupped prop for my outboard to try and correct the ~36% slip I'm experiencing with the OEM aluminum propeller. Rather than sell me the expensive stainless prop I was looking for he informed me that he can put a cupped edge on my aluminum for a fraction the cost of the replacement. I always thought you needed stainless to have a cupped edge for the extra rigidity to hold the load on the edges, but I wasn't aware that because it's a small hp outboard it doesn't have the shaft torque to distort the aluminum -- so it will perform like the stainless would have.

I'm bringing the prop to him tomorrow and hopefully will have it back to test out next Friday, but I always appreciate the rare instance when a business actually tries to understand and address your issue rather than just make a quick sale.
 
Top