TinBoats.net
The original aluminum boat site!
You are using an out of date browser. It may not display this or other websites correctly.
You should upgrade or use an alternative browser.
You should upgrade or use an alternative browser.
Alumacraft 1436LT Conversion
- Thread starter onthewater102
- Start date

Help Support TinBoats.net:
This site may earn a commission from merchant affiliate
links, including eBay, Amazon, and others.
onthewater102
Well-known member
Will do - I meant to do that a while back & keep forgetting while I'm launching. From memory the water sits just below the rib stamped into the side of the boat at the transom which is the lowest point.
I started with a 1436LT which is 20lbs lighter than the standard Alumacraft 1436, giving me a little wiggle room. I'm sure I added 20lbs of aluminum bracing alone, ~25 lbs of FRP, ~25 lbs of expanding foam, plus the side console, livewell linings and hatches - so the non-removable additions probably total ~120 lbs. Add to that the outboard (105lbs) the trolling motor (50lbs) the battery (65lbs) that leaves me ~200lbs of capacity per the sticker for me, my gear & guests...oh well - I've added plenty of flotation evenly around the boat in the event something goes wrong.
I started with a 1436LT which is 20lbs lighter than the standard Alumacraft 1436, giving me a little wiggle room. I'm sure I added 20lbs of aluminum bracing alone, ~25 lbs of FRP, ~25 lbs of expanding foam, plus the side console, livewell linings and hatches - so the non-removable additions probably total ~120 lbs. Add to that the outboard (105lbs) the trolling motor (50lbs) the battery (65lbs) that leaves me ~200lbs of capacity per the sticker for me, my gear & guests...oh well - I've added plenty of flotation evenly around the boat in the event something goes wrong.
onthewater102
Well-known member
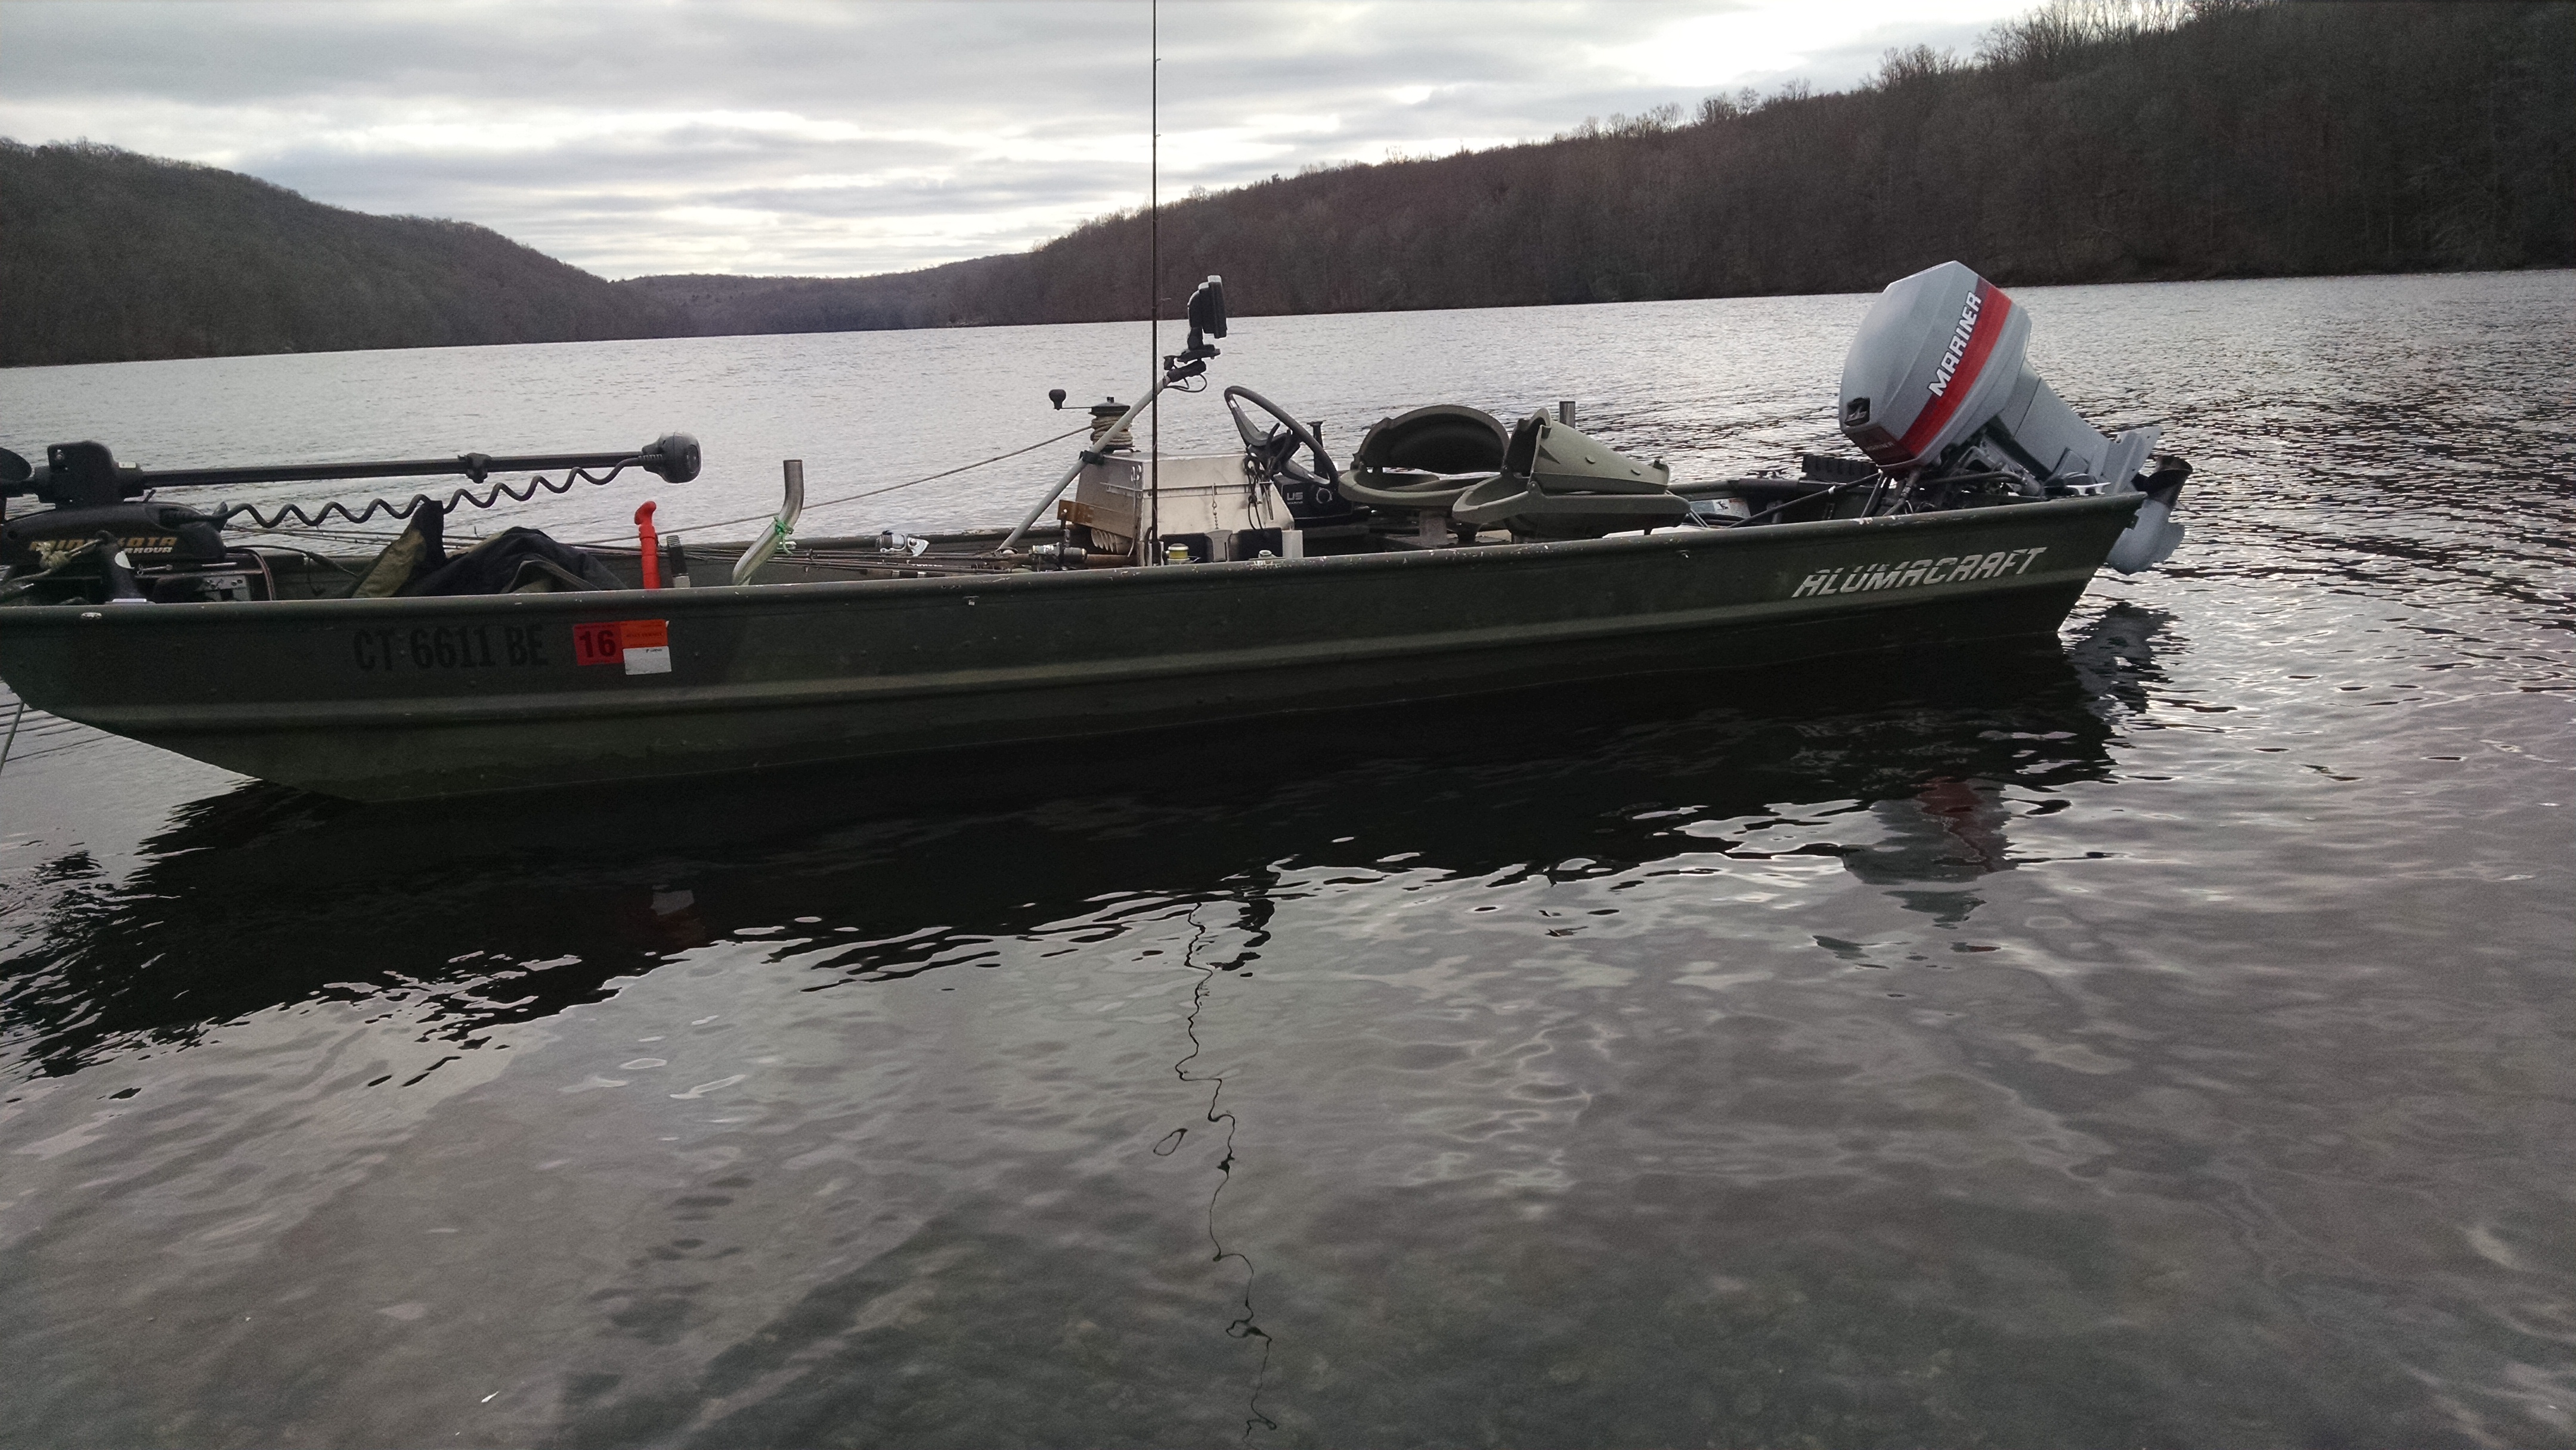
Lighting was terrible, but there is several inches of freeboard below the rib stamped down the length of the side. This was with the livewell in the back seat full.
user 20022
Well-known member
- Joined
- Aug 20, 2015
- Messages
- 466
- Reaction score
- 4
Nice!
Sent from the dust in front of you!
Sent from the dust in front of you!
onthewater102
Well-known member
Hit 23.5mph with a full livewell and a 2nd person in the boat. Not sure what was happening but the boat would rise up on one side (starboard) at full speed. I'm not sure if the water in the livewell was shifting destabilizing the boat or what. The engine RPMs would surge a bit at the same time, but there was always a strong tilt to the portside. Any thoughts what might cause this? felt like the starboard side was planning higher than the port - almost as if there were a huge airbubble under the starboard side.
user 20022
Well-known member
- Joined
- Aug 20, 2015
- Messages
- 466
- Reaction score
- 4
Too much weight on that side?
Sent from the dust in front of you!
Sent from the dust in front of you!
user 21075
Well-known member
- Joined
- May 12, 2016
- Messages
- 89
- Reaction score
- 0
WOW, what a transformation on this build. Looking forward to seeing it after your painting. Nice work !!
onthewater102
Well-known member
I hadn't wanted to mess around with extending the rear deck back any further, but my son keeps getting his rod tangled in the wires and the plumbing to the livewell, so it's only a matter of time before something gets damaged unless I get something over top.
Alumacraft is really slow responding RE: the paint - I contacted them last week & still haven't heard back from the factory as to whether i need to buy it from them or if they can supply me with a code to get it locally. I'd prefer to just touch up the gunwales & paint the side console if possible & not get into redoing the entire boat at this point this year - but I don't want it mix-matched either.
Alumacraft is really slow responding RE: the paint - I contacted them last week & still haven't heard back from the factory as to whether i need to buy it from them or if they can supply me with a code to get it locally. I'd prefer to just touch up the gunwales & paint the side console if possible & not get into redoing the entire boat at this point this year - but I don't want it mix-matched either.
onthewater102
Well-known member


onthewater102 said:Alumacraft is really slow responding RE: the paint - I contacted them last week & still haven't heard back from the factory as to whether i need to buy it from them or if they can supply me with a code to get it locally. I'd prefer to just touch up the gunwales & paint the side console if possible & not get into redoing the entire boat at this point this year - but I don't want it mix-matched either.
I went to my dealer Friday to look at a 1436LT and it was scratched. Sales guy told me they ordered paint from the factory to do the touch ups. Now I have to wait 2 more weeks for delivery of the next batch!
onthewater102
Well-known member
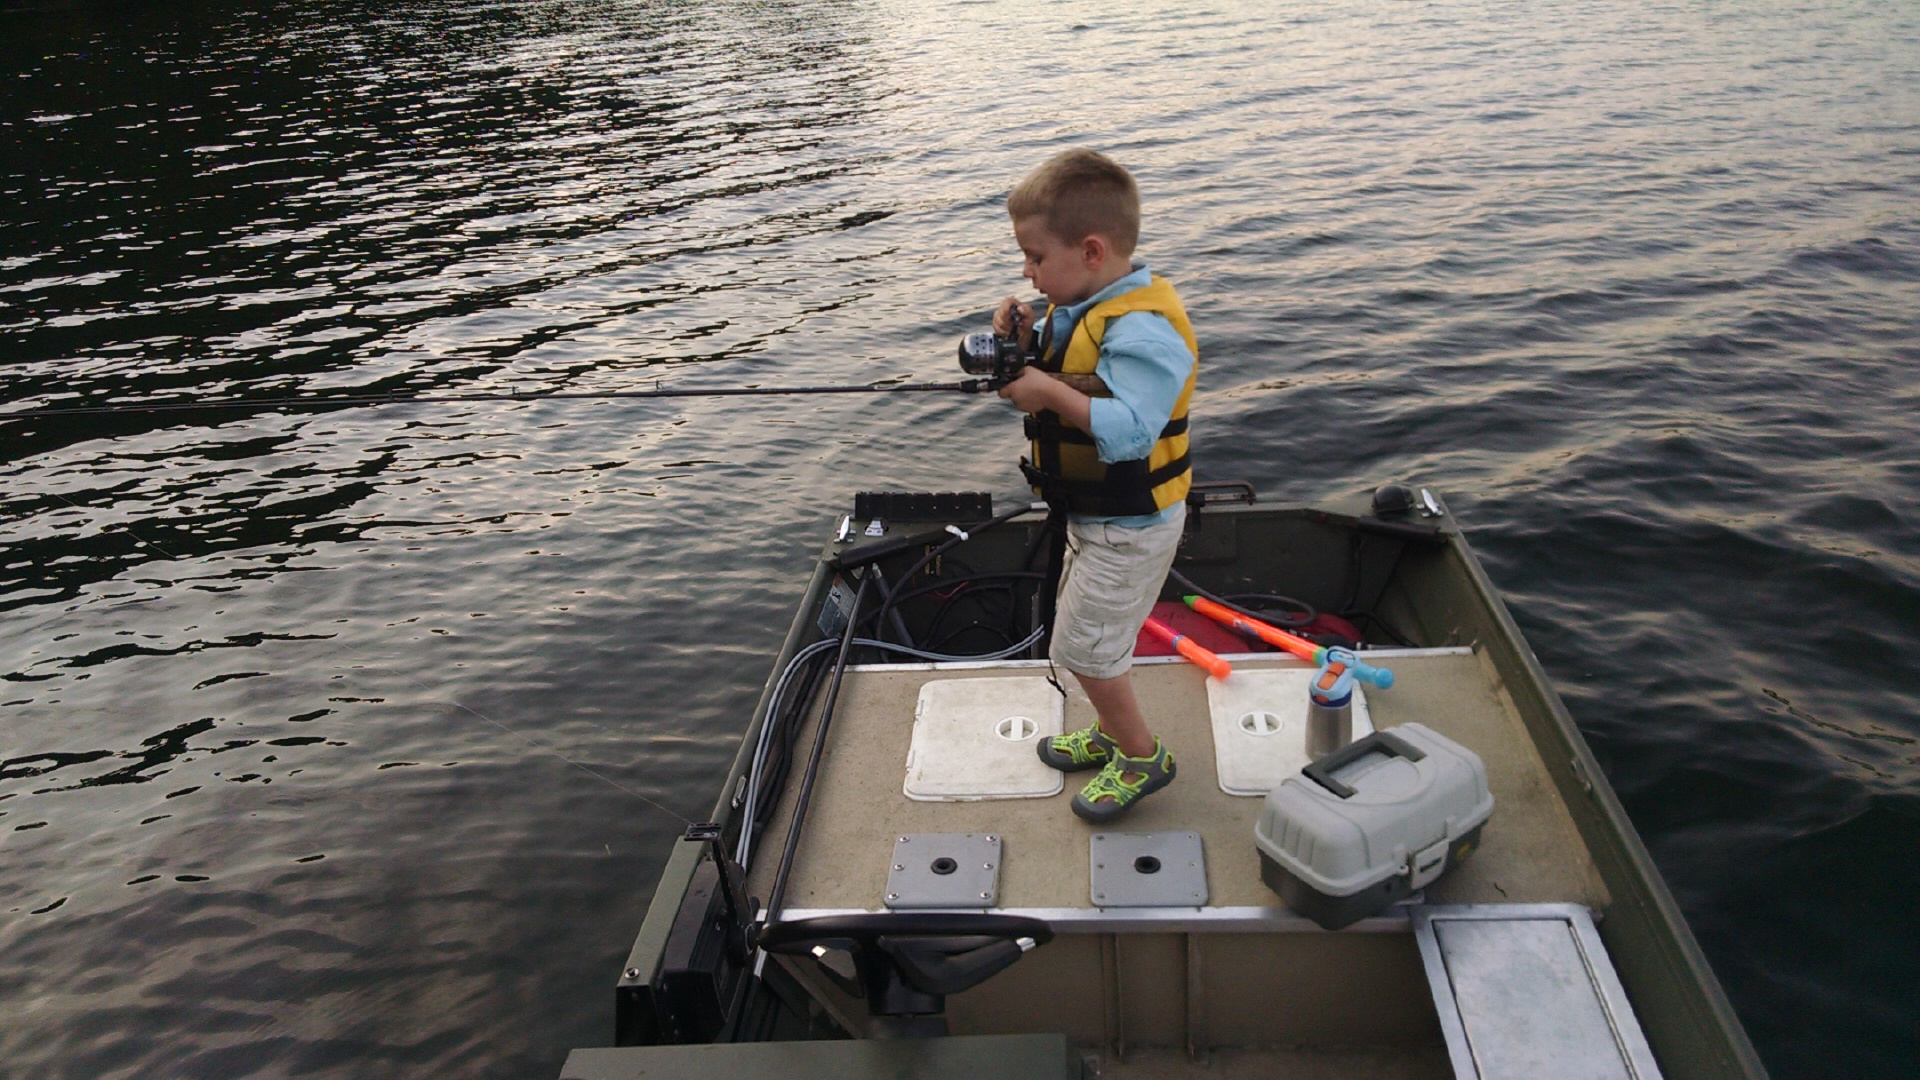
It finally came in & after sanding, priming & painting everything it came out looking fantastic. I picked up 2 cans which was enough to re-do all the gunwales and the sides from the lateral stamped rib up in addition to the side console & remote control mount I added and the plate I mounted my trolling motor to --> I'll get a pic up of how it looks now - but you can see the gunwales in the picture with my son - they were all scratched & scuffed in earlier pictures & look much better now.
onthewater102
Well-known member
My companion showing me up last night...
I wish there was a way to preserve the paint at the back of the boat where I have to run the strap across to trailer it. I'm probably asking too much.
And a pretty good view of the repainted console & steering wheel.

I wish there was a way to preserve the paint at the back of the boat where I have to run the strap across to trailer it. I'm probably asking too much.
And a pretty good view of the repainted console & steering wheel.
onthewater102
Well-known member
Nightlights - worked fantastic! I could still see the shoreline & gauge my casts accordingly.

onthewater102
Well-known member
Found this little gadget on Amazon. Now I can entertain my 2yr old with a movie while I fish 8)
14trackergrzzly
New member
- Joined
- Jul 7, 2016
- Messages
- 2
- Reaction score
- 0
Yal have me thinking..now I think I'm gonna extend my deck a little and put live wells on either side...where do I even start with live wells as far as what material to use and how and what the livewell needs to keep the fish alive?
Sent from my iPhone using Tapatalk
Sent from my iPhone using Tapatalk
onthewater102
Well-known member
I'm sure there are a number of ways to do it - or you can order them custom made from https://www.customlivewells.com/ which might be the way to go if you've got irregular shapes you're trying to build. I've only read good things about their products but they're pricey.
I wanted to keep it simple for the tooling I have at home (IE no TIG welder...yet...) so I made mine out of PVC board that I ordered from US plastics so I could use PVC cement to join the boards. I lapped all the joints with 1" PVC angle cementing the boards to the angle. This should have been sufficient to keep it water proof but I added a bead of silicone aquarium caulk to the inside corners on the sides and bottom for a belt & suspenders finish. I installed it resting atop the foam that was in the bench originally, and sprayed expanding gap filling foam around the sides and over the top as best I could. Unfortunately this was messy work and I didn't stop to take pictures of it - sorry.
For fittings I glued the scrap PVC several layers thick so that I could make a thick spot in the bottom then drilled through it, tapped it & and mounted a 90 degree PVC threaded elbow with a 3/4" barbed fitting to give me a drain that was flush with the bottom. I have a simple attwood overflow drain fitting and a sprayer that shoots the water into the top corner of the livewell to get as much aeration as possible. I used a TH marine remote drain valve and controls from a Nitro bass boat that I picked up off ebay. The pump timer is from BPS but I had it laying around in the basement for a long time and the timer doesn't work, so it's basically an on-off switch :-(. I really just use the livewell to entertain my kids while they're on the boat, so I haven't bothered getting a functional timer.
I do get water splashing up & out of the top if I'm running around on rough water or I leave the pump on too long, but no leaks from the sides or bottom.
Source for board:
https://www.usplastic.com/catalog/item.aspx?itemid=23056&catid=733
Source for angle:
https://www.usplastic.com/catalog/item.aspx?itemid=23195&catid=733
onthewater102
Well-known member
Cover support seems to be working - used 9mm tent poles from amazon
https://www.amazon.com/gp/product/B001A74VMK/ref=oh_aui_detailpage_o00_s00?ie=UTF8&psc=1

https://www.amazon.com/gp/product/B001A74VMK/ref=oh_aui_detailpage_o00_s00?ie=UTF8&psc=1
onthewater102
Well-known member
Replying to a post about Muffs vs. Tank vs. Water testing I got to thinking about my timing again & I tried calling the local shop to make an appointment to have some fine tuning adjustments made in their tank and they want you to drop it off and they'll get to it within in a few days...am I just too uptight or does anyone else find this unprofessional and unacceptable? The motor is operational, I just don't have the test prop to be able to correctly adjust and synchronize everything.
What's so hard about saying bring it by in two weeks on Monday morning and I'll get to it during the day & you can pick it up later that day when it's done? That's how any auto mechanic would have handled scheduling. Not having someone telling you to leave your personal property outside on their lot where they take no responsibility if anything happens to it and it's exposed to the weather and whenever they get to it they'll get to it & give you a call.
What's so hard about saying bring it by in two weeks on Monday morning and I'll get to it during the day & you can pick it up later that day when it's done? That's how any auto mechanic would have handled scheduling. Not having someone telling you to leave your personal property outside on their lot where they take no responsibility if anything happens to it and it's exposed to the weather and whenever they get to it they'll get to it & give you a call.
Similar threads
- Replies
- 0
- Views
- 696
- Replies
- 0
- Views
- 937
- Replies
- 46
- Views
- 7K
- Replies
- 35
- Views
- 3K
- Replies
- 0
- Views
- 116
Latest posts
-
-
-
Has anyone made a homemade OB motor lift strap to hoist motor onto boat?
- Latest: Still Afloat
-
-
