
Thought I'd share this project, as it is a little different than what I usually post. Sure, the boat's not 'loominum, but the addition is, so in my eyes, it counts. :lol:
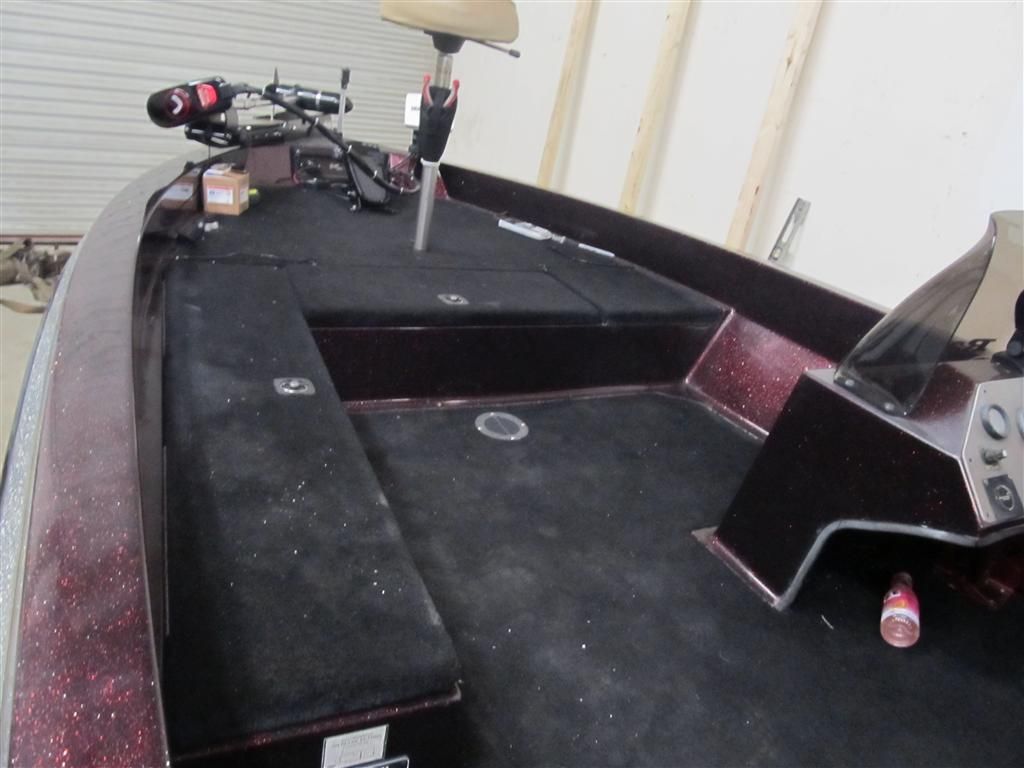
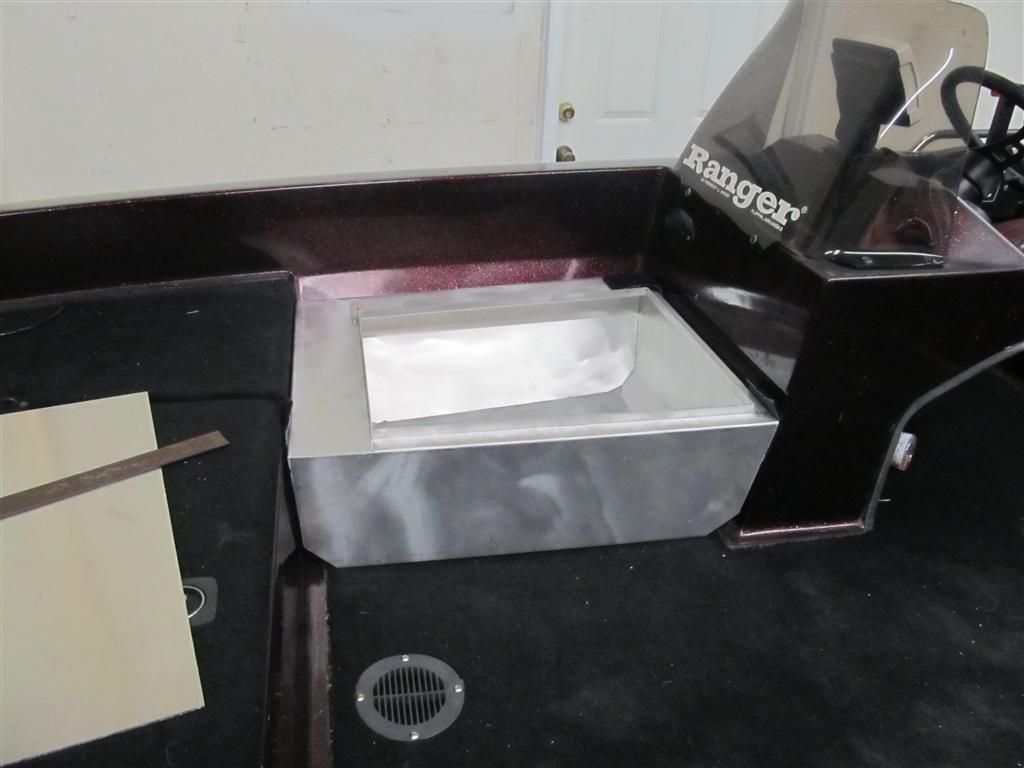
Anyway, customer brought by a Ranger 374, tired of the lack of storage, and wanted a deck extension. No problem.
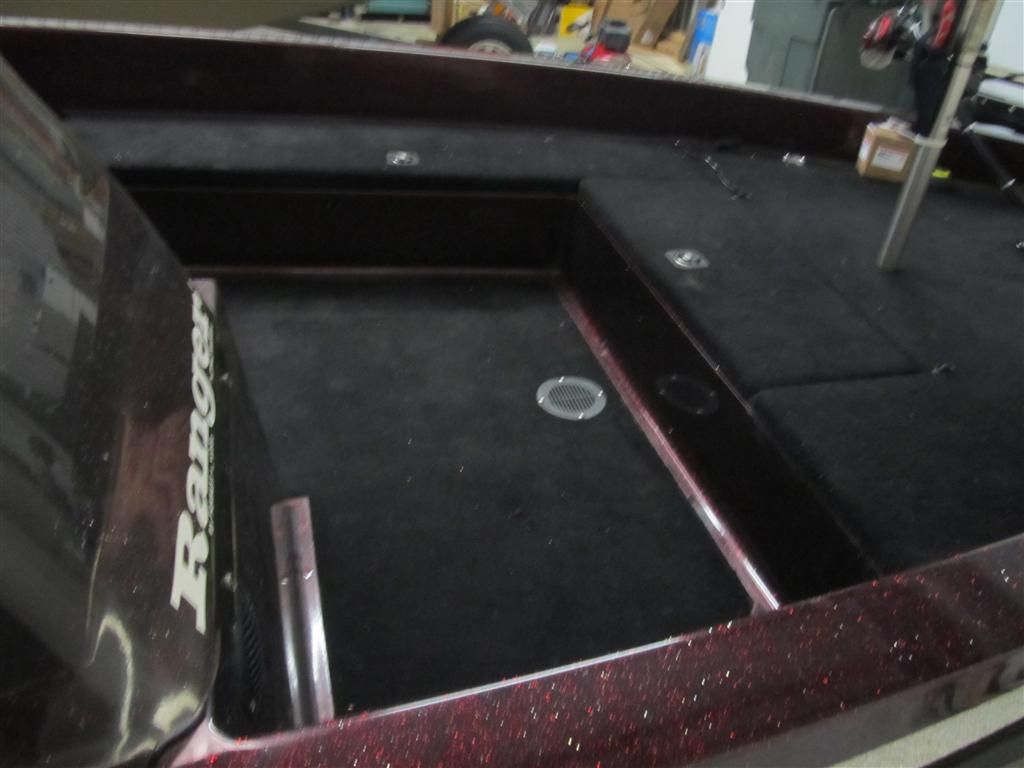
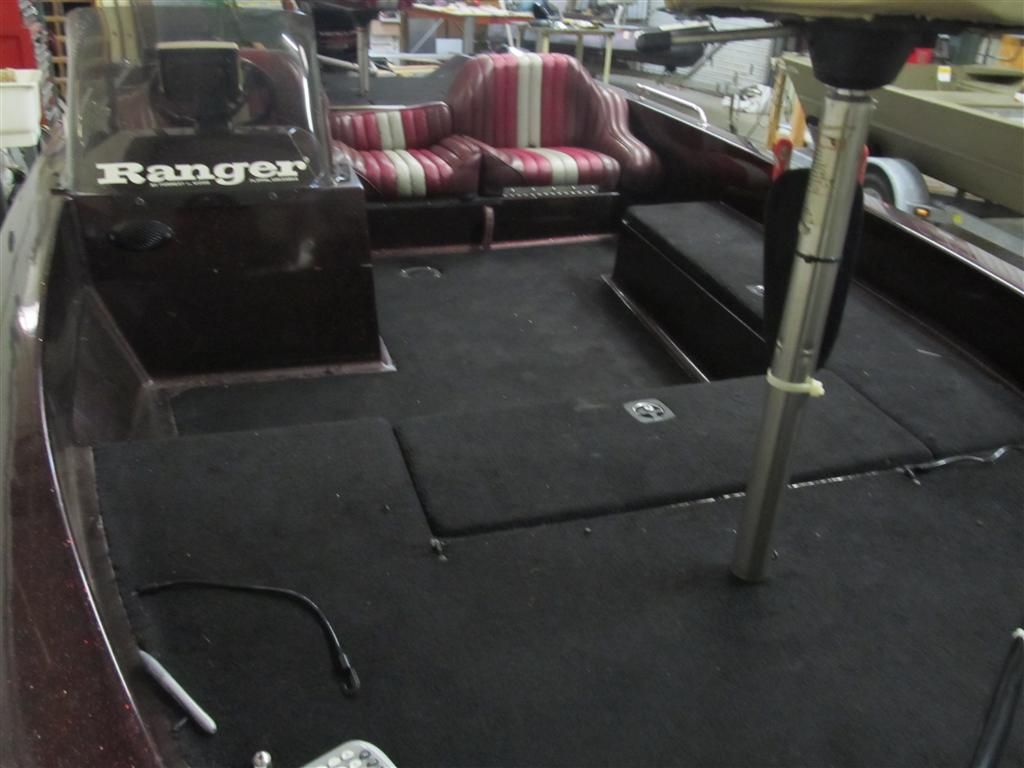
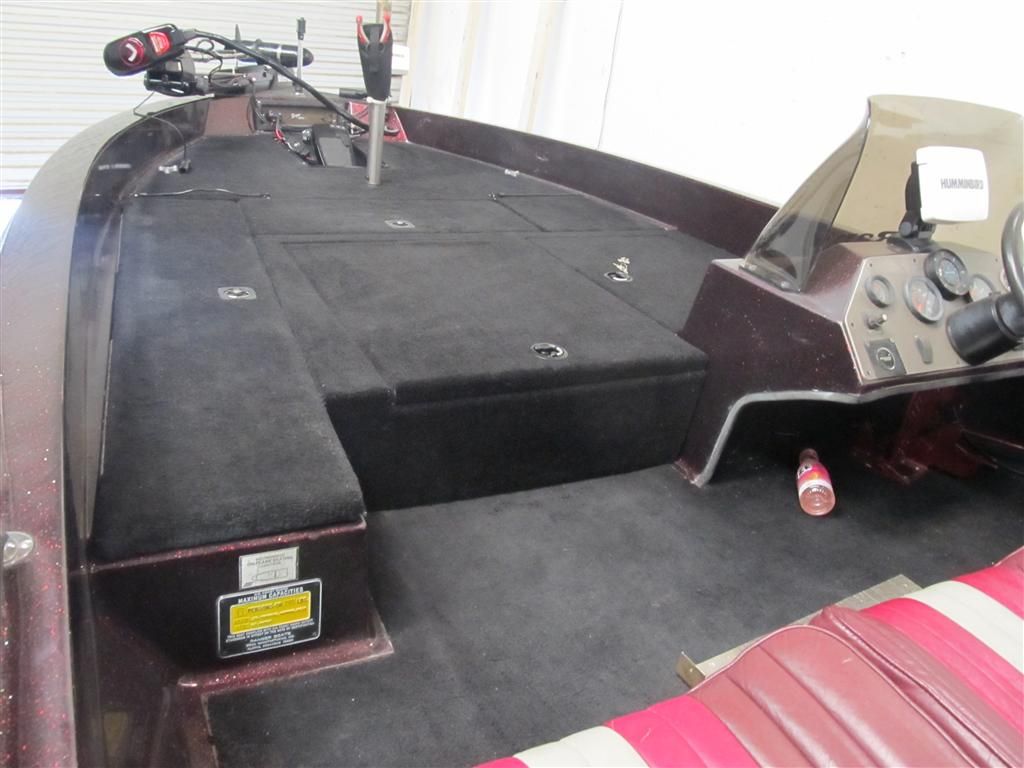
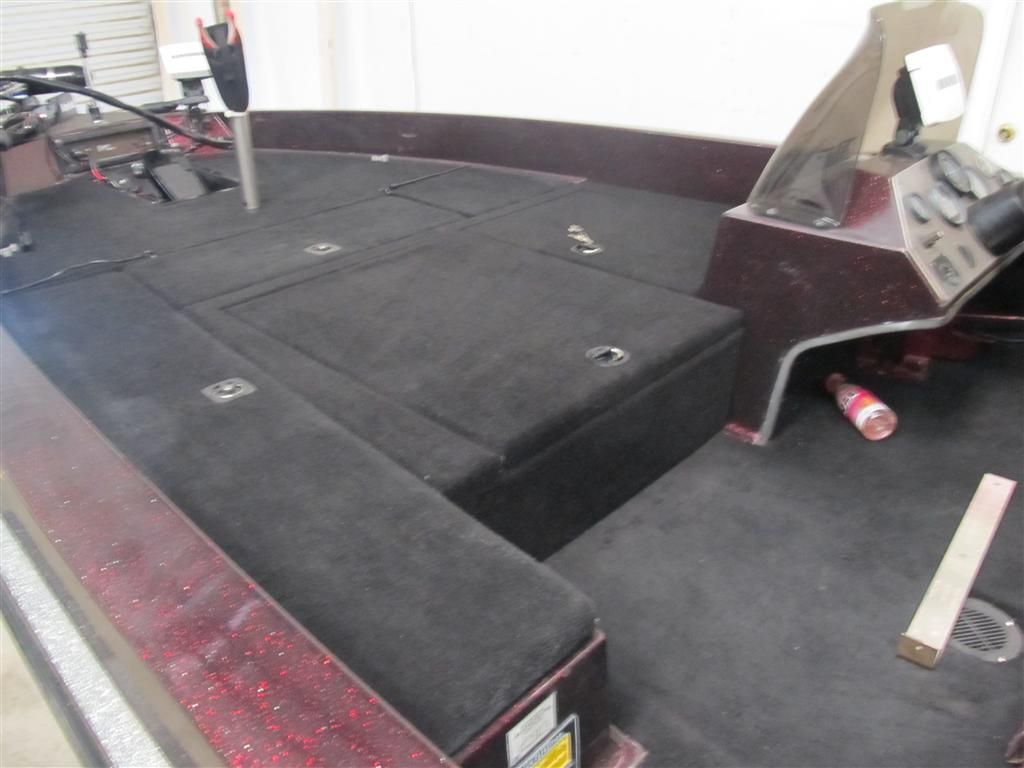
Plenty of wasted space here. We decided to split the extension into two hatches, one in front of the console, and one right in the middle.
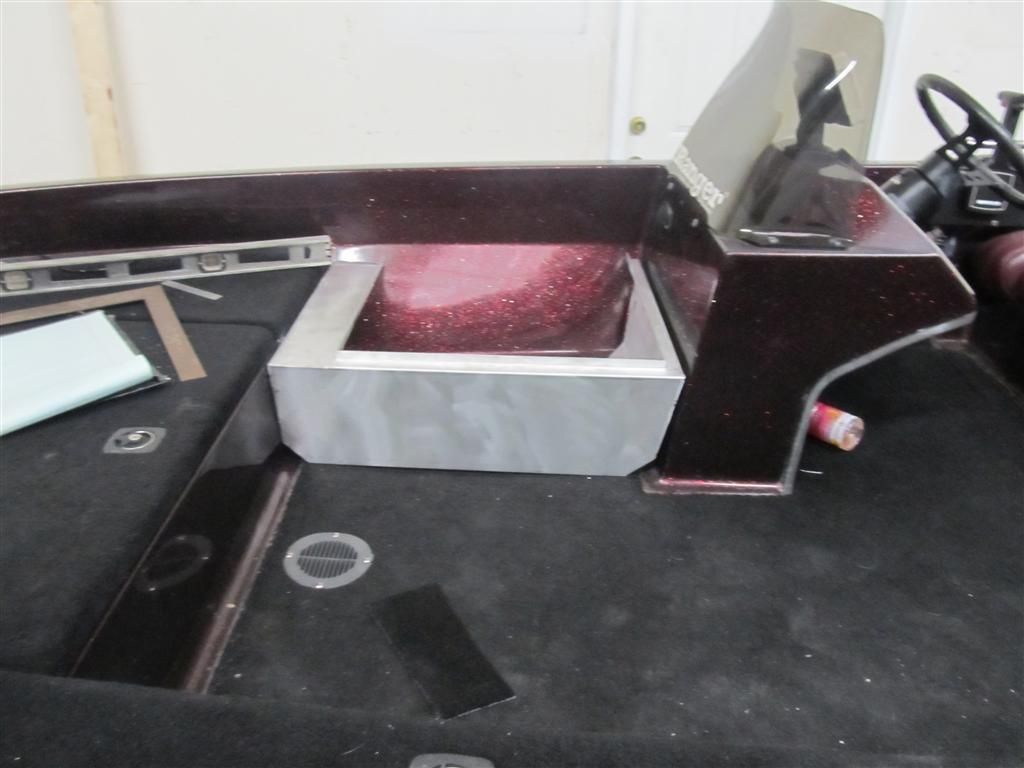
For a couple reasons, I built these as two separate boxes, connecting them later. So, I started with the box in front of the console. Notice the beveled bottom. The bottom of the bulkheads in this boat have a radius, and I didn't want the box sitting on that radius (or touching the gel coat, where it could scratch it), hence the beveled corners.
Fitting of 3 sides/bottom.
Final side on - tackup for this box is complete.
Now, we start on the second box.
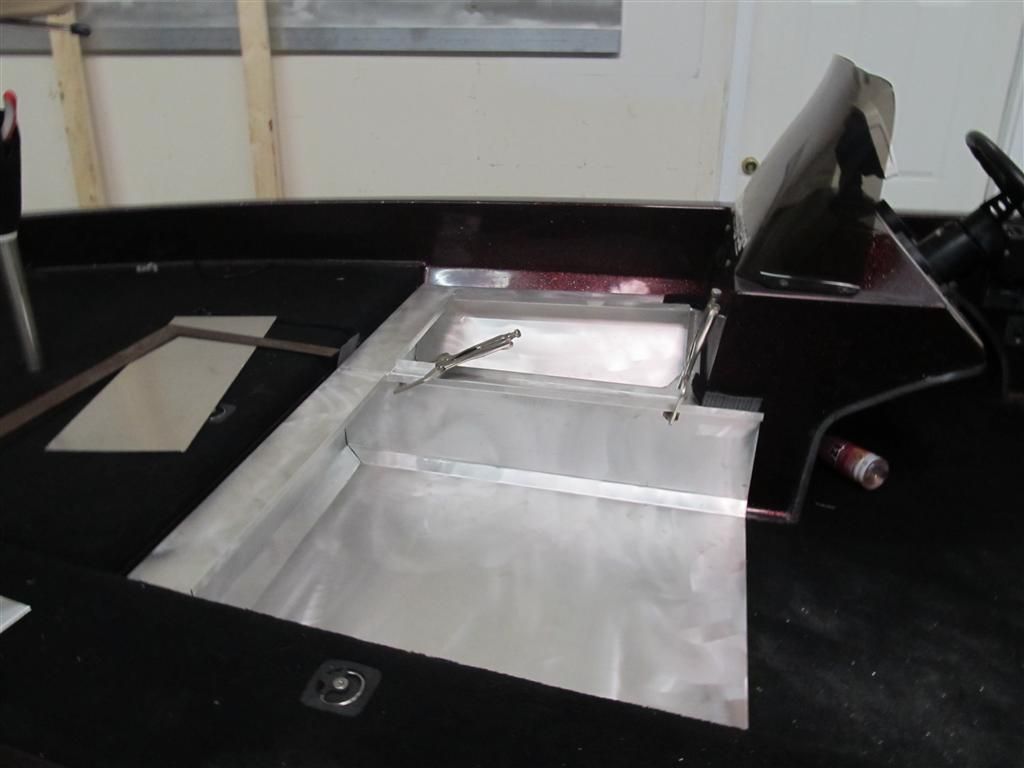
Add a few more pieces.
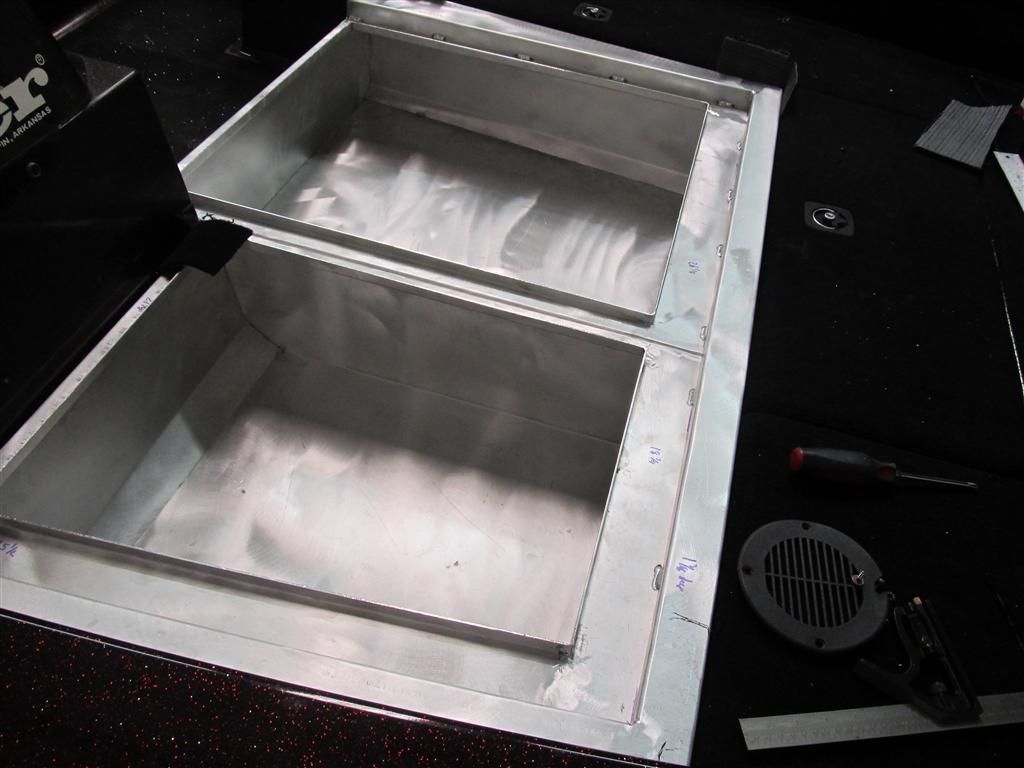
Now, we're ready to pull the boxes back out, and watertight weld them.
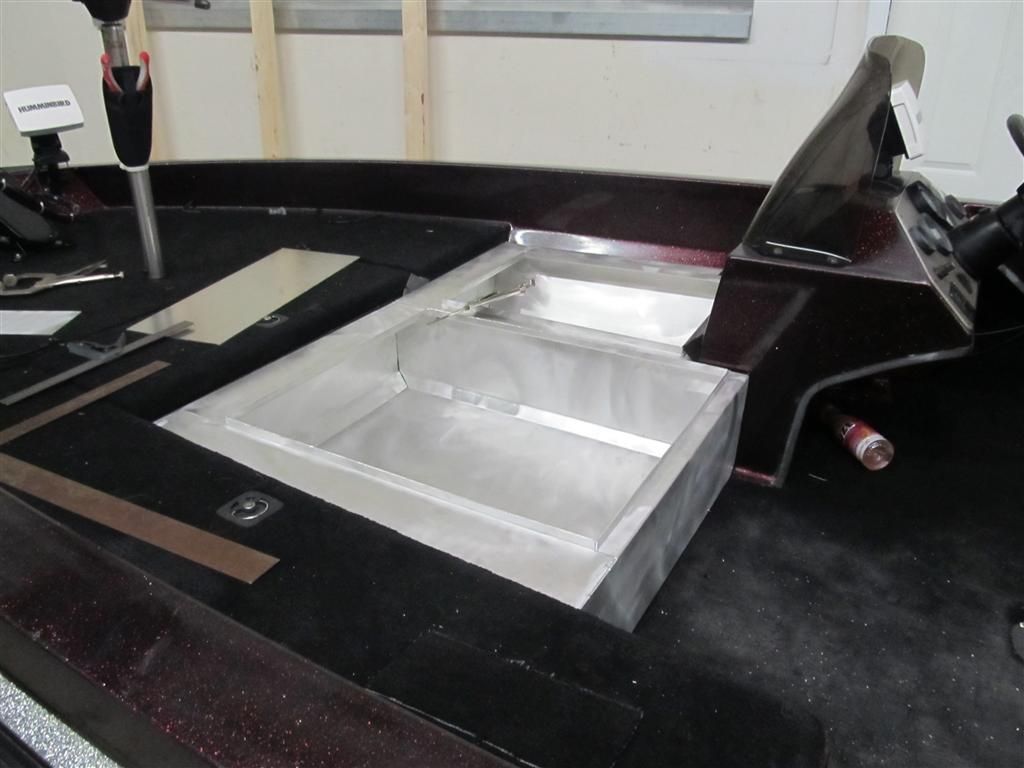
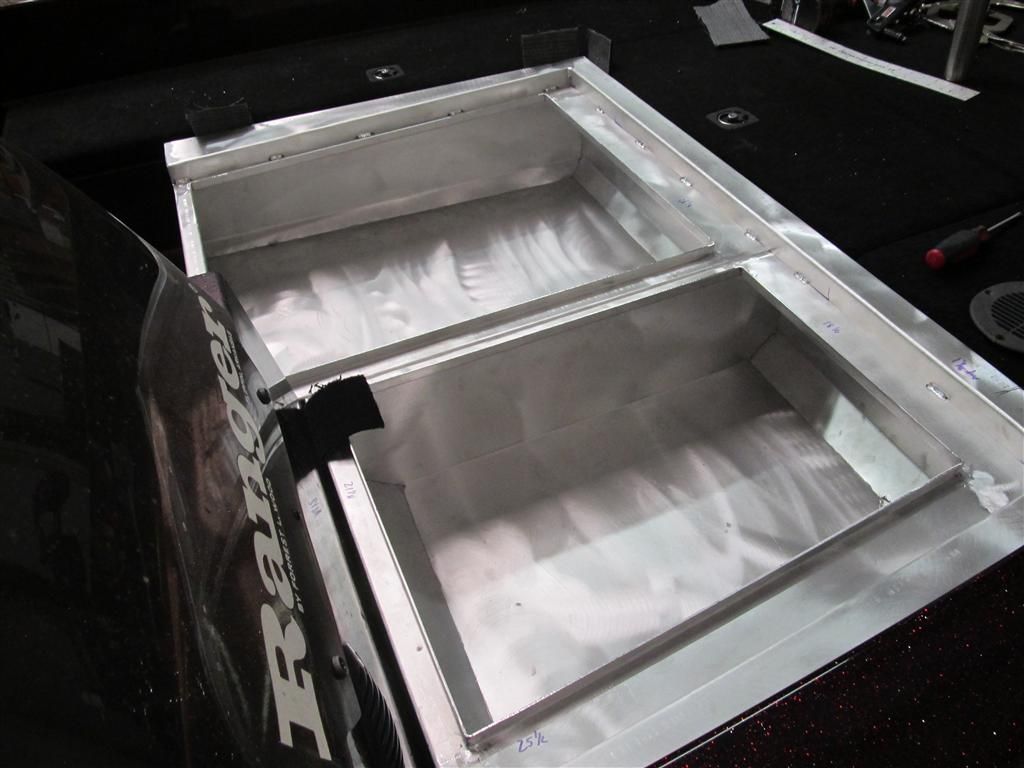
Next, we add the perimeter deck piece. This gives a mounting surface for the hinges.
As you can probably see, there are little bits of carpet as spacers. The entire deck extension is undersized by the carpet thickness, so the carpet can wrap down the sides. This gives a clean wrapped carpet look, but more importantly, isolates the fiberglass from the aluminum, so coupled with the beveled lower corners, there is no chance of the aluminum scratching the gel coat, if for some reason, he wants to remove the extension.

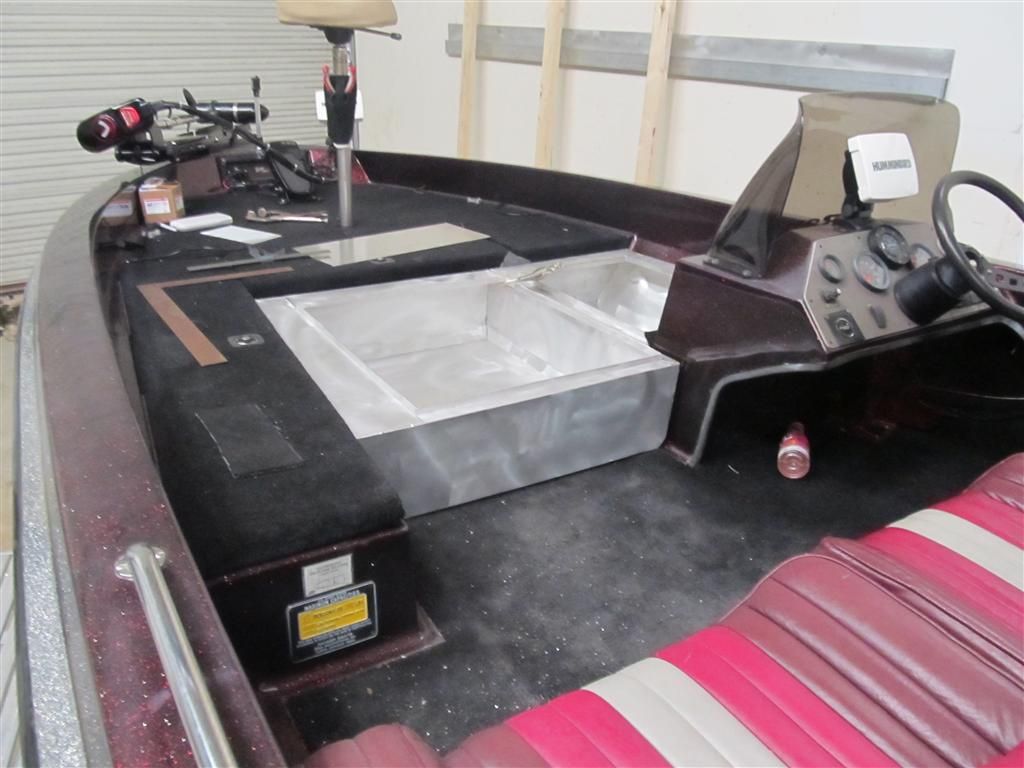
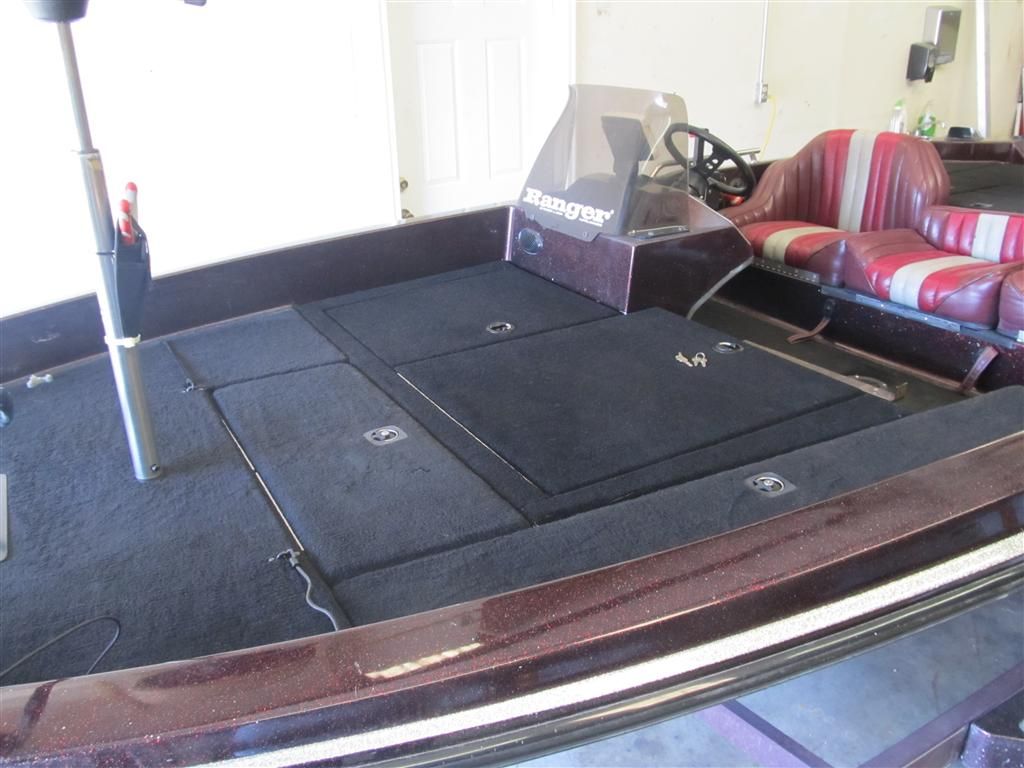
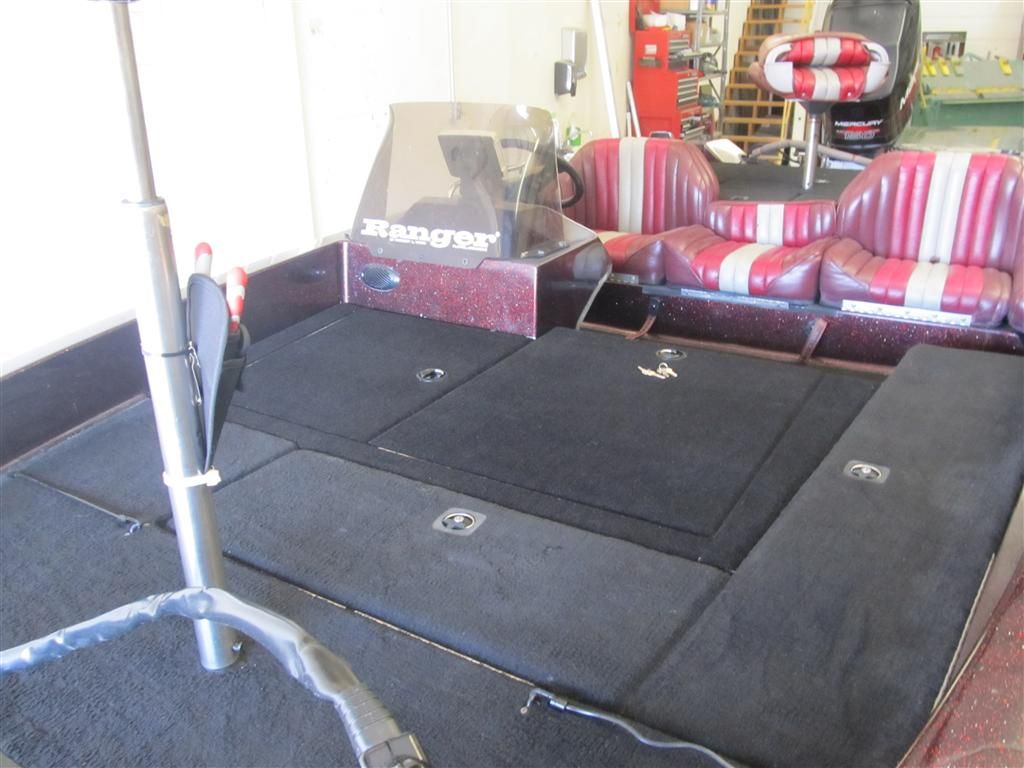
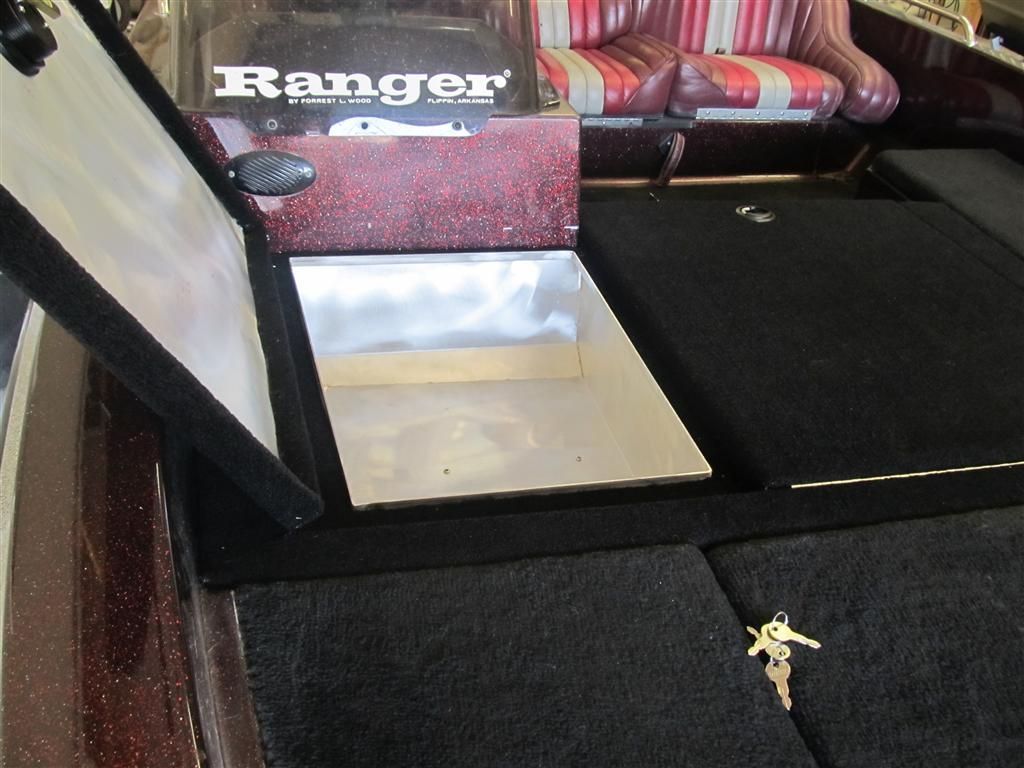
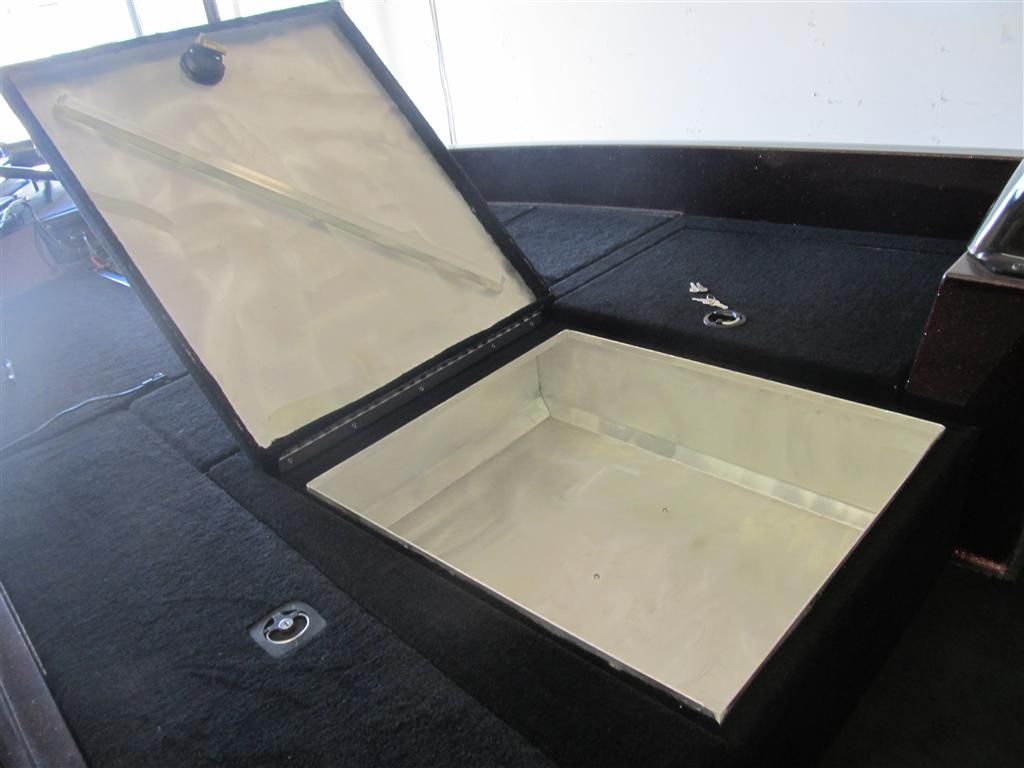
Then, we add carpet and some lids. Unfortunately, black carpet does fade in the sun a fair amount, so getting new carpet that matches the old is an exercise in futility. The color difference is more noticeable in the photo than in person, but it is there. If an exact color match is required, it usually will require a recarpet of the entire boat.
Anyway, customer brought by a Ranger 374, tired of the lack of storage, and wanted a deck extension. No problem.
Plenty of wasted space here. We decided to split the extension into two hatches, one in front of the console, and one right in the middle.
For a couple reasons, I built these as two separate boxes, connecting them later. So, I started with the box in front of the console. Notice the beveled bottom. The bottom of the bulkheads in this boat have a radius, and I didn't want the box sitting on that radius (or touching the gel coat, where it could scratch it), hence the beveled corners.
Fitting of 3 sides/bottom.
Final side on - tackup for this box is complete.
Now, we start on the second box.
Add a few more pieces.
Now, we're ready to pull the boxes back out, and watertight weld them.
Next, we add the perimeter deck piece. This gives a mounting surface for the hinges.
As you can probably see, there are little bits of carpet as spacers. The entire deck extension is undersized by the carpet thickness, so the carpet can wrap down the sides. This gives a clean wrapped carpet look, but more importantly, isolates the fiberglass from the aluminum, so coupled with the beveled lower corners, there is no chance of the aluminum scratching the gel coat, if for some reason, he wants to remove the extension.
Then, we add carpet and some lids. Unfortunately, black carpet does fade in the sun a fair amount, so getting new carpet that matches the old is an exercise in futility. The color difference is more noticeable in the photo than in person, but it is there. If an exact color match is required, it usually will require a recarpet of the entire boat.