Rhyan Craft: Now BRINE CRAFT

TinBoats.net

Help Support TinBoats.net:

This site may earn a commission from merchant affiliate links, including eBay, Amazon, and others.
Well, that's best, the looking and thinking part.

After this evening's plastic worm adventure I'm darned sure not going to rivet anything down. Machine screws for the deck and floatation pods now. I would have been seven miles upriver with a flooded boat if I couldn't get to the pods and transom to seal the leaks. Food for thought...

Jamie
 
Any updates. You have seriously inspired me. I am curious or afraid on how much you have spent up to now. I want to go and and start, but I want to make sure I can afford to do what I want to do, not get into it and run short. Especially since my boat is a 2003 smokercraft and really does not have anything wrong with it. I just want to make it so much more.
Thanks for all the updates and pictures.
Josh
 
Hey Josh,

I didn't see this till now. I don't have a total yet, but I have kept every receipt of the build. I'm afraid to add it up until I'm done. #-o

Unfortunately, I haven't been able to put any time into the boat lately; however, my progress is somewhat further than the pics currently show. I was hoping to have the back of the boat done before I posted, but I'll probably post up some pics of what I've done since my last post to present, because I'm not sure when I'll be able to dig back in. Currently, I'm almost done framing the back of the boat which includes a 40 gallon built-in livewell that I had been trying for months to figure out what and if I was gunna use. I'll try to post up a few pics next week with the work I've completed thus far.

Taking this long to complete the build has afforded me the ability to buy many of the items on sale/clearance (many of which are not even installed on the boat yet) and also given me plenty of time to think through how I want the boat to be completed. I bounced back and forth for months on the livewell, but I lucked into a solution that at this point seems like a winner for me, and I'm glad I didn't start framing before finding it.

Thanks for the kind words of inspiration. I've certainly gotten most of it myself from our members, and I'm sure I will continue to.

Brine
 
Thanks bulldog!

I've been wanting to put up some pics, but I've been holding off until I complete the next step. Right now, Atlanta is under 5" of snow and ice and the boat is outside, so I hope to have some pics in the near future with the progress.
 
Brine while waiting for all this snow/ice to melt I read back through your build and you've done a great job. I know it feels like it's taking forever, but like you said, spreading it out over time has allowed you to do it right. Can't wait to see the finished product.
 
Is the Rhyan Craft built in Arkansas. I just bought a 14' that is a Rhyan Craft. The sticker on the side of this one said it was. Just wondering if It was the same mfg. as yours. Yours looks awsome. I wish I had the patience to do work like that.
 
natestep said:
Is the Rhyan Craft built in Arkansas. I just bought a 14' that is a Rhyan Craft. The sticker on the side of this one said it was. Just wondering if It was the same mfg. as yours. Yours looks awsome. I wish I had the patience to do work like that.

Hi nate,

Thanks for the compliment.

Yes, they were built in AR, in business in from 1972-1988.
 
I have nowhere near to the patience needed to do a build like that. I was fishing out of mine as soon as I could. Still working on it it, but fishing out of it.
 
I have another boat I can still fish out of. I just don't get to much these days :evil:
 
Brine said:
I have another boat I can still fish out of. I just don't get to much these days :evil:

That makes more sense. Not much fishing to be had in January, regardless.
 
Update time.... I've been meaning to post some updates, but just got around to loading the pics. Not to mention, I wanted to have some finality to the next step before posting, but here goes.

After getting the front deck completed, I made my way back to the stern. The design issues I were kicking around were almost entirely contingent on me deciding on to either build in a permanant livewell, or simply use the 120qt cooler I have been using for the past several years by laying it on the floor in the middle of the boat when I wanted it, or simply taking it out when I didn't. The reason this was such a toss-up decision rested primarily on the ability to find (or not find) a livewell container that would fit below my deck height within the bench already installed, while holding enough water (for me 30 gallons). This was suprisingly difficult, and after many hours of looking both online and in stores, I happended upon a water tank for an RV that was being sold on EBAY. It just so happened to be exactly what I was looking for, and so I bought it.

Here is where I wanted to install the livewell
P9160173-1.jpg


Said water tank
P9160171-1.jpg


Once the bench was cut out and the livewell installed
P9160177-1.jpg
 
And then of course, I could start the framing on the back #-o

P2060402-1.jpg


P2060403-1.jpg


And then I attached the ACM

P2130419-1.jpg


P2130420-1.jpg


How the hatches work

P2130421-1.jpg


P2130422-1.jpg
 
I've since installed the back pedestal, cut out the top of the livewell, and realize I never put up any pics of the bow TM installed on the bracket that bassboy made me, so here they are too.

P9160174-1.jpg


P9160175.jpg


Shows that the rod locker will open even when the TM is stowed

P9160176.jpg


GLAD TO BE DONE FRAMING!!!!!!! :mrgreen:

I've got a few little finishing touches to do, but I'm planning on painting this month.
 
Your build looks fantastic, and by doing it the right way, it will last a lifetime! =D> Good thing you have all of these work in progress pics, so if you ever sell it, you can use them in the price negotiations to warrant the price you ask. I may have to move down to GA, close to Bassboy before I start my build! :D
 
It looks amazing! How much experience did you have working with aluminum before your build? I am looking to go the same route as you (aluminum frame and floor) and am wondering if it is manageable for someone working with aluminum for the first time?

Also, how did you cut the aluminum sheets for the decking. It looks very straight and clean?

Nice work!
 
Thanks guys.

cathprod,
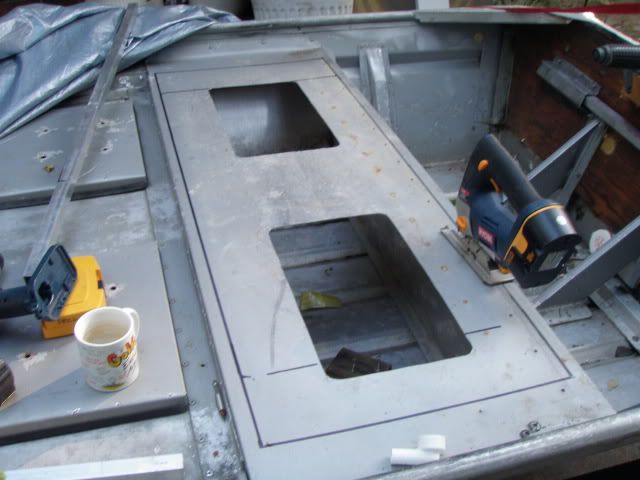
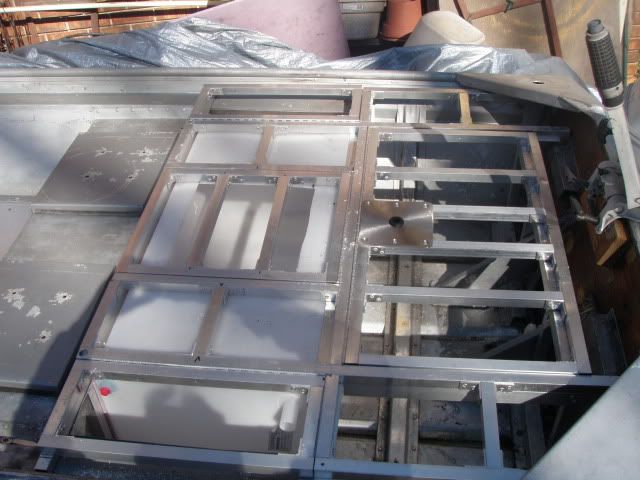
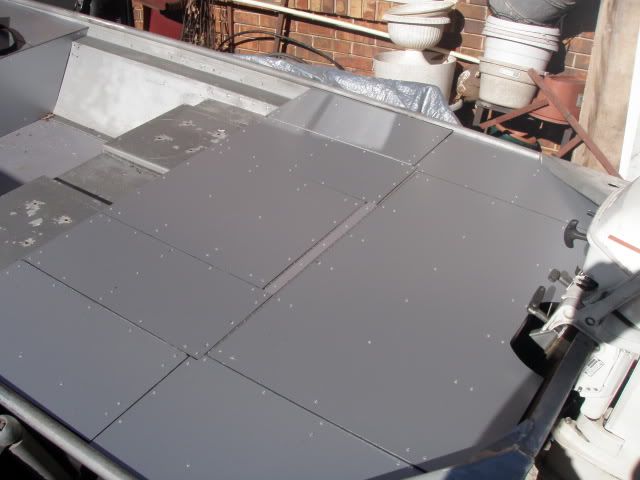
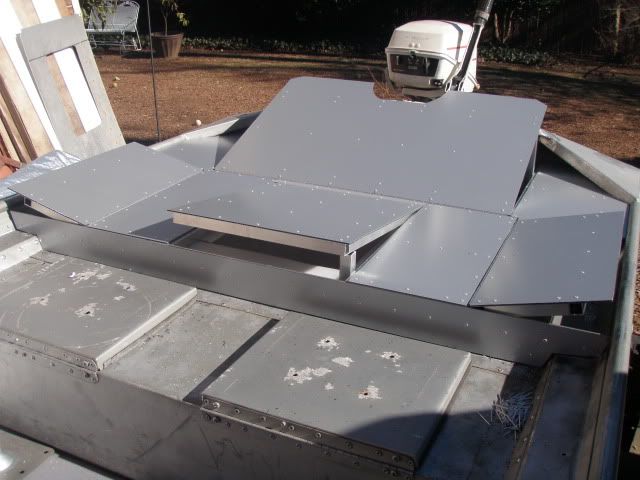
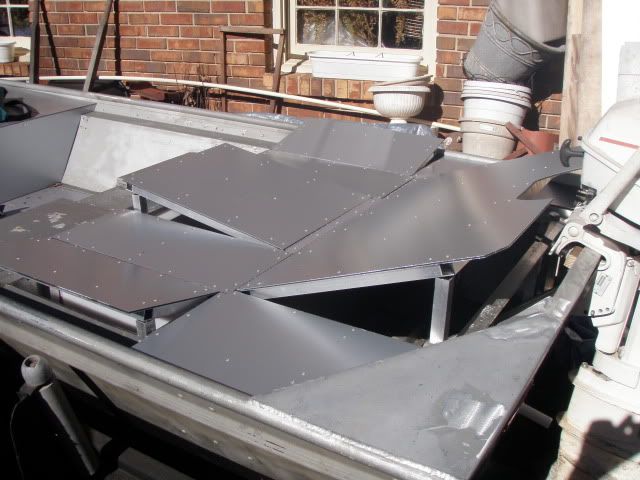
I had zero metal work experience before this build. I had some wood working experience, so I've used mitre saws, skill saws, jig saws, etc.... and know how to read a tape measure. I cut all of the deck with a cordless skill saw using a piece of tubing clamped down as a guilde. As long as you can create a straight fence, making the cut is easy. The ACM is easy to cut with cordless stuff, but if I were using .125 aluminum sheet, I'm sure the cordless wouldn't have gotten the job done.

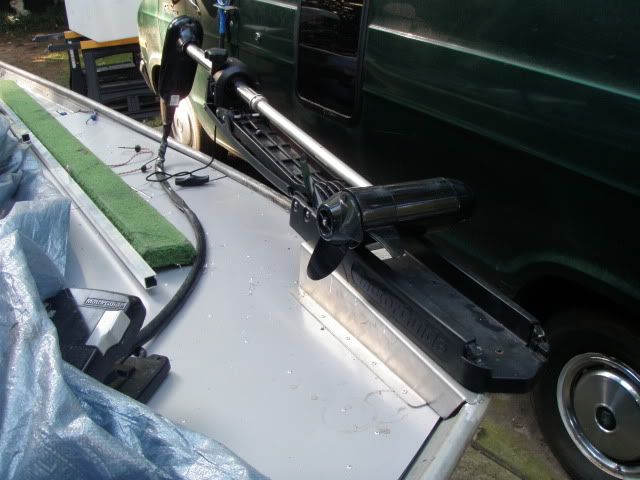
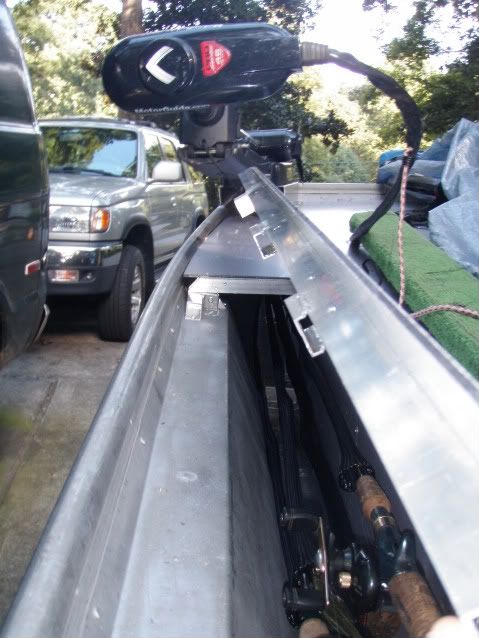
Some advice as a possible first timer that's worth repeating. You need eye and ear protection every time when cutting aluminum. It's probably a good idea to wear a dust mask as well. Several times I found myself making 20 cuts at a time with the mitre saw, and little flakes of aluminum were hanging in the air. Also, cutting 1.5 angle on a mitre saw is ear piercing, and had I not used ear protection, I would be deaf by now. Working with metal, the tolerances are alot less forgiving than wood, so many of my cuts were made after mocking up the piece and making a mark on it as opposed to simply measuring and cutting. You can't overcome an 1/8" in most applications with aluminum whether it's too big or small, and aluminum costs significantly more than wood. Bottom line is I spent alot of time cutting the material to the exact measurement I needed. Had it all been wood, it would have been much quicker, but that's just me. It also takes longer to drill and pop a rivet than it does to run a screw. Multiply that times a couple thousand, and the time difference becomes substantial. That said, I'm still happy with the results, how I've engineered it, and the decision not to use wood.

I think working with metal isn't much if any more difficult than working with wood when you look at the pros and cons of both, it just seems to take a bit longer and requires a bit more precision.
 
Great! Thanks for the response, this makes me feel a little more at ease with the prospect of dropping a nice chunk of change for some aluminum.
 
cathprod said:
Great! Thanks for the response, this makes me feel a little more at ease with the prospect of dropping a nice chunk of change for some aluminum.

That said, make sure to shop it hard. Prices seem to vary quite a bit around me from one place to another.
 

Latest posts

Top