Alumacraft MV1448 Seadoo IB jet, Still jetting

TinBoats.net

Help Support TinBoats.net:

This site may earn a commission from merchant affiliate links, including eBay, Amazon, and others.
Throttle is DONE :clapping

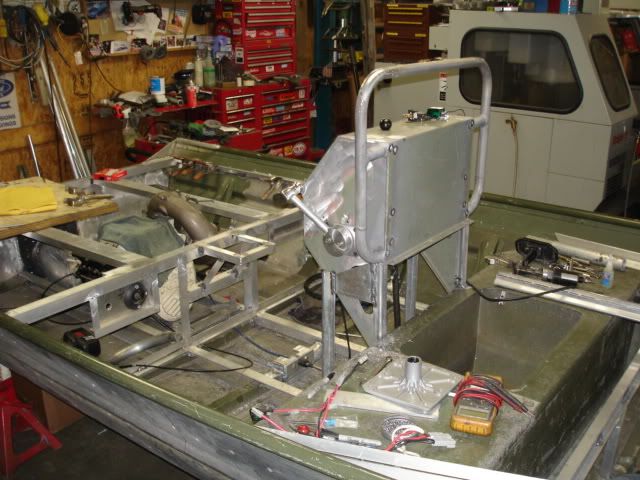
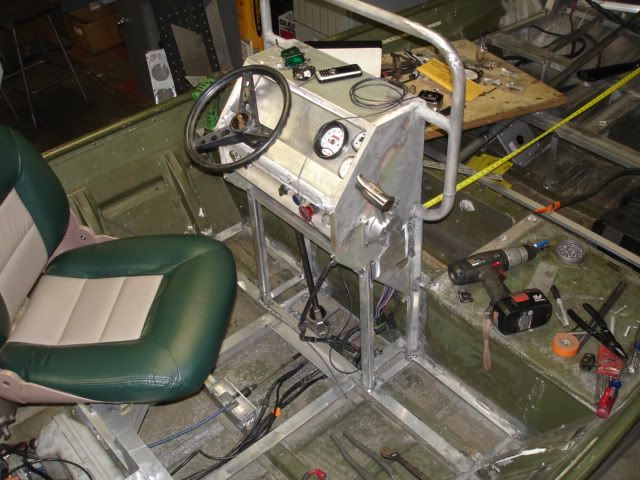
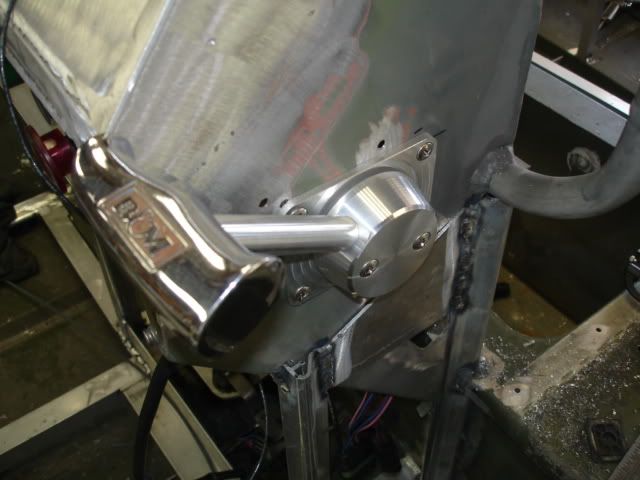
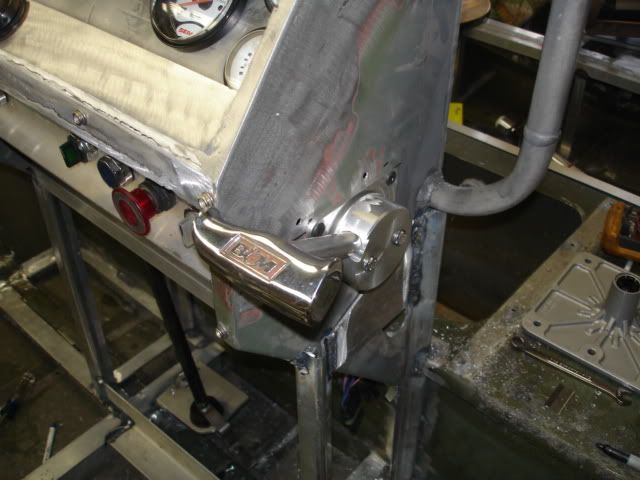
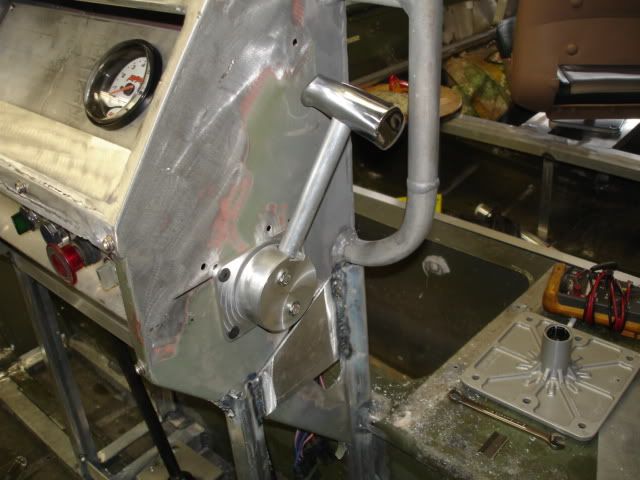
This morning I decided to go ahead and use the Hurst style handle for the throttle, it just felt right and it's heavy enough that it doesn't feel toylike. The shaft is a 3/4" aluminum pipe over a 1/2-20 threaded 1/2" aluminum shaft
DSC06604.jpg


DSC06605.jpg


DSC06606.jpg


Made a trip to Lowes and got some of the stainless hardware I needed after thes pice were taken and it's together. I think I'll make some shims to get rid of some of the looseness once the console is in paint.. I also mounted the choke between the fuel select and electrical shutoff to the right of the drivers seat. Once again, it fits in there and the cable was too short to go all the way up the console.

Moving forward I hard mounted the motor mount plate, reinstalled the starter with stainless hardware as well as the expansion pipe and am now rooting through the electrical box getting it ready to install that stuff. Had to swap the main power and starter leads so they come out of the correct side of the box for my install. I also found a bilge pump down i the shed from the old livewell and cleaned the fish scales out of it's filter and placed it in the back so I don't forget it.

Next is the fuel system. I need to go to wally world and get a 1/4" hose primer bulb and then stop at NAPA tomorrow for the clamps and fuel hose

Jamie
 
All I can say is WOW, I haven't even sanded my boat down yet... LOL. You putting me to shame.
 
you know.. half the time I never know what it is you are building or modding until you put the finished picture up... now it makes sense.

I love going through this thread
 
Mel, we're all here to have fun and catch some fish, no shame for anyone.

Russ, now you know how I feel when I'm putting this stuff together in my head.

And by Gawd the Rat Rod may get wet before the end of May if things keep going well.

Just a couple pics of what else I worked on this evening, from 5-8pm with only one interuption to weld a mounting bracket to an aluminum overflow can.

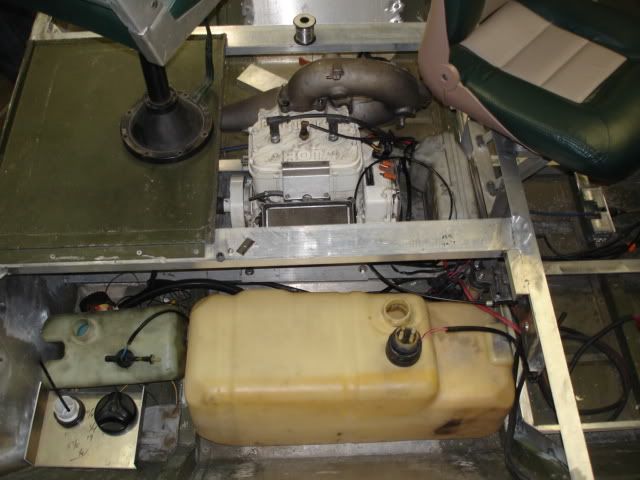
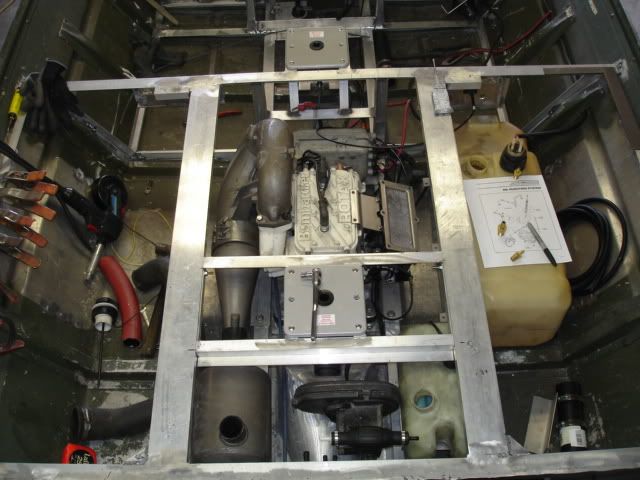
The Seadoo electrical system is mocked into place. Some wires will need extended, some shortened and then it all needs tied into the console controls. I have the 8ga mains run front and rear, they need terminated yet. I dropped the fuel and oil tanks in place to try and figure out what I want to do with them. Goals being an uncluttered deck with no trip hazards. I was going to mount them both on the starboard side and have a common panel with both fill caps mounted, but I really didn't like them taking up room on the deck where the rods will be stored so I decided to do an exposed flush mount for the fuel tank cap and put the oil tank under the rear deck cover above the pump inlet.

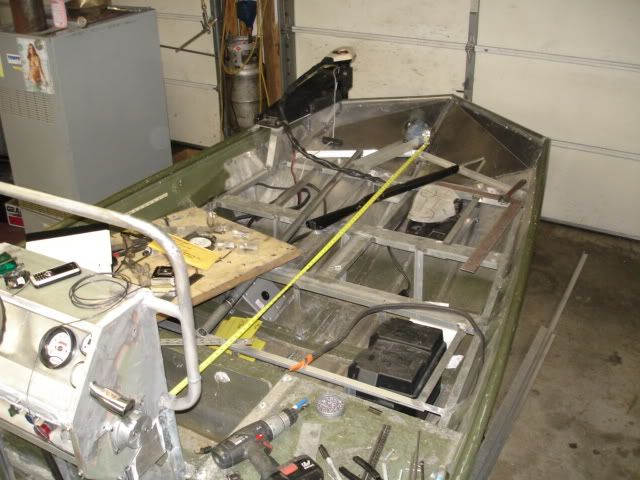
Pictures just show the general mess of the boat right now. I've been playing with the rear seat position a little to see how the doghouse and fuel fill will effect the safety and comfort of the guy out back and I don't think it'll be an issue. I'm going to try and keep the seat mount in the middle of the rear deck so it'll end up right around the back of the head when finished which means I need to make a removable scaffold for under the floor to hold the weight.
DSC06607.jpg


Wires wires everywhere, and nothings long enough... I'm seriously thinking about rewiring the seadoo stuff so I don't have any splices around the floor. I'm not real happy with the wiring right now and I know it's gonna suck up a lot of time to make it 'right'.
DSC06608.jpg


Tape measure shows 7' exactly from the front of the console to the front decks forward wall, I can sleep on this thing if needed.
DSC06609.jpg


I have two sheets of 3/4" foam insulation that needs cut to size and then painted before installing to hopefully keep the water from soaking into it.

More to come.
Jamie
 
Great job,I'm with alot of other people here,just following along...
How hot does that motor get,I don't think I see a wall(skin)to seperate the fuel cell from it,you probably already thought of that or would have but just incase.
...I'll be quite now
 
Zum, actually I hadn't thought about it which is why I like guys to question what they see as right or wrong. The engine is water cooled and has a high temp alarm at 210` at the head. The exhaust is on the other side and is water cooled. In the 'Doo the fuel and oil sit in the front of the hull. What is surprising is the PWC's don't have to comply with the same standards as a boat for fuel lines and other stuff. Dad stopped by yesterday and suggested putting some insulation around the engine to minimize the noise too.

I think I will put a thinwall aluminum bulkhead in just because. Another thing on the list...

Jamie
 
It wouldn't hurt to have a motor well that is sealed from the rest of the hull.If a water line breaks or some part of the engine springs a leak it could swamp the boat.
 
The sealed well would be a lot of extra work at this point. Luckilt Seadoo expected the PWC's to get swamped and equiped them with two eductors in he rear of the hull. The eductor uses the venturi effect of the pump pushing water past two 3/8" tubes to draw water out of the hull and works pretty good. I'll have them mounted and a 500gph bilge pump. The 'Doo cooling system is pretty simple too so I hope I don't have any problems withthe hoses. I actually figure I'll blow a hole in the bottom rockjumping before a cooling line fails.

Jamie
 
Another update, spent the day playing with the fuel and oil tank mounting, fabbing up the rear seat mount and took a picture of the finished throttle handle.

The seat mount will be removable to help pull the motor and there will be a small door behind the seat to access the oil tank and the primer bulb.
DSC06610.jpg


Used the lathe at work the other evening to clean up the round stuff. I'm really happy with how it turned out.
DSC06611.jpg


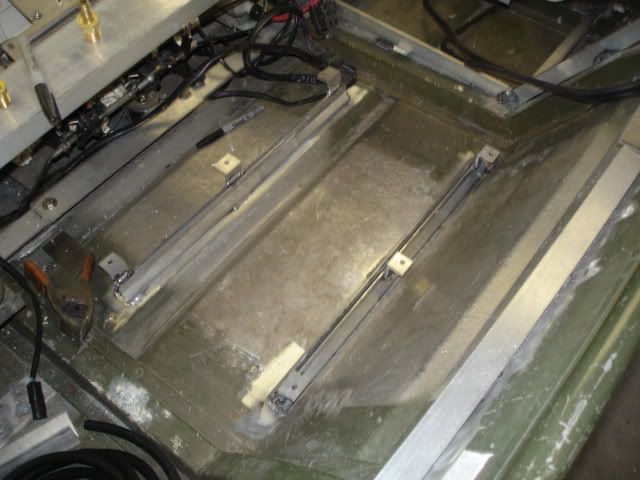
Gas tank saddle with tabs to bolt the hold downs. I think I'll make the hold downs out of stainless since it's easier to bend. There's a 3/16" rubber mat for a tank cushion.
DSC06612.jpg


More to come, but I have to work OT tomorrow...
Jamie
 
your doing a perfect job. wiring sucks but its better to do it right the first time than have a problem somewhere down the road

hurst shifter..... genious =D>
 
Update time...

Electrical Round I+II

I've actually been working on this since the beginning of the build, mostly gathering up junk to reuse and browsing swap meets to get components cheap. Now the fun begins...

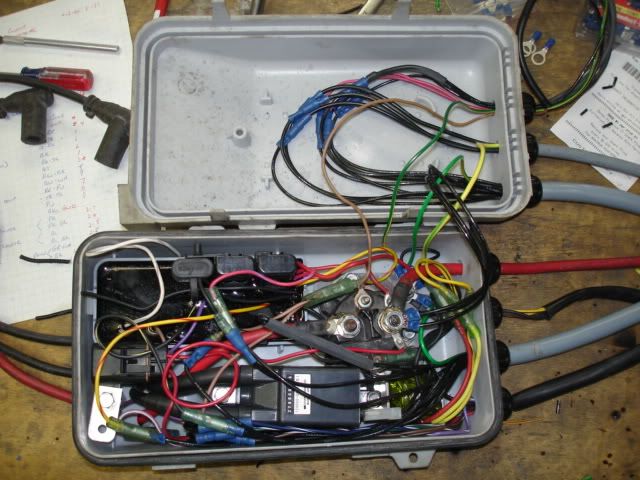
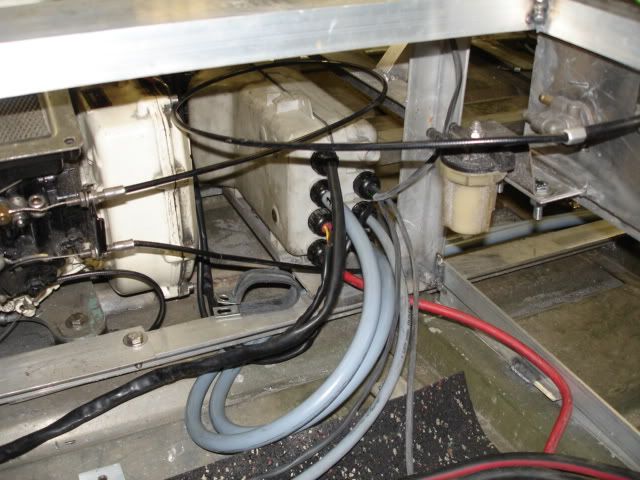
The guys on the Seadoo forums will know what a stock electrical box looks like. Basicly drew up a wiring diagram for the boat and integrated the seadoo electrical into that getting rid of all the extra wiring and GM weatherpack connectors. I chose to use a Ford starter relay because the Seadoo one wasn't availiable locally cheap (it was dead on the old hull). I did flip the battery and starter leads so they would fit this install better.

For the cables, the top right in the cover is for the local interior lamps, the oil and fuel level and the engine overtemp.
Second down is a four conductor cable to feed the back of the hull, bilge, stern lamp, and engine compartment blower.
Third is a 12 conductor to the console, carries power and gauge info to the console and brings back the stern wiring.
Fourth one down is the battey cable that will go to the disconnect by the fuel select.
Fifth goes to the magneto and stator wiring.
Sixth is another 12 conductor to the console with the rest of the Seadoo control stuff including the VTS controls.
Seveth is going back to the VTS module for the pump nozzle trim.
The left side has the two spark plug cables and the starter lead.

Everything is bullet connected inside the box and heat shrinked with No-Oxide compound on the outside of the box to keep the green death at bay.
DSC06613.jpg


Using the seadoo box made thing neater and more logical. Note the choke cable loop and the wiring in heat shrink going up to feed the compartment lamps
DSC06614.jpg


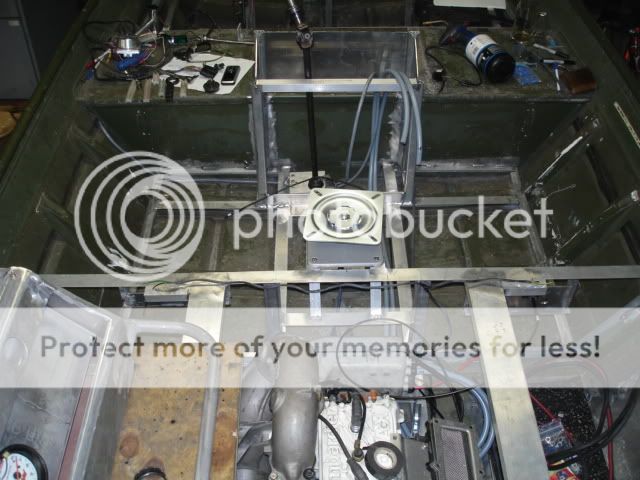
Top view, mounted a 1/8" panel to the back below the console to act as a backplane to mount the fuse panel and terminal strips on until I find a nice small NEMA box to tuck all that stuff inside.
DSC06615.jpg


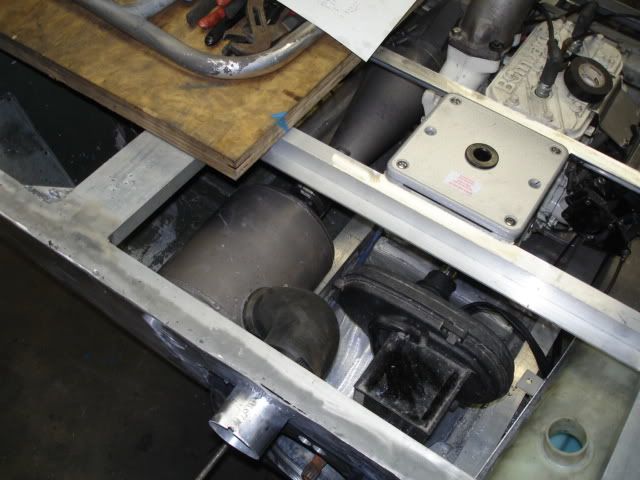
Finally a shot of the muffler install and the thru-hull pipe that I just rolled out of a small sheet of .050" aluminum and welded in.
DSC06616.jpg


More to come, this is taking for ever, but I'm happy with how much cleaner the install looks with this vs the Seadoo stuff in the earlier pics.
Jamie
 
not to be negative but that exhaust is gonna be loud. jetskis the exhaust is run low to try and keep it under the water. the water is used to muffle it
 
I've been working on a modest conversion of a Lowe 1236 and feeling pretty good about it but OMG this project of yours is amazing. Mine started small because I want to be able to carry the jon on top of my pop-up camper. Because of this I tried to do minimal work and keep it as light as possible. I used aluminum wherever I could and PVC sheeting instead of plywood for the deck and floor. I have to say though that your boat is the coolest thing ever. Even if I had a CNC in my garage I couldn't make anything like this. The best part is that you seem to be able to make anything you can imagine. I love to do Frankenstein projects because they make me use my brain instead of my credit card and also, being the son of a farmer, I can't help myself. Yours is way out of my league though. Way to go!
 
Woosh? Nah, it's just planning and doing. Hardest part is figuring what needs done and then fitting all the stuff in what you have. The Seadoo box worked out great and is watertight.

Ober, I just needed a 2.5" diameter tube to run the exhaust through the hull. The thin sheet I had rolled nice and welded right in. I'll extend the pipe out to the rear of the hull once the deck is built with the rest of the rubber hose inside a chunk of polished 3" stainless dairy pipe.

NNBS The exhaust will be a little loud, but ever here a jet outboard? You can here then a half mile away coming up river.

Bobber, this boat should end up being lighter than the original wooded version. I can still lift the front or rear by myself with the batteries and motor in place.

Jamie
 

Latest posts

Top