BigTerp's Tracker Sportsman 16' O/B Jet build

TinBoats.net

Help Support TinBoats.net:

This site may earn a commission from merchant affiliate links, including eBay, Amazon, and others.
[url=https://www.tinboats.net/forum/viewtopic.php?p=326814#p326814 said:
Ranchero50 » 29 minutes ago[/url]"]When are you going to splash it?

Next week/weekend is the plan. The only question will be weither it's running with my 1965 Johnson 5hp or the 50/35 jet. Plan to take the boat over to my buddies this weekend so we can dry fit the motor and try to figure out how big of a transom riser we need. He has a buddy that's works with aluminum and is going to make us a riser. Waiting on the riser is the only thing that will hold us up getting the jet mounted. I got my controls yesterday and am ordering my stick steering kit this week. Will spend the rest of this week/weekend camo stenciling, installing accessories and running electric. Other than that, she's pretty much ready to go!!!
 
Hey dude,
How u like the soft and rubber that u did? How much did u use ? And does it hold up well?
 
[url=https://www.tinboats.net/forum/viewtopic.php?p=326822#p326822 said:
NH-PLAY » 36 minutes ago[/url]"]Hey dude,
How u like the soft and rubber that u did? How much did u use ? And does it hold up well?

I'll put some pictures up of it this evening. Can't say much for durability, I just did it last night. It goes on pretty easily. Lay a coat of paint and sprinkle on top. Then you lay your second coat overtop. I used about half of the quart sifter bottle they sell. I did my entire floor and bow deck. I'll give you a better review after I see how well it set into the paint tonight.
 
Terp -- I too am interested in this -- I actually won't have too much surface area to use it on because I am using hydro turf for a lot of the floor covering, but where I won't have it I think I will want a nonslip additive. I look forward to the video/photos if you have em!

Cheers
Herc
 
[url=https://www.tinboats.net/forum/viewtopic.php?p=326847#p326847 said:
hercdrvrwo » 49 minutes ago[/url]"]Terp -- I too am interested in this -- I actually won't have too much surface area to use it on because I am using hydro turf for a lot of the floor covering, but where I won't have it I think I will want a nonslip additive. I look forward to the video/photos if you have em!

Cheers
Herc

I'll snap some pictures this evening.
 
As promised I snapped a few pictures of the Asper Grit. Now, we didn't paint in the best conditions. We started applying the first coat at around 6:30 and finished the second coat right before dark. We threw up 2 easy ups to keep dew off the paint job overnight, but it was still dewy this morning. Might have not been the best idea. The paint is nice and dry and the Asper Grit has adhered VERY well. BUT, the paint is alot brighter/lighter than the first paint job when we painted the outside hull. It dried with blotchy waterspots as well. I'm thinking the dew screwed it up. It most likely will be getting another coat or two on Saturday to even out the color. I'm not so worried about it being pretty, but it's just to bright and I'm afraid it will really stand out and possibly flair ducks/geese. That's what I get for rushing, won't make that mistake again.

Here you can see the difference. The lighter spots is where we had to paint some rivets from installing the control mounts.
IMAG0945_zpsfaacbb85.jpg


The full inside. You can see the texture the Asper Grit adds. It is nice and grippy for sure. It's a bit tricky to use. Hard to get a nice even coat.
IMAG0938_zpsac4feed4.jpg


Asper Grit on the bow. We enter and exit the boat a lot from the bow during hunting season. Non-skid was definitely needed there.
IMAG0940_zps5390747f.jpg


Close up of the Asper Grit. I'm happy with how the Asper Grit turned out.
IMAG0939_zpsf9621925.jpg


Floor drains.
IMAG0942_zpsce74c1f7.jpg


IMAG0941_zpsa2989ceb.jpg


Was planning on starting my stenciling work this week as well. That will now have to wait until I re-coat what we painted last night. Actually might be a good thing to add another coat or 2 for durability as much traffic as the inside hull will see.
 
[url=https://www.tinboats.net/forum/viewtopic.php?p=326910#p326910 said:
NH-PLAY » Yesterday, 9:55 pm[/url]"]I like, extra coats should do the trick no worries

Thanks. I really like the asper grit. It was just what I was hoping it would be.

Yeah, I plan to recoat everything on Saturday morning once I get the boat nice a dry, I have plenty of paint. Will give it all day to dry/cure. And I'm sure it will solve my problem. It's just dissapointing to have to redo it. My fault for sure, we rushed getting the second coat on not giving the first coat enough time to dry and doing it right when the dew started laying. I'm sure all that excess moisture caused the paint to finish alot lighter.
 
Had another minor setback. I ordered my stick steering setup yesterday, but it's on manufacturer backorder for up to 15 business days #-o . Won't be using the jet during goose season it looks like. But it's not a huge issue. The boat will still be ready to go with accessories installed and everything wired up. We will just be crusing along at a snails pace just like last year with the 5hp motor.
 
[url=https://www.tinboats.net/forum/viewtopic.php?p=326942#p326942 said:
BigTerp » 22 Aug 2013, 09:05[/url]"]Had another minor setback. I ordered my stick steering setup yesterday, but it's on manufacturer backorder for up to 15 business days #-o . Won't be using the jet during goose season it looks like. But it's not a huge issue. The boat will still be ready to go with accessories installed and everything wired up. We will just be crusing along at a snails pace just like last year with the 5hp motor.


That sucks brother -- but your boat looks good! I like it! Put up some pics of the hunt too ok!

BTW are you interested in trading a hunt? You can come on down and hunt my swamps and maybe I can head up your way and hunt with you once -- never fired my gun north of the Mason Dixon.

Cheers
Herc
 
Thanks man. Hopefully we will get into some birds opening day. I'll be sure to post some pics.

I'm happy with how things are turning out. The crappy paint job has me bummed though, but I'll feel much better when I can do it properly on Saturday. Hopefully it turns out as good as the outside hull this time!!! [-o<
 
I forgot I took this picture. This is the face plate for one of my control mounts. They were painted the same night as the inside of my boat. But I put them on a piece of carboard under the boat, so I don't think they got any dew on them. They turned out perfect. The picture is the face plate laying on my rear bench/hatch. You can see the difference in the paint I'm talking about.

IMAG0947_zps1df9e460.jpg
 
Just a little update on the Asper Grit.........that stuff is NICE!! I pressure washed the inside of my hull to get her cleaned up and ready for another coat or two of Parkers duck boat paint and to knock any loose paint off from my half $%# paint job. I was worried I was going to knock the Asper Grit loose, but it didn't budge. I had a few small spots of paint that peeled up around my seat mounts and one of my hatch lids. I'm sure this is from the aluminum being wet when I painted. But other than that the Asper Grit and Parkers paint help up awesome, even with my crappy paint job. Other than the way the color turned out, I'm extremely happy with the durability of the Parkers and the Asper Grit. Going to clean her up one more time this evening, tape everything off AGAIN, let her dry and then tarp her to keep her dry overnight. I'll then wipe her down with acetone and paint her CORRECTLY tomorrow morning. Wish me luck!!! [-o<
 
Got a good bit done over the weekend. Put 2 more coats of Parkers duck boat paint on the inside of the hull, and it came out MUCH nicer than what I did earlier in the week. My dumb fault for painting right before dark. But she's good to go now.

IMAG0951_zps9b05ebe2.jpg


IMAG0952_zpsf621d42b.jpg


IMAG0953_zps02e3444e.jpg


IMAG0954_zps0ce052f2.jpg


Got the entire inside camo stenciled yesterday. It turned out much better than I was expecting. Forgot to get good pictures of the camo work. But you can see some of it in the next pictures. My buddy stopped over and helped me get things wired up. We installed both batteries, 2-bank on board charger, nav lights, stern light, stereo, bilge pump, 12V socket and switch panel. Still need to wire up and install my sonar and interior lights and get all my wires tidied up. We ran out of daylight for those jobs. I didn't get good picutres of the wiring either.

Back of control panel. This is located on the face plate of my motor control mount.
IMAG0957_zps0c25e457.jpg


Port battery compartment. You can see the on board charger to the right, which is mounted in the center hatch.
IMAG0958_zpsf1696e8a.jpg


Just a few pictures of how much of a mess wiring a boat is.
IMAG0956_zps0ae3a83c.jpg


IMAG0959_zps55cf064c.jpg


Things turned out really nice and the boat is starting to come together. Only things left to do is camo stencil the outside of the hull, wire up sonar and interior lights, install sonar and tidy up all my wiring. I'll try and get some better pictures tonight of how things are coming along. Once we got cleaned up, it was to dark to get any good pictures of the boat.
 
Thanks man!! I'll get some better pictures tonight.

I can see the light........FINALLY!! Still a bit left to do, but she's ready to hunt, which is the main thing. Resident goose season opens up Monday. Planning on going Monday and, if I can get off work, Tuesday morning. For now we'll be using the trusty 1965 Johnson 5hp.

Remainder to be done:
-Finish camo stencils
-Install interior lights
-Plumb bilge pump
-Install sonar and transducer
-Clean up my wiring mess
-Figure out and install transom riser
-Install jet drive

Probably be back at it again tonight :shock:
 
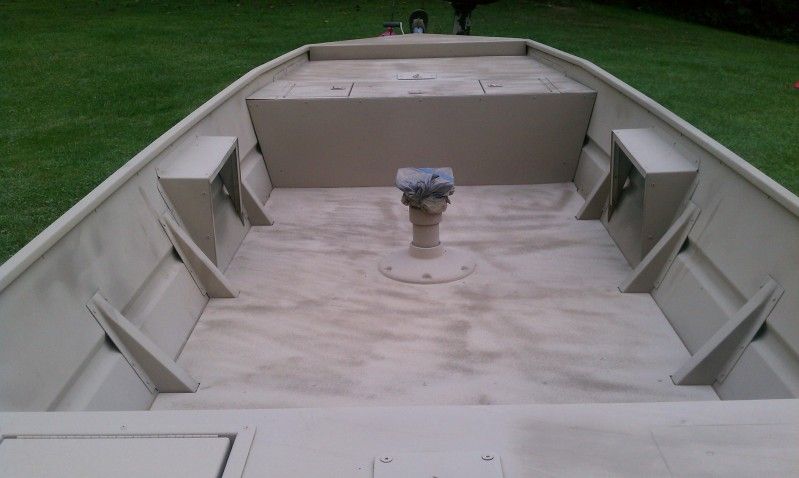
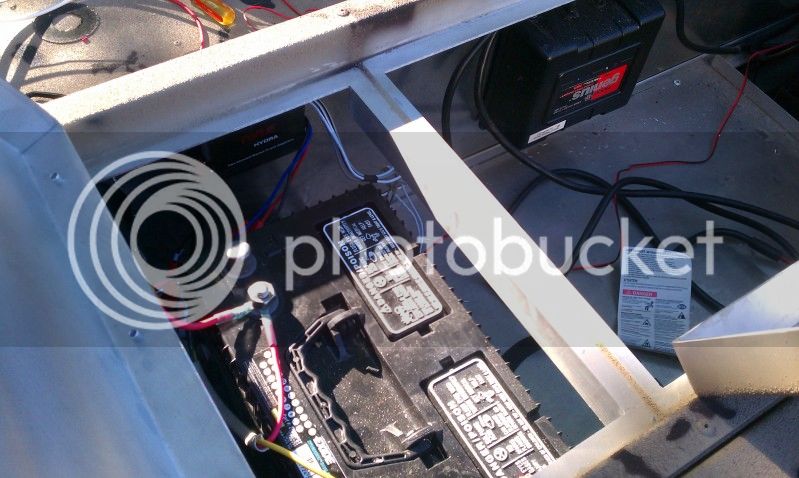
Was at it AGAIN last night. I've lost count of how many days in a row I've been working on this project, but I need a break!! I was actually sore yesterday and even today, I guess from spending countless hours over the weekend squating, bending, etc. over the boat to paint and wire. I've gotten alot done in a short amount of time though, so it's been worth it. And my wifes been AWESOME with all the time I've been spending on the boat. Can't be appreciative enough for that!! Anyway, last night I drilled and installed my outles for my bilge pump. I also found the right spot for my pump and 5200'd the base to my bilge. I also grinded clean a few screws from mounting my bus bar and battery charger to keep them from getting caught on waders. Also finished up stenciling the outside of the boat. Hoping to finish up wiring my interior lights later this week. On to the pictures.

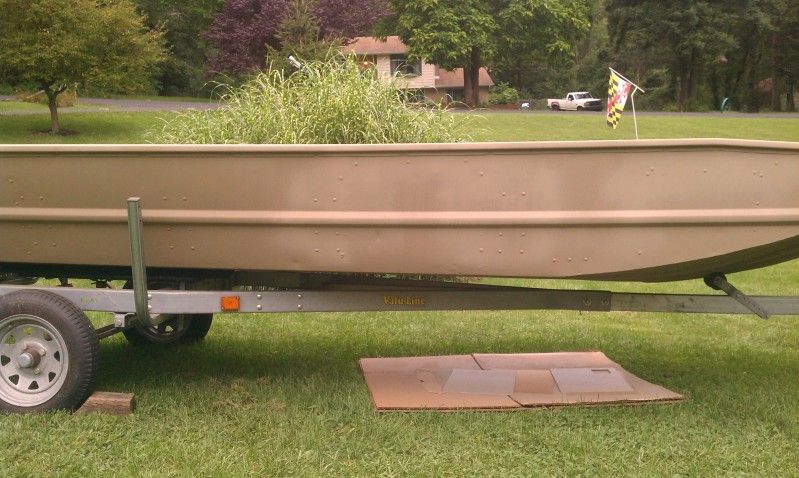
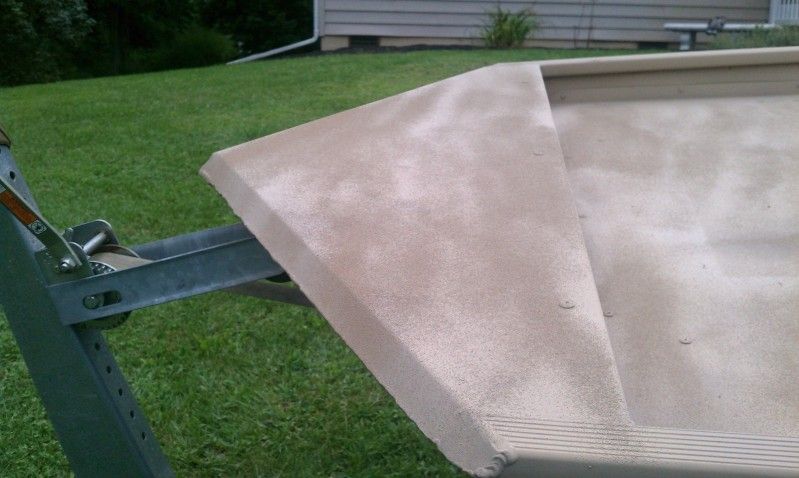
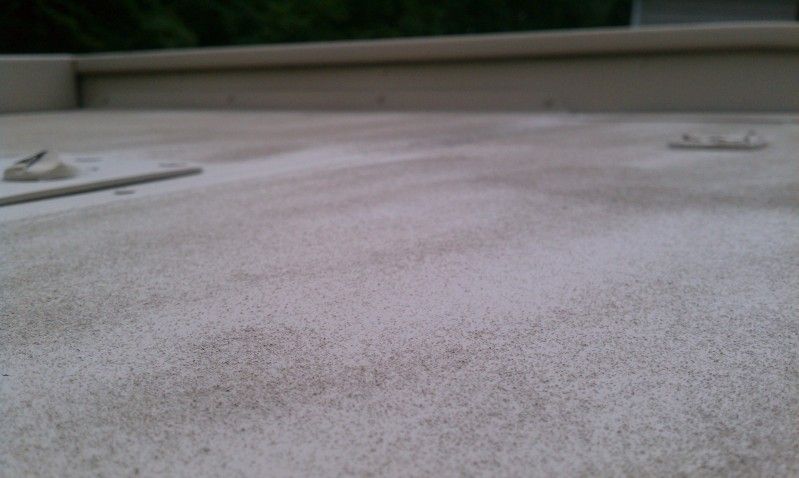
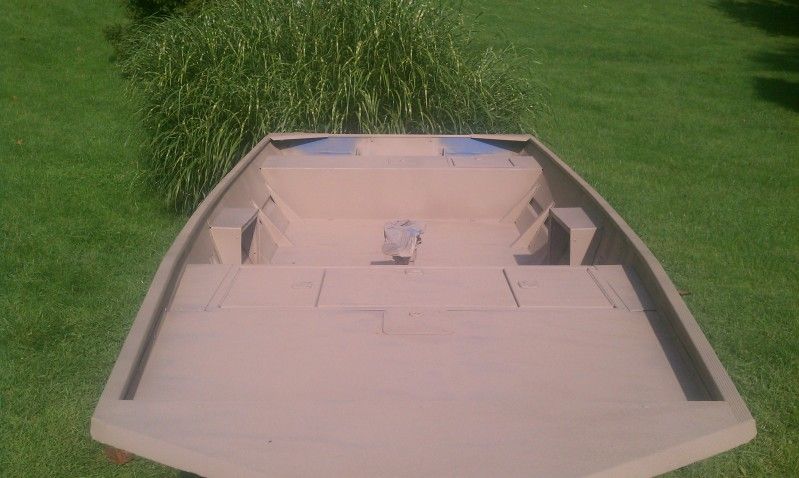
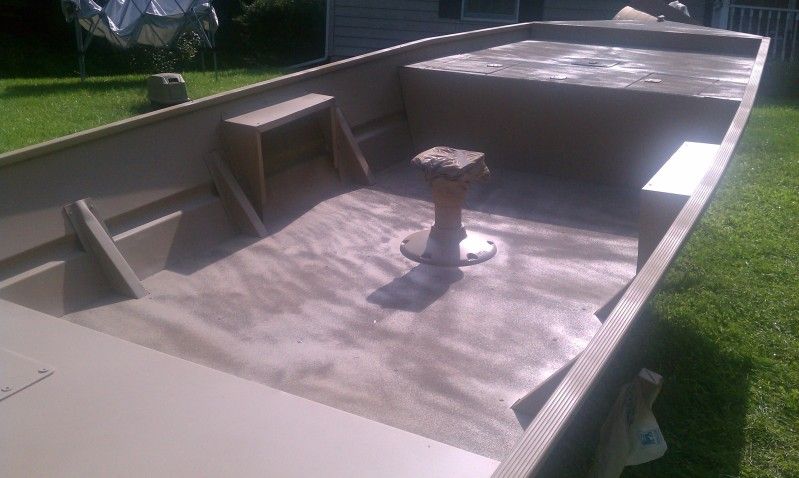
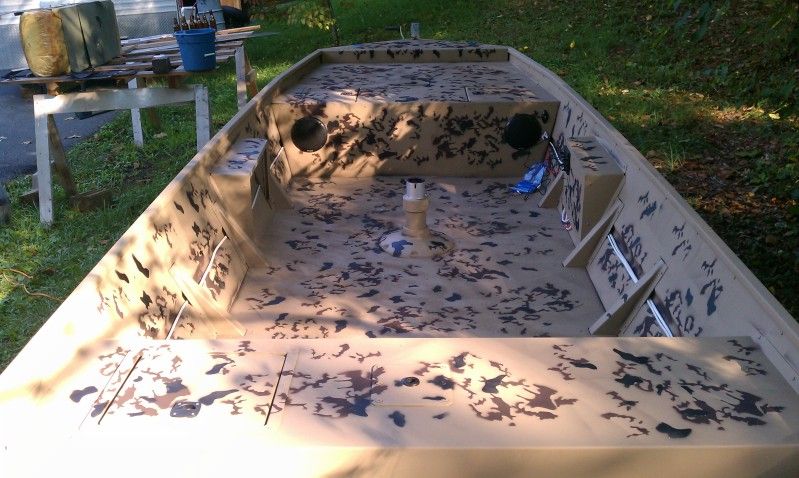
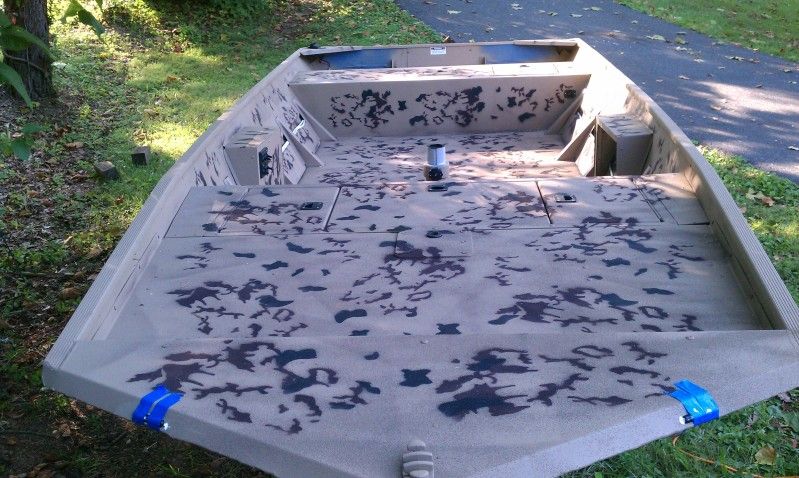
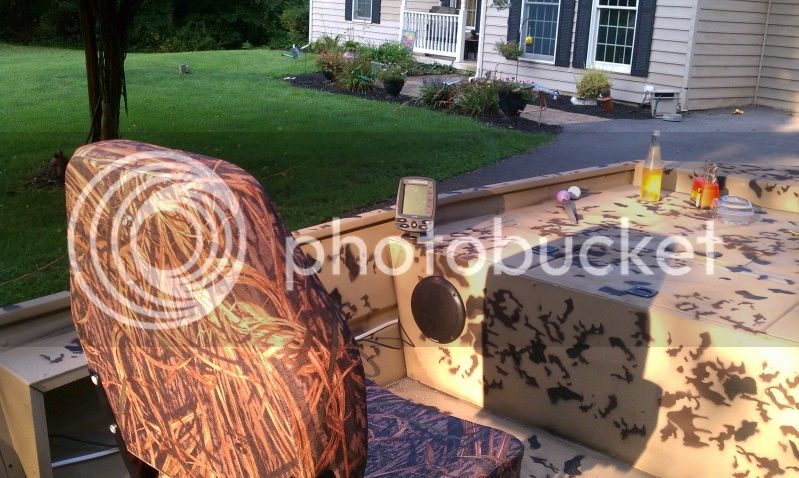
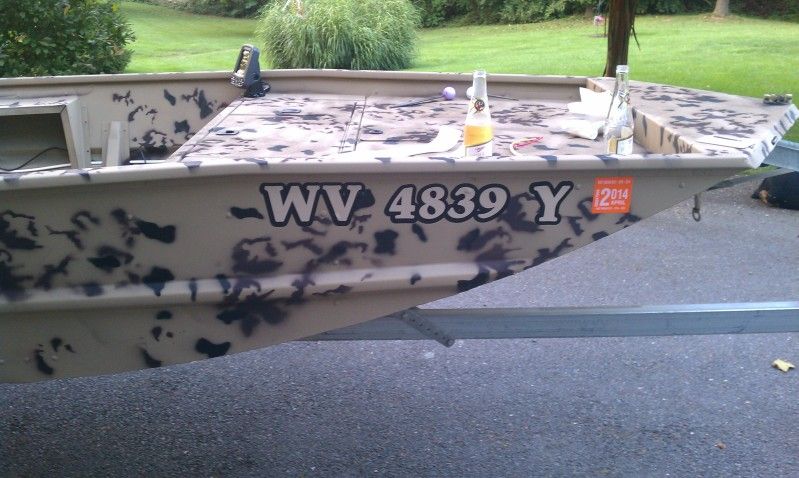
Got a few better pictures of the paint work. Turned out really nice IMO.
IMAG0960_zps26415cda.jpg


IMAG0965_zpsae49b9a5.jpg


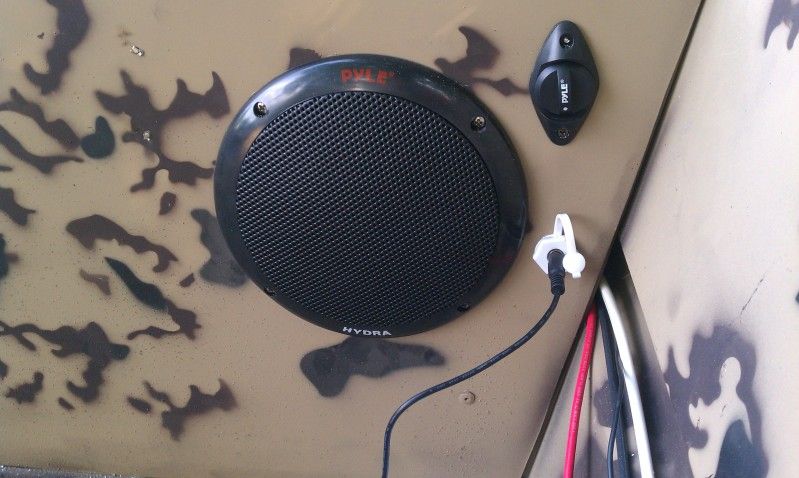
Stereo setup. It's just 2 6" amplified speakers for mp3, smart phone, etc. hookup. The white plug is the auxillary jack, and the black knob is gain/volume control. sounds really nice.
IMAG0966_zps888fdc79.jpg


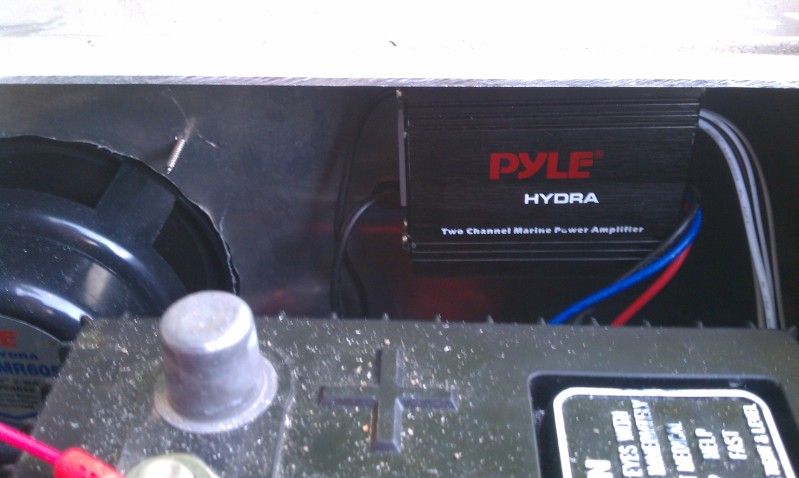
Aplifier tucked in front of the starboard battery.
IMAG0967_zps4ac57b4c.jpg


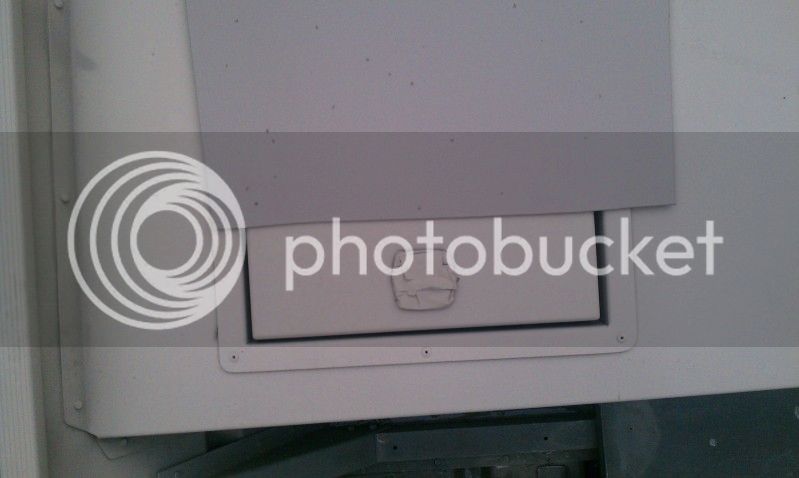
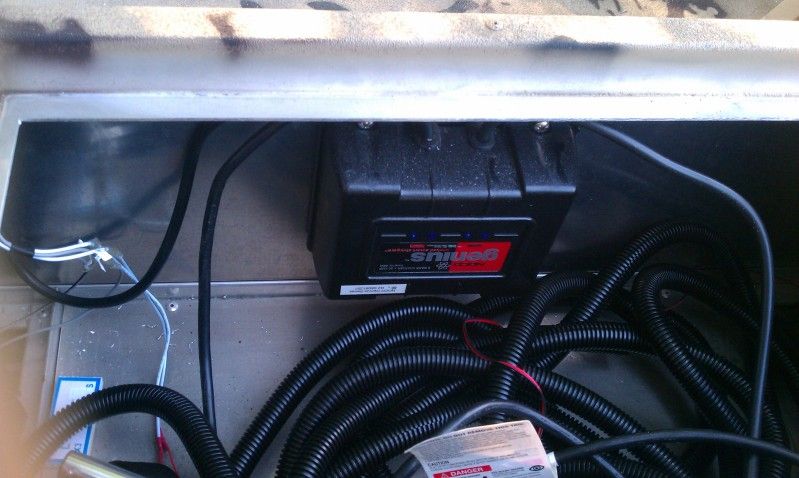
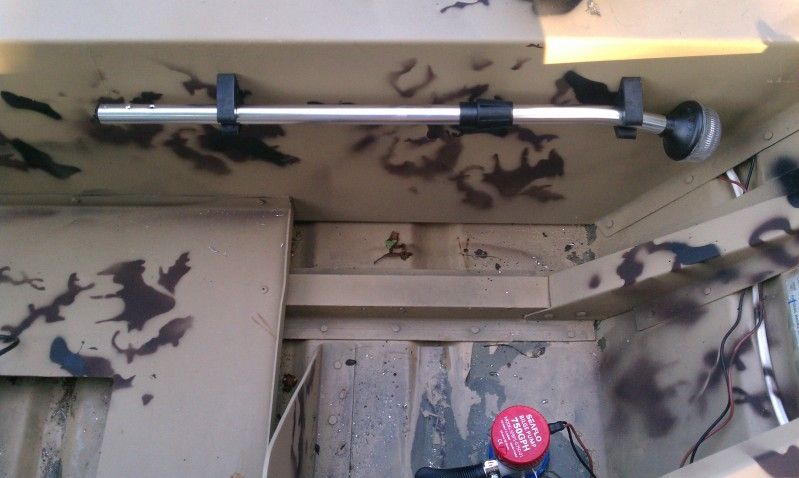
2-bank on board charger. Mounted on the faceplate of my center bow hatch. You can see all the wire conduit I still need to install.
IMAG0968_zps12592dfc.jpg


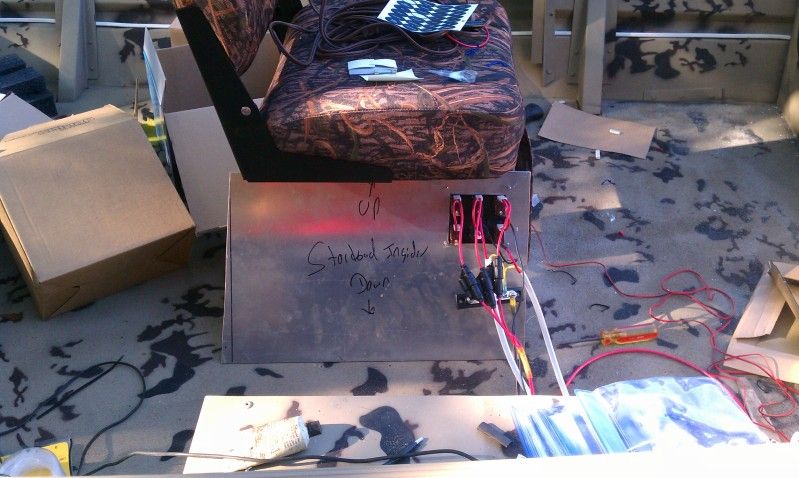
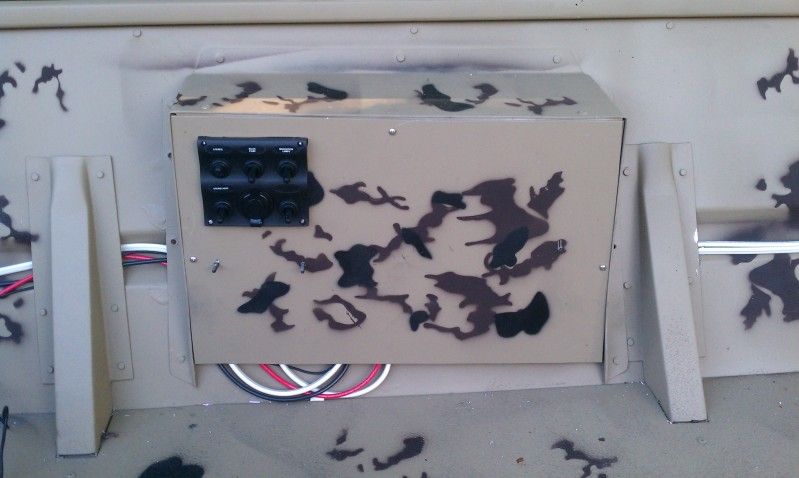
Control panel. This is on the starboard gunwale. My motor controls will be mounted right beside the panel once we get the motor installed. JUST enough clearance for both.
IMAG0963_zps998e5c06.jpg


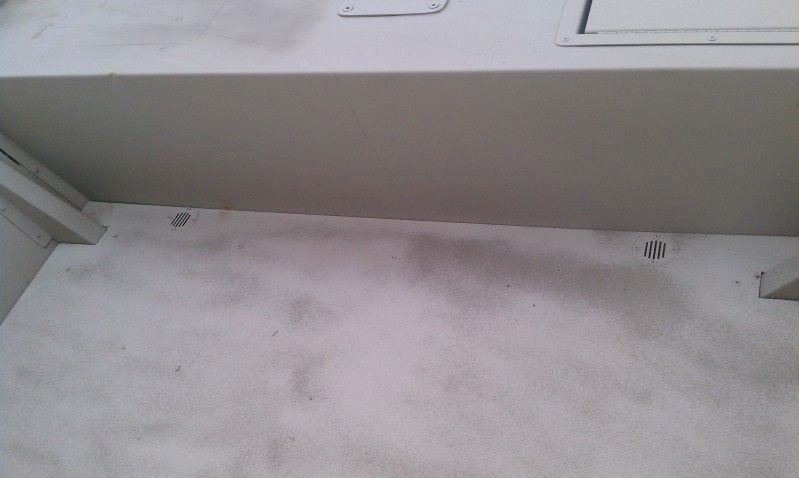
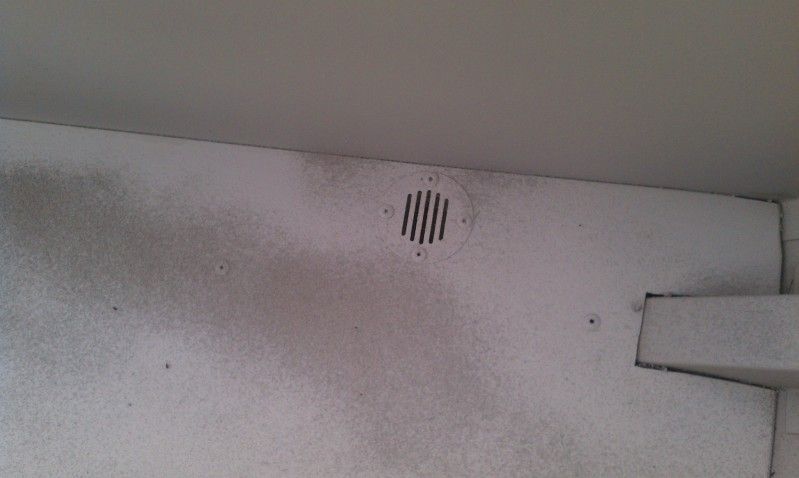
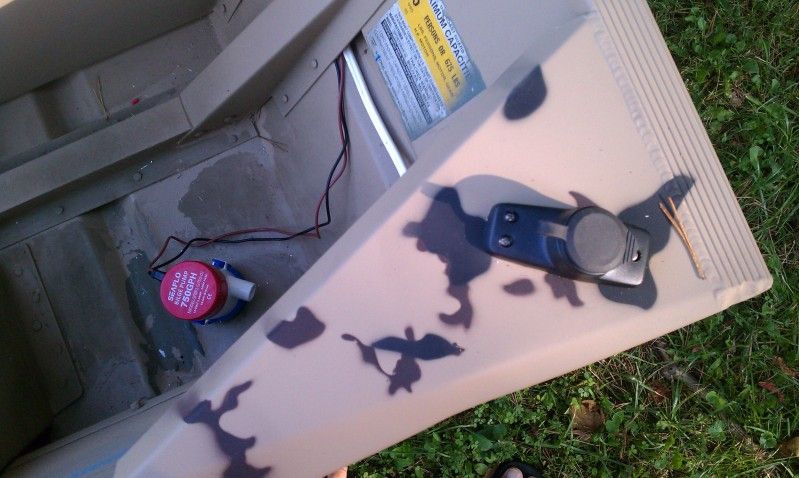
Stern light mount. You can see my bilge pump right below, which is where I mounted it. Through hull fitting for the pump is tucked under the corner transom brace right below the stern light. This is all on the starboard side.
IMAG0961_zps4a6a40fd.jpg


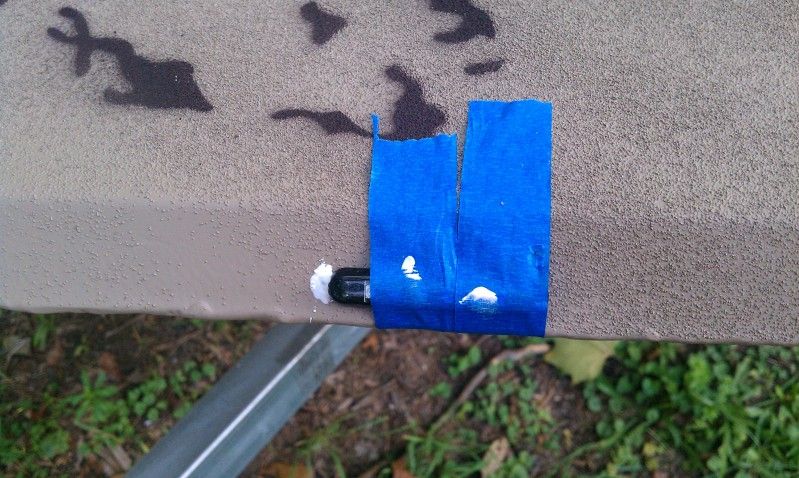
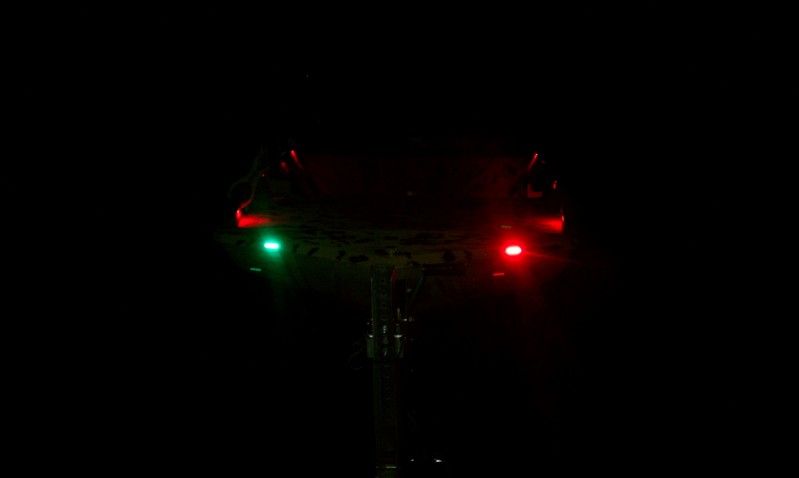
Navigation light. I went with led modules from www.oznium.com. Was looking for something low profile that wouldn't stick up on the bow and risk being kicked while entering and exiting the boat. These are only about 3" long, but are super bright. Just what I was looking for. They are installed with 5200. The painters tape is just a temporary clamp while the 5200 cures
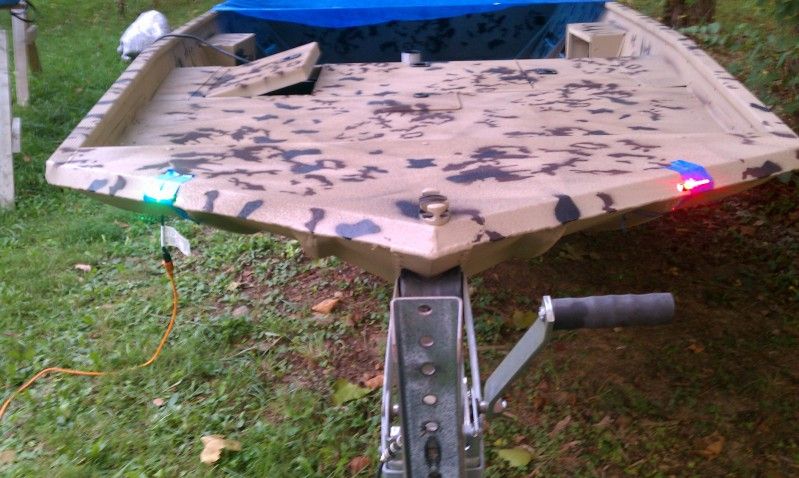
IMAG0964_zpsa3c01d6f.jpg


Lit up.
IMAG0969_zpsaa8e56a1.jpg


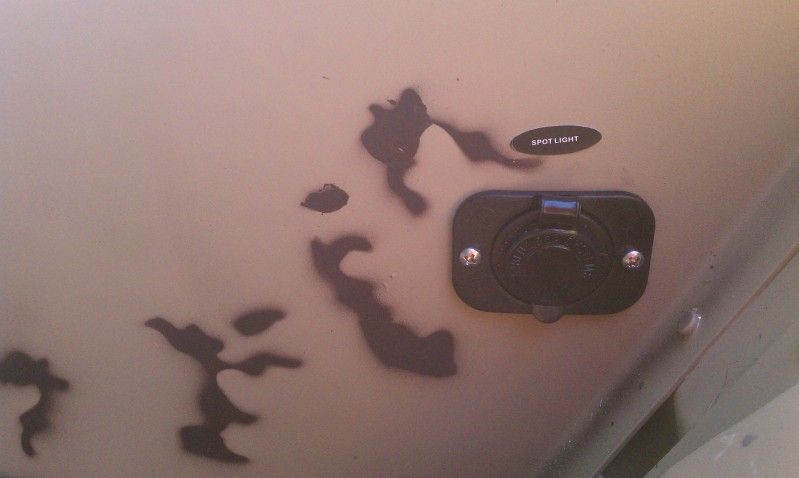
12V accessory plug. This is located on the port side of the rear bench. Once the jet pump is installed the captain will be up front. So the man in the rear seat will need to operate the spotlight.
IMAG0962_zpsc5089c7c.jpg


That's it for now. I'm calling her 95% done. Just need to finish installing interior lights and my sonar and transducer and cleaning up my wiring. I'm going to wait until after next week to do my sonar and transducer, since we are hunting Monday/Tuesday. I want to give the 5200 a good week to cure once I mount my transducer since it involves holes below the water line.
 
Got a few more things done over the past few nights. Installed/wired my sonar, installed my stern light storage clips, re-installed my fenders and side bunks, finished up my bilge pump installation and installed my boat numbers. Days are getting shorter which sucks when your trying to get things accomplished in the evenings.

750 gph bilge pump working. I 5200'd the pump to the starboard side of my bilge. Worked out nicely.
IMAG0972_zps25336512.jpg


IMAG0970_zps4568efbb.jpg


Stern light storage. These clips don't hold the light quite as tight as I'd like. The light can slide back and forth. Had to slide the light until the clip got snug against the curve of the shaft towards the top of the light. Nice and snug that way.
IMAG0974_zpsc86fbdc3.jpg


Sonar installed. Didn't install my transducer yet, will probably wiat until we get the jet hooked up to the boat. But wanted to get the sonar wired and installed so I can start cleaning up my wiring. It's located for easy viewing from the captains seat.
IMAG0973_zpsdc6bb87c.jpg


Boat numbers from John (bulldog from this site) at Vinyl Images (board sponsor). He did awesome work at a reasonable price!! I think they look nice. And now I'm LEGAL.
IMAG0975_zps19cc2e19.jpg


My buddy is going to stop by tonight to help me wire and install my interior lights. Once I get the wiring cleaned up, I won't be doing anything else until after we hunt next week. Going to take her out Sunday morning to do some scouting for our Monday morning hunt. Hopefully we can fill her full of birds!!
 
Got my interior lights wired up late last week, and am super happy with them. We used them yesterday morning and this morning while running to our hunting spot and while setting decoys. They are bright enough to light up the interior of the boat really well, but the red color doesn't effect your night vision at all. We had the boat out all day sunday with up to 4 people fishing off of it at a time. It fishes 3 comfortable, but 4 is doable. Never thought about getting pictures while fishing or hunting the last 2 days. Even though we only caught 2 fish and bagged 0 geese, I was having to much fun!!

Not sure how good these will show up, but here is the interior lights lit up.
IMAG0981_zps77f2746c.jpg


IMAG0979_zpsdcaa67da.jpg


Heres a little better shot of the LED nav lights. They are SUPER bright.
IMAG0976_zps86d05292.jpg
 
This looks really great dude. I like how you did the Nav Lights. I've already got a bow light for mine in the package but I may rethink that and go with something like you've got going on there. Nice work!
 

Latest posts

Top