Our project boat- 1977 Blue Fin Sea Hawk

TinBoats.net

Help Support TinBoats.net:

This site may earn a commission from merchant affiliate links, including eBay, Amazon, and others.
bonz_d said:
Boy does that look familiar! I kept mine clamped for 50hrs. Which it really didn't feel like it because I had other things I was working on at the same time and it still isn't in.

Did you decide on how you are going to seal it?
Not yet, but we are really considering your recipe! It all depends on what we have on hand- this will (hopefully) be the only piece of wood on the boat.
 
The mineral spirits and linseed oil are fairly inexpensive and the spar can be bought by the pint can.

What really makes this work is the linseed oil while the mineral spirits thins down the Spar and allows it all to penetrate the wood pores. Once dried it can be painted or covered with Spar urethane.


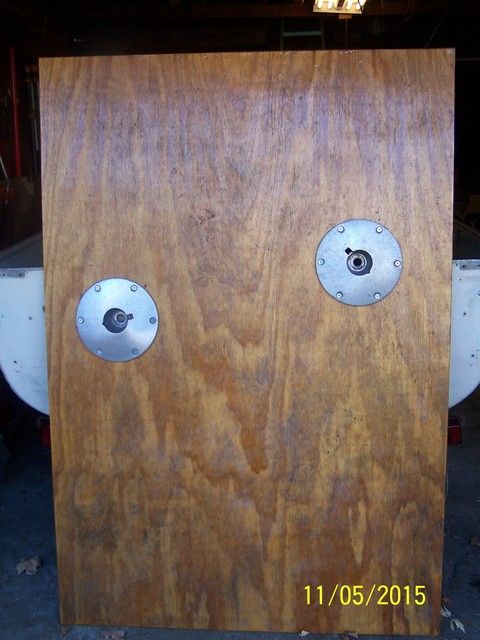
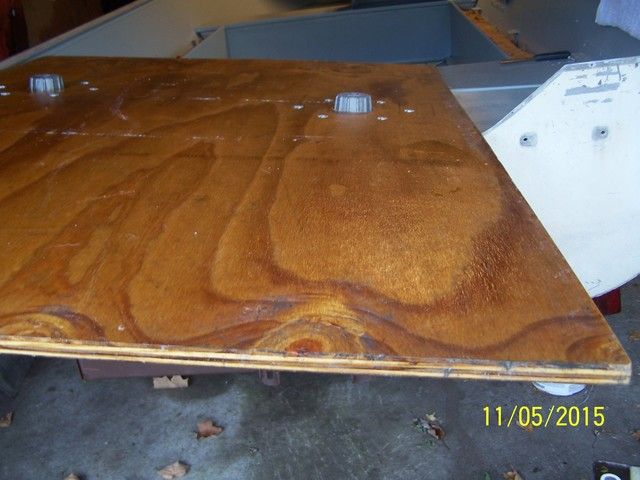
These are pictures of the plywood that was done and put in my Sean Nymph about 4 months ago. As a test I left them out in the weather, uncovered, in the rain and sun. I realize that this is just a short time frame but as I hope you can see there has been no change to the finish or water intrusion. Though you can see tat the top side of the ply is dirty from wear and walking on it.
 
bonz_d said:
The mineral spirits and linseed oil are fairly inexpensive and the spar can be bought by the pint can.

What really makes this work is the linseed oil while the mineral spirits thins down the Spar and allows it all to penetrate the wood pores. Once dried it can be painted or covered with Spar urethane.


These are pictures of the plywood that was done and put in my Sean Nymph about 4 months ago. As a test I left them out in the weather, uncovered, in the rain and sun. I realize that this is just a short time frame but as I hope you can see there has been no change to the finish or water intrusion. Though you can see tat the top side of the ply is dirty from wear and walking on it.
Thanks for the info! I can see how the mineral spirits and linseed oil would penetrate the wood- good point. I have been reading about a lot of people using epoxy resin. Any thoughts on that as an alternative?
 
epoxy resin is about the best way but it is also the most costly. In order for epoxy to really be used to it's full potential the plywood should be fitted 1st and all holes predrilled. This method is what all the glasser guys use.

I don't use it because there is no retailer close by that I can get it and it also has to be shipped as a haz-mat material which also greatly adds to the cost. Were the 3 parts in the formula can be purchased at any hardware store.

If epoxy is the way you decide to go that is the best way to go but again is also the most costly.

I also understand your thought about keeping wood out of the boat as best you can. When I build internal structures or supports I use aluminum angle. It's lighter and stronger than wood and does not rot.

Any new progress?
 
bonz_d said:
epoxy resin is about the best way but it is also the most costly. In order for epoxy to really be used to it's full potential the plywood should be fitted 1st and all holes predrilled. This method is what all the glasser guys use.

I don't use it because there is no retailer close by that I can get it and it also has to be shipped as a haz-mat material which also greatly adds to the cost. Were the 3 parts in the formula can be purchased at any hardware store.

If epoxy is the way you decide to go that is the best way to go but again is also the most costly.

I also understand your thought about keeping wood out of the boat as best you can. When I build internal structures or supports I use aluminum angle. It's lighter and stronger than wood and does not rot.

Any new progress?
Great advice- thank you. I think I am in the same situation with a dealer for the epoxy resin. I will probably go with your recipe, it makes a lot of sense. I was planning on dry fitting it and predrilling all the through holes first, and then applying the sealant.
No real progress, just cut the transom to shape- i'll dry fit it, pre drill and seal it this week.
Thanks for all your help!
 
Bonz_d-
I just primed the transom using your recipe. I applied it continuously, making sure to apply a lot to the end grain, until it seemed to be saturated, then waited 15 minutes and applied some more. I then let it dry for an hour or so an wiped off the excess.
I was really impressed by how much soaked in, and have to think a lot penetrated the wood deeply.
I'll wait a few days and apply a couple of coats of straight spar as you suggested. Thanks again for the tip!
 
I think you will like the results. I know I do.

The piece that I pictured above, that was a piece of ply that was left over from another project and that sheet had been sitting in the garage for almost 5 years. It was so dry that I used almost a whole qt. of this formula to do it. It soaked up that much!

I just picked up another qt. of spar today to finish sealing my transom ply and the 2 small pcs. that cover the side flotation boxes. Hope to get out tomorrow and finish those up.

So let me know what you think after you've finished it up.
 
lckstckn2smknbrls said:
Epoxy shouldn't be Haz-mat, Polyester resin is Haz-mat.


Either way it adds to the cost which I understand to some isn't a big deal and isn't even a consideration. Guess I just like the fact that I can get all ingredients just 10min. away at the local hardware store and supporting our town's economy helps.

In no way am I stating that this formula is a better solution than epoxy but from my experience I haven't found anything better for the cost.

Even epoxy encapsulated wood can be compromised and once it is it retains water more so than a varnished finish.
 
Trailer work...
Finally got some time to get back to the boat project. The transom is back in place and it should last another 40 years or so!
We took the boat off the trailer to prep the hull for paint, and noticed how crooked the trailer was.

It looked like the trailer was out of square, but after some measurements, it turned out the springs didn't match!
135e93236c54e8e5fe9158e88dff1208.jpg
f2420271fed4b06a3e4604a106c19f83.jpg


We replaced the springs with matching ones, removed the old bunks and rollers and replaced them with new bunks.

ac10da5073ae10220d7bc6c392ff45d2.jpg


Then, I added fenders and steps

ba84303f090dd168993006cc9238e707.jpg


9af530f13de2cb8d9ad3ead8d5ce4783.jpg


Next after priming and painting, I'll cover the steps with aluminum diamond plate.
The steps will also house the brake lights to protect them from when we hit stuff!

Soon, we will start working on the boat!

Sent from my SM-N900V using Tapatalk
 

Attachments

  • uploadfromtaptalk1450705587299.jpg
    uploadfromtaptalk1450705587299.jpg
    81.3 KB · Views: 1,272
f9ee4217043eca0bcbb8b82be0df3195.jpg

A cpuple of photos of the completed steps with aluminum diamond plate. We are hoping to get it dirty soon- the bright aluminum is a little to fancy for a catfish boat!

Speaking of the boat, we cleaned and primered the hull. Ready for paint, well, the outside of the hull anyway.
View attachment 1

Sent from my SM-T350 using Tapatalk
 

Attachments

  • uploadfromtaptalk1451105541802.jpg
    uploadfromtaptalk1451105541802.jpg
    42.3 KB · Views: 1,231
  • uploadfromtaptalk1451105779956.jpg
    uploadfromtaptalk1451105779956.jpg
    32.4 KB · Views: 1,231
We installed sealed, submersible, led lights on the trailer, and began working on the inside of the boat.

View attachment 1
We prepped the inside of the hull for paint by getting rid of old carpet adhesive (the tan or yellow looking stuff below) as well as layers of old green paint.
View attachment 2
View attachment 3
We tried using Goof Off on the carpet adhesive by applying it, waiting a few minutes to an hour, and then scraping with a putty knife or wire brush. It really didn't work. So we used grinders and wire wheels and it made quick work of it.
View attachment 4
We cleaned it up and got a coat of primer on all the aluminum. Next up paint, and then the real work of the build will begin.

Sent from my SM-N900V using Tapatalk
 

Attachments

  • uploadfromtaptalk1452400700840.jpg
    uploadfromtaptalk1452400700840.jpg
    38.9 KB · Views: 1,176
  • uploadfromtaptalk1452400734531.jpg
    uploadfromtaptalk1452400734531.jpg
    37.7 KB · Views: 1,176
  • uploadfromtaptalk1452400945214.jpg
    uploadfromtaptalk1452400945214.jpg
    52.9 KB · Views: 1,176
  • uploadfromtaptalk1452400962933.jpg
    uploadfromtaptalk1452400962933.jpg
    47.2 KB · Views: 1,176
  • uploadfromtaptalk1452401048237.jpg
    uploadfromtaptalk1452401048237.jpg
    46.4 KB · Views: 1,176
daschmetterling said:
We installed sealed, submersible, led lights on the trailer, and began working on the inside of the boat.

View attachment 1
We prepped the inside of the hull for paint by getting rid of old carpet adhesive (the tan or yellow looking stuff below) as well as layers of old green paint.
View attachment 2
View attachment 3
We tried using Goof Off on the carpet adhesive by applying it, waiting a few minutes to an hour, and then scraping with a putty knife or wire brush. It really didn't work. So we used grinders and wire wheels and it made quick work of it.
View attachment 4
We cleaned it up and got a coat of primer on all the aluminum. Next up paint, and then the real work of the build will begin.

Sent from my SM-N900V using Tapatalk
As usual, the photos are in reverse order, but I bet everyone can figure it out.

Sent from my SM-N900V using Tapatalk
 
We made some progress on painting the hull and started fitting some aluminum angle for the floor framing
View attachment 1
View attachment 2

Sent from my SM-N900V using Tapatalk
 

Attachments

  • uploadfromtaptalk1453057576647.jpg
    uploadfromtaptalk1453057576647.jpg
    31.4 KB · Views: 1,127
  • uploadfromtaptalk1453057595103.jpg
    uploadfromtaptalk1453057595103.jpg
    35.2 KB · Views: 1,127
  • uploadfromtaptalk1453057623094.jpg
    uploadfromtaptalk1453057623094.jpg
    35.8 KB · Views: 1,127
Wow, I have the same boat. Just picked it up this past spring and used it all summer. I'm planning to re do it when the weather warms up so I'm super stoked to have found your thread. I'll post pics of mine when I get a chance!
 
njtrouttracker said:
Wow, I have the same boat. Just picked it up this past spring and used it all summer. I'm planning to re do it when the weather warms up so I'm super stoked to have found your thread. I'll post pics of mine when I get a chance!
Yes, post some pictures- I'd love to see your boat. Obviously we just have a hull, but I would really like to see how yours is set up and what works, and what you will improve. Thanks for posting!

Sent from my SM-N900V using Tapatalk
 
So I haven't really taken many pictures showing the full layout but here's what I have right now. The boat is set up with a 6 hp Johnson outboard that I'll be upgrading. I use it on a lake that has a 9.9 limit but I also want to go out on the Delaware River so I'll also want to have a 25+ hp for that. It appears that these boats had a console at one time but when I bought mine that had been stripped and it was converted to a tiller steer. It has a basic carpeted wood deck with storage at the bow and and a bench seat with storage. It was stripped of all its electronics when I got it so I installed a switch panel and a battery, wired the lights, installed a new stern light (modified from Walmart to fit in the existing mount) USB/12v charger, fish finder, trolling motor and bought some new seats. The boat came with seat mounts already configured in the deck. Not sure of the new layout but I'll be reconfiguring the deck with new storage, installing vinyl, and replacing the rotted transom.

It's not much to look at right now but we had a blast on it over the summer camping and fishing. I can't wait to fix it up.

ImageUploadedByTapatalk1453237291.089758.jpgImageUploadedByTapatalk1453237314.076262.jpgImageUploadedByTapatalk1453237326.111589.jpgImageUploadedByTapatalk1453237350.581800.jpgImageUploadedByTapatalk1453237415.009002.jpg
 

Latest posts

Top