BigTerp's Tracker Sportsman 16' O/B Jet build

TinBoats.net

Help Support TinBoats.net:

This site may earn a commission from merchant affiliate links, including eBay, Amazon, and others.
[url=https://www.tinboats.net/forum/viewtopic.php?p=322799#p322799 said:
BigTerp » Today, 09:01[/url]"]Still have a bit of fine tunning to do to get my floor fitting well. Down to the filing stage at this point. Hoping to have it finished up tonight and then I can start on framing out my bow deck extension. Would like to have all of that done by the end of the weekend.

Having a bit of trouble figuring out how to frame out my bow extension. The curve of my hull is making it a challenge. My buddy stopped by last night to help me brainstorm and I THINK I have it figured out.

Be sure to allow your self enough room at the ribs to cover your decking and still be able to get it out.

For the front deck, follow the straight line rule and just add wings to the sides.
 
Thanks Jaime.

Not sure what you mean by wings. What I plan to do is basically make 3 rectangular boxes. 2 for battery storage and one larger one in the middle for regular storage. I am also planning on riveting a piece of angle to the hull to support the top of my deck on the ends. Is this what you mean by wings?
 
Hey Terp what brand if hvlp sprayer did you use? I have so much over spray with my cheap kolbalt sprayer... Maybe I need to turn pressure down on compressor? Any thoughts.
 
[url=https://www.tinboats.net/forum/viewtopic.php?p=322852#p322852 said:
panFried » 6 minutes ago[/url]"]Hey Terp what brand if hvlp sprayer did you use? I have so much over spray with my cheap kolbalt sprayer... Maybe I need to turn pressure down on compressor? Any thoughts.

I used my buddies sprayer, which is this one.

https://www.harborfreight.com/2-piece-professional-automotive-hvlp-spray-gun-kit-60239.html

I THINK we used around 40 psi, IIRC. We had a decent amount of overspray, but nothing to bad. You'll always get some overspray with a hvlp gun, but it sounds like you are having alot. We also used a 1.8mm tip. What are you running your compressor at now? If it's anything over 40 I'd try and dial it down to 40 and maybe even 35psi.
 
Lol... Um I'm embarrassed to say... 125psi :( I have sprayer but not sure on tip size. That's what I get for being novice. Let me dial down to 15-25 psi and see what happens. I do like the coverage with 15% thinner.
 
[url=https://www.tinboats.net/forum/viewtopic.php?p=322857#p322857 said:
panFried » Today, 2:58 pm[/url]"]Lol... Um I'm embarrassed to say... 125psi :( I have sprayer but not sure on tip size. That's what I get for being novice. Let me dial down to 15-25 psi and see what happens. I do like the coverage with 15% thinner.

HA!! It happens. I'm a novice with this stuff as well. My buddy knew what he was doing though, so I just followed his lead. Your gun should have a max psi number on it somewhere. Try 5 or so psi below that and see how it goes.

Speaking of being a novice, when I cut my first piece of angle the other day I proceeded to pick up the small piece I had just cut off. THAT CRAP WAS HOT!! Good thing I had gloves on, even though the thumb and second fingers are a bit melted now. I also ran my screw gun thru my finger when I was redoing my transom last September. That was fun!!

I'll be keeping an eye on your thread to see how it turns out.
 
Got my floor finished up yesterday. Still have a few cosmetic things to do to get it nice and clean looking, but it fits and I'm happy!! I'll tell you though, it was quite the tedious project. I worked on it from 9:30 till about 4:00 yesterday. Took a long lunch break and a few beer breaks as well. I'd say I have a total of about 10 man hours in just the floor. My wife was awesome and helped me test fit the floor about 10 times yesterday. That was the tedious part. Each time I test fit the floor I would mark with a sharpie what needed cut, grinded or filed. As the floor inched closer to fitting, it got even more tedious. The curves of the hull, especially towards the bow, made fitting a pain. I think it turned out nicely though.

IMAG0831_zpsf7f45d6a.jpg


IMAG0832_zpsbfe15950.jpg


Here is how the front of my floor is supported. This is where my front deck extension will meet the floor. I riveted a small piece of angle to the goofy front rib to support it in the middle.

IMAG0834_zps61a71a5b.jpg


I started to work on framing out my deck extension, but didn't get very far. I was beat!! Not sure if you can tell from the picture, but the bow portion of my framing sits higher than the floor support. Need to figure out a way to frame this up and tie it into my angle that supports the floor. I'm planning on 3 compartments under my deck extension. Two small ones on either side for battery storage, and one large in the middle for additional storage. Getting this framed out and aluminum sheet cut is my project for the week.

IMAG0835_zpsc22f0efa.jpg
 
Looks really good! Is that red sharpie or blood? :)

If you want to add more strength to the deck extension, I saw some nice square alum tubing at Lowe's this weekend. Costs a little more than angle but provides added benefit and piece o mind. Are you going to rivet or try to weld?
 
Red sharpie (although I am sitting at work today with some band-aids on a few of my fingers, no joke). I used black, purple and red because I had to make so many "notes" that I couldn't remember what needed cut, filed or grinded or if that was from the 3 times before test fit.

I'm using 1" x 1" angle. I'm not concerned about the extenison being stout enough, it's only going to be 18" long. Just need to figure out how I'm going to tie everything together. The mod v of my hull presents quite the challenge.

I'll be riveting my angle together for the frame, riveting my sheet to the angle and finally riveting my hatches to the sheet. The only thing I can think of that may need some welding is my transom riser. Still need to figure out how I'm going to tackle that project as well. Goose season opens up Sept. 2nd. So I need to get on the ball!!!
 
Itching to get this deck extension framed out!!! Rain messed up my plans Monday evening, and I had a softball game yesterday evening. My grass needs mowed this evening, but my buddy has time to stop by and help me work on the framing. So the grass will have to wait. Will probably be able to make some hay by the time I get to it :shock:

Some good news is the engine block is finally done. I guess the machine shop was pretty backed up, but they finally were able to get to boring out the cylinders for new pistons. We have all the replacement parts for the motor (gasket sets, water pump kit, etc.). So reassembling the motor is just another thing I NEED to find time to get done.

Fingers crossed that I'll have some pictures for you guys of a completed front deck extension frame tomorrow morning [-o<
 
Trade you, I'm replacing the roof on my 20x40' shed this week.

Go to MD metals up in the North end for aluminum. Quite the experience walking through the old foundry but they are the cheapest in the area.
 
i like how you got the floor to fit real tight around the ribs...my stepdad cut his out square cuts with a circular saw and left big huge gaps.... and of course when fishing, no matter what you drop, it will find them holes...im using plywood but they will fit tight... i went and bought 10 pieces of poster board to make a template...

i have that funny v rib in the front of my boat too, but my floor wont go that far....i dont see a point in putting a floor under my deck...im just gonna build a tray to strap my trolling motor battery there, and stash life vests and a soft day bag or whatever under the deck...

my boat layout is arranged a little different than yours....

looking great...

how much would you say that aluminum floor weighs?? im a fabricator for a living and when i worked in an aluminum shop them stupid sheets were very misleading-ly heavy!! but we usually were toting sheets that were 5x10 or 5x12 and mostly 3/16...
 
[url=https://www.tinboats.net/forum/viewtopic.php?p=323448#p323448 said:
Ranchero50 » Today, 11:10 am[/url]"]Trade you, I'm replacing the roof on my 20x40' shed this week.

Go to MD metals up in the North end for aluminum. Quite the experience walking through the old foundry but they are the cheapest in the area.

HA, no chance!!

I was originally going to get my materials from MD Metals, but my buddies friend got everything for me at his cost. Saved me some $ that's for sure.
 
[url=https://www.tinboats.net/forum/viewtopic.php?p=323451#p323451 said:
marshman » 50 minutes ago[/url]"]i like how you got the floor to fit real tight around the ribs...my stepdad cut his out square cuts with a circular saw and left big huge gaps.... and of course when fishing, no matter what you drop, it will find them holes...im using plywood but they will fit tight... i went and bought 10 pieces of poster board to make a template...

i have that funny v rib in the front of my boat too, but my floor wont go that far....i dont see a point in putting a floor under my deck...im just gonna build a tray to strap my trolling motor battery there, and stash life vests and a soft day bag or whatever under the deck...

my boat layout is arranged a little different than yours....

looking great...

how much would you say that aluminum floor weighs?? im a fabricator for a living and when i worked in an aluminum shop them stupid sheets were very misleading-ly heavy!! but we usually were toting sheets that were 5x10 or 5x12 and mostly 3/16...

Thanks man. My goal was to make things fight as tighlty and neatly as possible. It certainly isn't perfect, but it turned out pretty nice. The extra time and effort I put into was worth it.

Yeah, that rib is a PITA. I'm making 3 seperate storage compartments from there forward. I'm putting a floor in mine because I want the large middle compartment to be dry storage.

My best guess on the weight of the floor would be no more than 35 lbs. I can pick it up and move it around easily, so it can't weigh much more than that. The sheet it was cut from was a 5 x 10 sheet. Took two people to move it, mostly because of the size and not so much the weight. This is only 1/8" aluminum.
 
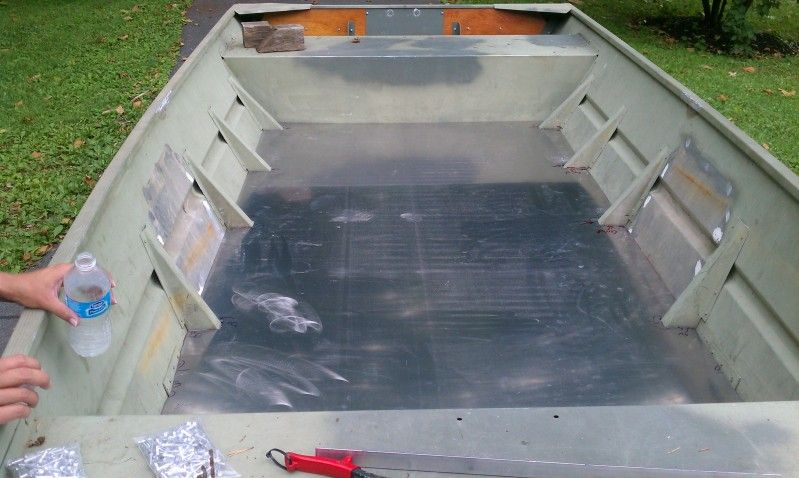
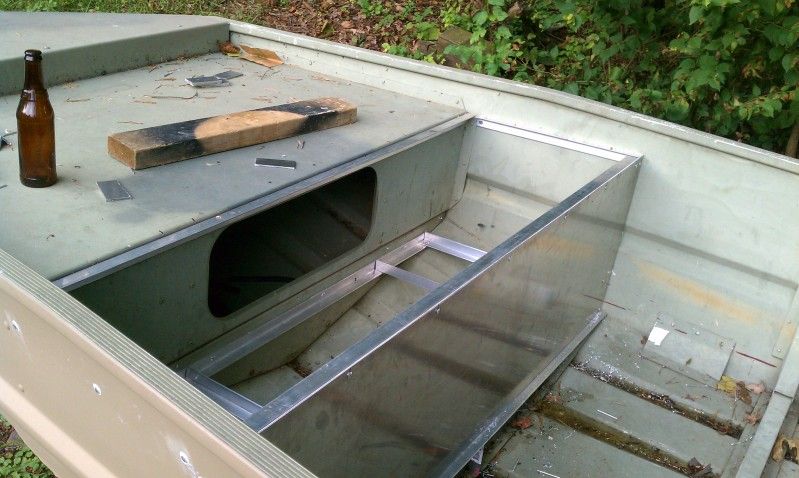
As promised, I got some pictures of an ALMOST completed front deck extension. I'm waiting to hear back from bassboy1 (fish on fabrications) as to some questions I have regarding the hatches he is making me. Once I hear back I only have a few pieces of angle left to install to complete my framing.

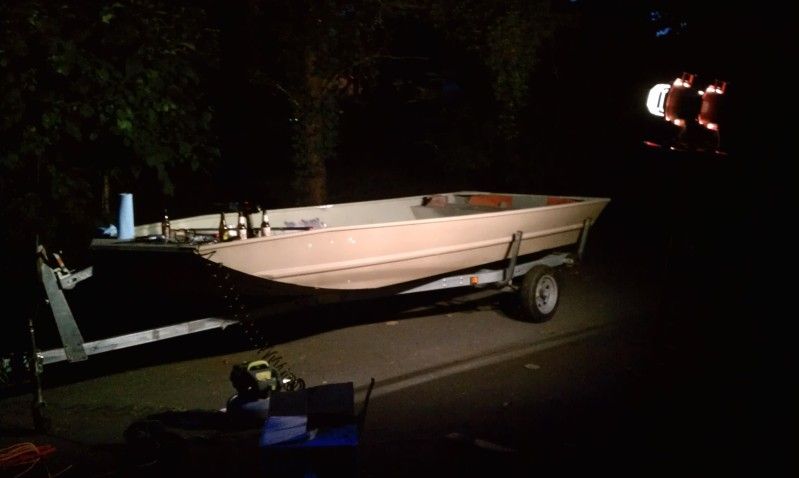
My buddy came over last night and we worked until 11:30. Hurting a bit this morning, but we got a decent amount done. I didn't get any pictures as we progressed because we were working by spotlight.

Now this is dedication!!!
IMAG0839_zpsf18d92c3.jpg


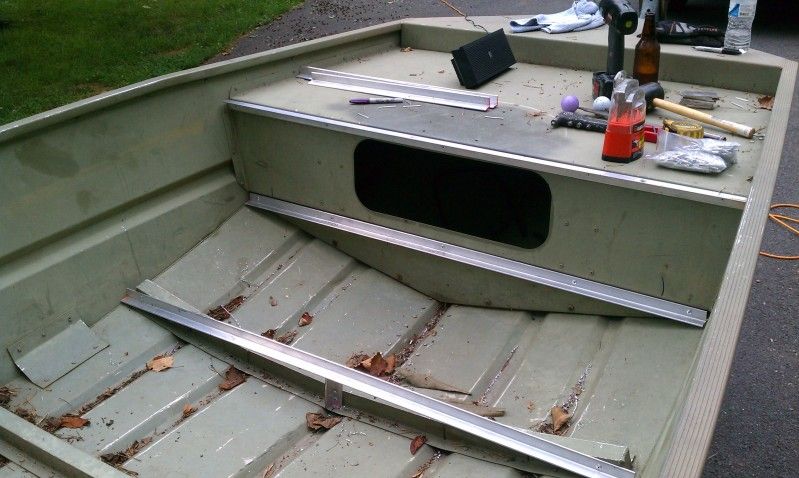
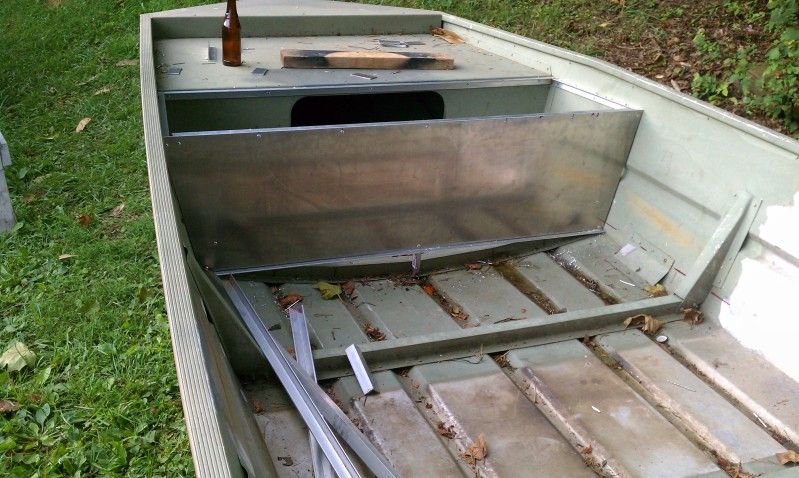
Had to install the face plate for the deck extension because the support angle for the hatch bottoms is higher than my floor. Needed to rivet that piece of angle into the face plate.
IMAG0842_zps07c3733e.jpg


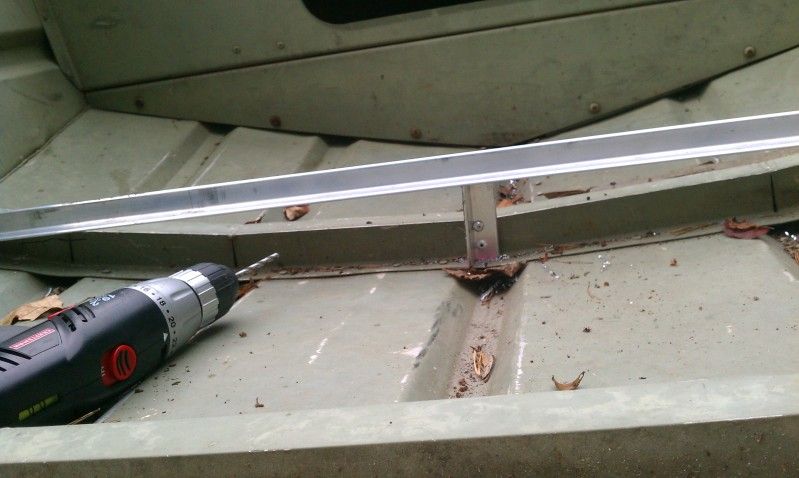
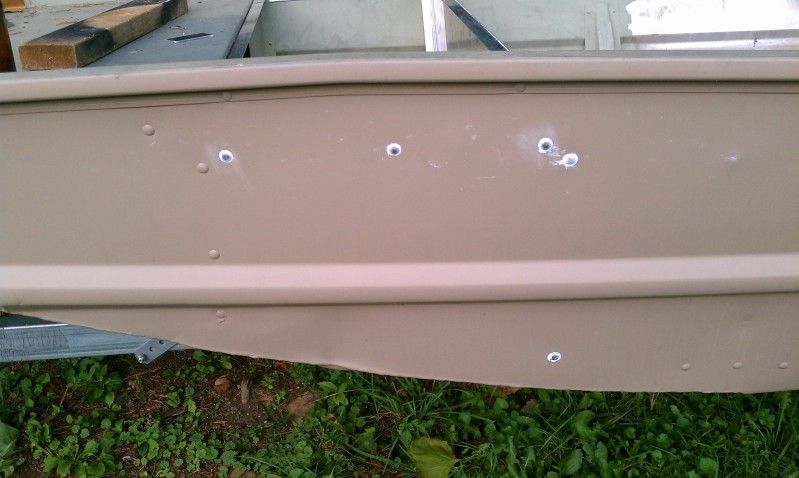
Had to drill and install a few solid rivets for my angle supports along the gunwale. Messed up my shiny new paint job :( Not sure if you can see in this picture or not, but I sanded a bit of the first hole we drilled to de-bur it before we installed the rivet. The Parkers paint was barely phased by the sand paper. I'm really happy with this paint.
IMAG0844_zps008eb8b2.jpg


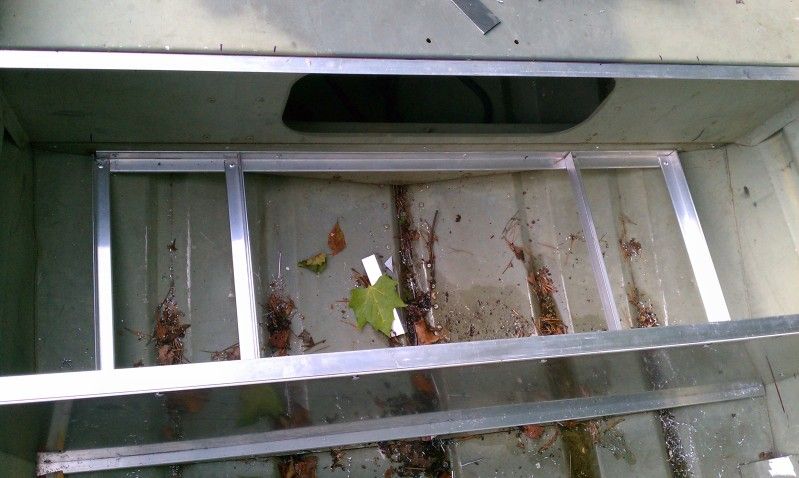
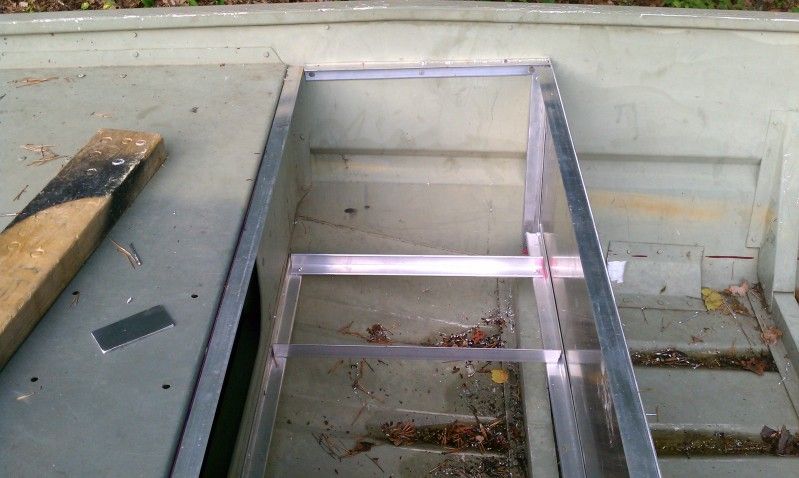
I removed and re-installed my original piece of angle that was to support the hatch floors. I cut it shorter so we could drop down the floor leaving more space for my batteries to fit. Also decided to only floor out the middle compartment. I have battery trays with straps that I'll screw into the pieces of angle you see in this picture. The middle compartment will be partitioned off from the battery compartments by a piece of sheet on each side.
IMAG0845_zps0d4c58b5.jpg


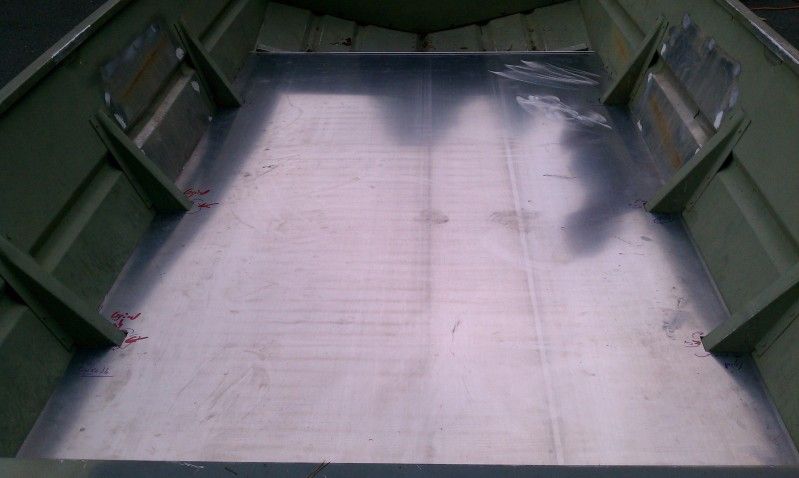
Just a few more pics of the work we got done last night.
IMAG0843_zpsd99f4421.jpg


IMAG0841_zpsd991fffa.jpg


IMAG0846_zps8ab300c3.jpg


I'm SUPER happy with how things are turning out so far. Have the rest of this week and the weekend to get things finished up. Need to tidy up the floor a bit, finish the frame for my deck extension, cut my sheet for the compartment floor and top and cut my foam for under the floor. Then I can go ahead and start prepping the inside of the hull for paint. Was originally planning on painting my floor before it was installed, but taking that piece of sheet in and out is only going to ding the crap out of my paint. So everything will get painted once installed.
 
fwiw...its been my experience--a sealed up aluminum box(dry storage) will have serious condensation(sweating) problems... i had a little 14x14x12 box built on to the front of my console in a boat i had built several years ago and it ended being a sweatbox... i couldnt keep any tools in there, they would rust...i ended up popping some 1 inch holes from under the console to ventilate it....worked much better, but still weatherproof...

im not sure of your plans for your storage boxes, just passing along my experience...need some sort of ventilation..
 
[url=https://www.tinboats.net/forum/viewtopic.php?p=323576#p323576 said:
marshman » 28 minutes ago[/url]"]fwiw...its been my experience--a sealed up aluminum box(dry storage) will have serious condensation(sweating) problems... i had a little 14x14x12 box built on to the front of my console in a boat i had built several years ago and it ended being a sweatbox... i couldnt keep any tools in there, they would rust...i ended up popping some 1 inch holes from under the console to ventilate it....worked much better, but still weatherproof...

im not sure of your plans for your storage boxes, just passing along my experience...need some sort of ventilation..

Thanks for the heads up. I actually took your advice and ended up making 2 trays out of angle for my batteries instead of flooring out those compartments. I had to make them as low as possible so my batteries would fit. Helped make my middle stoarge compartment a bit deeper as well.

I'm only sealing the middle compartment from the side batterry compartments with aluminum sheet. The existing hole you see in the existing deck will remain there for additional "wet" storage. Never thought about ventilation, but hopefully that'll be enough. For the batterry compartments they will be open to the floor and the rib running along the gunwale of the boat leaves a gap in my face plate on each side. Hopefully that'll be enough ventilation for the side compartments.
 
Looking good brother! Keep it up! Can't wait to see it ready for duck season!

Cheers
Herc
 
Top