MMF'S-1990 Tracker TX-17 Alum Build (FINAL PIX 10/22/11)

TinBoats.net

Help Support TinBoats.net:

This site may earn a commission from merchant affiliate links, including eBay, Amazon, and others.
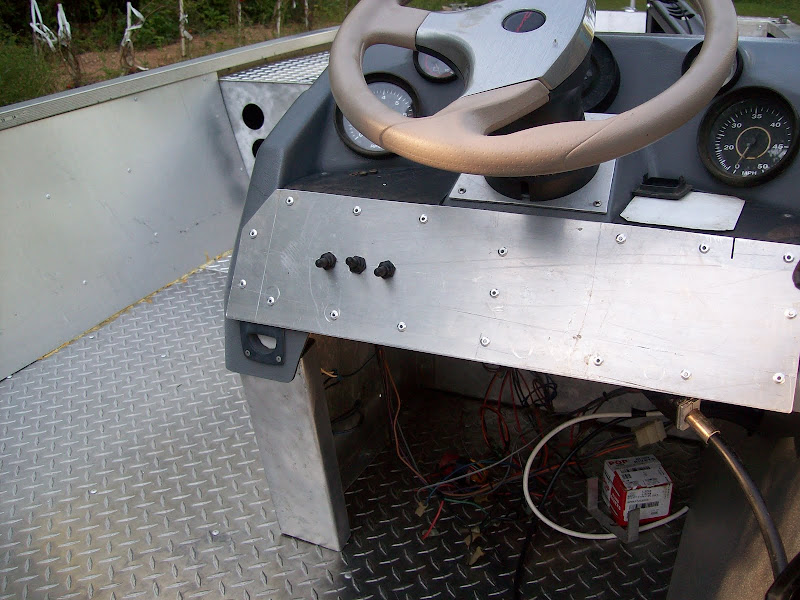
OK, getting some of the smaller things done but necessary. We had a big storm roll in last night and everything is wet this morning. First off, got the Teleflex steering all installed and the helm adapter fabricated, drilled and installed. This helm does not have offset bracket that the original had so the steering wheel is more horizontal than the other one.........

TRACKER%252520UPDATES%252520082111%252520001.jpg


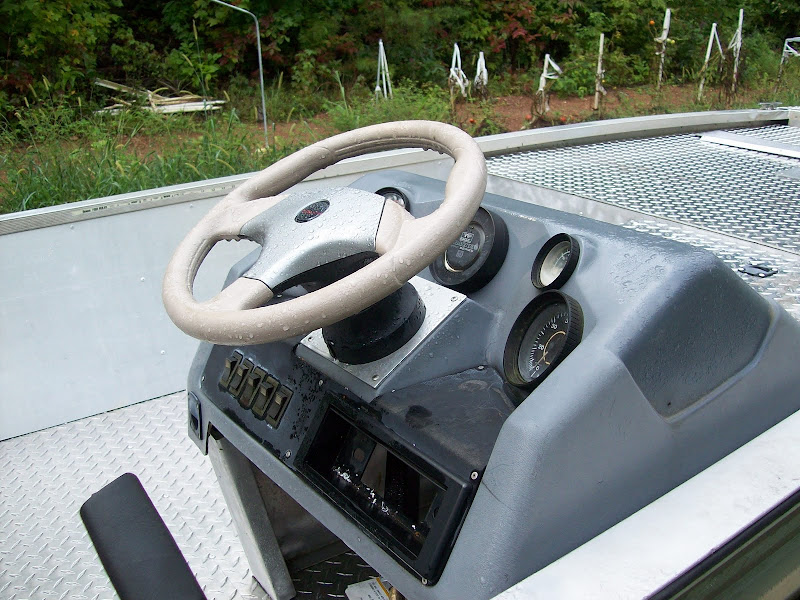
The rack protruding below, will be hidden when I get the console switch plate made

TRACKER%252520UPDATES%252520082111%252520002.jpg


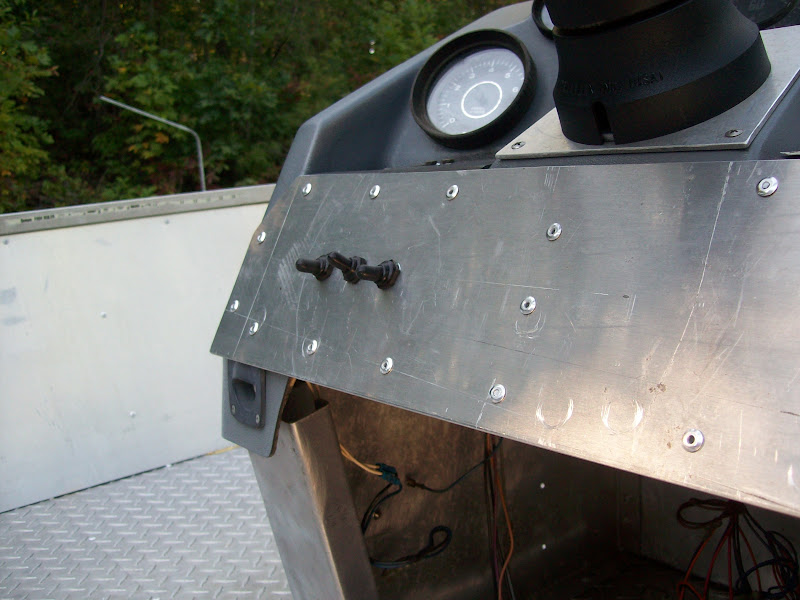
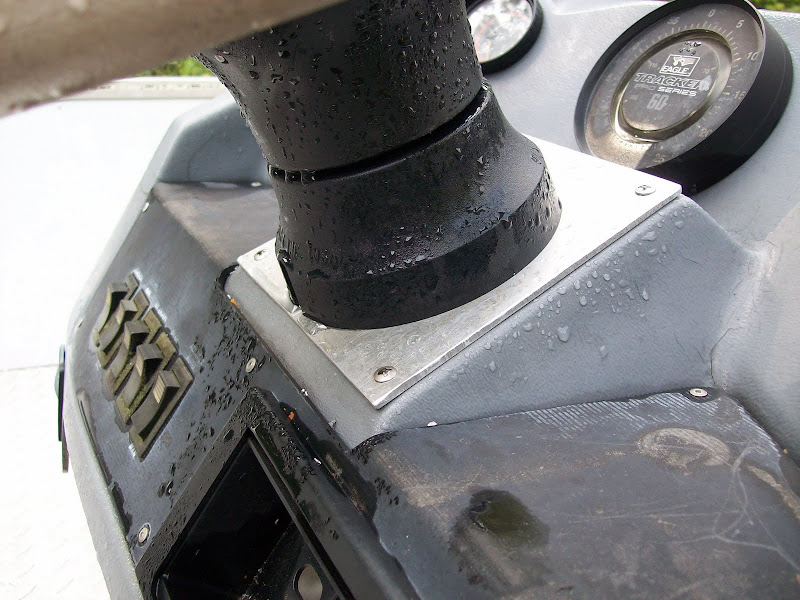
Close up of the adapter plate........

TRACKER%252520UPDATES%252520082111%252520003.jpg


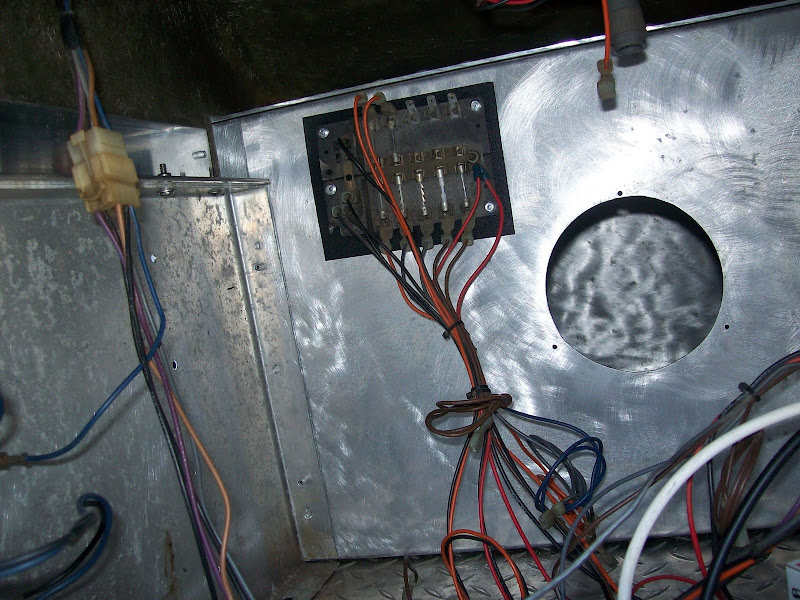
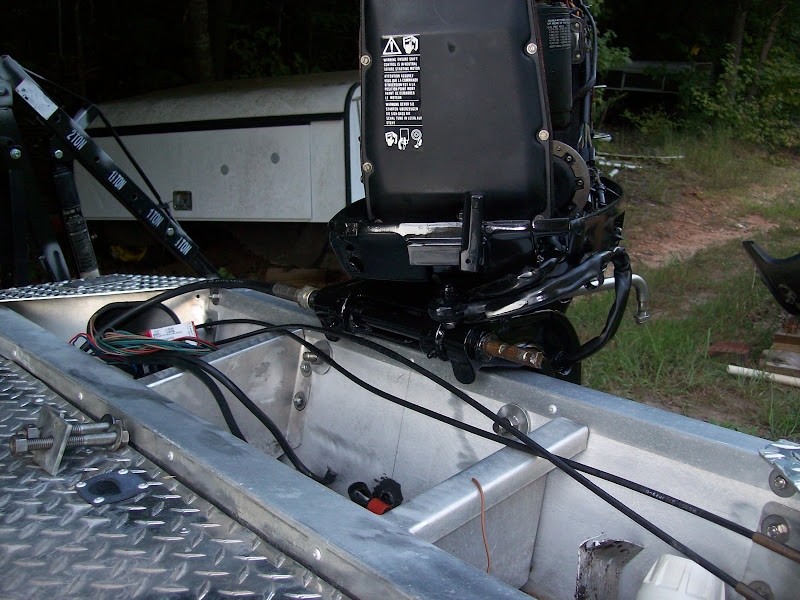
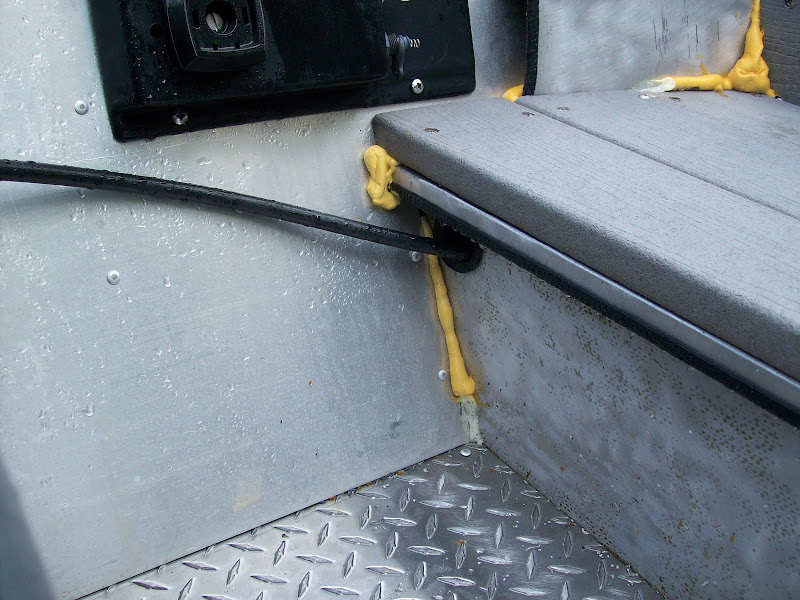
This is where the steering cable originally went in except it went in the tube with the wiring...

TRACKER%252520UPDATES%252520082111%252520007.jpg


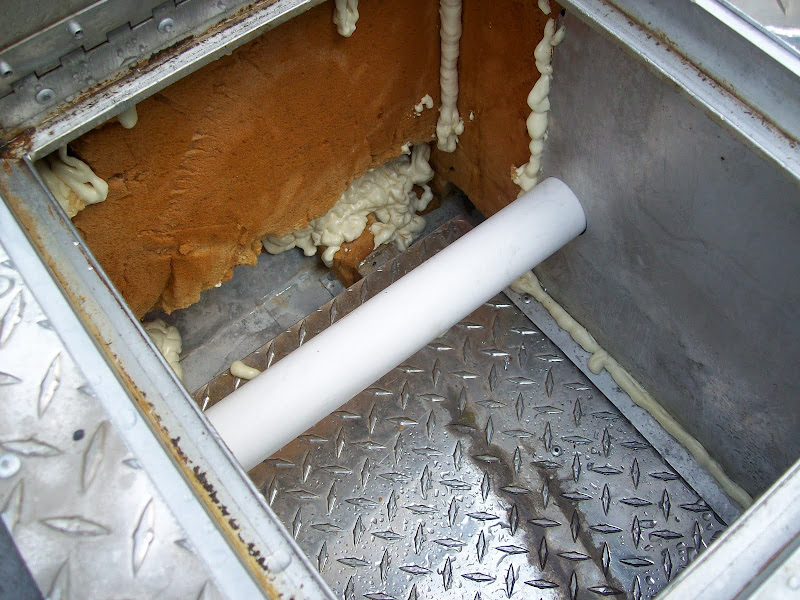
This is the 2" PVC pipe I added for steering cable to go thru as it goes thru storage compartment.....

TRACKER%252520UPDATES%252520082111%252520006.jpg


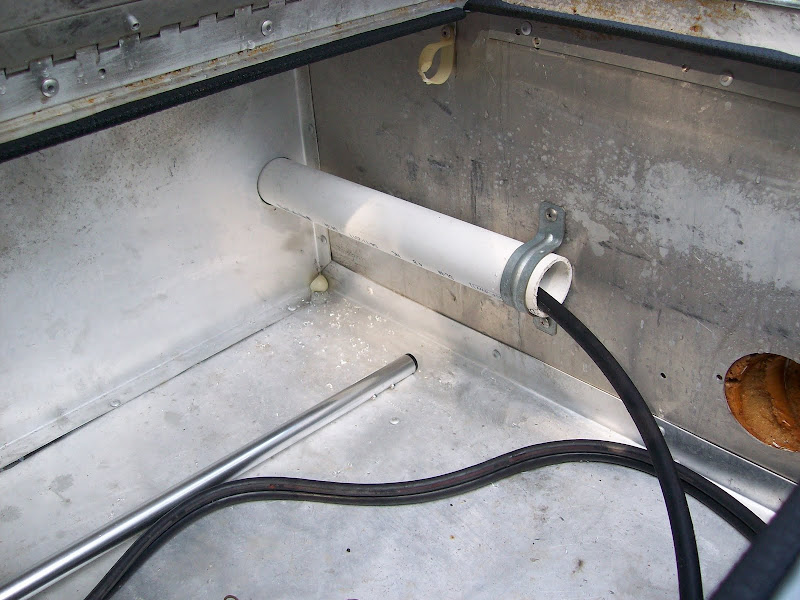
The fuel compartment where the steering cable tube terminates supported by the pipe clamp.........

TRACKER%252520UPDATES%252520082111%252520009.jpg


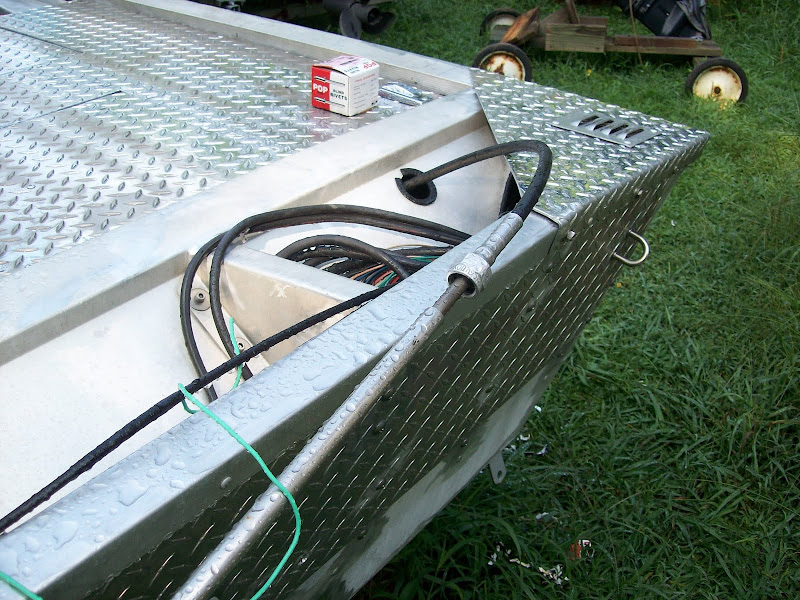
This is where the cable protrudes thru the splash well. Hole edge is covered with stainless/rubber edging.................

TRACKER%252520UPDATES%252520082111%252520008.jpg


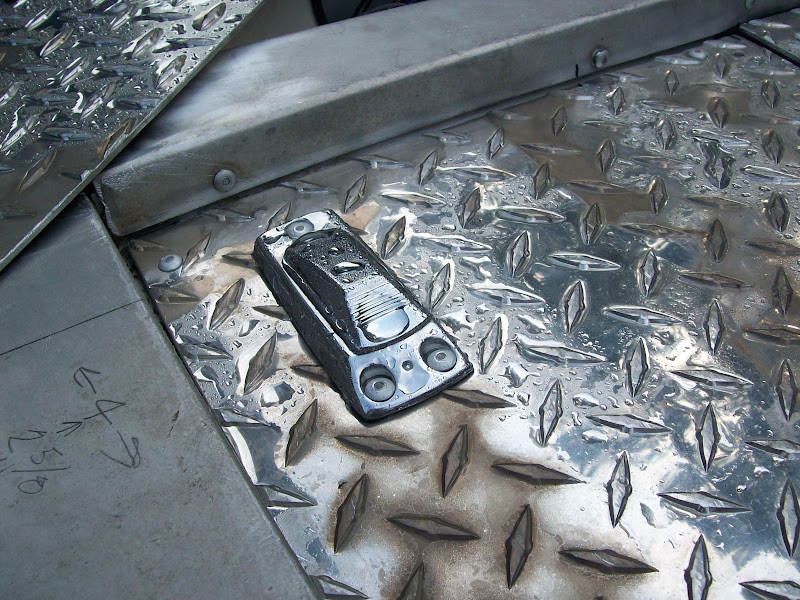
Addition of stern/bow light socket...........

TRACKER%252520UPDATES%252520082111%252520010.jpg


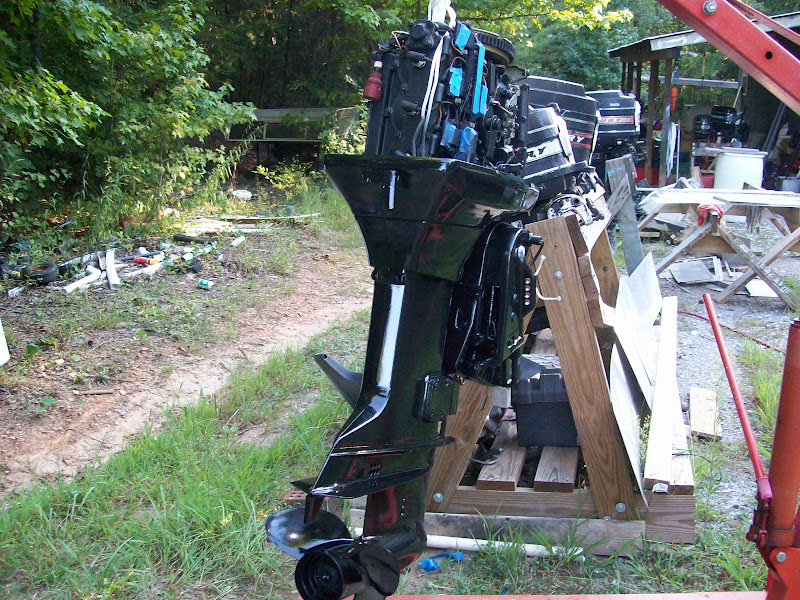
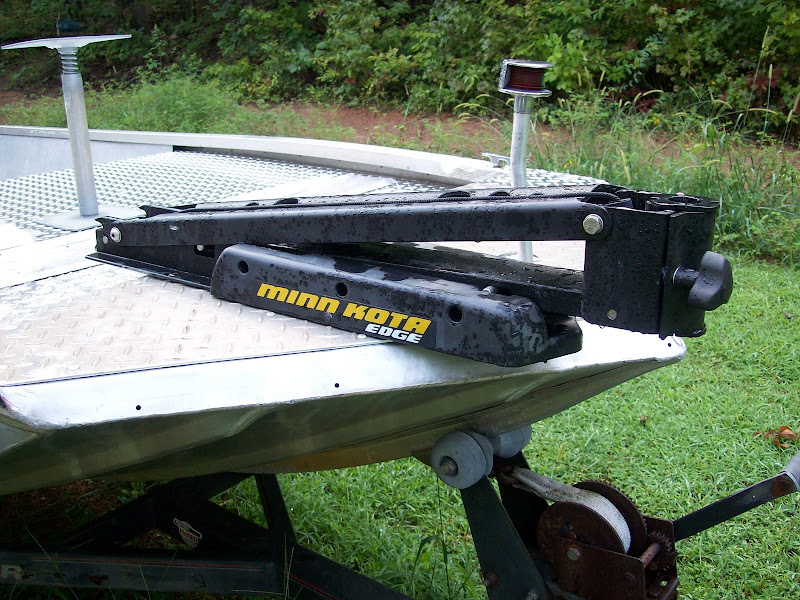
Troll motor mount where it will be located, I chose this location so neither the head or the prop will be in harms way................

TRACKER%252520UPDATES%252520082111%252520012.jpg

TRACKER%252520UPDATES%252520082111%252520013.jpg


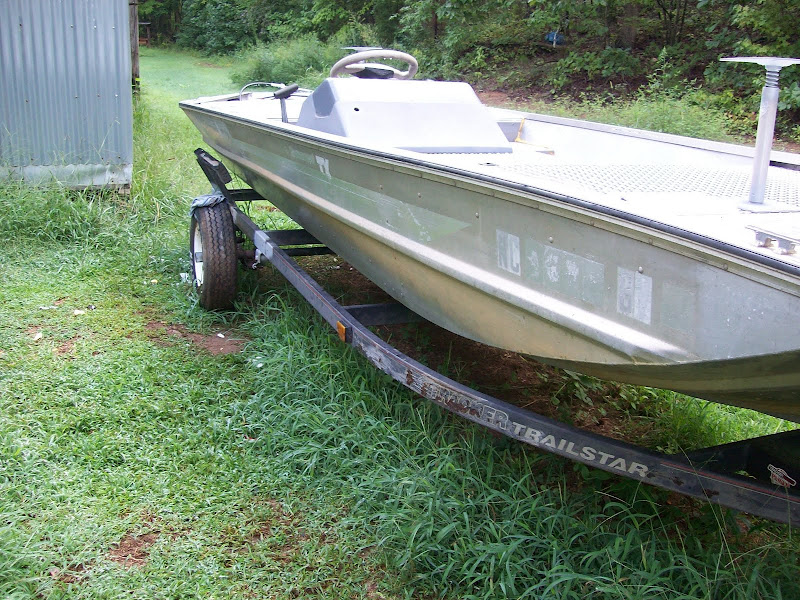
Removed one side decals and numbers, still have to get of the glue.............

TRACKER%252520UPDATES%252520082111%252520014.jpg

TRACKER%252520UPDATES%252520082111%252520015.jpg


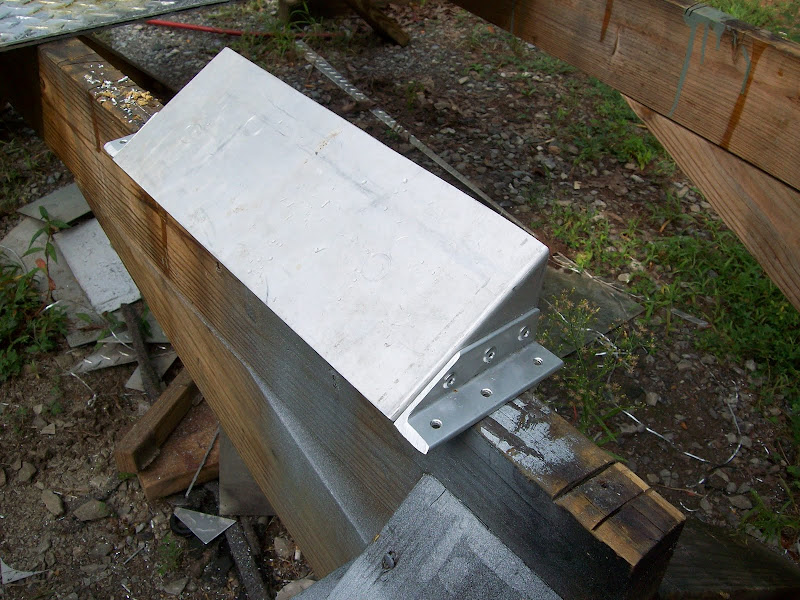
Laying out position of front switch panel I am making...........

TRACKER%252520UPDATES%252520082111%252520004.jpg

TRACKER%252520UPDATES%252520082111%252520005.jpg


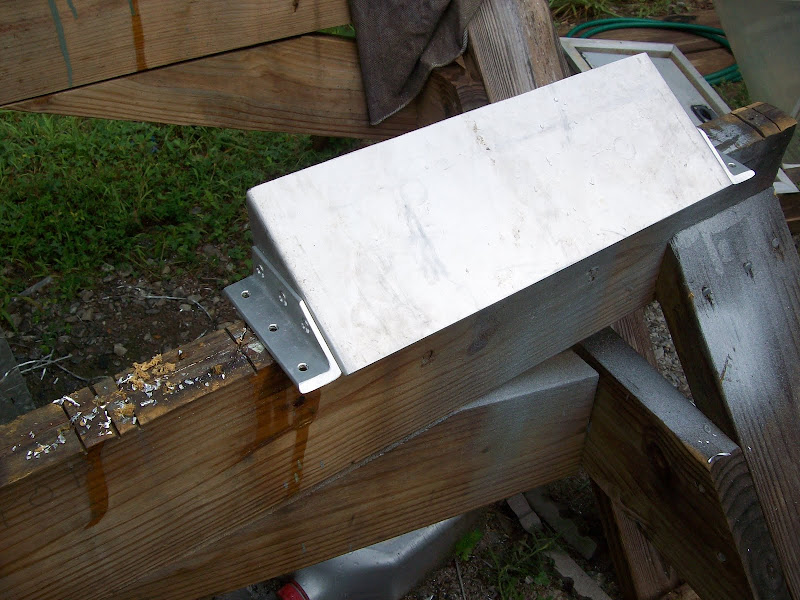
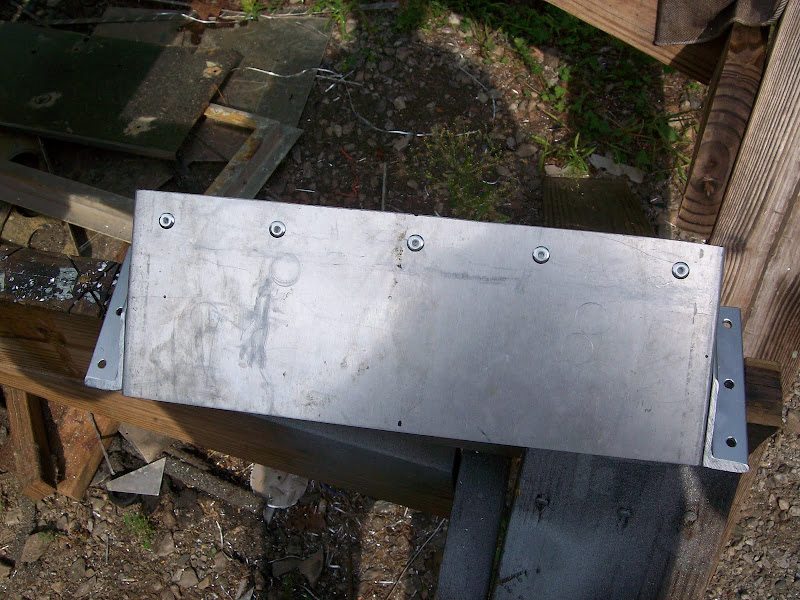
Assembly of front switch panel

TRACKER%252520UPDATES%252520082111%252520016.jpg

TRACKER%252520UPDATES%252520082111%252520017.jpg

TRACKER%252520UPDATES%252520082111%252520018.jpg


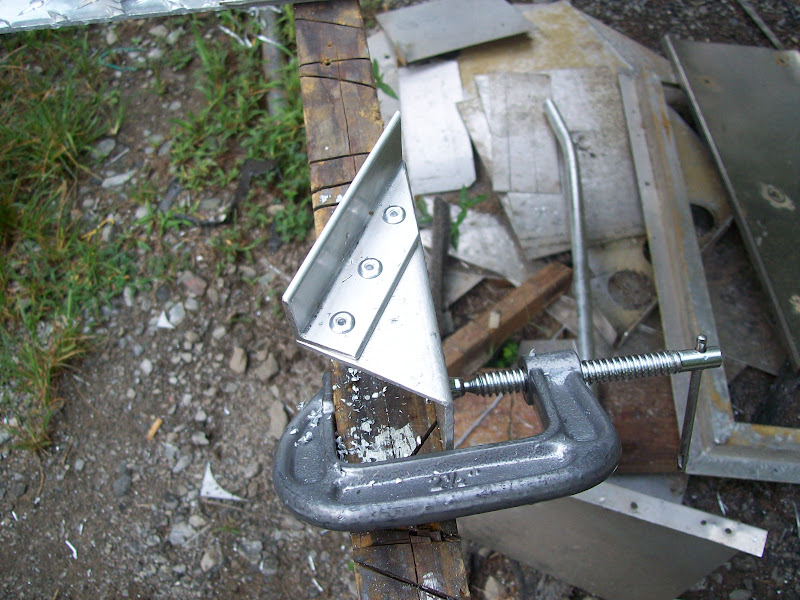
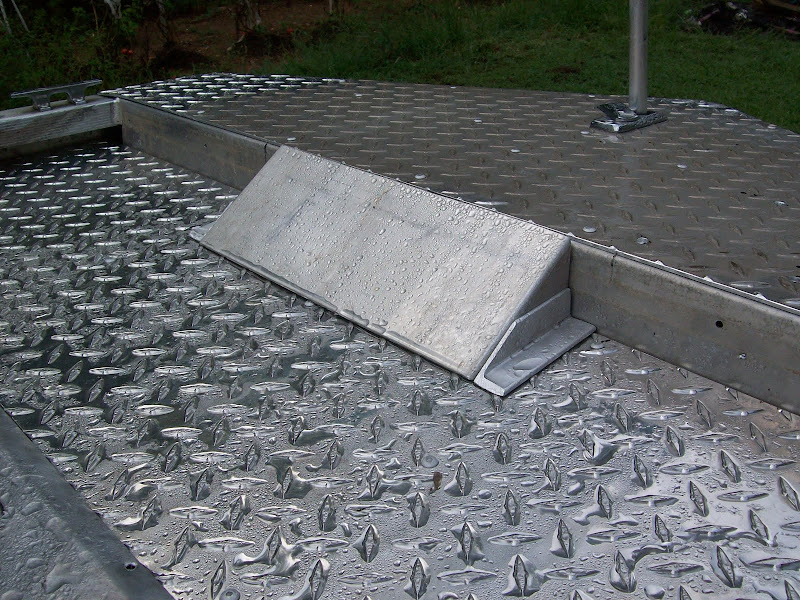
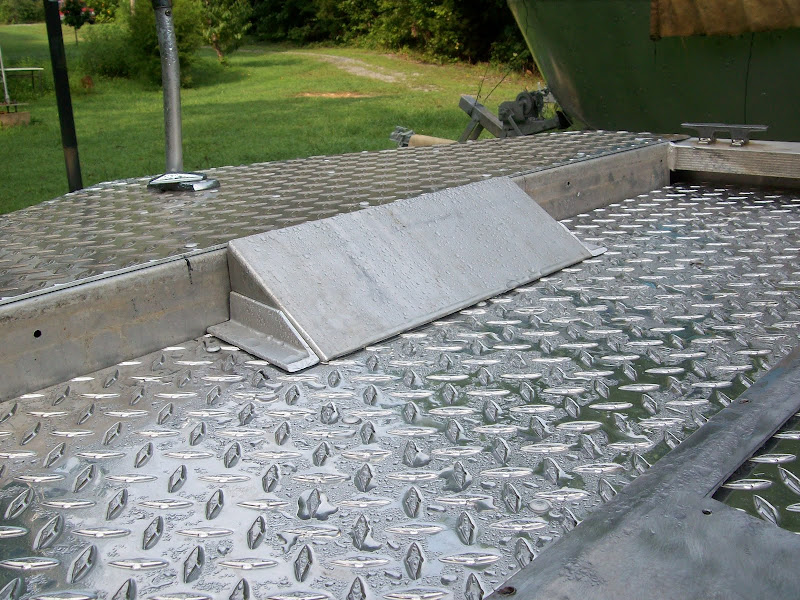
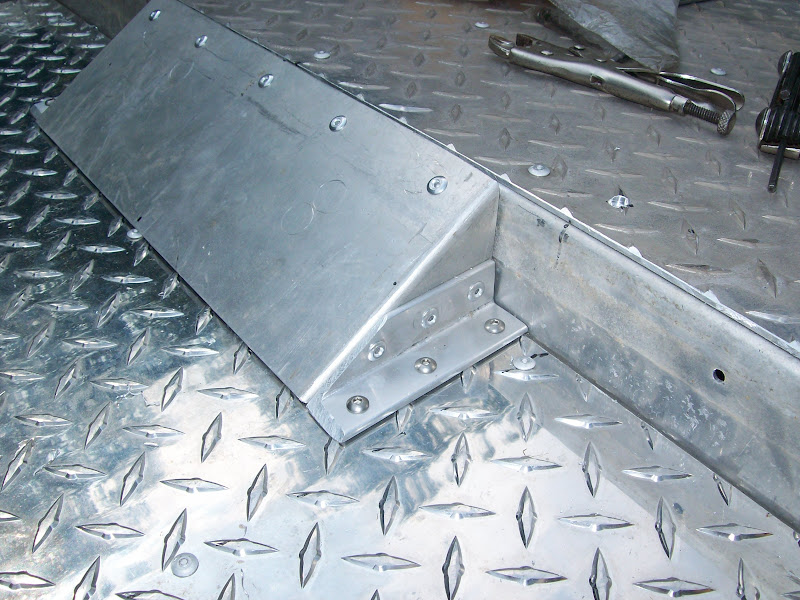
Adding support/water deflector to underside, this will strengthen the panel in case it gets stepped on and deflect any water away from the switches when it is mounted...........

TRACKER%252520UPDATES%252520082111%252520019.jpg


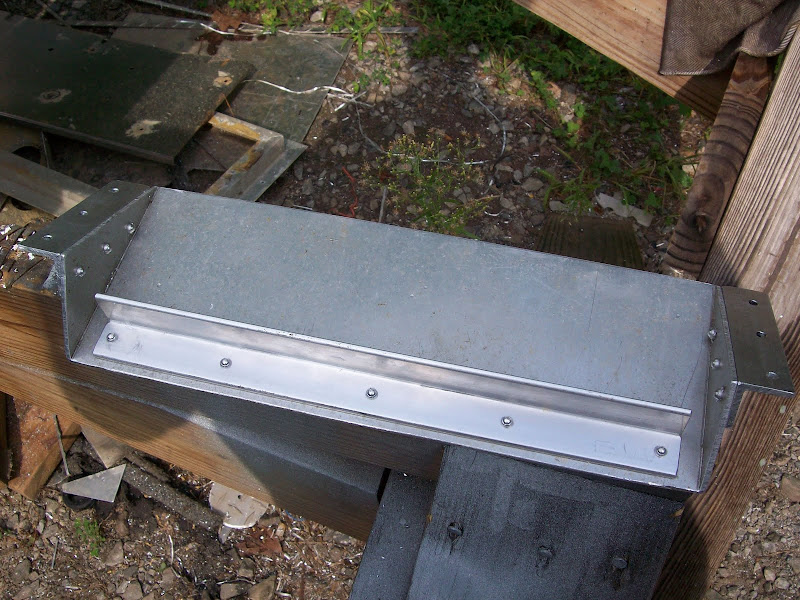
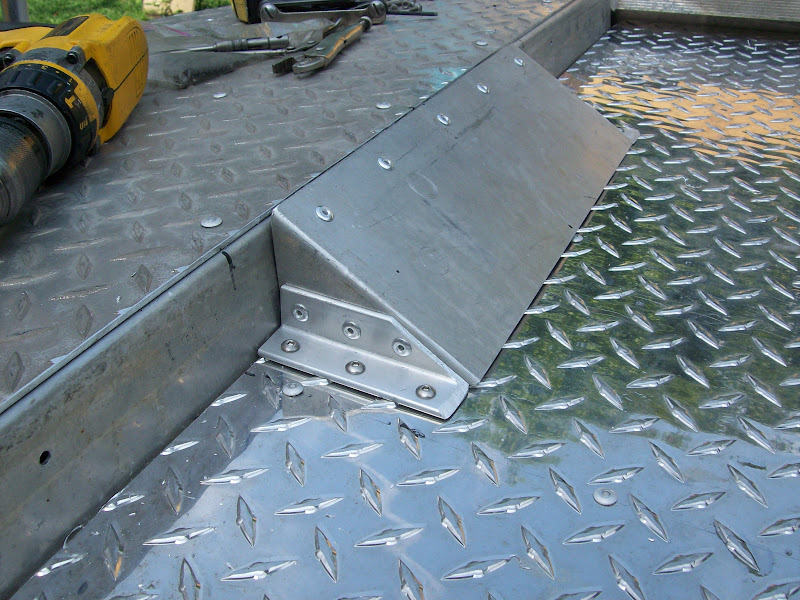
All riveted up ready to install, will drill switches, light, troll motor receptacle later..........

TRACKER%252520UPDATES%252520082111%252520020.jpg


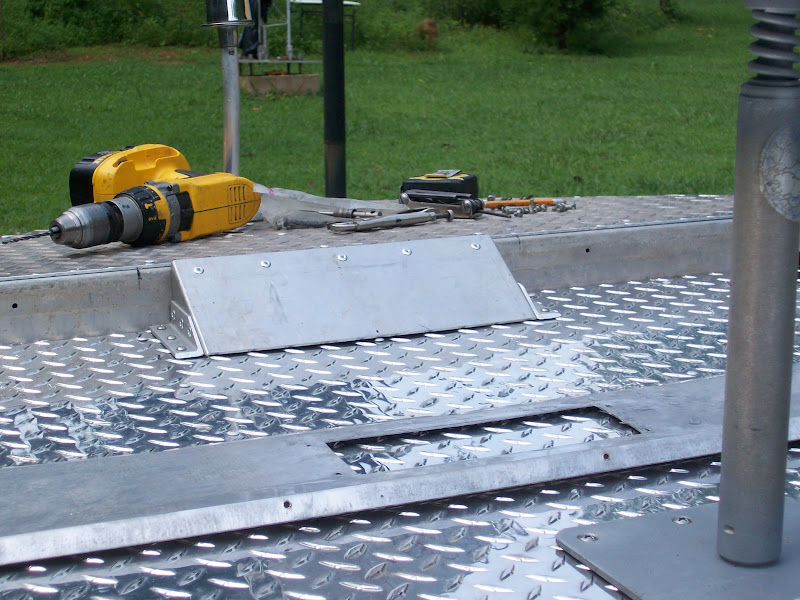
This is the installed position, I drilled the metal and tapped for 10-32 stainless button head screws......

TRACKER%252520UPDATES%252520082111%252520021.jpg

TRACKER%252520UPDATES%252520082111%252520022.jpg

TRACKER%252520UPDATES%252520082111%252520023.jpg


Next to last is the console switch plate then installing of rod tubes. Getting to the end is in sight!!!
 
Sent off boat registration about 2 weeks ago and started worrying whether the NC Wildlife had received it or not, so I called. They lost a bunch of info on a bad hard drive their on the system and the supervisor there told me something had been sent to me but could not tell me WHAT it was. The registration and year sticker came in the mail yesterday but I did not receive the title yet. I am glad to get it so not to hold up my fall fishing (I think), if I can just get finished. Looking for a used vehicle for my wife is taking up my time at the moment so I hope to get back soon on it!
 
cooter brown said:
That switch panel up front looks great! Will you make me one? :lol:
thank you cooter brown, I wish I could but I used the last piece of it for a console dash/switchplate. I was even a little shy to make it go where I wanted it to go but used it anyway, the fish won't care. I cut the angle on the switchplate with a hacksaw then filed it, I don't have a shopfull of good metal working equipment and have to improvise sometimes. The original bow switchplate was a little too flimsy for me.

Today, I have been installing my fuseblock and console wiring, then I cleaned and painted the 70 HP Evinrude motor except for the powerhead cover, it is fiberglass and has alot of decals I must remove and then sand. The hurricane wind blew all day today making working in the sun more tolerable but not good spray-painting conditions outside but I did it anyway. Glad Irene did'nt come any further inland than it did!
 
Thanks Brine, I really like the way your Brine Craft turned out too! I especially like your paint scheme and the white interior! :)
 
Here's the console switch panel I made. I don't particularly like it but it was the only piece of the 1/8" plain aluminum I had left, but it's mainly for rigidity to strengthen the thin fiberglass in this area.

TRACKER%252520SWITCHES%252520MOTOR%252520014.jpg


I mounted 3 switches and ordered silicone boots for them from Allied Electronics to keep the water out and prevent rusting and corrosion. One switch will be for the lights, one for the bilge pump, one for the horn. May put more in later if the need arises.

TRACKER%252520SWITCHES%252520MOTOR%252520015.jpg


Here is the original fuse block reinstalled in it's final position, I would have upgraded this but I'm being a tightwad now. I can upgrade later if I need to.

TRACKER%252520SWITCHES%252520MOTOR%252520016.jpg


DO NOT buy the NEW Rustoleum paint with the "new improved" high output tip. I have used the regular cans of this with GREAT results, but this is the first time I had bought the new style cans. The problem I found is TOO MUCH PAINT is expelled at a time and it's very hard to control and you will get runs easily! I will NOT buy any more of the new style cans!

TRACKER%252520SWITCHES%252520MOTOR%252520013.jpg


Painted 1990 Evinrude 70 HP motor yesterday, got a couple of runs with the "improved" tip on the can, but I will get over it, they are not that noticable. Also, the paint dried too quickly which reduces the glossiness of the paint, thanks to Irene hurricane winds.....

TRACKER%252520SWITCHES%252520MOTOR%252520010.jpg


TRACKER%252520SWITCHES%252520MOTOR%252520011.jpg


TRACKER%252520SWITCHES%252520MOTOR%252520012.jpg
 
Thanks for the heads up on the HO spray tip! I won't use that!
On the console switch panel, If you have a small cup type wire brush, you could put a
Spun Polished swirl pattern on it with a hand drill to spiff it up. :)
 
hsiftac said:
mmf, what did you do to prep your motor for paint?

Hello, hsiftsc! I usually begin by throughly degreasing the engine and letting it dry for a day in the sun. Next I rough all surfaces up with some medium grade paper then, fine. Chipped areas get feather sanded and if I go thru primer then I touch it up with more. I try NOT to sand thru any primer unless I have to. Once the surface is satisfactory, I blow it off good with my air compressor then wipe it down with paint thinner and tape next. On this motor, it has a fiberglass hood and the top of is chipped pretty good from tennis ball size hail we had in the spring, I did sand this down to the glass and I will shoot it with several coats of HIGH BUILD primer before I paint it. I ran out of paint so the hood is not painted yet. After the motor is painted, I let the sun bake the paint for a couple of days before I touch it. I have been buying some NICE stickers from a guy on EBay username "garzonstudio" if want to look at them, he will make about anything you want him to if you email him thru EBay. :wink:
 
Won this nice set of Evinrude decals today on EBay from "garzonstudio" for $16.17!
I think they look nice.

Rebel-Flag-Decal-Set-Navy.jpg
 
Decided to go ahead and mount the motor and might run it a little before I paint it. Only 2 bolts holding it on for the moment until I get some more sealer at Lowe's.......

TRACKER%252520MOUNTING-PAINT%252520001.jpg


before

TX-17%252520Project%252520028.jpg


after


TRACKER%252520MOUNTING-PAINT%252520002.jpg


My buddy that had this tracker said the motor ran well except for a little glitch, he said after running a couple of hours the motor would quit on you, then when it cooled down a little it would start right back up again, so I suspect a bad coil, sure enough, I did a resistance check on the three coils and one coil has a high resistance and is probably the one quitting. I will check the motor over good later.


TRACKER%252520MOUNTING-PAINT%252520005.jpg


I thought I would 2-tone the motor with a dark blue cowling so I bought what I thought was going to be dark blue Duplicolor engine paint at Advance Auto. The can top was really dark but when the paint came out, it was'nt, I DO NOT like the color or the look of it but I can always go back and do it again later. The fiberglass was pretty beat up too by the hail with chips all over. I am not an OMC man anyway, I do Mercury's, this one just came with the boat.......

TRACKER%252520MOUNTING-PAINT%252520003.jpg

TRACKER%252520MOUNTING-PAINT%252520004.jpg
 
Most of you don't know but I am a marine mechanic. As a younger man in the late 60's, I was an Electrical engineering student in college by day and a marine mechanic in the afternoon. The marine dealer I worked for was a Mercury dealer (although we had to work on all brands) and I learned much from the other mechanics there while I was working. Later in the 70's, I started working on Mercurys at my home and have continued through the years. I have not been doing much service work lately due to working on many projects but I will pick this back up after I retire from my current work place. I served as an electrical engineer for a company for many years until economic times forced them to close, now I have had to return to my tool belt as an older man and be an electrical technician at my current workplace.

I mainly now restore the '70's model Mercurys and buy, swap, sell and trade alot of outboard motors. :)
 
Well, I got my Evinrude decals in the mail today and put them on the top cowling and they look pretty good to me. As I said before I did not like the color of the top cowling so I went to wally world and found some Krylon with a DARK blue cap and a satin finish, took it home a sprayed a little and behold, the same color as the the "Dark Blue Ford" duplicolor paint! Maybe I need to buy black and it will be DARK blue.....oh well, spayed it anyway to get the satin finish instead of the gloss finish. I will post pictures tomorrow because my camera batteries need charging.

Got the motor mounting bolts all put in and sealed, also removed the port side "Tracker" vinyl stickers about a 2 1/2 hour job. Next I jacked up the whole rear of the boat with my 2 engine lifts and pulled the trailer out from under the boat to start working on it. I bought a cheap seat for the helm and a new trailer jack from wally world and forgot to get a new winch. Disassembled trailer and scraped old paint and steel brushed the rest of the day. Got to get some 2 X 4 X 10's, bunk carpet and new trailer wheel bearings and seals. I am glad I saved the two new 13" tires and galvanized rims I have from last year too!
More later..................
 
OK, got some more pix as promised, here is the boat jacked up and the trailer removed......

TRACKER%252520DECALS-TRAILER%252520001.jpg


Final removal of the Tracker decals, they were not too hard to get off until I reached the stern portion of the boat where the picture of the bass was, in this area the decal was very stubborn to remove and thinner than the other portion, I had to take a heat gun and scrape with a razor a little at a time but finally got it. I gonna try paint remover to get the glue off as it is dried on pretty hard!

TRACKER%252520DECALS-TRAILER%252520002.jpg


Here are the decals I won on an auction from ebay, thank you garzon studio! The hood now has a satin finish instead of the gloss, I like it better though I wanted dark blue, what do you think?

TRACKER%252520DECALS-TRAILER%252520004.jpg


TRACKER%252520DECALS-TRAILER%252520006.jpg


Below, the trailer stripped except for temporary wheels, getting ready for the Jasco .......

TRACKER%252520DECALS-TRAILER%252520005.jpg


I use Jasco regularly on any steel repair and for etching aluminum. It is GREAT stuff in my book and always gives me good results on any rusty surfaces..........

TRACKER%252520DECALS-TRAILER%252520009.jpg


Scored a good deal for a replacement vehicle for my wife so that saved me delaying my boat progress!

TRACKER%252520DECALS-TRAILER%252520013.jpg


Weather man says we are suppose to get 5-10 inches of rain tomorrow and rain all day Tuesday as well so looks like more weather delays, you guys that have an indoor workplace are lucky!!!
More later! :D
 
Forgot, I went by Lowes today and bought wood for the trailer bunks, new carpet to cover them with, new galvanized lag bolts and washers for attachment some rustoleum aluminum paint for misc. painting, a pack of 4 inch professional foam paint rollers, a new heavy duty staple gun, staples and a new Reece winch w/strap and hook.

Trailer bearings feel good but I will have to put in 2 new grease seals and repack the bearings. Once I get the trailer painted etc. I will reload the boat and then begin the motor checkout. I know water pump impeller will be the first task since the motor sat for 10 years without running, then carb kits.
 

Latest posts

Top