SeaArk SuperJon 1872MV Tunnel Remodel (All Pics on Pg1)

TinBoats.net

Help Support TinBoats.net:

This site may earn a commission from merchant affiliate links, including eBay, Amazon, and others.
I think it looks pretty good. The outboard hanging off the back will balance out the boat visually. If you can, put the outboard back there temporarily to help you get a better idea of what things will look like when it is all done.
 
Ride_Klein said:
I think it looks pretty good. The outboard hanging off the back will balance out the boat visually. If you can, put the outboard back there temporarily to help you get a better idea of what things will look like when it is all done.

Good call...that will help balance it out!
 
Hatch Layout mocked up...the side hatches will be for all rigging except the Hyd Steering which will run through 1" conduit through the ribs. I'm plumbing in 2" conduit to the console from each side to allow me to snake in the control cables and electric.

29.jpg


Starting to cut hatches...

30.jpg


Side hatches cut...all hatches will be painted to match once i find a good solution to painting them.

31.jpg


The foam cutting tool...this is a must have when removing foam.

32.jpg


Conduit for Hyd Steering lines in...

33.jpg
 
hsiftac said:
Anything new here?

Small things i guess...
Conduit all ran.
Livewell plumbing done.
Control cables ran
Working on wiring all accessories while I have the floor out.

Once the majority of wiring is done...I'll put the floor back in and paint the interior.

Not a whole lot of anything picture worthy.

TNtroller said:
what is the foam cutting tool shown ?

It reminds me of an electric charcoal starter...its just a heating element that burns through the foam allowing you to take it out in large chunks versus billions of little pieces.
 
what a nice find with the SeaArk Center Console. It looks awesome up front like that!

What are you going to do with the bait well that was attached to the console? You could use it for a drivers seat with storage right behind the console. Just like the G3 and Lowe factory jet rigs are set up. A flip flop cooler seat would be cool too. And removable.

Awesome build! Im so Jealous! I wish I could have found a blank canvas to start from. You are building my dreamboat! A huge prop tunnel with plenty of storage and set up like a jet with fwd console!
 
reedjj said:
What are you going to do with the bait well that was attached to the console? You could use it for a drivers seat with storage right behind the console. Just like the G3 and Lowe factory jet rigs are set up. A flip flop cooler seat would be cool too. And removable.

Awesome build! Im so Jealous! I wish I could have found a blank canvas to start from. You are building my dreamboat! A huge prop tunnel with plenty of storage and set up like a jet with fwd console!

It was a two piece thing so I'm probably going to reuse the hatch and cut the rest of it up for misc stuff. I already have a livewell in the rear bench plus I'm really trying to keep the floor space open in the back for seating and gear and whatever else I need.

Thanks...its exactly what I was daydreaming about myself. now I just have to put it all together properly to make sure it comes true!
 
TNtroller said:
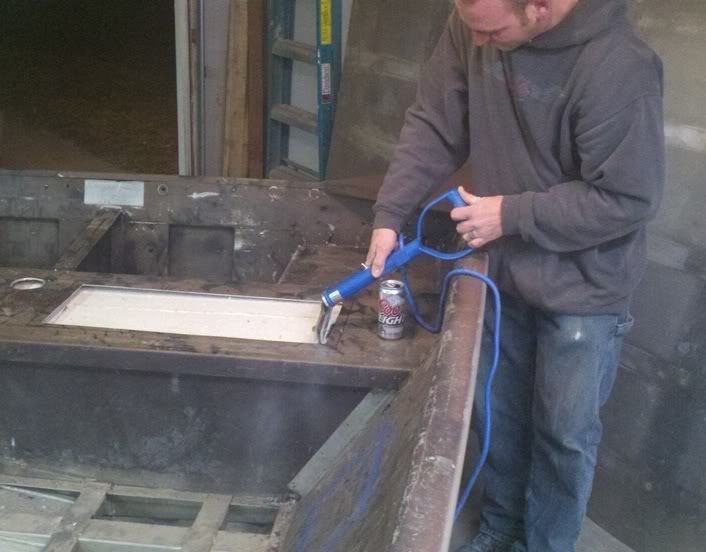
nice build to day, what is the foam cutting tool shown ?


I was thinking it was the cold one shown in the pic:
32.jpg
But then again, that's almost a required tool for any project, ain't it?
:mrgreen: :lol: :wink: :p

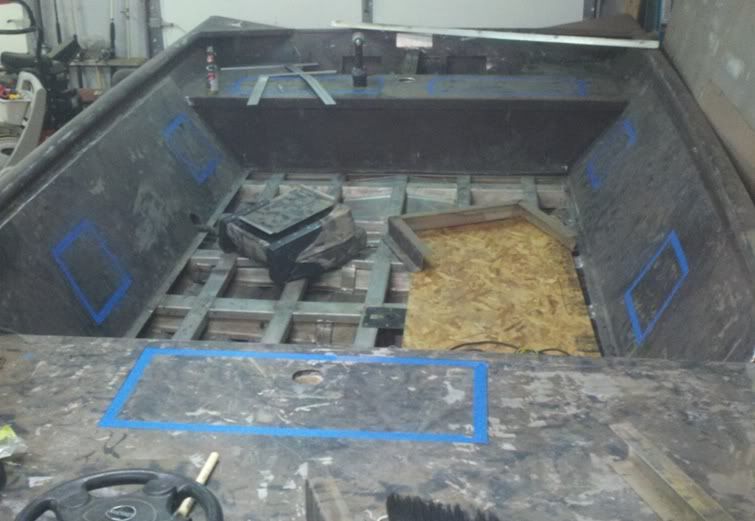
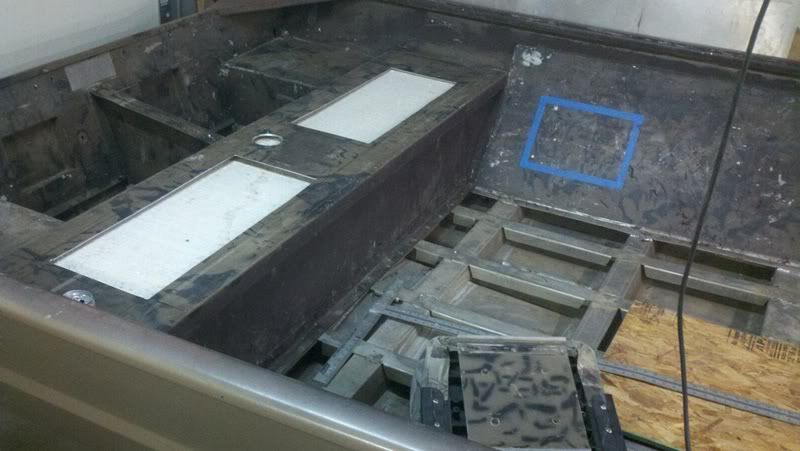
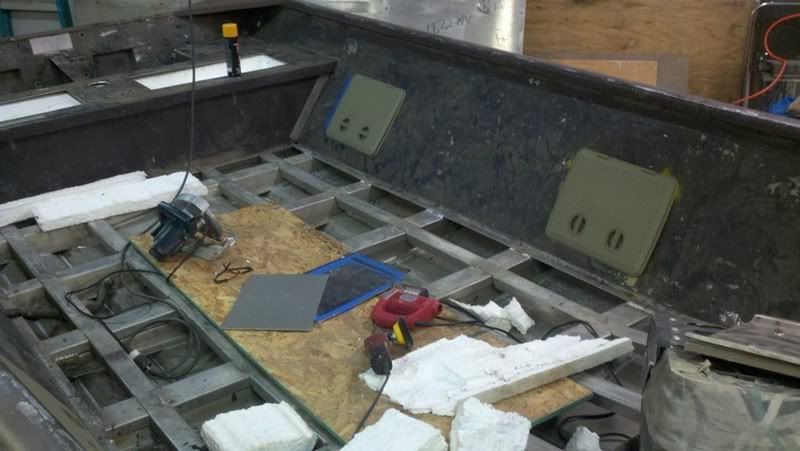
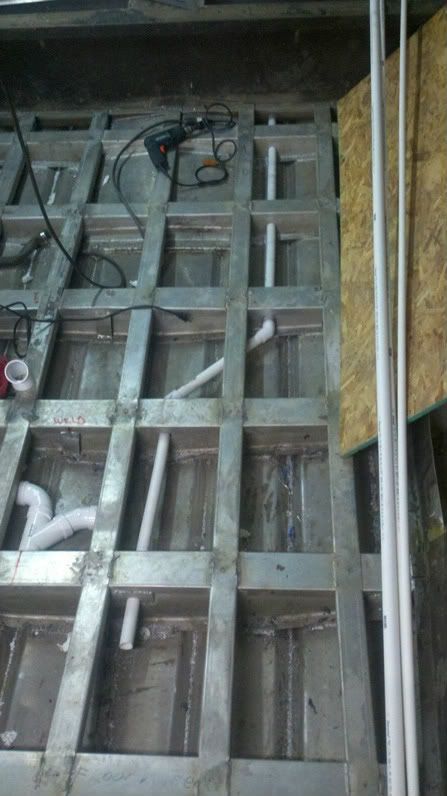
Seriously, though, it's looking good. I'm curious what are the gunwale hatches used for? Access to wire harnesses, etc? Storage? Or both?

As the gunwales of a typical johnboat with an inner hull are only about 2-3" thick, it's hard for me to think what you could actually store in that space.

That said, ANY kind of storage on a boat is a good thing. The more, the better. My old 14 foot DuraCraft was set up for storage.

Sadly, it's not so with my 16 foot Triton, the storage layout on that boat really sucks. The manufacturer didn't seem to put a lot of thought into the design of that boat overall. The drainage system sucks, too, all the trash flows right off the main deck and into the bilge, there's no strainer tray, etc.

Now that I've had the boat for over 2 years, I've worn the new off it, and at some point, I'm going to end up taking a saw to it, and making some storage areas. When I get to that point, I reckon I'll post some pics on here!

Anyhow, keep us posted on the progress of your boat. Ought to be a really good setup once it's done. Joining the ranks of many other good projects here. Personally, I think the boat manufacturers could take some lessons from a lot of folks on this board about how a boat ought to be built!
 
lol...plenty of beer has been invested in thus far... that's one expense I opted not to track on the budget.

Yes the side hatches are for rigging. The local ETEC dealer requested a 3" hole for harness and all controls. Well I couldnt provide a 3" run any way I looked at it. So I'm running everything through the side walls and down. (Exception being the hyd steering cables, they only come in 20' so I made a dedicated run straight down through the ribs with 1"pvc) There is about a thumb width space between the sheet of aluminum on the side and the side ribs. So I am going to try and run as much as possible myself to make his job as easy as plugging everything in and fine tuning the motor. The ETEC harness itself has almost three 1" electrical plugs.

If its clean enough once I get everything ran, I may store a few things in there...but their main purpose is access to rigging, elec wires and making it easy for me to add accessories later. Just snake from the side to the center console and the run to the rear is easy.

I hear you on the storage...this boat had a big storage bench added to the front deck, I'm not putting it back in so I have to make as much storage as I can. I'm kicking around adding another dedicated anchor storage hatch in the very front of the bow deck as well. We'll see tho on that.
 
I'd definitely go with a dedicated storage hatch in the bow for an anchor. They're real nice to have.

And a quick note on anchor ropes:
I keep my anchor rope, and a lot of other ropes aboard my boat, "daisy-chained". When done properly, you can deploy a line really quick, without worrying about tangling. Try this method once, it's a great method for storing large amounts of line in a small compact space, but still being readily deployable.
 
All wiring and controls/steering cables are ran. Even ran an extra pair of 14ga to each spot just incase I want to add something later.
34.jpg


Mounted new bilge and livewell pumps, also added 1/4" aluminum stock for additional support for the transom. I'll be putting 24"x18" sections of .100 aluminum over the pumps for my gas tanks to sit on and to keep the bottom sealed off and clean.
35.jpg


Floor will be going back in next...then painting of the interior. Also working on making 2 rear hinged lids for the gas tank area that will sit flush with the rear bench. Giving me a spot to fight fish.
 
Good idea to run the extra wires, in case you add something later. Better to have it and not need it, than to end up needing it, and having to try to pull wires through conduit later on....trust me, that's a PITA!

Interesting that you used regular PVC instead of the gray electrical PVC, or the flexible nonmetallic conduit, but then again, with regular PVC, there are a wider variety of fittings and elbows that can be used.

Looks like it's coming along pretty good. Keep us posted!
 
If I could do it all over again...it would be some other kind of conduit...getting stuff to pull through those 45's is a PITA!

Any of the flexible pvc was ridiculous in pricing compared to the regular pvc.
 
lowblazah said:
If I could do it all over again...it would be some other kind of conduit...getting stuff to pull through those 45's is a PITA!

I bet. Even with a fish tape, it can be a major aggravation. One trick I've learned is to mock up the entire run of conduit without gluing anything, then, pull your wire through a straight section, fish it through your 45 or 90 elbow, then, pull it through another straight section, and so on.

At that point, you make a few wraps with some electrical tape, or some saran wrap, around your wires where each joint is to be glued (this protects the insulation from the glue) then, glue your fittings. It's a LOT easier than trying to pull through all the elbows.

I use this method when assembling the gray PVC, and the glue used to assemble that type of PVC doesn't seem to affect the insulation of wires, even without a protective wrap of tape. I can't say what regular PVC glue might do to insulation, though, especially if you skip the step of wrapping each joint with tape or the saran wrap.
 
[youtube]UqjTNbHi63k[/youtube]

Cutting rear deck lids on a CNC Plasma cutter at my buddys shop.

Then Bent them up on his really nice brake.

36.jpg

37.jpg


All set.
38.jpg


Tomorrow he'll weld the seams and reinforce with some c channel.
 

Latest posts

Top